🛩️ Scout
This guide gets you ready to fly the Scout altitude for our AI Flight Academy session during Team Week. It assumes you're starting fresh: you'll set up Microsoft Scout, then run a short test flight that builds something real from your Microsoft 365 work. At the end you'll take a screenshot and fill out a quick form to get certified.
Your goal: Pilot Certification. Finish the minimum for this altitude, screenshot your result, and upload it to the form. Keep this link handy - it's how you get certified.
Two parts:
Already running Scout? Skip ahead to the test flight - there's nothing to install beyond Scout itself and signing in.
Set up Scout
Don't know your GitHub login? Confirm your account
Scout runs on GitHub Copilot, so it needs Copilot access on your Microsoft EMU (Enterprise Managed User) account. Do this first - without it, Scout's GitHub sign-in fails.
Go to aka.ms/copilot/explore and select Continue.
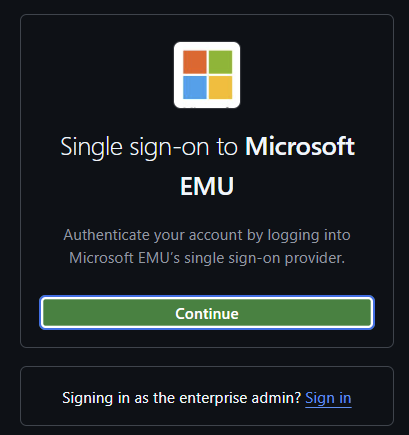
Sign in with your Microsoft account.
You land on GitHub Copilot Access. Seeing this page means the EMU account works.
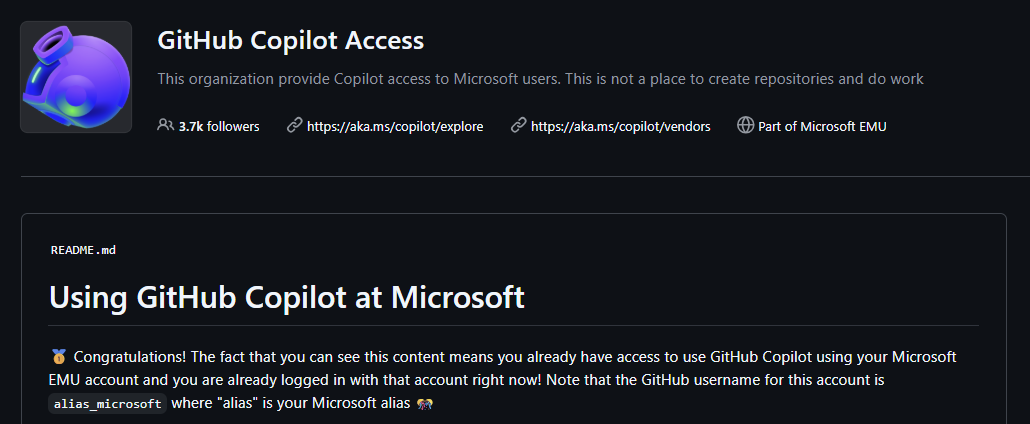
Your username should be
<alias>_Microsoft. Make note of this - you'll sign in with it.
Using a personal GitHub account instead (optional)
On aka.ms/copilot, under "Optional: Would you also like to use GitHub Copilot with your own personal GitHub account?", select Yes, show me how and follow the linking steps.

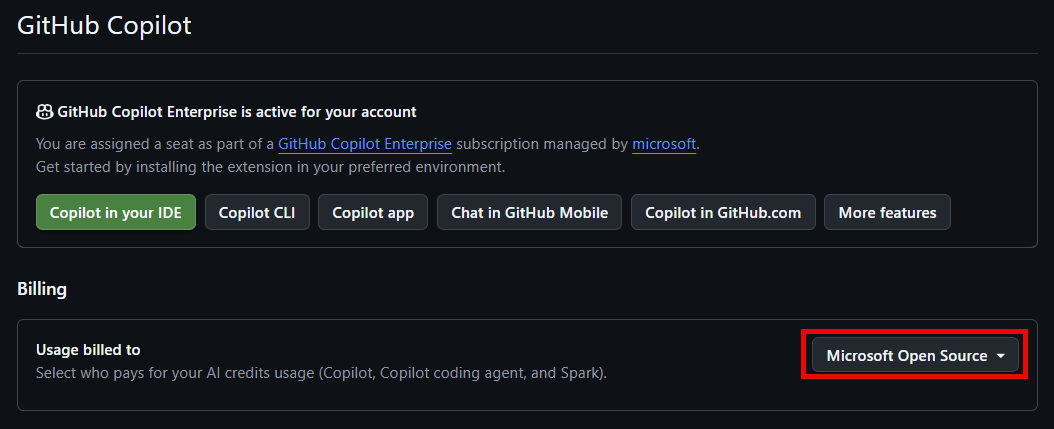
Once linked, navigate to github.com/settings/copilot/features. Make sure you're signed in with your personal GitHub account, then set Usage billed to to Microsoft Open Source.
Prerequisites
Install each prerequisite for the AI Flight Academy Scout altitude.
| Requirement | Get it from |
|---|---|
| GitHub account with GitHub Copilot access | Above. Do this first |
| Microsoft Scout | aka.ms/scout-internal |
| Scout access (if you've never installed it) | Request access |
| Latest Scout version | Releases page — download v0.23.779 |
Note: Worried you'll lose your conversation history? Ask Scout to back up your sessions, conversations, automations, skills, and any locally stored settings or memory to OneDrive. Questions? Reach out to an expert.
Check you're ready
Navigate to aka.ms/scout-internal, scroll to the bottom, and select Download Microsoft Scout.
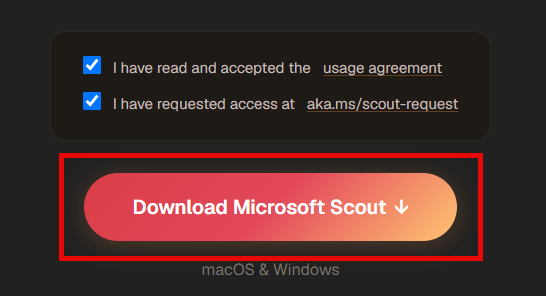
You'll be redirected to GitHub. Select the download for your computer type - Windows x64, Windows ARM64, Mac Apple Silicon, or Mac Intel.
Install and open Scout. When prompted to sign in, select Sign in to Microsoft 365 first.
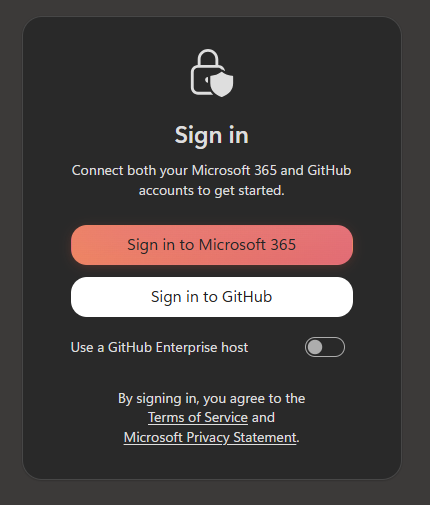
Choose your Microsoft account, then select Continue.
Next, sign in to GitHub and authorize the GitHub Copilot CLI. Unsure of your login? See Don't know your GitHub login? above.
You're ready when both sign-ins complete and Scout opens a session.
Explore your settings
Scout is a powerful tool - take a few minutes to make its settings match how much AI access you're comfortable with.
Permissions. Go to Settings > Intelligence > Permissions and review what Scout is allowed to do.

Default file location. By default, Scout reads and writes files in
C:\Users\<user>\OneDrive - Microsoft\Documents\Microsoft Scout. Change it under Settings > Storage & Connectivity > Default file location.
For more, see Explore settings.
Build your own personal assistant
Write a heartbeat: a single prompt Scout runs on its own, on a schedule, without you asking. It watches the things you care about, digs up the context you'd otherwise hunt for, and messages you in Teams only when something actually needs you.
The minimum to get certified
Complete Before you start, then pick your scope, set up your assistant, and run it once to get your first brief in Teams (steps 1 to 3). Screenshot the brief - that's all you need. Steps 4 and 5 are extra - they act on it and tune it.
Before you start
Two things to set up first: connect Scout to Teams so your briefs can reach you, and allow the permissions your assistant needs to read your work and remember what it's told you.
Connect Teams
Go to Settings > Integrations.
Under Teams bot, select Connect.
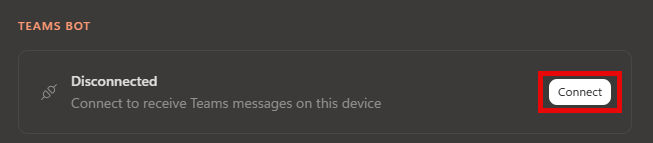
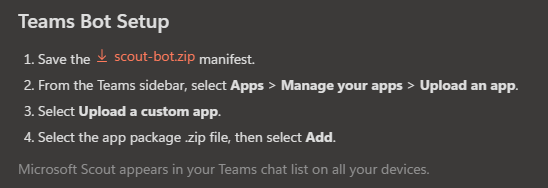
Follow the steps under Teams bot setup.
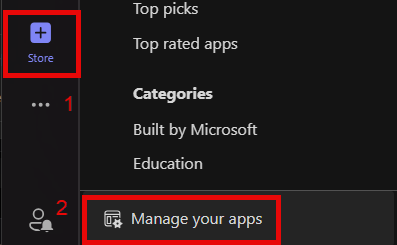
Note: To reach Manage your apps, select Store (+) in the Teams navigation rail, then at the bottom of the Teams window select Manage your apps. In Manage your apps, select Upload an app (or ..., depending on window size) > Upload a custom app.
Enable permissions
Your assistant reads across your work and remembers what it's told you, so it needs a few permissions set to Allow. Anything left on Ask is skipped when Scout runs in the background.
Heartbeat runs in its own sandbox. It has a tighter permission policy than the rest of Scout, edited right here in the Heartbeat panel - so you can run Scout wide open day to day while this background loop stays locked down to only what it needs.
Navigate to Automations and select Heartbeat. Then under Permissions, select Customize Permissions, then Custom.
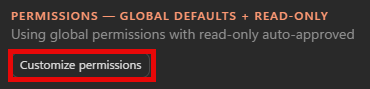
Under App tools, set memory to Allow. This stops your assistant from telling you the same thing twice.

Under Work IQ > Teams, set List your chats to Allow so it can read your recent Teams chats.

Under Work IQ > Email, set List emails to Allow so it can read your recent mail.

Permissions not looking right?
By default, selecting Custom sets the read permissions to Allow. If you've changed them, select Reset to defaults at the bottom - or, if you'd prefer to stay in full control, set the following to Allow:
| # | Tool |
|---|---|
| 1 | App Tools > Memory > Look up saved memory |
| 2 | Work IQ Tools > People > Read your own profile |
| 3 | Work IQ Tools > People > Look up your manager |
| 4 | Work IQ Tools > Email > List emails |
| 5 | Work IQ Tools > Email > Read emails |
| 6 | Work IQ Tools > Email > Search emails |
| 7 | Work IQ Tools > Teams > List your chats |
| 8 | Work IQ Tools > Teams > Search chats |
| 9 | Work IQ Tools > Teams > Read messages in a chat |
| 10 | Work IQ Tools > Calendar > List calendar events |
1 · Decide what deserves to interrupt you
Before setting anything up, answer one question: what is worth being interrupted for?
The instinct is "my email." That's the mistake that kills this. An assistant that pings you about everything gets muted in two days. You're not building an inbox notifier - you're naming the small number of things you never want to miss.
Pick one narrow starting scope:
| Scope | Good when |
|---|---|
| My manager and skip-level | You want nothing missed from up the chain |
| My direct reports | You're the unblocker and you want to be fast |
| A named customer or partner | You own an external relationship |
| Meeting invites from outside my team | Your calendar is the thing under attack |
| Teams messages that @mention me | Chat is where your real work lands |
| One named project, across all sources | You're running something that spans mail, chat, and meetings |
Now turn it into one sentence that names who, which sources, and what counts as important:
❌ "My email." - everything; you'll be pinged about parking notices and newsletters.
⚠️ "Mail from my manager." - better, but it misses her Teams messages and meeting invites.
✅ "Mail, Teams messages, and meeting invites from my manager and my skip-level, where they've asked me something, are waiting on me, or need a decision."
A scope can also combine a few sources at once. Here's one you can model on:
- Mail from my manager and my skip-level
- Any meetings or Teams messages from
<colleague's name>- Teams messages that @mention me
- Anything about
<project name>, including the<project Teams chat name>chat
Paste a short list like that straight into the prompt.
Write your sentence down - you'll paste it into the prompt in the next step. Start narrower than feels useful; you can widen it in step 5 once you've seen what it catches.
2 · Set up your assistant
Open Automations > Heartbeat and select Enable, then set the schedule:
- Frequency: every 15, 30, 60, or 120 minutes (we recommend every 2 hours)
- Schedule: Monday to Friday, 8am to 6pm

Paste the prompt below into the Prompt field, then make three swaps so it's yours:
- Name - replace every
[Clippy](it appears four times) with a name you like. Every brief is signed with it, so pick something you'll recognize. Default: Clippy. - Scope - in STEP 2, replace
[PASTE YOUR SCOPE SENTENCE HERE]with your sentence from step 1. - Quiet reply (optional) - in STEP 6,
[Nothing new to report]is exactly what it says on a run with nothing to raise. Reword it if you like, or leave it as is.
Your name is [Clippy]. You are my personal assistant. You run on your own in the
background. You are READ-ONLY: your only job is to notice things and report them.

CONSTRAINTS
Never try to run a command or read a file. Keep every query small so results come
back inline: use a limit of 15 or less on any list or search, and query one narrow
thing at a time rather than pulling everything and sorting through it. If a result
comes back too large to read, narrow the query and try again.

STEP 1 - CHECK WHAT YOU ALREADY RAISED
Call m_recall with the query "[Clippy] raised". Anything you find there has already
been reported. Do not raise it again.

m_recall is your ONLY source of truth for this. If it returns nothing, then nothing
has been raised - treat every candidate as new, however familiar it looks. Never
treat your own earlier Teams messages or briefs as evidence that you already
reported something; your own past output is not memory.

STEP 2 - SCAN
Look at, from the last 24 hours: [PASTE YOUR SCOPE SENTENCE HERE]

STEP 3 - FILTER OUT NOISE
Ignore external senders unless my scope names them. Ignore newsletters, promotions,
shipping, billing, security alerts, surveys, and automated notifications. Ignore
anything where I am only on CC and nobody asked me anything. Ignore anything that
looks already resolved. Ignore anything you found in STEP 1. Do not drop something
just because it feels familiar - only STEP 1 memory can rule something out.

STEP 4 - GATHER CONTEXT
For each item that survives, dig before you report it. Find the rest of the thread,
any related meeting on my calendar in the next 7 days, what other people have already
said or agreed to, and anything I already committed to. Raise at most 3 items. Pick
the most urgent.

STEP 5 - REMEMBER WHAT YOU RAISE
For each item you are about to report, call m_remember with a fact starting exactly
with "[Clippy] raised" then the person and a short description. Do this before you
write your answer.

STEP 6 - DECIDE WHETHER TO SPEAK AT ALL
If NOTHING survived the filter, your entire response must be exactly this and
nothing else:

[Nothing new to report]

No explanation, no status line, no summary of what you checked, no list of what you
dropped.

If something DID survive: your final response IS the notification. Do not call any
messaging tool. Write the brief directly as your answer, signed "[Clippy]". For each
item include:
- Who it is and their relationship to me
- What they want, in one line
- The context you found
- What you recommend
- A "Tell Scout:" line - the exact sentence I can send back to act on it

Never mention tool errors, blocked tools, or what you could not access. If something
is unavailable, work around it silently.

RULES
You are read-only. Never send an email. Never draft an email. Never message anyone.
Never write, create, or modify any file.
Already have a Heartbeat you don't want to touch?
If you've already got a Heartbeat set up that you'd rather not disturb, don't edit it. Instead, copy the prompt above - with your three swaps made - paste it into Scout, and ask Scout to put it on a schedule for you.
One catch: run this way, your assistant uses your global Scout permissions, not the Heartbeat sandbox. Before you schedule it, go to Settings > Permissions and set every tool listed under Permissions not looking right? (above) to Allow.
3 · Run it and read your first brief
You're not going to sit and wait two hours. In the Heartbeat panel, select Run now, then open Teams. Within a minute or so you should have a brief from Microsoft Scout like the example above.
Read it properly. The interesting part isn't that it found things - it's the context it went and got: who else already replied, what meeting it collides with, what you said you'd do and haven't.
If nothing arrives, congratulations - you're all caught up. The person who wrote this note envies you. A quiet run just replies
[Nothing new to report]instead of a brief - it isn't broken, you just can't prove it works until there's something to catch. Have a colleague @mention you a fake task in Teams, then select Run now again. First confirm your scope in STEP 2 of the prompt includes Teams @mentions, or there'll be nothing to trip it.
🚨 IMPORTANT
That's the bar - get your Pilot Certification. Your assistant has sent you a brief in Teams. Screenshot it as your proof - that's all you need to be certified. Everything below is extra.
Want to keep it working for you? Keep going.
4 · Act on it from Teams
Every item ends with a Tell Scout: line. That's your action. Reply to the message in Teams - type your instruction straight back to the Scout bot, from your desk or your phone:
Accept the review meeting from my manager tomorrow.Your reply routes into Scout, which picks it up and acts on it. Or, if you'd rather see what it does first, paste the same line into Scout at your desk.
Why your assistant is hands-off instead of acting. That's a choice, not a limit. This prompt is scoped read-only on purpose - it notices and reports, then waits for you. If you'd rather it act on its own (auto-accept certain meetings, send from a template, and so on), you can widen the prompt and grant the matching permissions in Manage permissions - for example, setting Work IQ > email to Allow. This test flight shows one safe possibility; the boundary is yours to move.
5 · Tune it until you'd keep it on
The first version is always slightly wrong. Fix it by editing the heartbeat prompt.
- It raised junk. Name the offender in the prompt's STEP 3: "Also ignore anything from noreply addresses, anything marked [EXTERNAL] unless it's from a domain in my scope, and anything from Viva or Yammer."
- It was too quiet. Widen the prompt's STEP 2 by one source - add Teams mentions, or one more person.
- Briefs are too long for a phone. Tighten the prompt's STEP 4: "Keep each item to three lines. Lead with the person's name and what they want."
- It keeps raising something you handled. Confirm
m_rememberandm_recallare on Allow; if memory is on and it still repeats, make the "Clippy raised" wording in the prompt's STEP 1 and STEP 5 match exactly.
Select Run now after each change. Two or three rounds is normal.