Managed identity for projects and pipelines
Managed identities offer a secure method for controlling access to Azure resources. Azure handles these identities automatically, allowing you to verify access to services compatible with Azure AD authentication. This means you won’t need to embed credentials into your code, enhancing security. In Azure DevOps, managed identities can authenticate Azure resources within your self-hosted agents, simplifying access control without compromising security.
In this lab, you’ll create a managed identity and use it in Azure DevOps YAML pipelines running on self-hosted agents to deploy Azure resources.
The lab takes approximately 30 minutes.
Before you start
You’ll need an Azure subscription, Azure DevOps organization, and the eShopOnWeb application to follow the labs.
- Verify that you have a Microsoft account or a Microsoft Entra account with the Contributor or the Owner role in the Azure subscription. For details, refer to List Azure role assignments using the Azure portal and View and assign administrator roles in Azure Active Directory.
Prerequisites
Complete the labs:
- Follow the steps to validate your lab environment.
- Configure a project and repository structure to support secure pipelines
- Configure agents and agent pools for secure pipelines
Instructions
Exercise 0: (skip if done) Import and run CI/CD Pipelines
In this exercise, you will import and run the CI/CD pipelines in the Azure DevOps project.
Task 1: (skip if done) Import and run the CI pipeline
Let’s start by importing the CI pipeline named eshoponweb-ci.yml.
-
Navigate to the Azure DevOps portal at
https://aex.dev.azure.comand open your organization. -
Open the eShopOnWeb project in Azure DevOps.
-
Go to Pipelines > Pipelines.
-
Select the Create Pipeline button.
-
Select Azure Repos Git (Yaml).
-
Select the eShopOnWeb repository.
-
Select Existing Azure Pipelines YAML File.
-
Select the /.ado/eshoponweb-ci.yml file then click on Continue.
-
Select the Run button to run the pipeline.
Note: Your pipeline will take a name based on the project name. You will rename it to easier identify the pipeline.
-
Go to Pipelines > Pipelines and select the recently created pipeline. Select the ellipsis and then select Rename/move option.
-
Name it eshoponweb-ci and select Save.
Task 2: (skip if done) Import and run the CD pipeline
Note: In this task, you will import and run the CD pipeline named eshoponweb-cd-webapp-code.yml.
-
Go to Pipelines > Pipelines.
-
Select New pipeline button.
-
Select Azure Repos Git (Yaml).
-
Select the eShopOnWeb repository.
-
Select Existing Azure Pipelines YAML File.
-
Select the /.ado/eshoponweb-cd-webapp-code.yml file then select Continue.
-
In the YAML pipeline definition, set the variables section to:
variables: resource-group: 'YOUR-RESOURCE-GROUP-NAME' location: 'centralus' templateFile: 'infra/webapp.bicep' subscriptionid: 'YOUR-SUBSCRIPTION-ID' azureserviceconnection: 'YOUR-AZURE-SERVICE-CONNECTION-NAME' webappname: 'YOUR-WEB-APP-NAME' -
Replace the values of the variables with the values of your environment:
- Replace YOUR-RESOURCE-GROUP-NAME with the name of the resource group you want to use in this lab, for example, rg-eshoponweb-secure.
- Set the value of the location variable to the name of the Azure region you want to deploy your resources, for example, centralus.
- Replace YOUR-SUBSCRIPTION-ID with your Azure subscription id.
- Replace YOUR-AZURE-SERVICE-CONNECTION-NAME with azure subs
- Replace YOUR-WEB-APP-NAME with a globally unique name of the web app to be deployed, for example, the string eshoponweb-lab-multi-123456 followed by a random six-digit number.
-
Select Save and Run and choose to commit directly to the main branch.
-
Select Save and Run again.
-
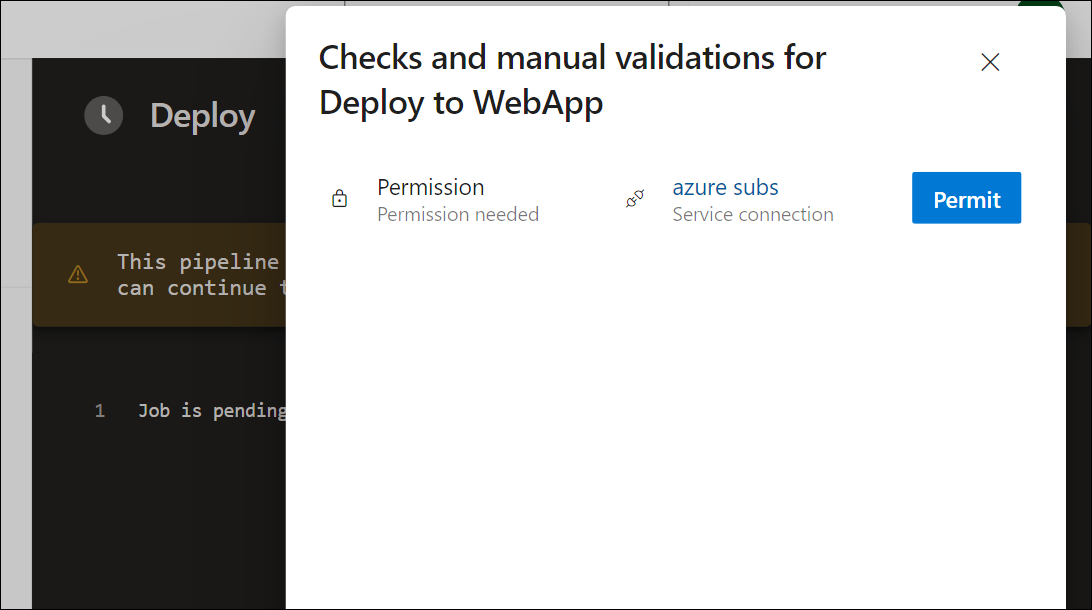
Open the pipeline run. If you receive the message “This pipeline needs permission to access a resource before this run can continue to Deploy to WebApp”, select View, Permit and Permit again. This is needed to allow the pipeline to create the Azure App Service resource.

-
The deployment may take a few minutes to complete, wait for the pipeline to execute. The pipeline is triggered following the completion of the CI pipeline and it includes the following tasks:
- AzureResourceManagerTemplateDeployment: Deploys the Azure App Service web app using bicep template.
- AzureRmWebAppDeployment: Publishes the Web site to the Azure App Service web app.
Note: In case the deployment fails, navigate to the pipeline run page and select Rerun failed jobs to invoke another pipeline run.
Note: Your pipeline will take a name based on the project name. Let’s rename it for identifying the pipeline better.
-
Go to Pipelines > Pipelines and select the recently created pipeline. Select the ellipsis and then select Rename/move option.
-
Name it eshoponweb-cd-webapp-code and click on Save.
Exercise 1: Configure managed identity in Azure pipelines
In this exercise, you will use a managed identity to configure a new service connection and incorporate it the CI/CD pipelines.
Task 1: Set the managed identity in the Azure subscription
-
In your browser, open the Azure Portal at
https://portal.azure.com. -
In the Azure portal, navigate to the page displaying the Azure VM eshoponweb-vm you deployed in the previous lab.
-
On the eshoponweb-vm Azure VM page, in the toolbar, select Start to start it, in case it is stopped.
-
On the eshoponweb-vm Azure VM page, in the vertical menu on the left side, in the Security section, select Identity.
-
On the Identity page, verify that the Status is to On and select Azure role assignments.
-
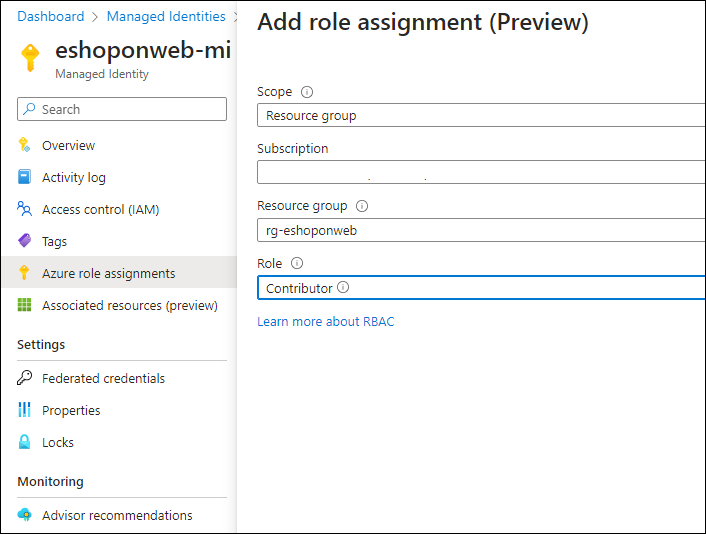
Select the Add role assignment button, and perform the following actions:
Setting Action Scope drop-down list Select Subscription. Subscription drop-down list Select your Azure subscription. Role drop-down list Select the Contributor role. Note: The subscription scope is necessary to accommodate deployments in the subsequent labs.
-
Select the Save button.

Task 2: Create a managed identity-based service connection
-
Switch to the web browser displaying the eShopOnWeb project in the Azure DevOps portal at
https://aex.dev.azure.com. -
In the eShopOnWeb project, navigate to Project settings > Service connections.
-
Select the New service connection button and select Azure Resource Manager.
-
Select Managed Identity (agent-assigned) as the Authentication method.
-
Set the scope level to Subscription and provide the information from the Azure portal, including the Subscription Id, Subscription name, and Tenant Id.
Note: You can find the Subscription Id in the Azure portal by navigating to the Subscriptions blade and selecting the subscription you are using. The Tenant Id can be found in the Microsoft Entra ID blade.
-
In Service connection name type azure subs managed. This name will be referenced in YAML pipelines when accessing your Azure subscription.
-
Select Save.
Task 3: Update the CI pipeline to use the self-hosted agent pool
In this task, you will update the CI pipeline to use the self-hosted agent pool.
-
Switch to the browser window displaying the eShopOnWeb project in the Azure DevOps portal.
-
On the eShopOnWeb project page, navigate to Pipelines > Pipelines.
-
Select the eshoponweb-ci pipeline and select Edit.
-
In the jobs subsection of the stages section, update the value of the pool property to reference the self-hosted agent pool eShopOnWebSelfPool you configured in this task, so it has the following format:
jobs: - job: Build pool: eShopOnWebSelfPool steps: - task: DotNetCoreCLI@2 -
Select Validate and save and choose to commit directly to the main branch.
-
Select Save again.
-
Select to Run the pipeline, and then click on Run again.
-
Verify that the build job is running on the eShopOnWebSelfAgent agent and it completes successfully.
Note: If you see the message The agent request is not running because all potential agents are running other requests. Current position in queue: 1, you can wait for the agent to become available or you can stop the agent job that is running. It may be the CD pipeline that is running automatically.
Note: If you see the message “This pipeline needs permission to access a resource before this run can continue to Build .Net Core Solution” in the pipeline run page, select View, Permit and Permit again. This is needed to allow the pipeline to use the self-hosted agent pool.
Task 4: Update the CD pipeline to use the self-hosted agent pool and the managed identity-based service connection
In this task, you will update the CD pipeline to use the managed identity-based service connection and the self-hosted agent pool.
-
Switch to the browser window displaying the eShopSecurity project in the Azure DevOps portal.
Note: eShopSecurity is the name of the project you created in the first lab.
-
On the eShopSecurity project page, navigate to Repos > Files.
-
Select the eshoponweb-secure-variables.yml file and click on the Edit button.
-
In the variables section, update the azureserviceconnection variable to use the name of the service connection you created in the previous task, azure subs managed.
azureserviceconnection: 'azure subs managed' -
Click on the Commit button, and choose to commit directly to the main branch.
-
Click on the Commit button again.
-
Switch to the eShopOnWeb project.
-
On the eShopOnWeb project page, navigate to Pipelines > Pipelines.
-
Select the eshoponweb-cd-webapp-code pipeline and select Edit.
-
In the jobs subsection of the stages section, update the value of the pool property to reference the self-hosted agent pool you created in the previous lab, eShopOnWebSelfPool, so it has the following format:
jobs: - job: Deploy pool: eShopOnWebSelfPool steps: #download artifacts - download: eshoponweb-ci -
Click on the Validate and save button and choose to commit directly to the main branch.
-
Click on Save again.
-
Navigate to the Pipelines > Pipelines and select the eshoponweb-cd-webapp-code pipeline already running from the previous task.
-
Click on the pipeline run and Cancel. Click on the Yes button to confirm.
Note: You will run the pipeline enable system diagnostics to see the logs of the pipeline.
-
Click to Run new pipeline, check the “Enable system diagnostics” checkbox and click on the Run button.
-
Open the pipeline run.
Note: If you see the message “This pipeline needs permission to access 2 resources before this run can continue to Deploy to WebApp”, select on View, Permit and Permit again for all resources. This is needed to allow the pipeline to use the service connection and the self-hosted agent pool.
-
The deployment may take a few minutes to complete, wait for the pipeline to execute.
[!IMPORTANT] If the pipeline fails because of the AZ CLI error, you may need to restart your self-hosted agent and re-run the pipeline. To restart the agent, in the Azure portal, navigate to the page displaying the Azure VM eshoponweb-vm you deployed in the previous lab, connect to the VM using the Connect button, and restart the Azure Pipelines Agent service name starting with vstsagent. Right-click on the agent service and select Restart.
-
You should see from the pipeline logs that the pipeline is using the managed identity.

Note: After the pipeline finishes, you can use the Azure portal to verify the state of the App Service web app resources.
[!IMPORTANT] Remember to delete the resources created in the Azure portal to avoid unnecessary charges.
Review
In this lab, you learned how to use a managed identity assigned to self-hosted agents in Azure DevOps YAML pipelines.