Configure and validate permissions
In this lab, you’ll set up a secure environment that adheres to the principle of least privilege, ensuring that members can access only the resources they need to perform their tasks and minimize potential security risks. This involves configuring and validating user and pipeline permissions and setting up approval and branch checks in Azure DevOps.
These exercises take approximately 20 minutes.
Before you start
You’ll need an Azure subscription, Azure DevOps organization, and the eShopOnWeb application to follow the labs.
- Follow the steps to validate your lab environment.
- Install a self-hosted agent following the lab Configure agents and agent pools for secure pipelines or the steps in Install a self-hosted agent.
Instructions
Exercise 0: (skip if done) Import and run CI/CD Pipelines
In this exercise, you will import and run the CI/CD pipelines in the Azure DevOps project.
Task 1: (skip if done) Import and run the CI pipeline
Let’s start by importing the CI pipeline named eshoponweb-ci.yml.
-
Navigate to the Azure DevOps portal at
https://aex.dev.azure.comand open your organization. -
Open the eShopOnWeb project in Azure DevOps.
-
Go to Pipelines > Pipelines.
-
Select the Create Pipeline button.
-
Select Azure Repos Git (Yaml).
-
Select the eShopOnWeb repository.
-
Select Existing Azure Pipelines YAML File.
-
Select the /.ado/eshoponweb-ci.yml file then click on Continue.
-
Select the Run button to run the pipeline.
Note: Your pipeline will take a name based on the project name. You will rename it to easier identify the pipeline.
-
Go to Pipelines > Pipelines and select the recently created pipeline. Select the ellipsis and then select Rename/move option.
-
Name it eshoponweb-ci and select Save.
Task 2: (skip if done) Import and run the CD pipeline
Note: In this task, you will import and run the CD pipeline named eshoponweb-cd-webapp-code.yml.
-
Go to Pipelines > Pipelines.
-
Select New pipeline button.
-
Select Azure Repos Git (Yaml).
-
Select the eShopOnWeb repository.
-
Select Existing Azure Pipelines YAML File.
-
Select the /.ado/eshoponweb-cd-webapp-code.yml file then select Continue.
-
In the YAML pipeline definition, set the variables section to:
variables: resource-group: 'YOUR-RESOURCE-GROUP-NAME' location: 'centralus' templateFile: 'infra/webapp.bicep' subscriptionid: 'YOUR-SUBSCRIPTION-ID' azureserviceconnection: 'YOUR-AZURE-SERVICE-CONNECTION-NAME' webappname: 'YOUR-WEB-APP-NAME' -
Replace the values of the variables with the values of your environment:
- Replace YOUR-RESOURCE-GROUP-NAME with the name of the resource group you want to use in this lab, for example, rg-eshoponweb-secure.
- Set the value of the location variable to the name of the Azure region you want to deploy your resources, for example, centralus.
- Replace YOUR-SUBSCRIPTION-ID with your Azure subscription id.
- Replace YOUR-AZURE-SERVICE-CONNECTION-NAME with azure subs
- Replace YOUR-WEB-APP-NAME with a globally unique name of the web app to be deployed, for example, the string eshoponweb-lab-multi-123456 followed by a random six-digit number.
-
Select Save and Run and choose to commit directly to the main branch.
-
Select Save and Run again.
-
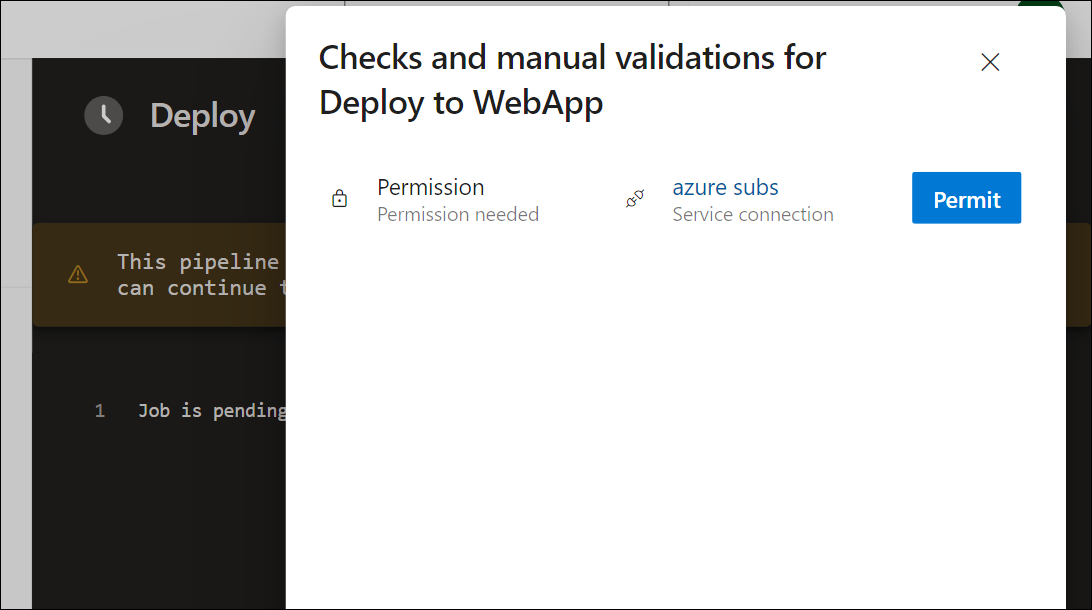
Open the pipeline run. If you receive the message “This pipeline needs permission to access a resource before this run can continue to Deploy to WebApp”, select View, Permit and Permit again. This is needed to allow the pipeline to create the Azure App Service resource.
-
The deployment may take a few minutes to complete, wait for the pipeline to execute. The pipeline is triggered following the completion of the CI pipeline and it includes the following tasks:
- AzureResourceManagerTemplateDeployment: Deploys the Azure App Service web app using bicep template.
- AzureRmWebAppDeployment: Publishes the Web site to the Azure App Service web app.
Note: In case the deployment fails, navigate to the pipeline run page and select Rerun failed jobs to invoke another pipeline run.
Note: Your pipeline will take a name based on the project name. Let’s rename it for identifying the pipeline better.
-
Go to Pipelines > Pipelines and select the recently created pipeline. Select the ellipsis and then select Rename/move option.
-
Name it eshoponweb-cd-webapp-code and click on Save.
Exercise 1: Configure and validate approval and branch checks
In this exercise, you will configure and validate approval and branch checks for the CD pipeline.
Task 1: Create an environment and add approvals and checks
-
In the Azure DevOps portal, from the eShopOnWeb project page, select Pipelines > Environments.
-
Select Create environment.
-
Name the environment Test, select None as the resource, and select Create.
-
In the Test environment, select the Approvals and checks tab.
-
Select Approvals.
-
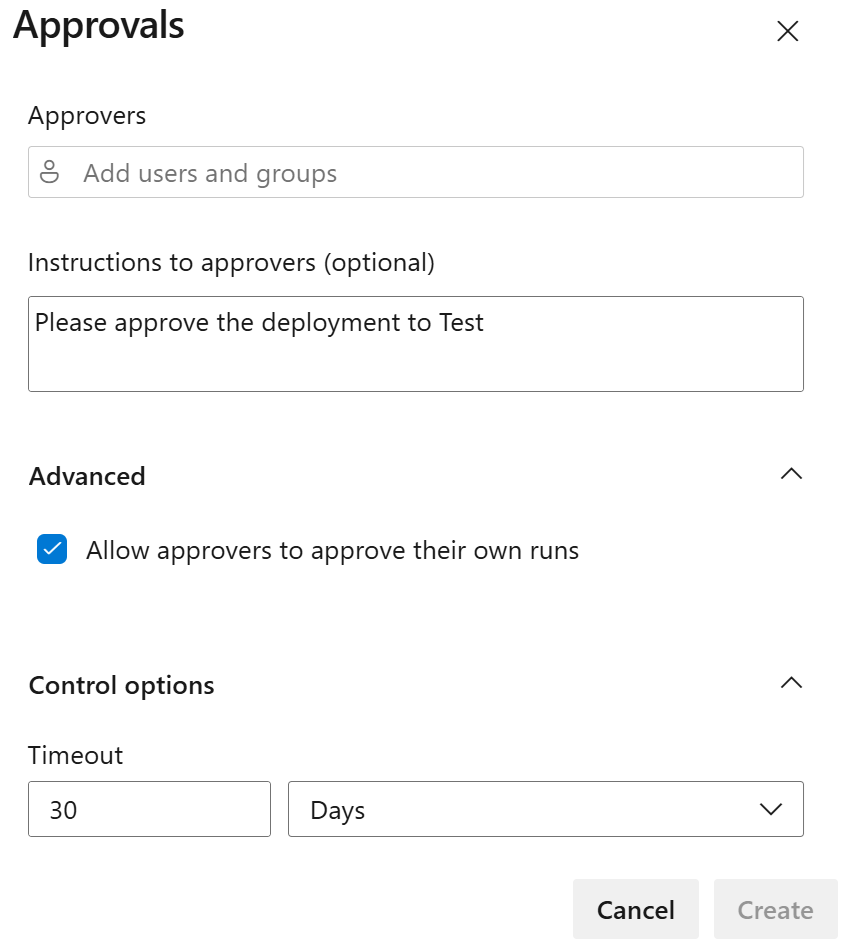
In the Approvers text box, enter your user name.
-
If not enabled, check the box labeled “Allow approvers to approve their own runs.”
-
Give the instructions Approve the deployment to Test and select Create.
-
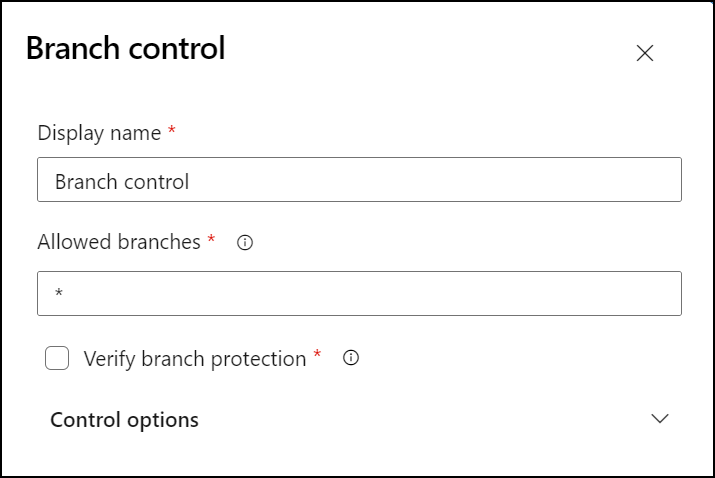
Click on + Add new button, select Branch control, and then select Next.
-
In the Allowed branches field, leave the default and select Create. You can add more branches if you want.
-
Create another environment named Production and perform the same steps to add approvals and branch control. To differentiate the environments, add the instructions Approve the deployment to Production and set the allowed branches to refs/heads/main.
Note: You could add more environments and configure approvals and branch control for them. Additionally, you could configure Security to add users or groups to the environment with such roles as User, Creator or Reader.
Task 2: Configure the CD pipeline to use the new environment
-
In the Azure DevOps portal, from the eShopOnWeb project page, select Pipelines > Pipelines.
-
Open the eshoponweb-cd-webapp-code pipeline.
-
Select Edit.
-
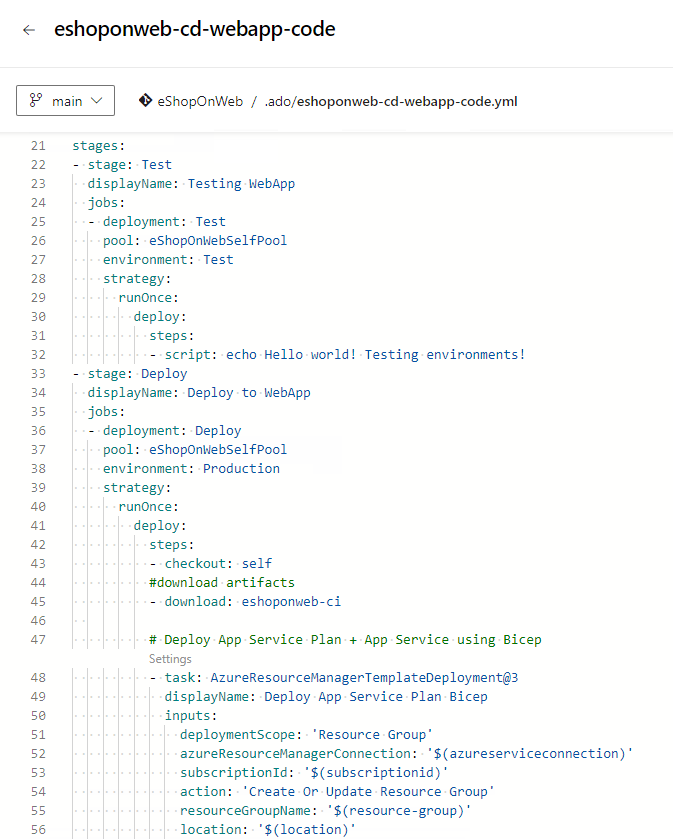
Select the line above the #download artifacts comment, up to the stages: line in the pipeline YAML file and replace the content with the following code:
stages: - stage: Test displayName: Testing WebApp jobs: - deployment: Test pool: eShopOnWebSelfPool environment: Test strategy: runOnce: deploy: steps: - script: echo Hello world! Testing environments! - stage: Deploy displayName: Deploy to WebApp jobs: - deployment: Deploy pool: eShopOnWebSelfPool environment: Production strategy: runOnce: deploy: steps: - checkout: selfNote: You will need to shift all the lines following the code above six spaces to the right to ensure that YAML indentation rules are satisfied.
Your pipeline should look like this:
[!IMPORTANT] Confirm that the pool name is the same as the one you created in the previous lab.
-
Click on Validate and save, choose to commit directly to the main branch, and then click on Save.
-
Your pipeline will trigger automatically. Open the pipeline run.
Note: If you receive a message “This pipeline needs permission to access a resource before this run can continue to Testing WebApp” select View, Permit and Permit again.
-
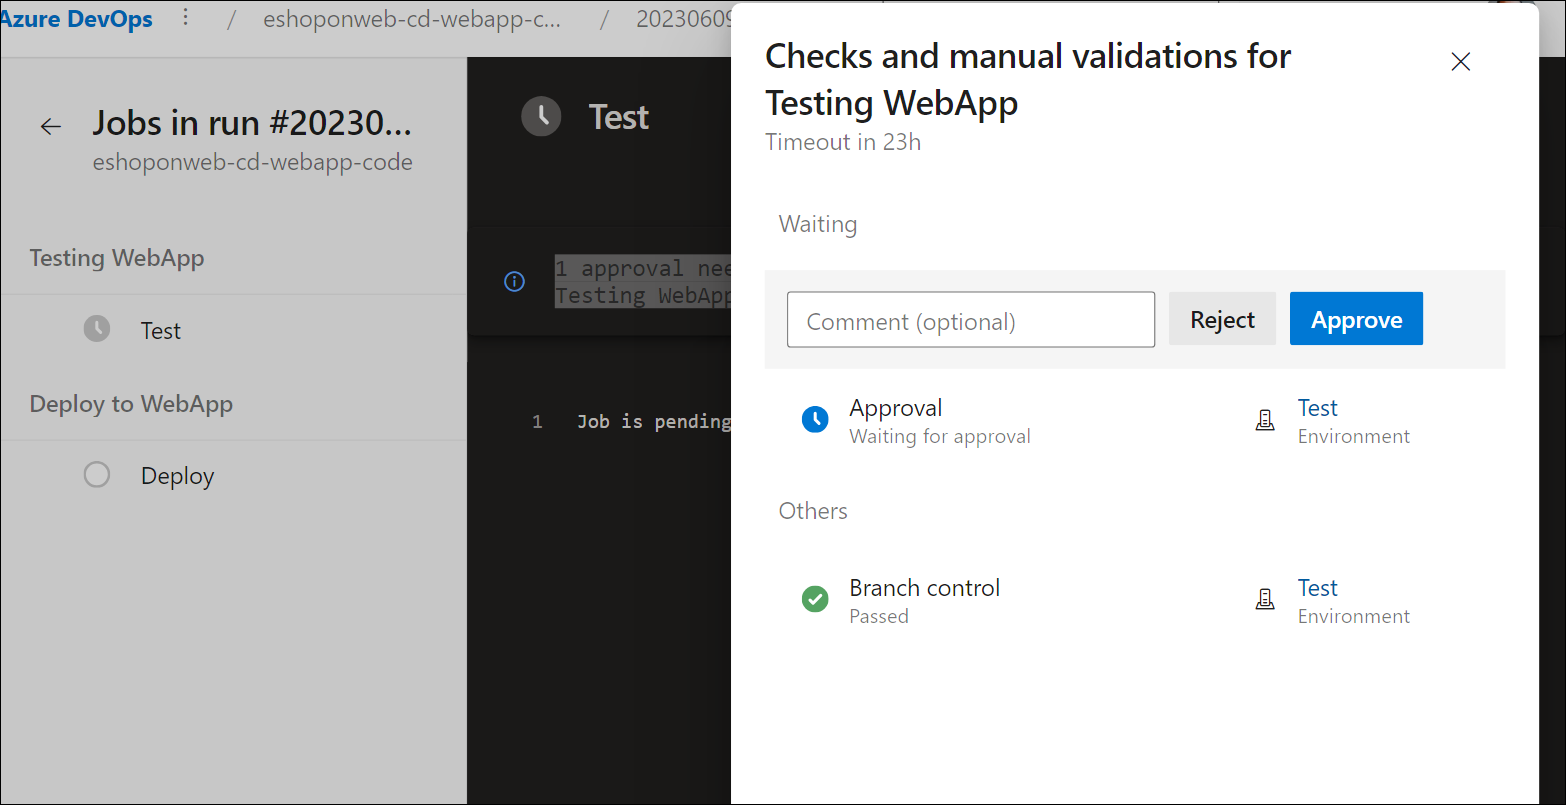
Open the Testing WebApp stage of the pipeline and note the message 1 approval needs your review before this run can continue to Testing WebApp. Select Review and select Approve.
-
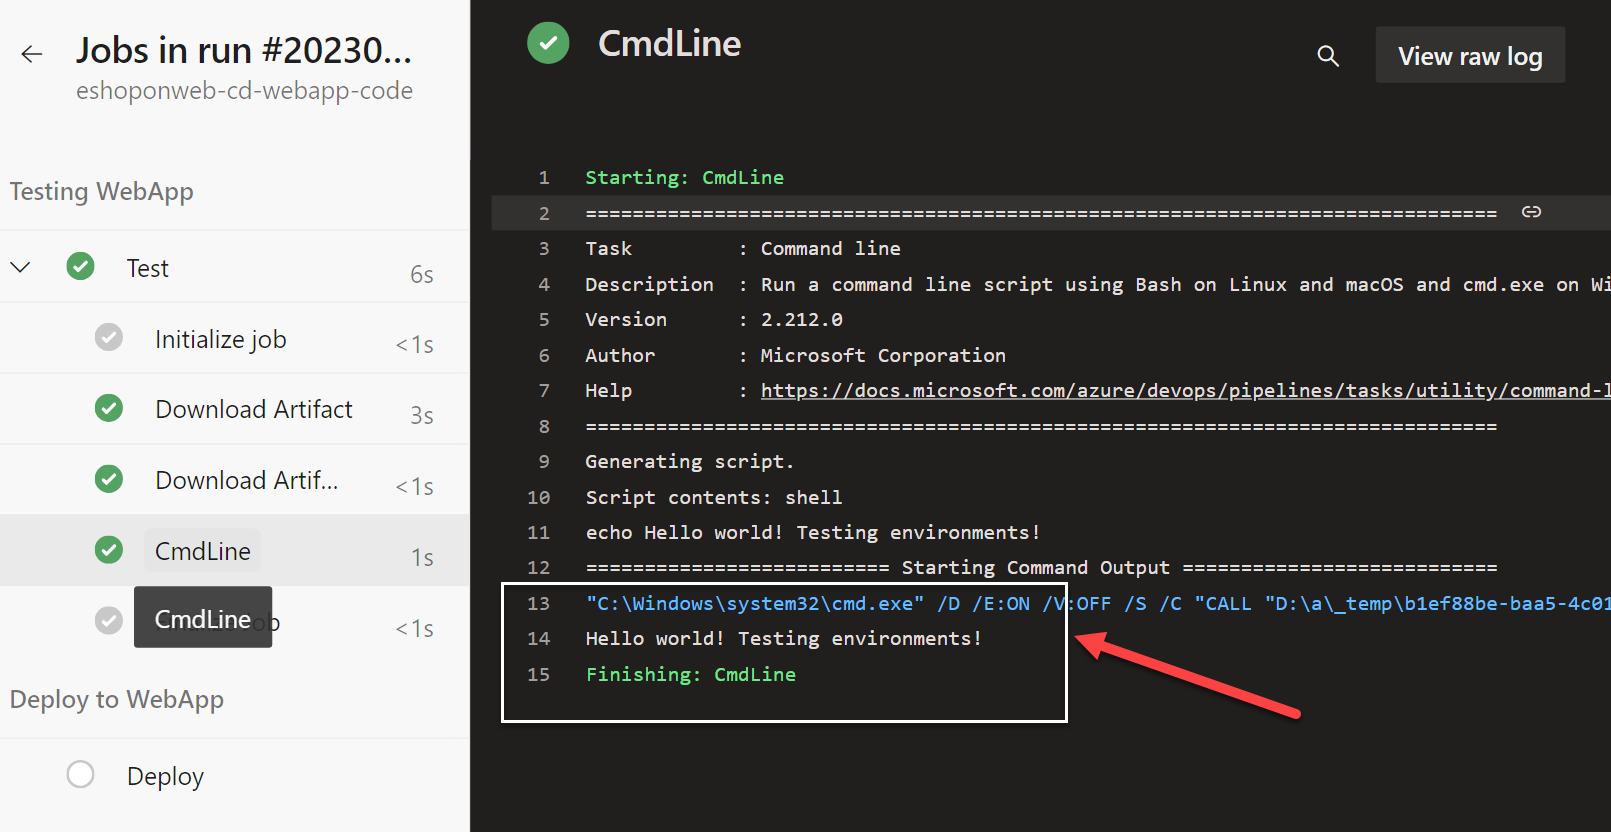
Wait for the pipeline to finish, open the pipeline log and check that the Testing WebApp stage was executed successfully.
-
Back to the pipeline and you will see the stage Deploy to WebApp waiting for approval. Select Review and Approve as you did before for the Testing WebApp stage.
Note: If you receive a message “This pipeline needs permission to access a resource before this run can continue to Deploy to WebApp” select View, Permit and Permit again.
-
Wait for the pipeline to finish and check that the Deploy to WebApp stage was executed successfully.
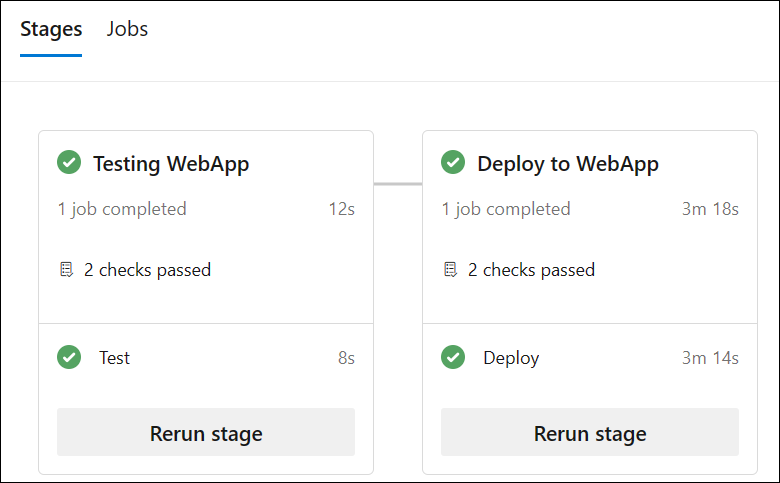
Note: You should be able to run the pipeline successfully with the approvals and branch checks in both environments, Test and Production.
[!IMPORTANT] Remember to delete the resources created in the Azure portal to avoid unnecessary charges.
Review
In this lab, you have learned how to set up a secure environment that adheres to the principle of least privilege, ensuring that members can access only the resources they need to perform their tasks and minimize potential security risks. You configured and validated user and pipeline permissions and set up approval and branch checks in Azure DevOps.