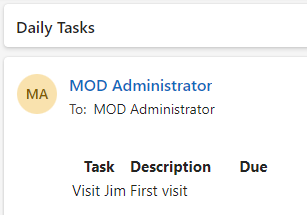
Practice Lab 6 – Scheduled flow
In this lab you will create a scheduled flow.
What you will learn
- How to create a Power Automate scheduled flow and process a list of SharePoint items.
High-level lab steps
- Create a scheduled flow
- Query SharePoint list
- Use Data operations
- Test the flow
Prerequisites
- Must have completed Lab 3: SharePoint
Detailed steps
Exercise 1 – Create scheduled flow
Task 1.1 - Create the trigger
-
Navigate to the Power Automate portal
https://make.powerautomate.com -
Make sure you are in the Dev One environment.
-
Select the + Create tab from the left navigation menu.
-
Select Scheduled cloud flow.
-
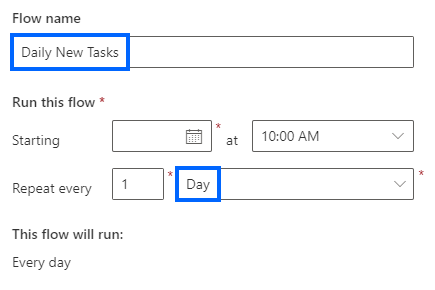
Enter
Daily New Tasksfor Flow name. -
Set Repeat every to 1 Day.
-
Select Create.
Task 1.2 - Configure the trigger
-
Select the Recurrence step.
-
Select the Recurrence step name and enter
Daily
Task 1.3 - Query new tasks
-
Select the + icon under the trigger step and select Add an action.
-
Enter
list itemsin search. -
Select Get items under SharePoint.
-
Select Get items step name and enter
New tasks -
Select the Power Automate SharePoint site.
-
Select the Tasks list.
-
Next to Advanced parameters, select Show all.
-
Select the Filter Query field and enter
ApprovalStatus eq 'New'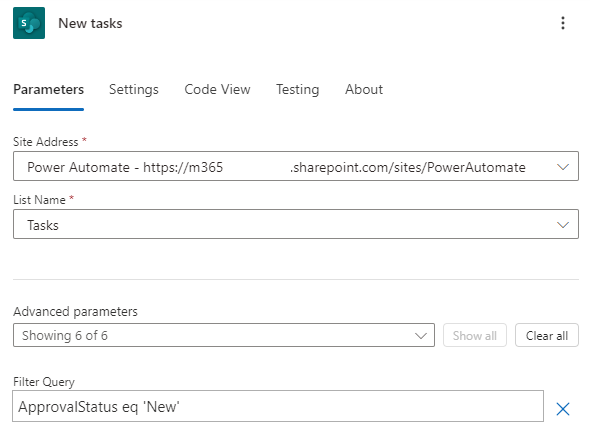
Task 1.4 - Select columns
-
Select the + icon under the New tasks step and select Add an action.
-
Enter
Selectin search. -
Select Built-in.
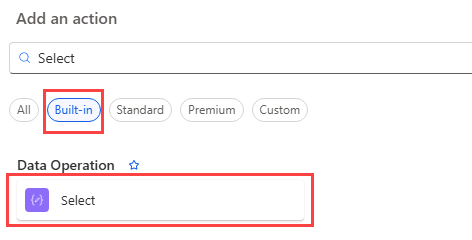
-
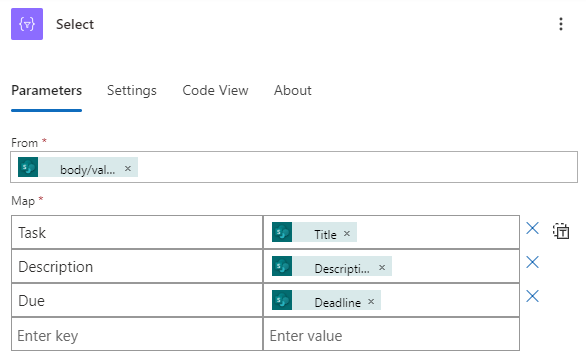
Select Select under Data Operation.
-
Select From field and select the Dynamic content icon.
-
Select body/value from New tasks.
-
Select Enter key field and enter
Task -
Select Enter value field, select the Dynamic content icon.
-
Select Title from New tasks.
-
Select Enter key field and enter
Description -
Select Enter value field, select the Dynamic content icon.
-
Select Description from New tasks.
-
Select Enter key field and enter
Due -
Select Enter value field, select the Dynamic content icon and select See more.
-
Select Deadline from New tasks.
-
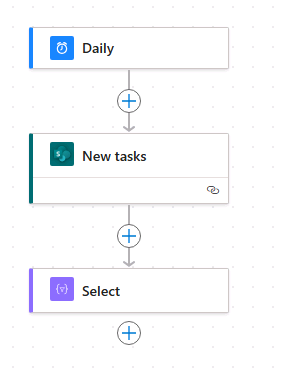
If the flow designer has automatically added one or more For Each loops, drag the Select step outside of the loops and delete the loop(s).
Task 1.5 - Create table
-
Select the + icon under the Select step and select Add an action.
-
Enter
create htmlin search. -
Select Built-in.
-
Select Create HTML table under Data Operation.
-
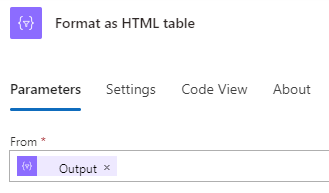
Select Create HTML table step name and enter
Format as HTML table -
Select From field and select the Dynamic content icon.
-
Select Output from Select.
Task 1.6 - Send email
-
Select the + icon under the Format as HTML table step and select Add an action.
-
Enter
emailin search. -
Select Send an email (V2) under Office 365 Outlook.
-
Select Send an email (V2) step name and enter
Notify by email -
Select To field and enter
MOD Administrator. -
Select your tenant user id for To.
-
Select Subject field and enter
Daily Tasks -
Select Body field and select the Dynamic content icon.
-
Select Output from Format as HTML table.
-
Select Save.
Exercise 2 – Test scheduled flow
Task 2.1 - Run scheduled flow manually
-
Select Test
-
Select Manually.
-
Select Test.
-
Select Run flow.
-
Select Done.
-
In the Power Automate portal, select the App launcher in the top left of the browser window and then select Outlook.
