Practice Lab 3 – SharePoint
In this lab you will create a SharePoint site and list.
What you will learn
- How to create a SharePoint list
- How to upload data
High-level lab steps
- Create a SharePoint list for Opportunities
Prerequisites
- Must have completed Lab 0: Validate lab environment
Detailed steps
Exercise 1 – Create SharePoint list
Task 1.1 Create a SharePoint site
-
In the Power Apps maker portal,
https://make.powerapps.com -
Select the App launcher in the top left of the browser window and then select SharePoint.

-
If the Welcome to SharePoint Start Page pop-up dialog is displayed, select X to close the dialog.
-
In SharePoint, select + Create site.
-
Select Team site, select Standard team template, and select Use template.
-
Enter
Power Automatefor Site name and select Next. -
Select Create site.
-
Select Finish.
-
If the Start designing your site pop-up dialog is displayed, close the dialog.
Task 1.2 Create a SharePoint list
-
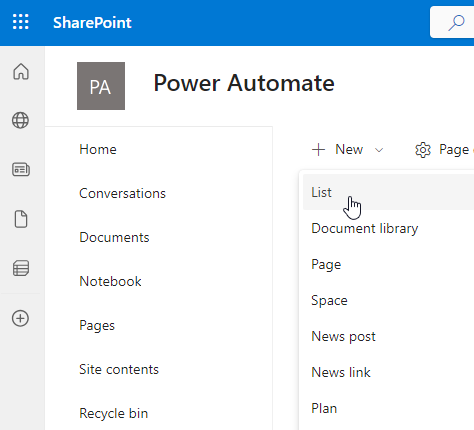
In the SharePoint site, select + New and then select List.
-
Select List under Create from blank.
-
Enter
Tasksfor Name and select Create. -
Select + Add column, select Multiple lines of text, and select Next.
-
In the Create a column pane, enter or select the following values:
- Name:
Description - Type: Multiple lines of text
- Name:
-
Select Save.
-
Select +Add column, select Text, and select Next.
-
In the Create a column pane, enter or select the following values:
- Name:
Owner Name - Type: Single line of text
- Name:
-
Select Save.
-
Select + Add column, select Date and time, and select Next.
-
In the Create a column pane, enter or select the following values:
- Name:
Deadline - Type: Date and time
- Name:
-
Select Save.
-
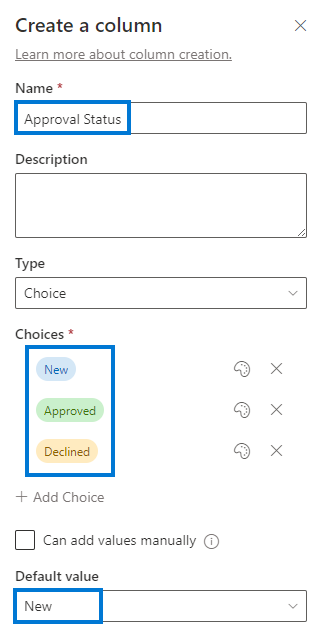
Select + Add column, select Choice, and select Next.
-
In the Create a column pane, enter or select the following values:
- Name:
Approval Status - Type: Choice
- Choice 1=
New - Choice 2=
Approved - Choice 3=
Declined
- Name:
-
Select New for Default value
-
Select Save.
-
Copy the first part of the URL of the SharePoint site, for example
https://m365x99999999.sharepoint.com/sites/PowerAutomate/
Exercise 2 – Add data SharePoint list
Task 2.1 - Add data
-
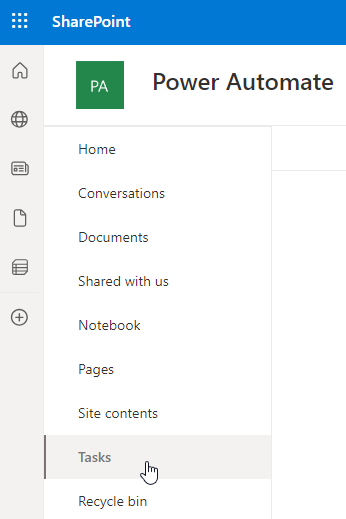
Navigate to the SharePoint site and select the Tasks list.
-
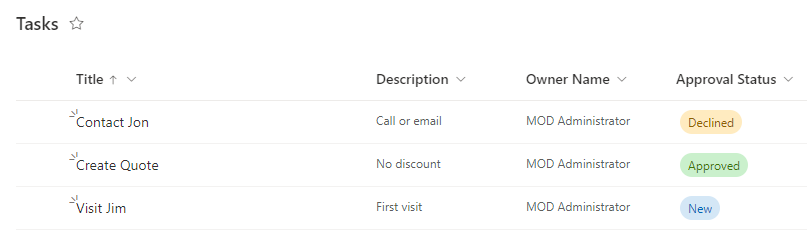
Select + Add new item and enter the following data and select Save:
- Title=
Contact Jon - Description=
Call or email - Owner Name=
MOD Administrator - Deadline=Yesterday
- Approval Status=Declined
- Title=
-
Select + Add new item and enter the following data and select Save:
- Title=
Create Quote - Description=
No discount - Owner Name=
MOD Administrator - Deadline=Today
- Approval Status=Approved
- Title=
-
Select + Add new item and enter the following data and select Save:
- Title=
Visit Jim - Description=
First visit - Owner Name=
MOD Administrator - Deadline=Tomorrow
- Approval Status=New
- Title=