Practice Lab 2 – Data model
In this lab you will create Dataverse tables and columns.
What you will learn
- How to create tables and columns in Microsoft Dataverse
- How to create a relationship with a lookup column
High-level lab steps
- Create a custom table
- Add columns to the table
- Create relationship to the by using a lookup column
Prerequisites
- Must have completed Lab 0: Validate lab environment
Detailed steps
Exercise 1 – Create custom tables
Task 1.1 - Create the Opportunity table
-
Navigate to the Power Apps Maker portal
https://make.powerapps.com -
Make sure you are in the Dev One environment.
-
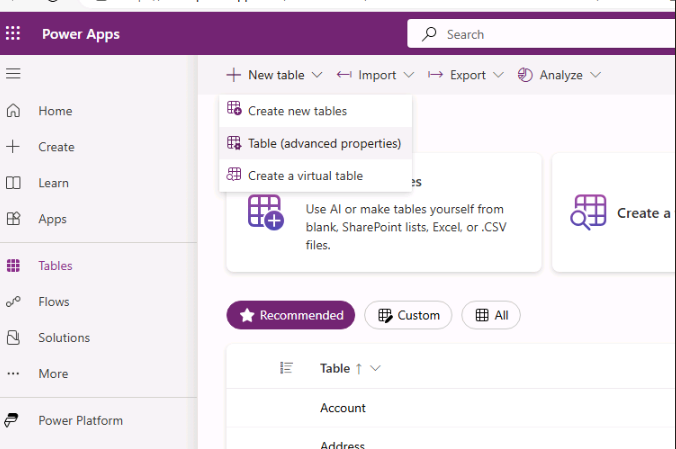
In the left navigation pane, select Tables.
-
Select + New table, and select Table (advanced properties).
-
Enter
Opportunityfor Display name.
Task 1.2 - Primary column
-
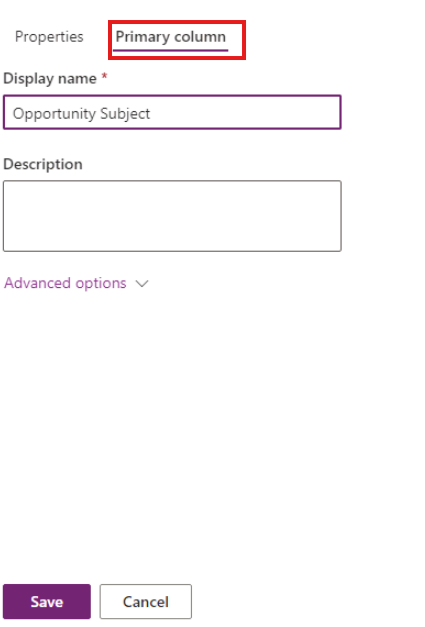
Select Primary column tab next to Properties tab.
-
Enter
Opportunity Subjectfor Display name. -
Select Save.
Task 1.3 - Add columns
-
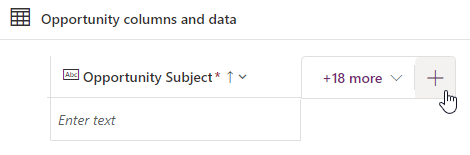
In the Opportunity columns and data pane, select + to add a new column.
-
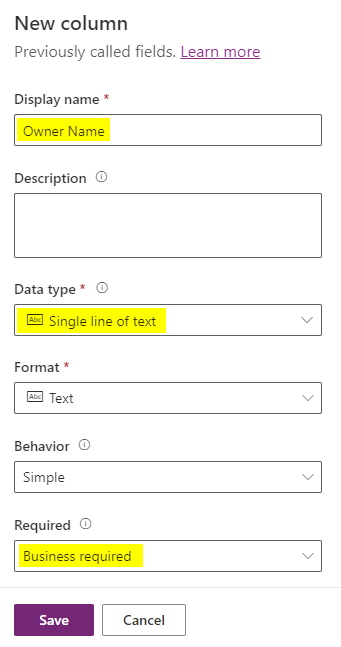
In the New column pane, enter or select the following values:
- Display name:
Owner Name - Data type: Single line of text
- Required: Business required
- Display name:
-
Select Save.
-
In the Opportunity columns and data pane, select + to add a new column.
-
In the New column pane, enter or select the following values:
- Display name:
Customer - Data type: Single line of text
- Required: Business required
- Display name:
-
Select Save.
-
In the Opportunity columns and data pane, select + to add a new column.
-
In the New column pane, enter or select the following values:
- Display name:
Address - Data type: Single line of text
- Required: Optional
- Display name:
-
Expand Advanced options and enter
200for Maximum character count. -
Select Save.
-
In the Opportunity columns and data pane, select + and in the New column pane, enter or select the following values:
- Display name:
Estimated Close Date - Data type: Date and time
- Format: Date only
- Required: Optional
- Display name:
-
Select Save.
-
In the Opportunity columns and data pane, select + and in the New column pane, enter or select the following values:
- Display name:
Amount - Data type: Currency
- Required: Optional
- Display name:
-
Select Save.
-
In the Opportunity columns and data pane, select + and in the New column pane, enter or select the following values:
- Display name:
Notes - Data type: Text > Multiple lines of text > Plain text
- Format: Text
- Required: Optional
- Display name:
-
Select Save.
Task 1.4 - Add choice column
-
In the Opportunity columns and data pane, select + and in the New column pane, enter or select the following values:
- Display name:
Opportunity Status - Data type: Choice > Choice
- Required: Optional
- Display name:
-
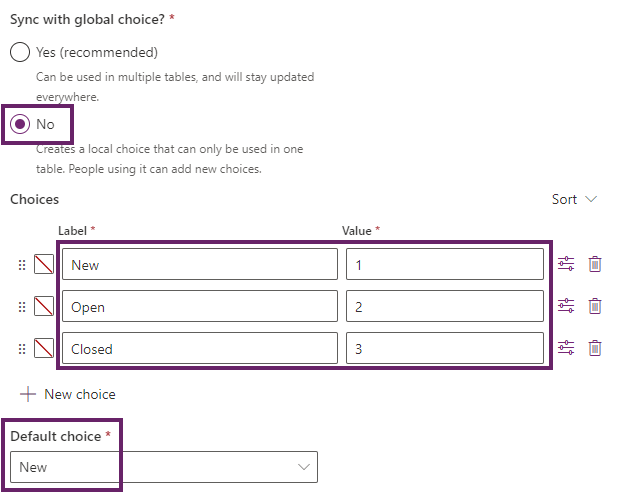
Select No for Sync with global choice?
-
Enter
Newfor Label and enter1for Value. -
Select + New choice and enter
Openfor Label and enter2for Value. -
Select + New choice and enter
Closedfor Label and enter3for Value. -
Select New for Default choice.
-
Select Save.
Exercise 2 – Create relationship
Task 2.1 - Create a lookup column
-
Navigate to the Power Apps Maker portal
https://make.powerapps.com -
Make sure you are in the Dev One environment.
-
In the left navigation pane, select Tables.
-
Select Opportunity.
-
In the Opportunity columns and data pane, select + and in the New column pane, enter or select the following values:
- Display name:
Account - Data type: Lookup > Lookup
- Required: Optional
- Related table: Account

- Display name:
-
Select Save.
Exercise 3 – Data
Task 3.1 - Add opportunity records
-
Navigate to the Power Apps Maker portal
https://make.powerapps.com -
Make sure you are in the Dev One environment.
-
In the left navigation pane, select Tables.
-
Select Opportunity.
-
In the Opportunity columns and data pane, select the drop-down caret next to Edit and select Edit in new tab.
-
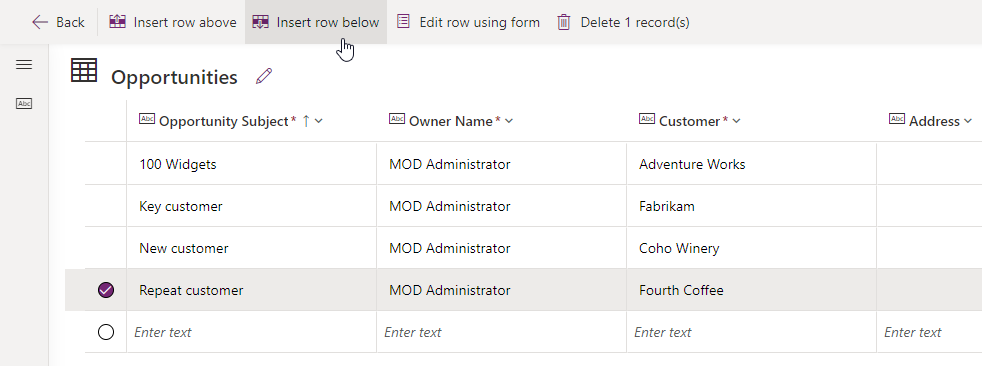
Select + New row and enter or select the following values:
- Opportunity Subject:
100 Widgets - Owner Name:
MOD Administrator - Customer:
Adventure Works - Estimated Close Date: Pick a date in the previous month
- Amount:
10,000 - Opportunity Status: Closed
- Opportunity Subject:
-
Select Insert row below and enter or select the following values:
- Opportunity Subject:
Key customer - Owner Name:
MOD Administrator - Customer:
Fabrikam - Estimated Close Date: Pick a future date in the current month
- Opportunity Status: New
- Amount:
50,000
- Opportunity Subject:
-
Select Insert row below and enter or select the following values:
- Opportunity Subject:
New customer - Owner Name:
MOD Administrator - Customer:
Coho Winery - Estimated Close Date: Pick a future date in the next month
- Amount:
25,000 - Opportunity Status: New
- Opportunity Subject:
-
Select Insert row below and enter or select the following values:
- Opportunity Subject:
Repeat customer - Owner Name:
MOD Administrator - Customer:
Fourth Coffee - Estimated Close Date: Pick a future date in the next month
- Amount:
15,000 - Opportunity Status: Open
- Opportunity Subject:
-
Close the tab.