Practice Lab 5 – External data
In this lab you will add an external data source.
What you will learn
- How to add a SharePoint list to your canvas app
- How to use collections
- How to use Patch
- How to use Office365Users connector
High-level lab steps
- Create a SharePoint list for Bookings
- Add the SharePoint list as a gallery
- Store selected records from a gallery
- Use Patch to set the decision for a booking request
- Use Office365User connector to display the user’s details.
Prerequisites
- Must have completed Lab 4: Build the UI
Detailed steps
Exercise 1 – Create SharePoint list
Task 1.1 Create a SharePoint site
-
In the Power Apps maker portal,
https://make.powerapps.comselect the App launcher in the top left of the browser window and then select SharePoint. -
If the Welcome to SharePoint Start Page popup dialog is displayed, select ✖ to close the dialog.
-
In SharePoint, select + Create site.
-
Select Team site, select Standard team template, and then select Use template.
-
Enter
Pet boardingfor Site name and select Next. -
Select Create site.
-
Select Finish.
-
If the Start designing your site pop-up dialog is displayed, close the dialog.
Task 1.2 Create a SharePoint list
-
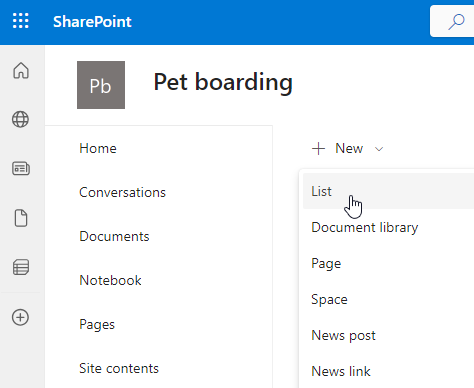
In the SharePoint site, select + New and then select List.
-
Select List under Create from blank.
-
Enter
Bookingsfor Name and select Create. -
Select + Add column, select Text, and select Next.
-
In the Create a column pane, enter or select the following values:
- Name:
Pet Name - Type: Single line of text
- Name:
-
Select Save.
-
Select + Add column, select Text, and select Next.
-
In the Create a column pane, enter or select the following values:
- Name:
Owner Name - Type: Single line of text
- Name:
-
Select Save.
-
Select + Add column, select Date and time, and select Next.
-
In the Create a column pane, enter or select the following values:
- Name:
Start Date - Type: Date and time
- Name:
-
Select Save.
-
Select + Add column, select Date and time, and select Next.
-
In the Create a column pane, enter or select the following values:
- Name:
End Date - Type: Date and time
- Name:
-
Select Save.
-
Copy the first part of the URL of the SharePoint site, for example
https://m365x99999999.sharepoint.com/sites/Petboarding/
Exercise 2 – Add SharePoint list to canvas app
Task 2.1 - Edit the app
-
Navigate to the Power Apps Maker portal
https://make.powerapps.com -
Make sure you are in the Dev One environment.
-
Select the Apps tab from the left navigation menu.
-
Select the Booking Request app, select the Commands (…), and select Edit > Edit in new tab.
Task 2.2 - Add SharePoint as a data source
-
In the app authoring menu, select Data.
-
Select the drop-down caret next to Add data and enter
SharePointin Search.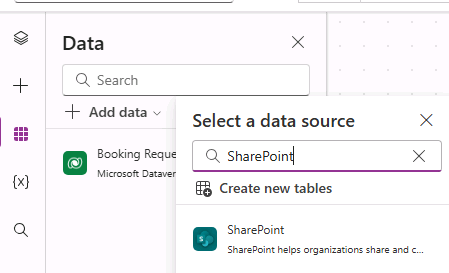
-
Select SharePoint.
-
Select Connect directly (cloud services) and select Connect.
-
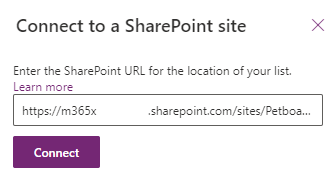
Enter the URL of the SharePoint site you created earlier in this lab.
-
Select Connect.
-
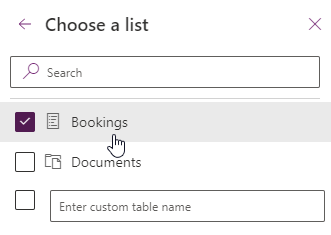
Select Bookings.
-
Select Connect.
Task 2.3 - Add gallery for SharePoint list
-
In the app authoring menu, select Insert (+).
-
Select Vertical gallery.
-
Select Bookings for data source.
-
Select Title and subtitle for Layout.
-
Select 6 selected next to Fields
-
Select Pet Name for Title3.
-
Select Start Date for Subtitle3.
-
Close the Data pane.
-
In the app authoring menu, select Tree view.
-
Rename the gallery to
BookingList. -
Set the properties of the gallery in the formula bar as follows:
- X=
1000 - Y=
80 - Height=
575 - Width=
250
- X=
Exercise 3 – Collections
Task 3.1 Create Collection
-
In the app authoring menu, select Tree view.
-
Expand BookingRequestList.
-
Select NextArrow2.
-
Set the OnSelect property of NextArrow in the formula bar to:
Collect(colRequests, ThisItem) -
In the app authoring menu, select Tree view.
-
Select the App object.
-
Set the OnStart property in the formula bar to:
Clear(colRequests)
Exercise 4 – Patch
Task 4.1 Decline booking request
-
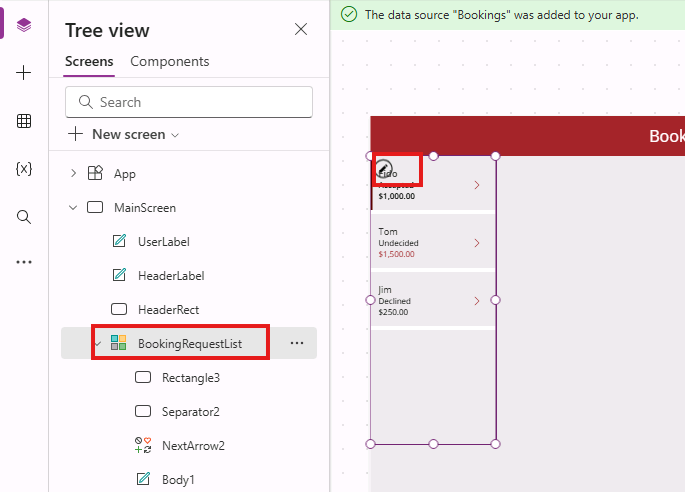
In the app authoring menu, select Tree view.
-
Select BookingRequestList.
-
Select the pencil icon in the top-left of the gallery control.
-
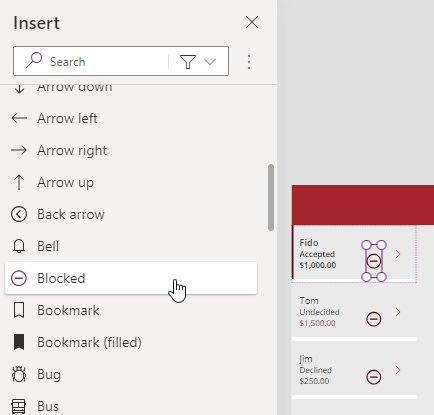
In the app authoring menu, select Insert (+).
-
Expand Classic icons.
-
Select Blocked. The icon will be added to each row in the gallery.
-
Set the properties of the icon in the formula bar as follows:
- X=
150 - Y=
60 - Height=
30 - Width=
30
- X=
-
In the app authoring menu, select Tree view.
-
Rename the icon to
DeclineIcon. -
Set the OnSelect property of DeclineIcon in the formula bar to:
Patch('Booking Requests', ThisItem, {Decision: 'Decision (Booking Requests)'.Declined})
Task 4.2 Confirm booking request
-
In the app authoring menu, select Tree view.
-
Select BookingRequestList.
-
Select the pencil icon in the top-left of the gallery control.
-
In the app authoring menu, select Insert (+).
-
Expand Classic icons.
-
Select Add. The icon will be added to each row in the gallery.
-
Set the properties of the icon in the formula bar as follows:
- X=
150 - Y=
10 - Height=
30 - Width=
30
- X=
-
In the app authoring menu, select Tree view.
-
Rename the icon to
AcceptIcon.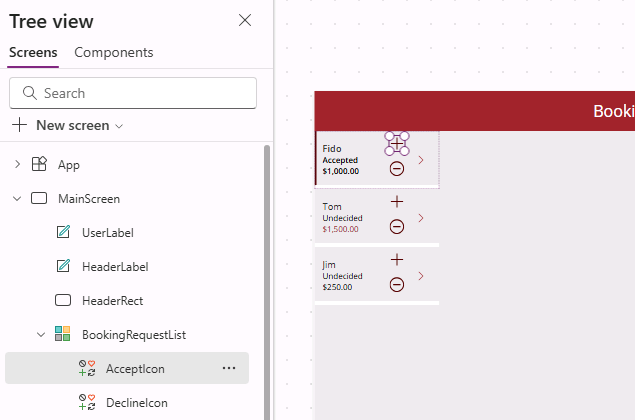
-
Set the OnSelect property of AcceptIcon in the formula bar to:
Patch(Bookings,Defaults(Bookings),{Title:"New Booking",'Pet Name':ThisItem.'Pet Name','Owner Name':ThisItem.'Owner Name', 'Start Date':ThisItem.'Start Date','End Date':ThisItem.'End Date'})
Exercise 5 – Office 365 Users
Task 5.1 Add Office 365 Users as a data source
-
In the app authoring menu, select Data.
-
Select the drop-down caret next to Add data and enter
Office 365in Search. -
Select Office 365 Users.
-
Select Connect.
Task 5.2 Display the user’s country
-
Select outside of the gallery on the blank canvas, or select the MainScreen on the Tree view.
-
In the app authoring menu, select Insert (+).
-
Select Text label.
-
Drag the label to the top right of the screen next to the UserLabel.
-
In the app authoring menu, select Tree view.
-
Rename the label to
UserDetailsLabel. -
Set the Text property of UserDetailsLabel in the formula bar to:
Office365Users.MyProfile().Country[!NOTE] If the user’s country doesn’t display, navigate to
https://admin.microsoft.com, select Users > Active users, select the user profile, select Manage contact information, set the Country or region field to any country, and then select Save changes. -
Set the properties of the label in the formula bar as follows:
- X=
930 - Y=
20 - Size=
18 - Color=
Color.White
- X=
-
Select Save in the top-right of the Power Apps Studio.
-
Select the <- Back button from the top left of the command bar, and select Leave to exit the app.