Practice Lab 4 – Build the UI
In this lab you will change the colors of the controls in the app.
What you will learn
- How to use themes
- How to personalize your app
High-level lab steps
- Select a theme
- Personalization
Prerequisites
- Must have completed Lab 3: Create a canvas app
Detailed steps
Exercise 1 – Theme
Task 1.1 - Edit the app
-
Navigate to the Power Apps Maker portal https://make.powerapps.com.
-
Make sure you are in the Dev One environment.
-
Select the Apps tab from the left-side menu.
-
Select the Booking Request app, select the Commands (…), and select Edit > Edit in new tab.
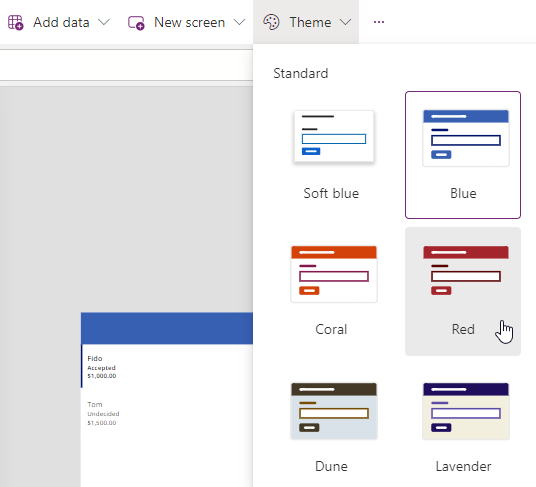
Task 1.2 - Select a theme
-
In Power Apps Studio, select the More icon (…) at the bottom of the left navigation bar, and then select Themes.
-
Select the Red theme.
Task 1.3 - Brand controls
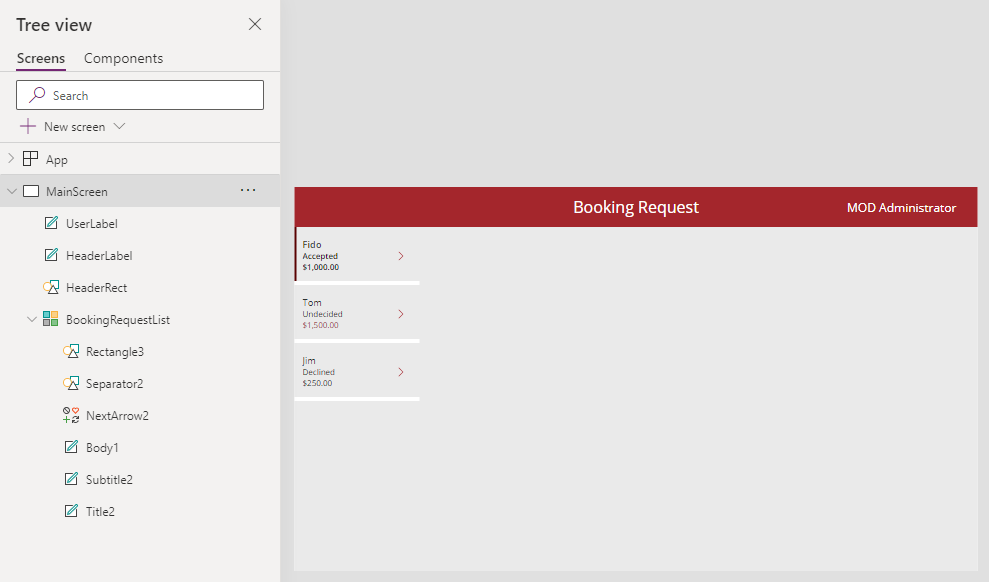
-
In the app authoring menu, select Tree view.
-
Expand the BookingRequestList gallery.
-
Select NextArrow2.
-
Set the Color property of NextArrow in the formula bar to:
RGBA(164, 38, 44, 1) -
Select Body1.
-
Set the Color property of Body in the formula bar to:
If(ThisItem.Cost > 1000, RGBA(164, 38, 44, 1), Color.Black) -
Select Save in the top-right of the Power Apps Studio.
Exercise 2 – Personalization
Task 2.1 - Add user label
-
Select outside of the gallery on the blank canvas or select the MainScreen.
-
In the app authoring menu, select Insert (+).
-
Select Text label.
-
Drag the label to the top right of the screen.
-
In the app authoring menu, select Tree view.
-
Rename the label to
UserLabel. -
Set the properties of the label in the formula bar as follows:
- X=
1100 - Y=
20 - Height=
40 - Width=
250 - Align=
Align.Right - Size=
18 - PaddingRight=
10 - Color=
Color.White - Text=
User().FullName
- X=
-
Select Save in the top-right of the Power Apps Studio.
-
Select the <- Back button from the top left of the command bar, and select Leave to exit the app.