Practice Lab 3 – Create a canvas app
In this lab you will design and build a canvas app from blank, add a data source and a gallery.
What you will learn
- How to create a canvas app with a gallery linked to a data source
- How to format fields with Power Fx formulas
High-level lab steps
- Create a canvas app from blank
- Add a data source to the app
- Add a gallery to the app
- Configure the fields in the gallery
Prerequisites
- Must have completed Lab 2: Data model
Detailed steps
Exercise 1 – Create a canvas app
Task 1.1 - Create the app
-
Navigate to the Power Apps Maker portal
https://make.powerapps.com -
Make sure you are in the Dev One environment.
-
Select the + Create tab from the left navigation menu.
-
Select the Create from blank tile under Start from design.
-
Select Tablet size.
-
Wait for the blank app to be built.
-
Select Save in the top-right of the Power Apps Studio, enter
Booking Request appfor Name, and then select Save.
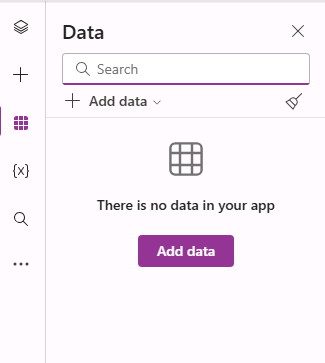
Task 1.2 - Add data source
-
In the app authoring menu, select Data.
-
Select the drop-down caret next to Add data and enter
Bookingin Search.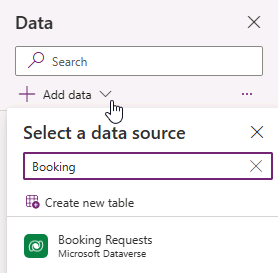
-
Select the Booking Requests Microsoft Dataverse table.
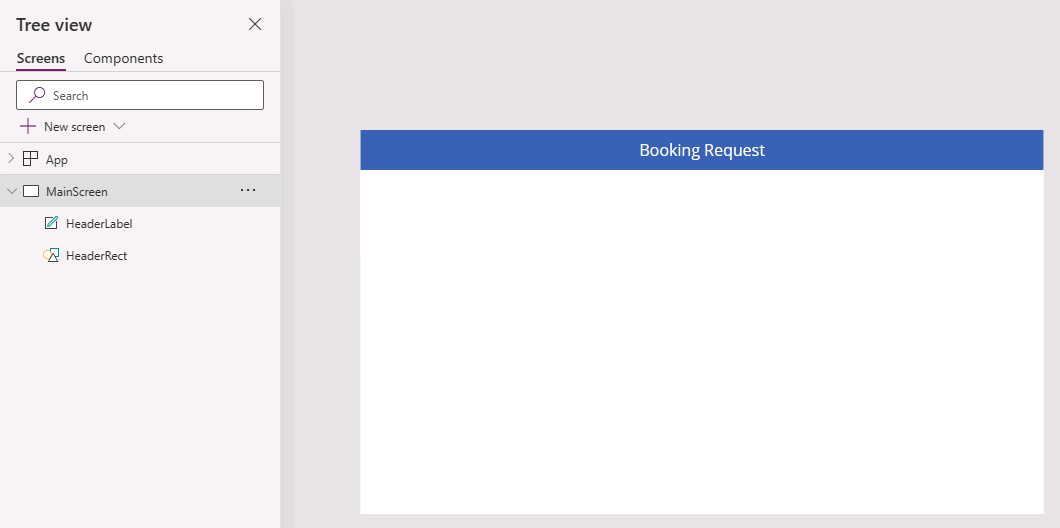
Task 1.3 - Configure the main screen
-
In the app authoring menu, select Tree view.
-
Select Screen1 in the tree view and select the ellipsis (…) and select Rename.
-
Enter
MainScreen. -
In the app authoring menu, select Insert (+).
-
Expand the Shapes category and select Rectangle.
-
Drag the rectangle to the top left of the screen.
-
In the app authoring menu, select Tree view.
-
Rename the rectangle to
HeaderRect. -
Set the properties of the rectangle in the formula bar as follows:
- X=
0 - Y=
0 - Height=
80 - Width=
Parent.Width
- X=
-
In the app authoring menu, select Insert (+).
-
Select Text label.
-
Drag the label to the top left of the screen.
-
In the app authoring menu, select Tree view.
-
Rename the label to
HeaderLabel. -
Set the properties of the label in the formula bar as follows:
- X=
0 - Y=
0 - Height=
80 - Width=
Parent.Width - Align=
Align.Center - Size=
24 - Text=
"Booking Request" - Color=
Color.White
- X=
-
Select Save in the top-right of the Power Apps Studio.
Task 1.4 - Add a gallery
-
In the app authoring menu, select Insert (+).
-
Select Vertical gallery.
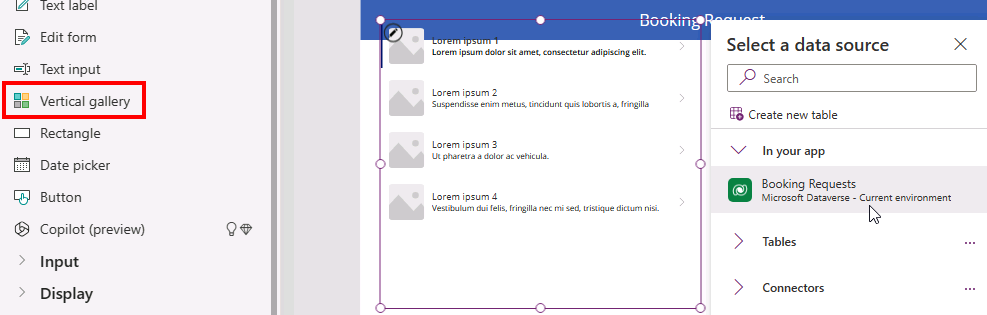
-
Select Booking Requests for the data source.
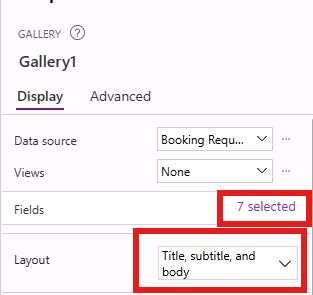
-
In the Properties tab, for Layout select Title, subtitle, and body.
-
Select 7 selected next to Fields.
-
Select Cost for Body1.
[!NOTE] The field names may appear as schema names with a prefix instead of the display name.
-
Select Decision for Subtitle2.
-
Select Pet Name for Title2.
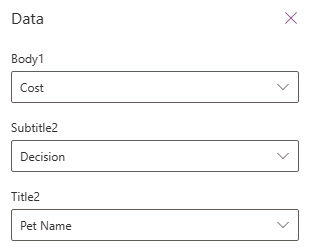
-
Close the Data pane.
-
In the app authoring menu, select Tree view.
-
Rename the gallery to
BookingRequestList. -
If a suggestions popup dialog appears, select Cancel.
-
Set the properties of the gallery in the formula bar as follows:
- X=
0 - Y=
80 - Height=
575 - Width=
250
- X=
Task 1.5 - Format the currency field
-
In the app authoring menu, select Tree view.
-
Expand the BookingRequestList gallery.
-
Select Body1.
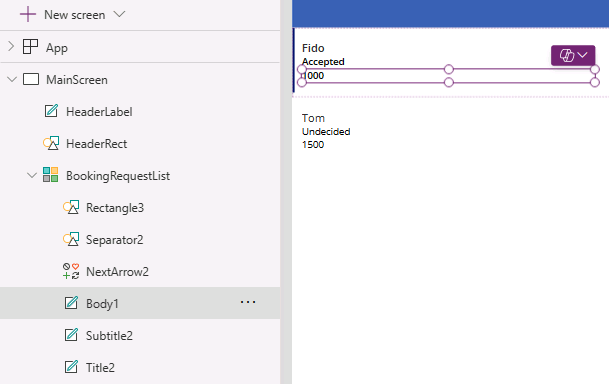
-
Set the Text property in the formula bar to the formula:
Text(Value(ThisItem.Cost), "$#,##0.00") -
Select Save in the top-right of the Power Apps Studio.
-
Select the <- Back button from the top left of the command bar, and select Leave to exit the app.