Get started with prompt flow in the Azure AI Studio
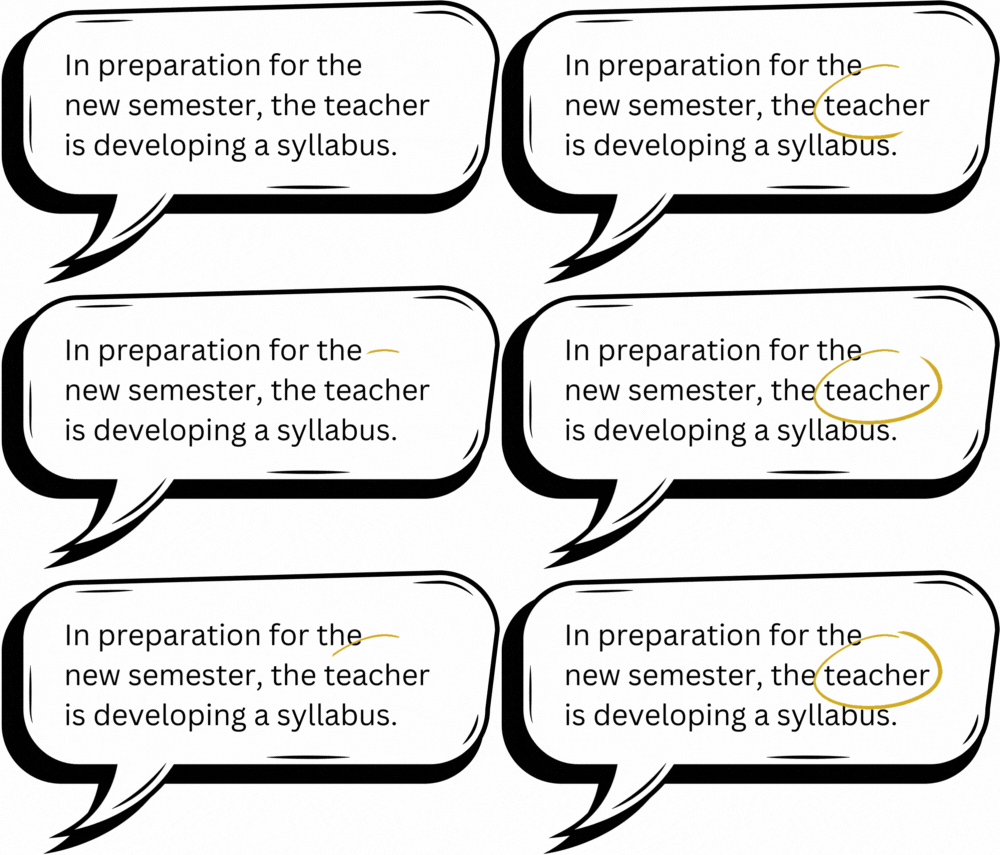
Extracting valuable information from text is known as Named Entity Recognition (NER). Entities are key words that are of interest to you in a given text.

Large Language Models (LLMs) can be used to perform NER. To create an application that takes a text as input and outputs entities, you can create a flow that uses a LLM node with prompt flow.
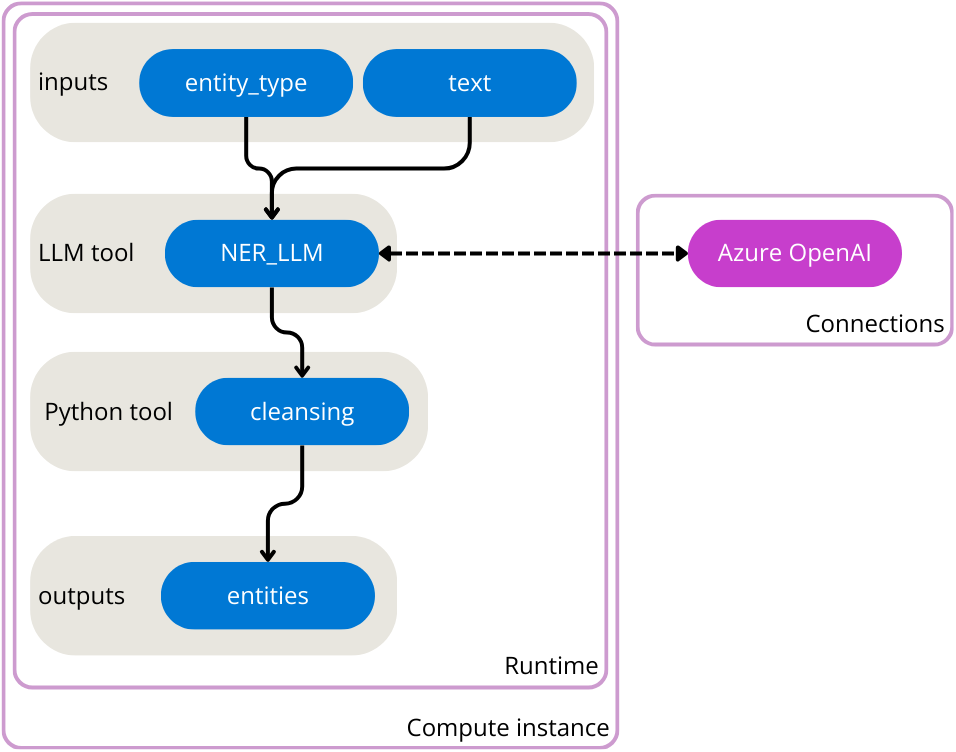
In this exercise, you’ll use Azure AI Studio’s prompt flow to create an LLM application that expects an entity type and text as input. It calls a GPT model from Azure OpenAI through a LLM node to extract the required entity from the given text, cleans the result and outputs the extracted entities.

You first need to create a project in the Azure AI Studio to create the necessary Azure resources. Then, you can deploy a GPT model with the Azure OpenAI service. Once you have the necessary resources, you can create the flow. Finally you’ll run the flow to test it and view the sample output.
Create a project in the Azure AI Studio
You start by creating an Azure AI Studio project and the Azure AI resources to support it.
- In a web browser, open https://ai.azure.com and sign in using your Azure credentials.
- Select the Build page, then select + New project.
- In the Create a new project wizard, create a project with the following settings:
- Project name: A unique name for your project
-
Azure AI resource: Create a new resource with the following settings:
- Resource name: A unique name
- Subscription: Your Azure subscription
- Resource group: A new resource group
- Location: Choose a location near you
- Review your configuration and create your project.
- Wait 5-10 minutes for your project to be created.
Deploy a GPT model
To use a LLM model in prompt flow, you need to deploy a model first. The Azure AI Studio allows you to deploy OpenAI models that you can use in your flows.
- In the navigation pane on the left, under Components, select the Deployments page.
- In Azure OpenAI Studio, navigate to the Deployments page.
- Create a new deployment of the gpt-35-turbo model with the following settings:
-
Model:
gpt-35-turbo - Model version: Leave the default value
-
Deployment name:
gpt-35-turbo - Set the Advanced options to use the default content filter and to restrict the tokens-per-minute (TPM) to 5K.
-
Model:
Now that you have your LLM model deployed, you can create a flow in Azure AI Studio that calls the deployed model.
Create and run a flow in the Azure AI Studio
Now that you have all necessary resources provisioned, you can create a flow.
Create a new flow
To create a new flow with a template, you can select one of the types of flows you want to develop.
- In the navigation pane on the left, under Tools, select Prompt flow.
- Select + Create to create a new flow.
- Create a new Standard flow and enter
entity-recognitionas folder name.
A standard flow with one input, two nodes, and one output is created for you. You’ll update the flow to take two inputs, extract entities, clean up the output from the LLM node, and return the entities as output.
Start the automatic runtime
To test your flow, you need compute. The necessary compute is made available to you through the runtime.
- After creating the new flow that you named
entity-recognition, the flow should open in the studio. - Select the Select runtime field from the top bar.
- In the Automatic runtime list, select Start to start the automatic runtime.
- Wait for the runtime to start.
Configure the inputs
The flow you’ll create will take two inputs: a text and the type of entity you want to extract from the text.
- Under Inputs, one input is configured named
topicof typestring. Change the existing input and update with the following settings:-
Name:
entity_type -
Type:
string -
Value:
job title
-
Name:
- Select Add input.
- Configure the second input to have the following settings:
-
Name:
text -
Type:
string -
Value:
The software engineer is working on a new update for the application.
-
Name:
Configure the LLM node
The standard flow already includes a node that uses the LLM tool. You can find the node in your flow overview. The default prompt asks for a joke. You’ll update the LLM node to extract entities based on the two inputs specified in the previous section.
- Navigate to the LLM node named
joke. - Replace the name with
NER_LLM - For Connection, select the
Default_AzureOpenAIconnection. - For deployment_name, select the
gpt-35-turbomodel you deployed. -
Replace the prompt field with the following code:
system: Your task is to find entities of a certain type from the given text content. If there're multiple entities, please return them all with comma separated, e.g. "entity1, entity2, entity3". You should only return the entity list, nothing else. If there's no such entity, please return "None". user: Entity type: {{entity_type}} Text content: {{text}} Entities: - Select Validate and parse input.
- Within the LLM node, in the Inputs section, configure the following:
- For
entity_type, select the value${inputs.entity_type}. - For
text, select the value${inputs.text}.
- For
Your LLM node will now take the entity type and text as inputs, include it in the prompt you specified and send the request to your deployed model.
Configure the Python node
To extract only the key information from the result of the model, you can use the Python tool to clean up the output of the LLM node.
- Navigate to the Python node named
echo. - Replace the name with
cleansing. -
Replace the code with the following:
from typing import List from promptflow import tool @tool def cleansing(entities_str: str) -> List[str]: # Split, remove leading and trailing spaces/tabs/dots parts = entities_str.split(",") cleaned_parts = [part.strip(" \t.\"") for part in parts] entities = [part for part in cleaned_parts if len(part) > 0] return entities - Select Validate and parse input.
- Within the Python node, in the Inputs section, set the value of
entities_strto${NER_LLM.output}.
Configure the output
Finally, you can configure the output of the whole flow. You only want one output to your flow, which should be the extracted entities.
- Navigate to the flow’s Outputs.
- For Name, enter
entities. - For Value, select
${cleansing.output}.
Run the flow
Now that you’ve developed the flow, you can run it to test it. Since you’ve added default values to the inputs, you can easily test the flow in the studio.
- Select Run to test the flow.
- Wait until the run is completed.
- Select View outputs. A pop-up should appear showing you the output for the default inputs. Optionally, you can also inspect the logs.
Delete Azure resources
When you finish exploring the Azure AI Studio, you should delete the resources you’ve created to avoid unnecessary Azure costs.
- Navigate to the Azure portal at
https://portal.azure.com. - In the Azure portal, on the Home page, select Resource groups.
- Select the resource group that you created for this exercise.
- At the top of the Overview page for your resource group, select Delete resource group.
- Enter the resource group name to confirm you want to delete it, and select Delete.