Use spark notebooks in Synapse Pipeline
Introduction
In this lab, we’re going to create a parquet file using the Azure Synapse Pipeline and a Azure Synapse Notebook which we created earlier to create a parquet file passing the runId of the pipeline as the name of the folder in which the contents are stored.
This lab will take approximately 45 minutes to complete.
Before you start
You’ll need an Azure subscription in which you have administrative-level access.
Provision an Azure Synapse Analytics workspace
You’ll need an Azure Synapse Analytics workspace with access to data lake storage. You can use the built-in serverless SQL pool to query files in the data lake.
In this exercise, you’ll use a combination of a PowerShell script and an ARM template to provision an Azure Synapse Analytics workspace.
- Sign into the Azure portal at
https://portal.azure.com. -
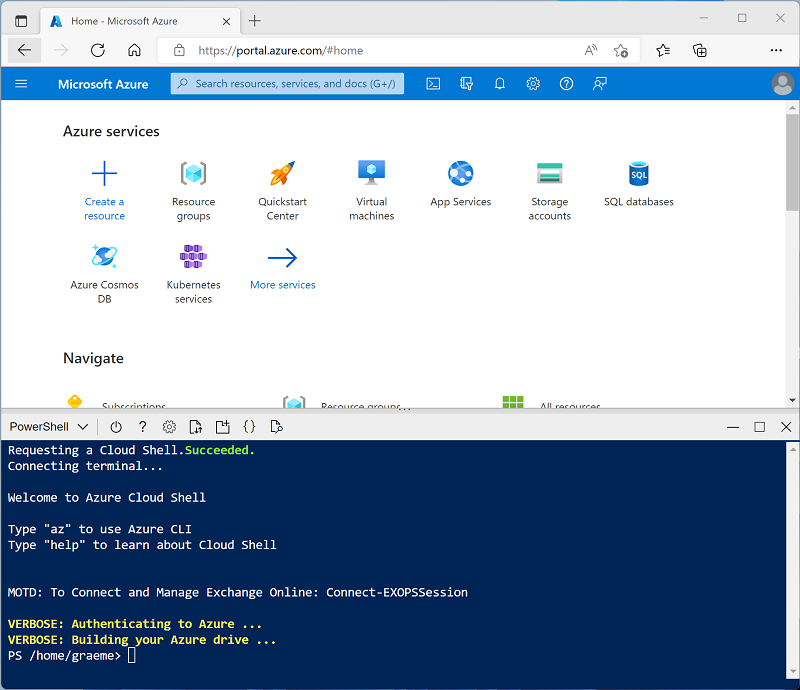
Use the [>_] button to the right of the search bar at the top of the page to create a new Cloud Shell in the Azure portal, selecting a PowerShell environment and creating storage if prompted. The Cloud Shell provides a command line interface in a pane at the bottom of the Azure portal, as shown here:
Note: If you have previously created a cloud shell that uses a Bash environment, use the the drop-down menu at the top left of the cloud shell pane to change it to PowerShell.
-
Note that Cloud Shell can be resized by dragging the separator bar at the top of the pane, or by using the—, ◻, and X icons at the top right of the pane to minimize, maximize, and close the pane. For more information about using the Azure Cloud Shell, see the Azure Cloud Shell documentation.
-
In the PowerShell pane, enter the following commands to clone this repository:
rm -r dp-000 -f git clone https://github.com/MicrosoftLearning/mslearn-synapse dp-000 -
After the repository has been cloned, enter the following commands to change to the folder for this lab, and run the setup.ps1 script it contains:
cd dp-000/Allfiles/Labs/17 ./setup.ps1 - If prompted, choose which subscription you want to use (this will only happen if you have access to multiple Azure subscriptions).
-
When prompted, enter a suitable password to be set for your Azure Synapse SQL pool.
Note: Be sure to remember this password!
- Wait for the script to complete - this typically takes around 10 minutes, but in some cases may take longer. While you’re waiting, review the Azure Synapse Pipelines article in the Azure Synapse Analytics documentation.
View and Navigate Synapse Workspace
- After the script has completed, in the Azure portal, go to the dp000-xxxxxxx resource group that it created, and select your Synapse workspace.
- In the Overview page for your Synapse Workspace, in the Open Synapse Studio card, select Open to open Synapse Studio in a new browser tab; signing in if prompted.
- On the left side of Synapse Studio, use the ›› icon to expand the menu - this reveals the different pages within Synapse Studio that you’ll use to manage resources and perform data analytics tasks.
- On the Data page, view the Linked tab and verify that your workspace includes a link to your Azure Data Lake Storage Gen2 storage account, which should have a name similar to synapsexxxxxxx (Primary - datalakexxxxxxx).
- Expand your storage account and verify that it contains a file system container named files (primary).
- Select the files container, and note that it contains folders named data and synapse. The synapse folder is used by Azure Synapse, and the data folder contains the data files you’re going to query.
Open the sales folder and the orders folder it contains, and observe the files contained within it.
Right-click any of the files and select Preview to see the data it contains. Note if the files contain a header row, so you can determine whether to select the option to display column headers.
Execute a notebook in an Azure Synapse Pipeline
Earlier in a lab we created a Synapse Notebook and created some tables. We’re going to return back to that notebook and add some code that allows us to call and run a step within the notebook as part of our pipeline using a parameter.
Create a parameter cell
- On the Develop tab, select the notebook named Spark Transform
- in the Right panel of the Spark Transform notebook, click on the drop-down box to the right of the Attach to
- Select sparkxxxxxxx replacing the “x” elements with the suffix assigned in your setup script
- Below the section in the notebook named Load Source Data and below the code block that populates the order_details python dataframe, click on the + Code.
- Type or paste the following commands into the new code window.
# We're going to use this for integration into a Synapse Pipleline
import uuid

#generates a random GUID
runId = uuid.uuid4()
print("Your parquet file to be created: " + str(runId))
> **Note**: This cell services two purposes, firstly, it establishes a filename if it's run from within the notebook. Secondly, it defines a placeholder for the pipeline job to populate when running from an Azure Synapse pipeline run.
-
Mouse-over the code and, select the … ellipse on the right-side of the code block then select Toggle parameter cell. You’ll notice the text parameters now appear in the bottom-right or top-right corner of the code block.

- Below this code block select the + Code to create another code block.
- Type or paste the following commands into the new window
%%pyspark

order_details.write.parquet('abfss://files@datalakexxxxxxx.dfs.core.windows.net/data/order_details/' + str(runId) + '.parquet')
- Replace the text in the new code datalakexxxxxxx with the name of the data lake within your Resource Group during the lab build.
-
We can now remove all of the other code and markdown cells below this text.
Note: If you leave the other objects, the notebook will still run; however, it will create those objects within the Data lake as it did in the prior lab as the pipeline is running the entire notebook.
- On the top right of the notebook pane, select the pipeline icon.
-
select the New pipeline option.

Within the Pipeline
In this particular case, we’re going to run the notebook and pass the name as the package’s runId for traceability. How you run a notebook in your organization will likely be different.
-
From the prior step you should now see a new Pipeline 1 which we’ll rename to Run Spark Transform notebook

- Select the Notebook on the canvas and then select the Settings tab.
- Expand Base parameters under the Settings tab.
-
Select the +New option and fill in the following information Name: runId Type: String Value: Select Add dynamic content [Alt+Shift+D] Pipeline Expression Builder: Select System variables, select Pipeline run ID The resulting settings should look like the image below:

- Navigate to the Data tab and select the Linked tab.
- Expand Azure Data Lake Storage Gen2.
- Expand the synapsexxxxxxx (Primary - datalakexxxxxxx) that matches your generated suffix.
- Select files (primary). You’ll note three files (2019.csv, 2020.csv, 2021.csv) in the data folder.
- Select the Pipeline Run Spark Transform Notebook.
-
Press the Debug button which will take you to the Output tab.
Note: This Output tab will continue to refresh every 20 seconds for 5 minutes as the default.
-
Take note of the Pipeline run ID: and monitor the Status

- Once the Status turns green with the words succeeded, navigate to the files tab
- You should see a folder named order_details underneath the data tab, which may require a refresh.
- Select this order_details folder and you’ll see a folder with the runId which was passed from the Pipeline to the notebook, which created output in a parquet format.
Validate the Results
- To validate the data was properly loaded through the pipeline, Select the New SQL Script dropdown.
-
Select Select TOP 100 rows as shown below

- in the Select TOP 100 rows File type panel, select parquet, then select Apply.
- Select the Run button.
Delete Azure resources
If you’ve finished exploring Azure Synapse Analytics, you should delete the resources you’ve created to avoid unnecessary Azure costs.
- Close the Synapse Studio browser tab and return to the Azure portal.
- On the Azure portal, on the Home page, select Resource groups.
- Select the dp000-xxxxxxx resource group for your Synapse Analytics workspace (not the managed resource group), and verify that it contains the Synapse workspace, storage account, and Spark pool for your workspace.
- At the top of the Overview page for your resource group, select Delete resource group.
-
Enter the dp000-xxxxxxx resource group name to confirm you want to delete it, and select Delete.
After a few minutes, your Azure Synapse workspace resource group and the managed workspace resource group associated with it will be deleted.