Use Azure Machine Learning with Azure Synapse Analytics
Azure Machine Learning is a cloud-based platform for creating, deploying, and operating machine learning solutions. When combined with Azure Synapse Analytics, you can ingest and prepare data for machine learning model training, and then use Azure Machine learning to train and deploy a model. You can then use the model to support predictive analytics in Azure Synapse Analytics.
This lab will take approximately 90 minutes to complete.
Before you start
You’ll need an Azure subscription in which you have administrative-level access.
Provision Azure resources
In this exercise, you’ll integrate an Azure Machine Learning workspace and an Azure Synapse Analytics workspace. You’ll start by using a script to provision these resources in your Azure subscription.
- Sign into the Azure portal at
https://portal.azure.com. -
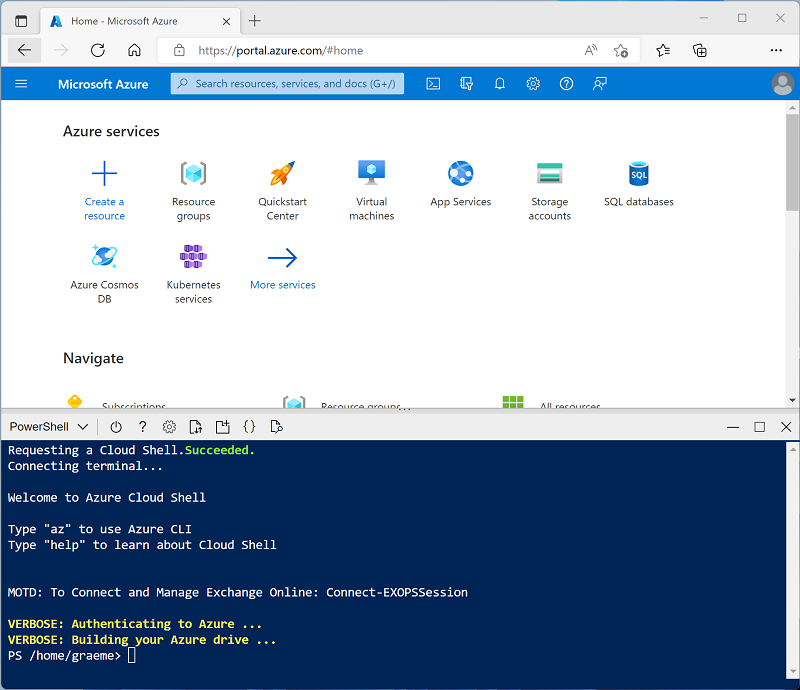
Use the [>_] button to the right of the search bar at the top of the page to create a new Cloud Shell in the Azure portal, selecting a PowerShell environment and creating storage if prompted. The cloud shell provides a command line interface in a pane at the bottom of the Azure portal, as shown here:
Note: If you have previously created a cloud shell that uses a Bash environment, use the the drop-down menu at the top left of the cloud shell pane to change it to PowerShell.
-
Note that you can resize the cloud shell by dragging the separator bar at the top of the pane, or by using the —, ◻, and X icons at the top right of the pane to minimize, maximize, and close the pane. For more information about using the Azure Cloud Shell, see the Azure Cloud Shell documentation.
-
In the PowerShell pane, enter the following commands to clone this repo:
rm -r dp-000 -f git clone https://github.com/MicrosoftLearning/mslearn-synapse dp-000 -
After the repo has been cloned, enter the following commands to change to the folder for this lab and run the setup.ps1 script it contains:
cd dp-000/Allfiles/Labs/12 ./setup.ps1 - If prompted, choose which subscription you want to use (this will only happen if you have access to multiple Azure subscriptions).
-
When prompted, enter a suitable password for your Azure SQL Database.
Note: Be sure to remember this password!
-
Wait for the script to complete - this typically takes around 15 minutes, but in some cases may take longer. While you are waiting, review the Machine Learning capabilities in Azure Synapse Analytics article in the Azure Synapse Analytics documentation.
- When the script has finished, in the Azure portal, view the dp000-xxxxxxx resource group that it created. This should include the following resources:
- amlxxxxxxx - An Azure Machine Learning workspace.
- amlxxxxxxxinsightsnnn… - An Application Insights instance.
- amlxxxxxxxkeyvaultnnn… - A Key vault.
- amlxxxxxxxstoragennn… - A storage account for Azure Machine Learning.
- datalakexxxxxxx - A storage account for the data lake used in Azure Synapse Analytics
- sparkxxxxxxx (synapsexxxxxxx/sparkxxxxxxx) - An Apache Spark pool.
- sqlxxxxxxx (synapsexxxxxxx/sqlxxxxxxx) - A dedicated SQL pool.
- synapsexxxxxxx - An Azure Synapse Analytics workspace.
Tip: If, after running the setup script you decide not to complete the lab, be sure to delete the dp000-xxxxxxx resource group that was created in your Azure subscription to avoid unnecessary Azure costs.
Explore data for model training
Before training a model, a data scientists generally explores the data with which the model will be trained, and prepares it by removing errors and outliers, identifying predictive features, and potentially using feature engineering techniques to augment the data with new derived values that will result in a more predictive model. In this example, we’ll explore some existing data that relates to a bike rental scheme for which we’ll later train a model to predict the expected number of rentals for a given day.
- In the dp000-xxxxxxx resource group, select the synapsexxxxxxx Synapse workspace.
- In the Overview page for your Synapse workspace, in the Open Synapse Studio card, select Open to open Synapse Studio in a new browser tab; signing in if prompted.
- On the left side of Synapse Studio, use the ›› icon to expand the menu - this reveals the different pages within Synapse Studio that you’ll use to manage resources and perform data analytics tasks.
- On the Data page, view the Linked tab. Then expand Azure Data Lake Storage Gen2 and your synapsexxxxxxx (Primary - datalakexxxxxxx) data lake storage account, and select its files container.
-
In the files tab, open the data folder. Then select the bike-rentals-training.csv file it contains and in the New notebook menu, select Load to DataFrame. This creates a new Notebook 1 tab for a notebook in which a single cell contains code similar to the following example:
%%pyspark df = spark.read.load('abfss://files@datalakexxxxxxx.dfs.core.windows.net/data/bike-rentals-training.csv', format='csv' ## If header exists uncomment line below ##, header=True ) display(df.limit(10)) -
Modify the code as follows to uncomment the
, header=Trueline and add a, inferSchema=Trueline:%%pyspark df = spark.read.load('abfss://files@datalakexxxxxxx.dfs.core.windows.net/data/bike-rentals-training.csv', format='csv' ## If header exists uncomment line below , header=True , inferSchema=True ) display(df.limit(10)) -
In the Attach to list, select your sparkxxxxxxx Spark pool. Then use the ▷ Run all button to run all of the cells in the notebook (there’s currently only one!).
Since this is the first time you’ve run any Spark code in this session, the Spark pool must be started. This means that the first run in the session can take a few minutes. Subsequent runs will be quicker.
-
When the code has finished running, view the output; which shows daily data for bike rentals. The data includes details for each day; including temporal, seasonal, and meteorological data) as well as the number of bikes rented.
Citation: This data is derived from Capital Bikeshare and is used in accordance with the published data license agreement.
-
Use the + Code button to add a new code cell to the notebook, and then enter the following code:
bike_df = df.select("season", "mnth", "holiday", "weekday", "workingday", "weathersit", "temp", "atemp", "hum", "windspeed", "rentals") bike_df.write.saveAsTable("bike_data") -
Use the ▷ button to the left of the code cell to run it. The code selects a subset of columns from the original dataset, and saves them as a table named bike_data in the default Spark database.
-
Use the Publish all button to publish the Notebook 1 notebook - you will return to it later.
-
In the Data pane, view the Workspace tab. If no databases are listed, you may need to use the ↻ button at the top right of Synapse Studio to refresh the page. Then expand Lake database, the default database, and its Tables folder to see the bike_data table you just created.
-
In the Notebook 1 notebook, add another new code cell and use it to run the following code to query the bike_data table:
%%sql SELECT * FROM bike_data - Publish the changes to the notebook. Then close the Notebook 1 tab, and stop the Spark session.
Connect Azure Synapse Analytics to Azure Machine Learning
Your Azure Synapse Analytics workspace now includes a Spark database with a table of data that you want to use to train a machine learning model. To use Azure Machine Learning to train the model, you’ll need to connect the two services.
Configure Azure Machine Learning access for the Azure Synapse Analytics managed identity
Before you can connect to Azure Machine Learning from Azure Synapse Analytics, you need to ensure that the managed identity used by your Azure Synapse Analytics workspace has access to your Azure Machine Learning workspace.
- Switch to the browser tab containing the Azure portal and view the dp000-xxxxxxx resource group.
- Select the amlxxxxxxx Azure Machine Learning resource.
- On the Access control (IAM) page for the amlxxxxxxx Azure Machine Learning resource, select + Add, and select Add role assignment.
- In the Add role assignment page, on the Role tab, select the Contributor role and then select Next.
- On the Members tab, in the Assign access to options, select Managed identity. Then use the + Select members link to select the Synapse workspace managed identity named synapsexxxxxxx (which is the managed identity used by your synapsexxxxxxx Azure Synapse Analytics workspace).
- Use the Review + Assign button to assign the role membership, which adds the synapsexxxxxxx managed identity account to the Contributor role for the amlxxxxxxx Azure Machine Learning workspace.
Create an Azure Machine Learning linked service
Now you can create a linked service to connect your Azure Machine Learning workspace to your Azure Synapse Analytics workspace.
- In Synapse Studio, on the Manage page, in the External connections section, select the Linked services tab. The existing linked connections in your workspace are shown.
- Select + New and then in the New linked service pane, on the Compute tab, select Azure Machine Learning.
- Continue adding the new linked service with the following settings:
- Name: AzureML
- Description: Azure Machine Learning service
- Connect via integration runtime: AutoResolveIntegrationRuntime
- Authentication method: System Assigned Managed Identity
- Azure Machine Learning workspace selection method: From Azure subscription
- Azure subscription: Select your Azure subscription
- Azure Machine Learning workspace name: Select your amlxxxxxxx Azure Machine Learning workspace
- Test the connection, and then create the linked service.
- Use the Publish all button to save the new linked connection.
Use automated machine learning to train a model
Now that you’ve connected your Azure Machine Learning workspace to your Azure Synapse Analytics workspace, you’re ready to train a machine learning model to predict the number of rentals for a day based on its temporal, seasonal, and meteorological features. To accomplish this, you can use Azure Machine Learning’s automated machine learning capability.
- In Synapse Studio, on the Data page, on the Workspace tab, select the bike_data table in the default lake database.
- In the bike_data table’s … menu, select Machine Learning > Train a new model.
- In the Train a new model pane, select Regression (you’re going to predict the number of rentals, which is a numeric value; making this a regression model.)
- Continue to configure a training job with the following details:
- Source data: bike_data
- Azure Machine Learning workspace: amlxxxxxxx (AzureML)
- Experiment name: mslearn-bike-rentals
- Best model name: rental-prediction-model
- Target column: rentals (integer)
- Apache Spark pool: sparkxxxxxxx
Note: The automated machine learning job will run on your Spark pool compute. Your Spark pool must use the Spark 2.4 runtime to support automated machine learning with Azure Machine Learning.
- Continue to configure the regression model with the following settings:
- Primary metric: Spearman correlation
- Maximum training job time (hours): 0.25
- Max concurrent iterations: 2
- ONNX model compatibility: Enable
- Select the option to open the run in a notebook and review the PySpark code in the notebook that is generated. This code is implemented in multiple code cells, which:
- Import the Azure Machine Learning libraries needed to train a model using automated machine learning.
- Establish a connection to the Azure Machine Learning workspace you linked previously.
- Create a training dataset from the data in the bike_data table.
- Configure an automated machine learning job based on the settings you selected previously.
- Run the job.
- Display an HTML link to the job in Azure Machine Learning Studio.
- Wait for the job to complete, and then register the best performing model.
- Use the ▷ Run all button to run all of the cells in the notebook, and observe the output as they run (once again it may take some time for the Spark session to start when running the first cell).
- In the output from cell [6] (
displayHTML(...), use the link to your experiment in the Azure Machine Learning portal to open Azure Machine Learning Studio in a new browser tab and view the job as it runs (sign in using your Azure credentials if prompted.) - In Azure Machine Learning Studio, on the Overview tab for the job, observe its status. A status of Running indicates that the job has started. Initially the job sets up the run, and then the automated machine learning process starts iteratively using multiple machine learning algorithms and data normalization techniques to train and evaluate many models in order to find the best performing one for your data.
- When model training begins, view the Models tab for the job. Details of each model as it is trained and evaluated will be displayed here. You can use the ↻ Refresh button to update the display.
- Wait for the training job to complete. This will take at least 15 minutes, so now might be a good time for a coffee break!
- When the job status changes to Completed, switch back to Synapse Studio and view the notebook. Then wait for the last cell in the notebook to complete. Iit may need to retry connections to Azure Machine Learning a few times, but eventually the best performing model should be registered as rental-prediction-model.
- Switch back to Azure machine Learning Studio, use the ☰ button to expand the pane on the left if necessary, and view the Models page to confirm that the model is registered in Azure Machine Learning.
Use a model for predictive analytics
Now that you have a machine learning model that can predict the number of bike rentals for a given day, you can use it to incorporate predictive analytics into a data warehousing solution.
View input data for the model
The model you created expects input values containing temporal, seasonal, and meteorological features for one or more days.
- In Synapse Studio, on the Manage page, in the SQL pools section, select the sqlxxxxxxx dedicated SQL pool row and then use its ▷ icon to resume it.
- Wait for the SQL pool to start. This can take a few minutes. Use the ↻ Refresh button to check its status periodically. The status will show as Online when it is ready.
- When the SQL pool has started, select the Data page; and on the Workspace tab, expand SQL databases and verify that sqlxxxxxxx is listed (use ↻ icon at the top-left of the page to refresh the view if necessary).
- Expand the sqlxxxxxxx database and its Tables folder, and then in the … menu for the weather_forecast table, point to New SQL script, and select Select TOP 100 rows.
- Review the results of the query, which show weather forecast data for 10 days.
Use the model to generate predictions
Azure Synapse Analytics includes support for a PREDICT function that you can use in Transact-SQL to generate a prediction from a model that is stored in a dedicated SQL database.
- In Synapse Studio, on the Data page, in the sqlxxxxxxx database, select the weather_forecast table; and in its … menu, select Machine learning > Predict with a model.
- In the predict with a model pane, ensure your amlxxxxxxx (AzureML) workspace is selected and select the rental-prediction-model you registered previously.
- Continue, and review the default mappings; which include the input mappings of source columns in the table to features in the model, and an output mapping that returns the predicted rentals value to a variable named variable_out1.
- Continue, and define the following objects to be created in the database:
- Store objects in the database:
- Script type: Stored procedure
- Stored procedure name: dbo.predict_rentals
- Load model into a database table:
- Database table: Create new
- New table: dbo.rental_prediction_model
- Store objects in the database:
- Deploy the model and open the script that gets generated.
- Review the Transact-SQl script that gets created. It includes a CREATE PROCEDURE statement to create a stored procedure that uses the PREDICT function to generate predictions from your model based on the data in the weather_forecast table, and an EXEC statement to call the stored procedure.
- Use the the ▷ Run button to run the script and review the results. The variable_out1 column contains the predicted number of rentals for each day.
- When you’re done, on the Manage page, pause the sqlxxxxxxx dedicated SQL pool.
Delete Azure resources
If you’ve finished exploring Azure Synapse Analytics, you should delete the resources you’ve created to avoid unnecessary Azure costs.
- Close the Synapse Studio browser tab and return to the Azure portal.
- On the Azure portal, on the Home page, select Resource groups.
- Select the dp000-xxxxxxx resource group.
- At the top of the Overview page for your resource group, select Delete resource group.
-
Enter the dp000-xxxxxxx resource group name to confirm you want to delete it, and select Delete.
After a few minutes, your Azure Synapse workspace resource group and the managed workspace resource group associated with it will be deleted.