Use Azure Synapse Link for Azure Cosmos DB
Azure Synapse Link for Azure Cosmos DB is a cloud-native hybrid transactional analytical processing (HTAP) technology that enables you to run near-real-time analytics over operational data stored in Azure Cosmos DB from Azure Synapse Analytics.
This lab will take approximately 35 minutes to complete.
Before you start
You’ll need an Azure subscription in which you have administrative-level access.
Provision Azure resources
To explore Azure Synapse Link for Azure Cosmos DB, you’ll need an Azure Synapse Analytics workspace and an Azure Cosmos DB account. In this exercise, you’ll use a combination of a PowerShell script and an ARM template to provision these resources in your Azure subscription.
- Sign into the Azure portal at
https://portal.azure.com. -
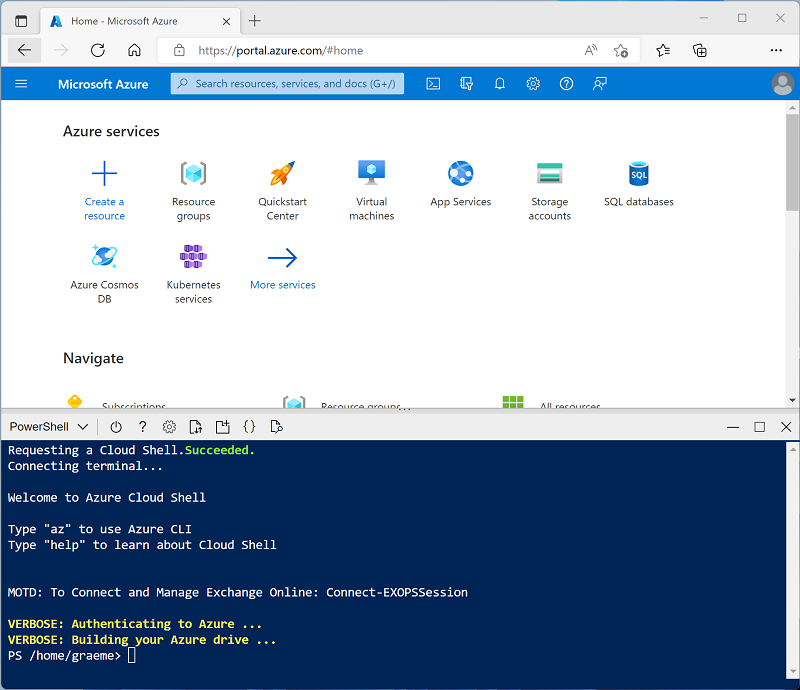
Use the [>_] button to the right of the search bar at the top of the page to create a new Cloud Shell in the Azure portal, selecting a PowerShell environment and creating storage if prompted. The cloud shell provides a command line interface in a pane at the bottom of the Azure portal, as shown here:
Note: If you have previously created a cloud shell that uses a Bash environment, use the the drop-down menu at the top left of the cloud shell pane to change it to PowerShell.
-
Note that you can resize the cloud shell by dragging the separator bar at the top of the pane, or by using the —, ◻, and X icons at the top right of the pane to minimize, maximize, and close the pane. For more information about using the Azure Cloud Shell, see the Azure Cloud Shell documentation.
-
In the PowerShell pane, enter the following commands to clone this repo:
rm -r dp-000 -f git clone https://github.com/MicrosoftLearning/mslearn-synapse dp-000 -
After the repo has been cloned, enter the following commands to change to the folder for this lab and run the setup.ps1 script it contains:
cd dp-000/Allfiles/Labs/06 ./setup.ps1 - If prompted, choose which subscription you want to use (this will only happen if you have access to multiple Azure subscriptions).
-
When prompted, enter a suitable password to be set for your Azure Synapse SQL pool.
Note: Be sure to remember this password!
- Wait for the script to complete - this typically takes around 10 minutes, but in some cases may take longer. While you are waiting, review the What is Azure Synapse Link for Azure Cosmos DB? article in the Azure Synapse Analytics documentation.
Configure Synapse Link in Azure Cosmos DB
Before you can use Synapse Link for Azure Cosmos DB, you must enable it in your Azure Cosmos DB account and configure a container as an analytical store.
Enable the Synapse Link feature in your Cosmos DB account
-
In the Azure portal, browse to the dp000-xxxxxxx resource group that was created by the setup script, and identify your cosmosxxxxxxxx Cosmos DB account.
Note: In some cases, the script may have tried to create Cosmos DB accounts in multiple regions, so there may be one or more accounts in a deleting state. The active account should be the one with the largest number at the end of its name - for example cosmosxxxxxxx3.
-
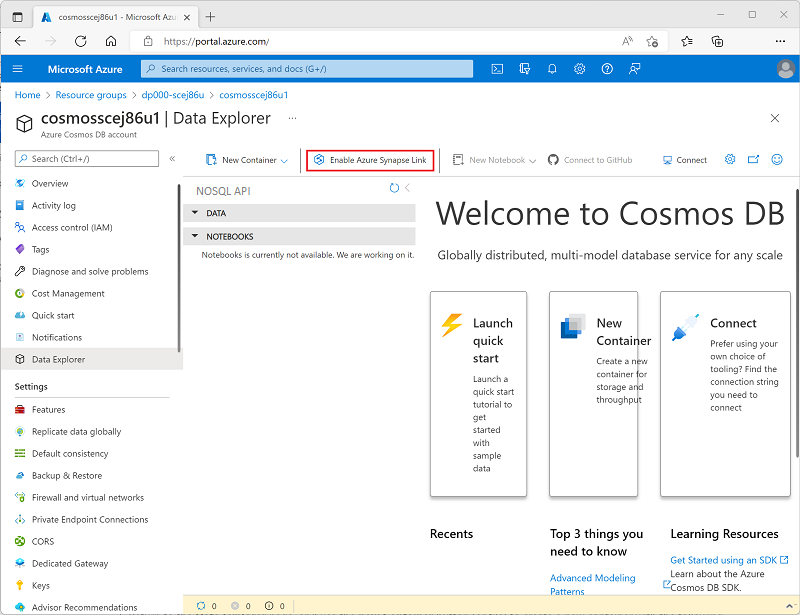
Open your Azure Cosmos DB account, and select the Data Explorer page on the left side of its blade.
If a Welcome dialog box is displayed, close it
-
At the top of the Data Explorer page, use the Enable Azure Synapse Link button to enable Synapse Link.
-
On the left side of the page, in the Integrations section, select the Azure Synapse Link page and verify that the status of the account is Enabled.
Create an analytical store container
- Return to the Data Explorer page, and use the new Container button (or tile) to create a new container with the following settings:
- Database id: (Create new) AdventureWorks
- Share throughput across containers: Unselected
- Container id: Sales
- Partition key: /customerid
- Container throughput (autoscale): Autoscale
- Container Max RU/s: 4000
- Analytical store: On
Note: In this scenario, customerid is used for partition key as it’s likely to be used in many queries to retrieve customer and sales order information in a hypothetical application, it has relatively high cardinality (number of unique values), so it will allow the container to scale as the number of customers and sales orders grows. Using autoscale and setting the maximum value to 4000 RU/s is appropriate for a new application with initially low query volumes. A max value 4000 RU/s will enable the container to automatically scale between this value all the way down to 10% of this max value (400 RU/s) when not needed.
-
After the container has been created, in the Data Explorer page, expand the AdventureWorks database and its Sales folder; and then select the Items folder.
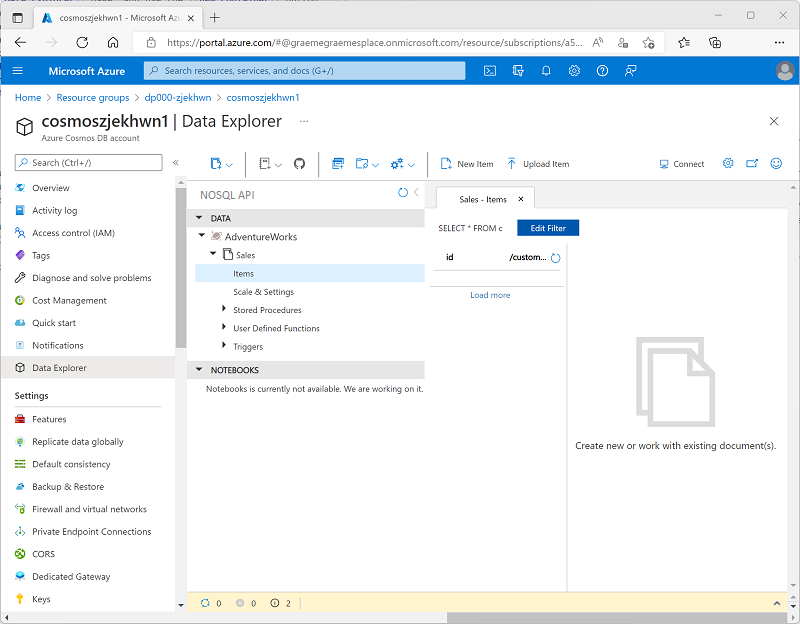
-
Use the New Item button to create a new customer item based on the following JSON. Then save the new item (some additional metadata fields will be added when you save the item).
{ "id": "SO43701", "orderdate": "2019-07-01", "customerid": 123, "customerdetails": { "customername": "Christy Zhu", "customeremail": "christy12@adventure-works.com" }, "product": "Mountain-100 Silver, 44", "quantity": 1, "price": 3399.99 } -
Add a second item with the following JSON:
{ "id": "SO43704", "orderdate": "2019-07-01", "customerid": 124, "customerdetails": { "customername": "Julio Ruiz", "customeremail": "julio1@adventure-works.com" }, "product": "Mountain-100 Black, 48", "quantity": 1, "price": 3374.99 } -
Add a third item with the following JSON:
 {
     "id": "SO43707",
     "orderdate": "2019-07-02",
     "customerid": 125,
     "customerdetails": {
         "customername": "Emma Brown",
         "customeremail": "emma3@adventure-works.com"
     },
     "product": "Road-150 Red, 48",
     "quantity": 1,
     "price": 3578.27
 }
Note: In reality, the analytical store would contain a much larger volume of data, written to the store by an application. These few items will be sufficient to demonstrate the principle in this exercise.
Configure Synapse Link in Azure Synapse Analytics
Now that you have prepared your Azure Cosmos DB account, you can configure Azure Synapse link for Azure Cosmos DB in your Azure Synapse Analytics workspace.
- In the Azure portal, close the blade for your Cosmos DB account if it is still open, and return to the dp000-xxxxxxx resource group.
- Open the synapsexxxxxxx Synapse workspace, and on its Overview page, in the Open Synapse Studio card, select Open to open Synapse Studio in a new browser tab; signing in if prompted.
- On the left side of Synapse Studio, use the ›› icon to expand the menu - this reveals the different pages within Synapse Studio.
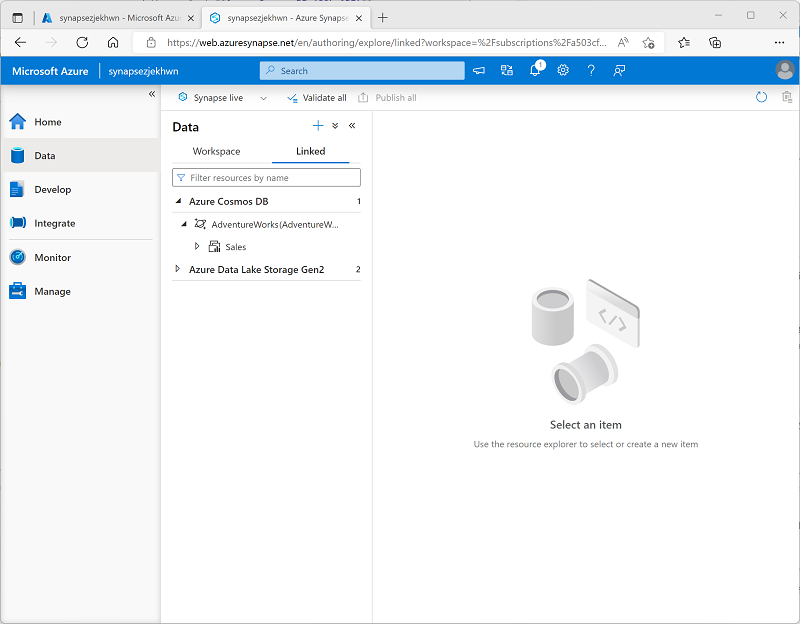
- On the Data page, view the Linked tab. Your workspace should already include a link to your Azure Data Lake Storage Gen2 storage account, but no link to your Cosmos DB account.
-
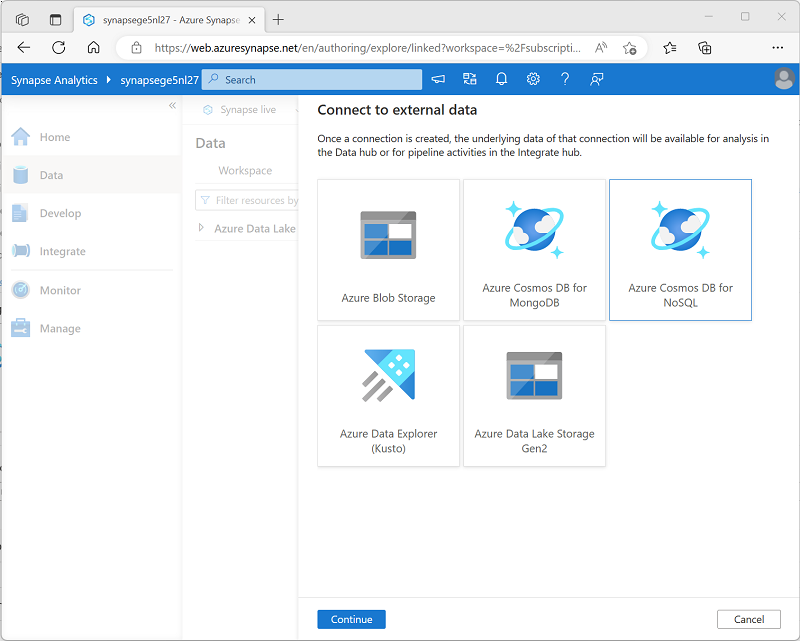
In the + menu, select Connect to external data, and then select Azure Cosmos DB for NoSQL.
- Continue, and create a new Cosmos DB connection with the following settings:
- Name: AdventureWorks
- Description: AdventureWorks Cosmos DB database
- Connect via integration runtime: AutoResolveIntegrationRuntime
- Authentication type: Account key
- Connection string: selected
- Account selection method: From subscription
- Azure subscription: select your Azure subscription
- Azure Cosmos DB account name: select your cosmosxxxxxxx account
- Database name: AdventureWorks
- After creating the connection, use the ↻ button at the top right of the Data page to refresh the view until an Azure Cosmos DB category is listed in the Linked pane.
-
Expand the Azure Cosmos DB category to see the AdventureWorks connection you created and the Sales container it contains.
Query Azure Cosmos DB from Azure Synapse Analytics
Now you’re ready to query your Cosmos DB database from Azure Synapse Analytics.
Query Azure Cosmos DB from a Spark pool
- In the Data pane, select the Sales container, and in its … menu, select New Notebook > Load to DataFrame.
-
In the new Notebook 1 tab that opens, in the Attach to list, select your Spark pool (sparkxxxxxxx). Then use the ▷ Run all button to run all of the cells in the notebook (there’s currently only one!).
Since this is the first time you’ve run any Spark code in this session, the Spark pool must be started. This means that the first run in the session can take a few minutes. Subsequent runs will be quicker.
-
While you are waiting for the Spark session to initialize, review the code that was generated (you can use the Properties button, which looks similar to 🗏*, on the right end of the toolbar to close the Properties pane so you can see the code more clearly). The code should look similar to this:
# Read from Cosmos DB analytical store into a Spark DataFrame and display 10 rows from the DataFrame # To select a preferred list of regions in a multi-region Cosmos DB account, add .option("spark.cosmos.preferredRegions", "<Region1>,<Region2>") df = spark.read\ .format("cosmos.olap")\ .option("spark.synapse.linkedService", "AdventureWorks")\ .option("spark.cosmos.container", "Sales")\ .load() display(df.limit(10)) - When the code has finished running, and then review the output beneath the cell in the notebook. The results should include three records; one for each of the items you added to the Cosmos DB database. Each record includes the fields you entered when you created the items as well as some of the metadata fields that were automatically generated.
-
Under the results from the previous cell, use the + Code icon to add a new cell to the notebook, and then enter the following code in it:
customer_df = df.select("customerid", "customerdetails") display(customer_df) -
Use the ▷ icon to the left of the cell to run it, and view the results; which should be similar to this:
customerid customerdetails 124 ”{“customername”: “Julio Ruiz”,”customeremail”: “julio1@adventure-works.com”}” 125 ”{“customername”: “Emma Brown”,”customeremail”: “emma3@adventure-works.com”}” 123 ”{“customername”: “Christy Zhu”,”customeremail”: “christy12@adventure-works.com”}” This query created a new dataframe containing only the customerid and customerdetails columns. Observe that the customerdetails column contains the JSON structure for the nested data in the source item. In the table of results that is displayed, you can use the ► icon next to the JSON value to expand it and see the individual fields it contains.
-
Add another new code cell and enter the following code:
customerdetails_df = df.select("customerid", "customerdetails.*") display(customerdetails_df) -
Run the cell and review the results, which should include the customername and customeremail from the customerdetails value as columns:
customerid customername customeremail 124 Julio Ruiz julio1@adventure-works.com 125 Emma Brown emma3@adventure-works.com 123 Christy Zhu christy12@adventure-works.com Spark enables you to run complex data manipulation code to restructure and explore the data from Cosmos DB. In this case, the PySpark language enables you to navigate the JSON properties hierarchy to retrieve the child fields of the customerdetails field.
-
Add another new code cell and enter the following code:
%%sql -- Create a logical database in the Spark metastore CREATE DATABASE salesdb; USE salesdb; -- Create a table from the Cosmos DB container CREATE TABLE salesorders using cosmos.olap options ( spark.synapse.linkedService 'AdventureWorks', spark.cosmos.container 'Sales' ); -- Query the table SELECT * FROM salesorders; - Run the new cell to create a new database containing a table that includes data from the Cosmos DB analytical store.
-
Add another new code cell, and then enter and run the following code:
%%sql

SELECT id, orderdate, customerdetails.customername, product
FROM salesorders
ORDER BY id;
The results from this query should resemble this:
id orderdate customername product SO43701 2019-07-01 Christy Zhu Mountain-100 Silver, 44 SO43704 2019-07-01 Julio Ruiz Mountain-100 Black, 48 SO43707 2019-07-02 Emma Brown Road-150 Red, 48 Observe that when using Spark SQL, you can retrieve named properties of a JSON structure as columns.
- Keep the Notebook 1 tab open - you’ll return to it later.
Query Azure Cosmos DB from a serverless SQL pool
- In the Data pane, select the Sales container, and in its … menu, select New SQL script > Select TOP 100 rows.
-
In the SQL script 1 tab that opens, hide the Properties pane and view the code that has been generated, which should look similar to this:
IF (NOT EXISTS(SELECT * FROM sys.credentials WHERE name = 'cosmosxxxxxxxx')) THROW 50000, 'As a prerequisite, create a credential with Azure Cosmos DB key in SECRET option: CREATE CREDENTIAL [cosmosxxxxxxxx] WITH IDENTITY = ''SHARED ACCESS SIGNATURE'', SECRET = ''<Enter your Azure Cosmos DB key here>''', 0 GO SELECT TOP 100 * FROM OPENROWSET(PROVIDER = 'CosmosDB', CONNECTION = 'Account=cosmosxxxxxxxx;Database=AdventureWorks', OBJECT = 'Sales', SERVER_CREDENTIAL = 'cosmosxxxxxxxx' ) AS [Sales]The SQL pool requires a credential to use when accessing Cosmos DB, which is based on an authorization key for your Cosmos DB account. The script includes an initial
IF (NOT EXISTS(...statement that checks for this credential, and throws an error if it does not exist. -
Replace the
IF (NOT EXISTS(...statement in the script with the following code to create a credential, replacing cosmosxxxxxxxx with the name of your Cosmos DB account:CREATE CREDENTIAL [cosmosxxxxxxxx] WITH IDENTITY = 'SHARED ACCESS SIGNATURE', SECRET = '<Enter your Azure Cosmos DB key here>' GOThe whole script should now resemble the following:
CREATE CREDENTIAL [cosmosxxxxxxxx] WITH IDENTITY = 'SHARED ACCESS SIGNATURE', SECRET = '<Enter your Azure Cosmos DB key here>' GO SELECT TOP 100 * FROM OPENROWSET(PROVIDER = 'CosmosDB', CONNECTION = 'Account=cosmosxxxxxxxx;Database=AdventureWorks', OBJECT = 'Sales', SERVER_CREDENTIAL = 'cosmosxxxxxxxx' ) AS [Sales] - Switch to the browser tab containing the Azure portal (or open a new tab and sign into the Azure portal at https://portal.azure.com). Then in the dp000-xxxxxxx resource group, open your cosmosxxxxxxxx Azure Cosmos DB account.
- In the pane on the left, in the Settings section, select the Keys page. Then copy the Primary Key value to the clipboard.
-
Switch back to the browser tab containing the SQL script in Azure Synapse Studio, and paste the key into the code replacing the <Enter your Azure Cosmos DB key here> placeholder so that the script looks similar to this:
CREATE CREDENTIAL [cosmosxxxxxxxx] WITH IDENTITY = 'SHARED ACCESS SIGNATURE', SECRET = '1a2b3c....................................==' GO SELECT TOP 100 * FROM OPENROWSET(PROVIDER = 'CosmosDB', CONNECTION = 'Account=cosmosxxxxxxxx;Database=AdventureWorks', OBJECT = 'Sales', SERVER_CREDENTIAL = 'cosmosxxxxxxxx' ) AS [Sales] -
Use the ▷ Run button to run the script, and review the results, which should include three records; one for each of the items you added to the Cosmos DB database.
Now that you have created the credential, you can use it in any query against the Cosmos DB data source.
-
Replace all of the code in the script (both the CREATE CREDENTIAL and SELECT statements) with the following code (substituting cosmosxxxxxxxx with the name of your Azure Cosmos DB account):
SELECT * FROM OPENROWSET(PROVIDER = 'CosmosDB', CONNECTION = 'Account=cosmosxxxxxxxx;Database=AdventureWorks', OBJECT = 'Sales', SERVER_CREDENTIAL = 'cosmosxxxxxxxx' ) WITH ( OrderID VARCHAR(10) '$.id', OrderDate VARCHAR(10) '$.orderdate', CustomerID INTEGER '$.customerid', CustomerName VARCHAR(40) '$.customerdetails.customername', CustomerEmail VARCHAR(30) '$.customerdetails.customeremail', Product VARCHAR(30) '$.product', Quantity INTEGER '$.quantity', Price FLOAT '$.price' ) AS sales ORDER BY OrderID; -
Run the script and review the results, which should match the schema defined in the
WITHclause:OrderID OrderDate CustomerID CustomerName CustomerEmail Product Quantity Price SO43701 2019-07-01 123 Christy Zhu christy12@adventure-works.com Mountain-100 Silver, 44 1 3399.99 SO43704 2019-07-01 124 Julio Ruiz julio1@adventure-works.com Mountain-100 Black, 48 1 3374.99 SO43707 2019-07-02 125 Emma Brown emma3@adventure-works.com Road-150 Red, 48 1 3578.27 - Keep the SQL script 1 tab open - you’ll return to it later.
Verify data modifications in Cosmos DB are reflected in Synapse
- Leaving the browser tab containing Synapse Studio open, switch back to the tab containing the Azure portal, which should be open at the Keys page for your Cosmos DB account.
- On the Data Explorer page, expand the AdventureWorks database and its Sales folder; and then select the Items folder.
-
Use the New Item button to create a new customer item based on the following JSON. Then save the new item (some additional metadata fields will be added when you save the item).
{ "id": "SO43708", "orderdate": "2019-07-02", "customerid": 126, "customerdetails": { "customername": "Samir Nadoy", "customeremail": "samir1@adventure-works.com" }, "product": "Road-150 Black, 48", "quantity": 1, "price": 3578.27 } - Return to the Synapse Studio tab and in the SQL Script 1 tab, re-run the query. Initially, it may show the same results as before, but wait a minute or so and then re-run the query again until the results include the sale to Samir Nadoy on 2019-07-02.
- Switch back to the Notebook 1 tab and re-run the last cell in the Spark notebook to verify that the sale to Samir Nadoy is now included in the query results.
Delete Azure resources
If you’ve finished exploring Azure Synapse Analytics, you should delete the resources you’ve created to avoid unnecessary Azure costs.
- Close the Synapse Studio browser tab and return to the Azure portal.
- On the Azure portal, on the Home page, select Resource groups.
- Select the dp000-xxxxxxx resource group for your Synapse Analytics workspace (not the managed resource group), and verify that it contains the Synapse workspace, storage account, and Spark pool for your workspace as well as your Azure Cosmos DB account.
- At the top of the Overview page for your resource group, select Delete resource group.
-
Enter the dp000-xxxxxxx resource group name to confirm you want to delete it, and select Delete.
After a few minutes, your Azure Synapse workspace resource group and the managed workspace resource group associated with it will be deleted.