Analyze data in a lake database
Azure Synapse Analytics enables you to combine the flexibility of file storage in a data lake with the structured schema and SQL querying capabilities of a relational database through the ability to create a lake database. A lake database is a relational database schema defined on a data lake file store that enables data storage to be separated from the compute used to query it. Lake databases combine the benefits of a structured schema that includes support for data types, relationships, and other features typically only found in relational database systems, with the flexibility of storing data in files that can be used independently of a relational database store. Essentially, the lake database “overlays” a relational schema onto files in folders in the data lake.
This lab will take approximately 45 minutes to complete.
Before you start
You’ll need an Azure subscription in which you have administrative-level access.
Provision an Azure Synapse Analytics workspace
To support a lake database, you need an Azure Synapse Analytics workspace with access to data lake storage. There is no need for a dedicated SQL pool, since you can define the lake database using the built-in serverless SQL pool. Optionally, you can also use a Spark pool to work with data in the lake database.
In this exercise, you’ll use a combination of a PowerShell script and an ARM template to provision an Azure Synapse Analytics workspace.
- Sign into the Azure portal at
https://portal.azure.com. -
Use the [>_] button to the right of the search bar at the top of the page to create a new Cloud Shell in the Azure portal, selecting a PowerShell environment and creating storage if prompted. The cloud shell provides a command line interface in a pane at the bottom of the Azure portal, as shown here:
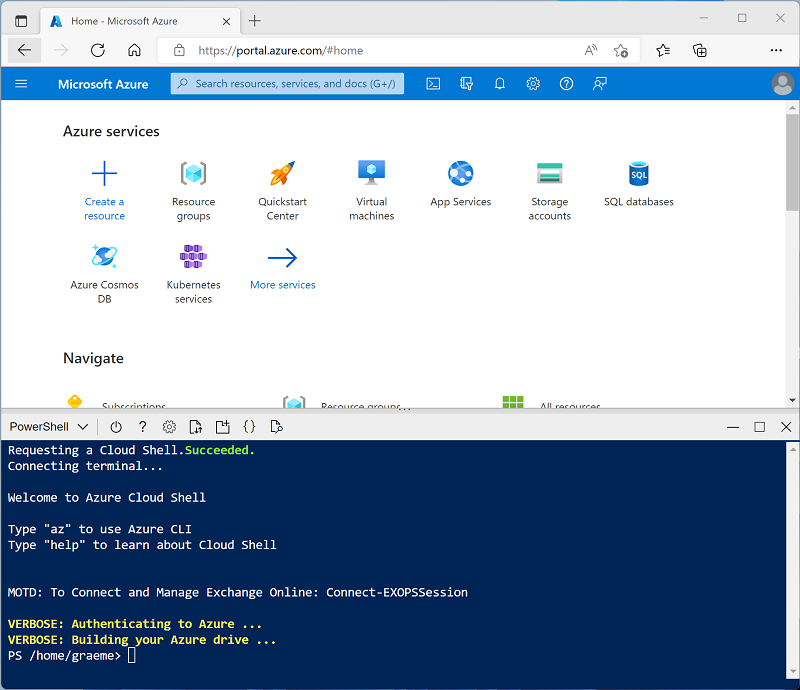
Note: If you have previously created a cloud shell that uses a Bash environment, use the the drop-down menu at the top left of the cloud shell pane to change it to PowerShell.
-
Note that you can resize the cloud shell by dragging the separator bar at the top of the pane, or by using the —, ◻, and X icons at the top right of the pane to minimize, maximize, and close the pane. For more information about using the Azure Cloud Shell, see the Azure Cloud Shell documentation.
-
In the PowerShell pane, enter the following commands to clone this repo:
rm -r dp-000 -f git clone https://github.com/MicrosoftLearning/mslearn-synapse dp-000 -
After the repo has been cloned, enter the following commands to change to the folder for this lab and run the setup.ps1 script it contains:
cd dp-000/Allfiles/Labs/03 ./setup.ps1 - If prompted, choose which subscription you want to use (this will only happen if you have access to multiple Azure subscriptions).
-
When prompted, enter a suitable password to be set for your Azure Synapse SQL pool.
Note: Be sure to remember this password!
- Wait for the script to complete - this typically takes around 10 minutes, but in some cases may take longer. While you are waiting, review the Lake database and Lake database templates articles in the Azure Synapse Analytics documentation.
Create a lake database
A lake database is a type of database that you can define in your workspace, and work with using the built-in serverless SQL pool.
- After the deployment script has completed, in the Azure portal, go to the dp000-xxxxxxx resource group that it created, and notice that this resource group contains your Synapse workspace, a Storage account for your data lake, and an Apache Spark pool.
- Select your Synapse workspace, and in its Overview page, in the Open Synapse Studio card, select Open to open Synapse Studio in a new browser tab; signing in if prompted.
- On the left side of Synapse Studio, use the ›› icon to expand the menu - this reveals the different pages within Synapse Studio that you’ll use to manage resources and perform data analytics tasks.
- On the Data page, view the Linked tab and verify that your workspace includes a link to your Azure Data Lake Storage Gen2 storage account.
- On the Data page, switch back to the Workspace tab and note that there are no databases in your workspace.
- In the + menu, select Lake database to open a new tab in which you can design your database schema (accepting the database templates terms of use if prompted).
- In the Properties pane for the new database, change the Name to RetailDB and verify that the Input folder property is automatically updated to files/RetailDB. Leave the Data format as Delimited Text (you could also use Parquet format, and you can override the file format for individual tables - we’ll use comma-delimited data in this exercise.)
- At the top of the RetailDB pane, select Publish to save the database so far.
- In the Data pane on the left, view the Linked tab. Then expand Azure Data Lake Storage Gen2 and the primary datalakexxxxxxx store for your synapsexxxxxxx workspace, and select the files file system; which currently contains a folder named synapse.
- In the files tab that has opened, use the + New folder button to create a new folder named RetailDB - this will be the input folder for the data files used by tables in your database.
Create a table
Now that you have created a lake database, you can define its schema by creating tables.
Define the table schema
- Switch back to the RetailDB tab for your database definition, and in the + Table list, select Custom, and note that a new table named Table_1 is added to your database.
- With Table_1 selected, in the General tab under the database design canvas, change the Name property to Customer.
- Expand the Storage settings for table section and note that the table will be stored as delimited text in the files/RetailDB/Customer folder in the default data lake store for your Synapse workspace.
-
On the Columns tab, note that by default, the table contains one column named Column_1. Edit the column definition to match the following properties:
Name Keys Description Nullability Data type Format / Length CustomerId PK 🗹 Unique customer ID 🗆 long -
In the + Column list, select New column, and modify the new column definition to add a FirstName column to the table as follows:
Name Keys Description Nullability Data type Format / Length CustomerId PK 🗹 Unique customer ID 🗆 long FirstName PK 🗆 Customer first name 🗆 string 256 -
Add more new columns until the table definition looks like this:
Name Keys Description Nullability Data type Format / Length CustomerId PK 🗹 Unique customer ID 🗆 long FirstName PK 🗆 Customer first name 🗆 string 256 LastName PK 🗆 Customer last name 🗹 string 256 EmailAddress PK 🗆 Customer email 🗆 string 256 Phone PK 🗆 Customer phone 🗹 string 256 - When you’ve added all of the columns, publish the database again to save the changes.
- In the Data pane on the left, switch back to the Workspace tab so you can see the RetailDB lake database. Then expand it and refresh its Tables folder to see the newly created Customer table.
Load data into the table’s storage path
- In the main pane, switch back to the files tab, which contains the file system with the RetailDB folder. Then open the RetailDB folder and create a new folder named Customer in it. This is where the Customer table will get its data.
- Open the new Customer folder, which should be empty.
-
Download the customer.csv data file from https://raw.githubusercontent.com/MicrosoftLearning/mslearn-synapse/master/Allfiles/Labs/03/data/customer.csv and save it in a folder on your local computer (it doesn’t matter where). Then in the Customer folder in Synapse Explorer, use the ⤒ Upload button to upload the customer.csv file to the RetailDB/Customer folder in your data lake.
Note: In a real production scenario, you would probably create a pipeline to ingest data into the folder for the table data. We’re uploading it directly in the Synapse Studio user interface in this exercise for expediency.
- In the Data pane on the left, on the Workspace tab, in the … menu for the Customer table, select New SQL script > Select TOP 100 rows. Then, in the new SQL script 1 pane that has opened, ensure that the Built-in SQL pool is connected, and use the ▷ Run button to run the SQL code. The results should include first 100 rows from the Customer table, based on the data stored in the underlying folder in the data lake.
- Close the SQL script 1 tab, discarding your changes.
Create a table from a database template
As you’ve seen, you can create the tables you need in your lake database from scratch. However, Azure Synapse Analytics also provides numerous database templates based on common database workloads and entities that you can use as a starting point for your database schema.
Define the table schema
- In the main pane, switch back to the RetailDB pane, which contains your database schema (currently containing only the Customer table).
- In the + Table menu, select From template. Then in the Add from template page, select Retail and click Continue.
- In the Add from template (Retail) page, wait for the table list to populate, and then expand Product and select RetailProduct. Then click Add. This adds a new table based on the RetailProduct template to your database.
- In the RetailDB pane, select the new RetailProduct table. Then, in the pane beneath the design canvas, on the General tab, change the name to Product and verify that the storage settings for the table specify the input folder files/RetailDB/Product.
- On the Columns tab for the Product table, note that the table already includes a large number of columns inherited from the template. There are more columns than required for this table, so you’ll need to remove some.
- Select the checkbox next to Name to select all of the columns, and then unselect the following columns (which you need to retain):
- ProductId
- ProductName
- IntroductionDate
- ActualAbandonmentDate
- ProductGrossWeight
- ItemSku
-
On the toolbar in the Columns pane, select Delete to remove the selected columns. This should leave you with the following columns:
Name Keys Description Nullability Data type Format / Length ProductId PK 🗹 The unique identifier of a Product. 🗆 long ProductName PK 🗆 The name of the Product… 🗹 string 128 IntroductionDate PK 🗆 The date that the Product was introduced for sale. 🗹 date YYYY-MM-DD ActualAbandonmentDate PK 🗆 The actual date that the marketing of the product was discontinued… 🗹 date YYY-MM-DD ProductGrossWeight PK 🗆 The gross product weight. 🗹 decimal 18,8 ItemSku PK 🗆 The Stock Keeping Unit identifier… 🗹 string 20 -
Add a new column named ListPrice to the table as shown here:
Name Keys Description Nullability Data type Format / Length ProductId PK 🗹 The unique identifier of a Product. 🗆 long ProductName PK 🗆 The name of the Product… 🗹 string 128 IntroductionDate PK 🗆 The date that the Product was introduced for sale. 🗹 date YYYY-MM-DD ActualAbandonmentDate PK 🗆 The actual date that the marketing of the product was discontinued… 🗹 date YYY-MM-DD ProductGrossWeight PK 🗆 The gross product weight. 🗹 decimal 18,8 ItemSku PK 🗆 The Stock Keeping Unit identifier… 🗹 string 20 ListPrice PK 🗆 The product price. 🗆 decimal 18,2 - When you’ve modified the columns as shown above, publish the database again to save the changes.
- In the Data pane on the left, switch back to the Workspace tab so you can see the RetailDB lake database. Then use the … menu for its Tables folder to refresh the view and see the newly created Product table.
Load data into the table’s storage path
- In the main pane, switch back to the files tab, which contains the file system, and navigate to the files/RetailDB folder, which currently contains the Customer folder for the table you created previously.
- In the RetailDB folder, create a new folder named Product. This is where the Product table will get its data.
- Open the new Product folder, which should be empty.
- Download the product.csv data file from https://raw.githubusercontent.com/MicrosoftLearning/mslearn-synapse/master/Allfiles/Labs/03/data/product.csv and save it in a folder on your local computer (it doesn’t matter where). Then in the Product folder in Synapse Explorer, use the ⤒ Upload button to upload the product.csv file to the RetailDB/Product folder in your data lake.
- In the Data pane on the left, on the Workspace tab, in the … menu for the Product table, select New SQL script > Select TOP 100 rows. Then, in the new SQL script 1 pane that has opened, ensure that the Built-in SQL pool is connected, and use the ▷ Run button to run the SQL code. The results should include first 100 rows from the Product table, based on the data stored in the underlying folder in the data lake.
- Close the SQL script 1 tab, discarding your changes.
Create a table from existing data
So far, you’ve created tables and then populated them with data. In some cases, you may already have data in a data lake from which you want to derive a table.
Upload data
- In the main pane, switch back to the files tab, which contains the file system, and navigate to the files/RetailDB folder, which currently contains the Customer and Product folders for the tables you created previously.
- In the RetailDB folder, create a new folder named SalesOrder.
- Open the new SalesOrder folder, which should be empty.
- Download the salesorder.csv data file from https://raw.githubusercontent.com/MicrosoftLearning/mslearn-synapse/master/Allfiles/Labs/03/data/salesorder.csv and save it in a folder on your local computer (it doesn’t matter where). Then in the SalesOrder folder in Synapse Explorer, use the ⤒ Upload button to upload the salesorder.csv file to the RetailDB/SalesOrder folder in your data lake.
Create a table
- In the main pane, switch back to the RetailDB pane, which contains your database schema (currently containing the Customer and Product tables).
- In the + Table menu, select From data lake. Then in the Create external table from data lake pane, specify the following options:
- External table name: SalesOrder
- Linked service: Select synapsexxxxxxx-WorkspaceDefautStorage(datalakexxxxxxx)
- Input file of folder: files/RetailDB/SalesOrder
- Continue to the next page and then create the table with the following options:
- File type: CSV
- Field terminator: Default (comma ,)
- First row: Leave *infer column names unselected.
- String delimiter: Default (Empty string)
- Use default type: Default type (true,false)
- Max string length: 4000
-
When the table has been created, note that it includes columns named C1, C2, and so on and that the data types have been inferred from the data in the folder. Modify the column definitions as follows:
Name Keys Description Nullability Data type Format / Length SalesOrderId PK 🗹 The unique identifier of an order. 🗆 long OrderDate PK 🗆 The date of the order. 🗆 timestamp YYYY-MM-DD HH:MM:SS:ff LineItemId PK 🗹 The ID of an individual line item. 🗆 long CustomerId PK 🗆 The customer. 🗆 long ProductId PK 🗆 The product. 🗆 long Quantity PK 🗆 The order quantity. 🗆 long Note: The table contains a record for each individual item ordered, and includes a composite primary key comprised of SalesOrderId and LineItemId.
-
On the Relationships tab for the SalesOrder table, in the + Relationship list, select From table, and then define the following relationship:
From table From column To table To column SalesOrder CustomerId Customer CustomerId -
Add a second From table relationship with the following settings:
From table From column To table To column SalesOrder ProductId Product ProductId The ability to define relationships between tables helps enforce referential integrity between related data entities. This is a common feature of relational databases that would otherwise be difficult to apply to files in a data lake.
- Publish the database again to save the changes.
- In the Data pane on the left, switch back to the Workspace tab so you can see the RetailDB lake database. Then use the … menu for its Tables folder to refresh the view and see the newly created SalesOrder table.
Work with lake database tables
Now that you have some tables in your database, you can use them to work with the underlying data.
Query tables using SQL
- In Synapse Studio, select the Develop page.
- In the Develop pane, in the + menu, select SQL script.
- In the new SQL script 1 pane, ensure the script is connected to the Built-in SQL pool and in the User database list, select RetailDB.
-
Enter the following SQL code:
SELECT o.SalesOrderID, c.EmailAddress, p.ProductName, o.Quantity FROM SalesOrder AS o JOIN Customer AS c ON o.CustomerId = c.CustomerId JOIN Product AS p ON o.ProductId = p.ProductId -
Use the ▷ Run button to run the SQL code.
The results show order details with customer and product information.
- Close the SQL script 1 pane, discarding your changes.
Insert data using Spark
- In the Develop pane, in the + menu, select Notebook.
- In the new Notebook 1 pane, attach the notebook to the sparkxxxxxxx* Spark pool.
-
Enter the following code in the empty notebook cell:
%%sql INSERT INTO `RetailDB`.`SalesOrder` VALUES (99999, '2022-01-01', 1, 6, 5, 1) - Use the ▷ button on the left of the cell to run it and wait for it to finish running. Note that it will take some time to start the Spark pool.
- Use the + Code button to add a new cell to the notebook.
-
Enter the following code in the new cell:
%%sql SELECT * FROM `RetailDB`.`SalesOrder` WHERE SalesOrderId = 99999 - Use the ▷ button on the left of the cell to run it and verify that a row for sales order 99999 was inserted into the SalesOrder table.
- Close the Notebook 1 pane, stopping the Spark session and discarding your changes.
Delete Azure resources
If you’ve finished exploring Azure Synapse Analytics, you should delete the resources you’ve created to avoid unnecessary Azure costs.
- Close the Synapse Studio browser tab and return to the Azure portal.
- On the Azure portal, on the Home page, select Resource groups.
- Select the dp000-xxxxxxx resource group for your Synapse Analytics workspace (not the managed resource group), and verify that it contains the Synapse workspace, storage account, and Spark pool for your workspace.
- At the top of the Overview page for your resource group, select Delete resource group.
-
Enter the dp000-xxxxxxx resource group name to confirm you want to delete it, and select Delete.
After a few minutes, your Azure Synapse workspace resource group and the managed workspace resource group associated with it will be deleted.