Migrate SQL Server databases to SQL Server on Azure Virtual Machine
In this exercise, you’ll learn how to migrate a SQL Server database to a SQL Server running on an Azure Virtual Machine using the Azure migration extension for Azure Data Studio. You’ll start by installing and launching the Azure migration extension for Azure Data Studio. Then, you’ll perform an online migration of a SQL Server database to a SQL Server running on an Azure Virtual Machine. You’ll also learn how to monitor the migration process on the Azure portal and complete the cutover process to finalize the migration.
This exercise will take approximately 45 minutes.
Note: To complete this exercise, you need access to an Azure subscription to create Azure resources. If you don’t have an Azure subscription, create a free account before you begin.
Before you start
To run this exercise, you’ll need:
| Item | Description |
|---|---|
| Target Server | A SQL Server on an Azure Virtual Machine. To learn more, visit Provision a SQL Server on an Azure Virtual Machine. Note: The SQL Server version between target and server must be the same. |
| Source Server | The latest SQL Server version installed on a server of your choice. |
| Source Database | The lightweight AdventureWorks database to be restored on the SQL Server 2022 instance. |
Provision an Azure Storage Account with a blob container
The purpose of creating an Azure Storage Account is to store the full and transaction log backups for the migration. We use the storage account later on in this exercise.
- Sign in to the Azure portal.
- From the left portal menu, select Storage accounts to display a list of your storage accounts. If the portal menu isn’t visible, select the menu button to toggle it on.
- On the Storage accounts page, select Create.
- Under Project details, select the same Azure subscription in which you created the Azure Virtual Machine.
- Select the same resource group in which you created the Azure Virtual Machine.
- Choose a unique name for your storage account, and select the same region as the Azure Virtual Machine.
- Choose Standard as the level of service.
- Leave all remaining options as their default values.
- Select Review + create, then select Create.
Once the storage account is created, you can create a container by following these steps:
- In the Azure portal, navigate to your newly created storage account.
- In the left menu for the storage account, scroll to Blob service and select Containers.
- Select + Container to create a new container.
- On the New container side page, provide the following information:
- Name: name of your preference
- Public access level: Private
- Select Create.
Install and launch the Azure migration extension for Azure Data Studio
Before start using the Azure migration extension, you need to install Azure Data Studio. For this scenario, install Azure Data Studio in the same server where the source database is located. The extension is available in Azure Data Studio marketplace.
To install the migration extension, follow these steps:
- Open the extensions manager in Azure Data Studio.
- Search for Azure SQL Migration and select the extension.
- Install the extension. Once you install it, the Azure SQL Migration extension is in the list of installed extensions.
- Connect to a SQL Server instance in Azure Data Studio.
- To launch the Azure migration extension, right-click on the source instance name and select Manage to access the dashboard and the landing page of the Azure SQL Migration extension.
Perform an online migration of a SQL Server database to a SQL Server running on an Azure Virtual Machine
To perform a minimal downtime migration using Azure Data Studio, follow these steps:
-
Launch the Migrate to Azure SQL wizard within the extension in Azure Data Studio.
-
On Step 1: Databases for assessment, select the database you want to migrate, then select Next.
Note: It’s recommended to collect performance data and get right-sized Azure recommendations.
-
On Step 2: Assessment results and recommendations, wait for the assessment to complete, then select SQL Server on Azure Virtual Machine as the Azure SQL target.
-
At the bottom of the Step 2: Assessment results and recommendations page, select View/Select to view the assessment results. Select the database to migrate.
Note: Take a moment to review the assessment results on the right side.
-
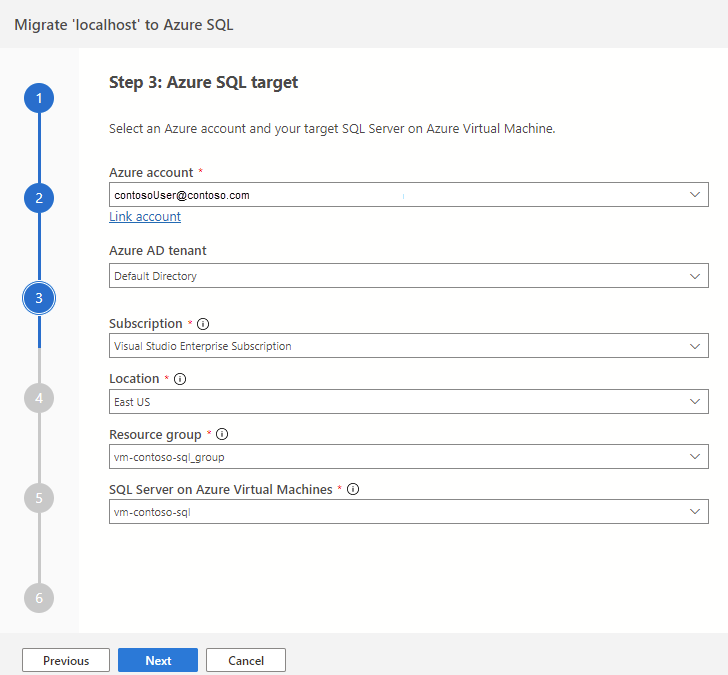
On Step 3: Azure SQL target, select an Azure account and your target SQL Server on Azure Virtual Machine.

-
On Step 4: Azure Database Migration Service, create a new Azure Database Migration Service using the Azure Data Studio wizard. If you have previously created one, you can reuse it. Alternatively, you can create an Azure Database Migration Service resource through the Azure portal.
Note: Make sure the subscription is registered to use the Microsoft.DataMigration namespace. To learn how to perform a resource provider registration, see Register the resource provider.
-
Back up the source database. You can back up to Microsoft Azure Blob Storage using SSMS or T-SQL. Alternatively, you also have the option to manually copy the database backup to a container folder using the Azure portal.
Note: Ensure that a folder is created in the container before proceeding with the backup file copy.
-
On Step 5: Data source configuration, select the location of your database backups, either on an on-premises network share or in an Azure Blob Storage container.
-
Start the database migration and monitor the progress in Azure Data Studio. You can also track the progress in the Azure portal under the Azure Database Migration Service resource.
Note: The Azure Data Migration Services will orchestrate and restore the backup files automatically at the target server.
-
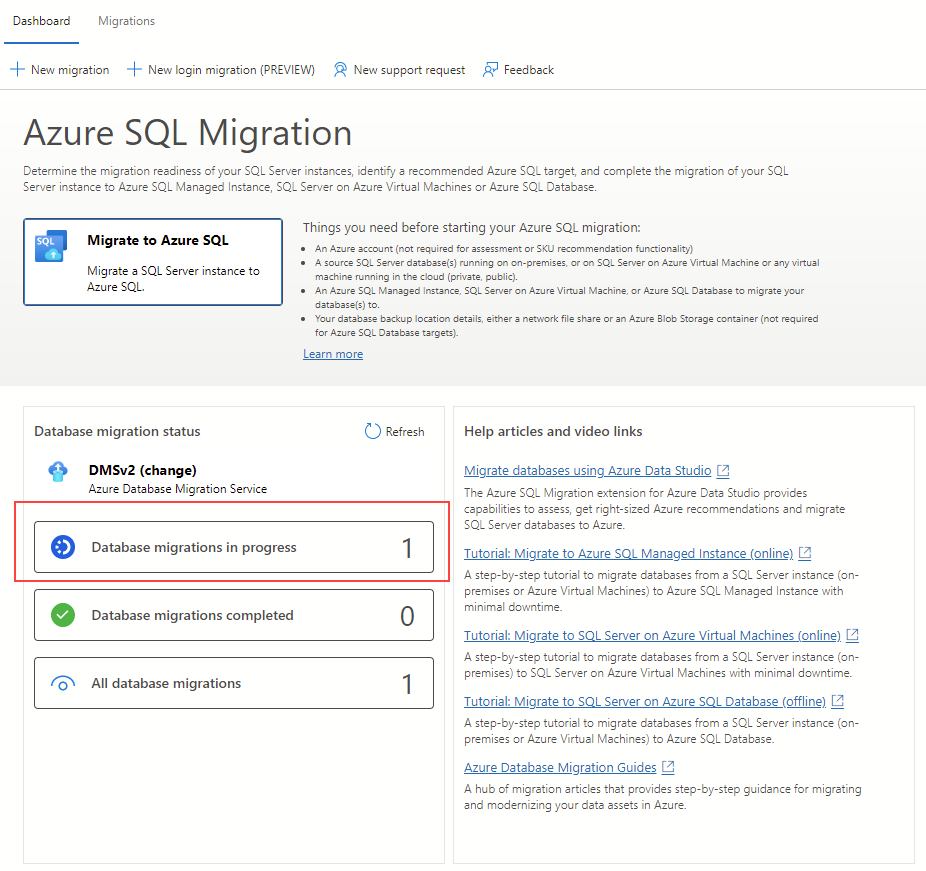
Select Database migrations in progress in the migration dashboard to view ongoing migrations.

-
Select the database name to get further details.

Monitor migration on Azure portal
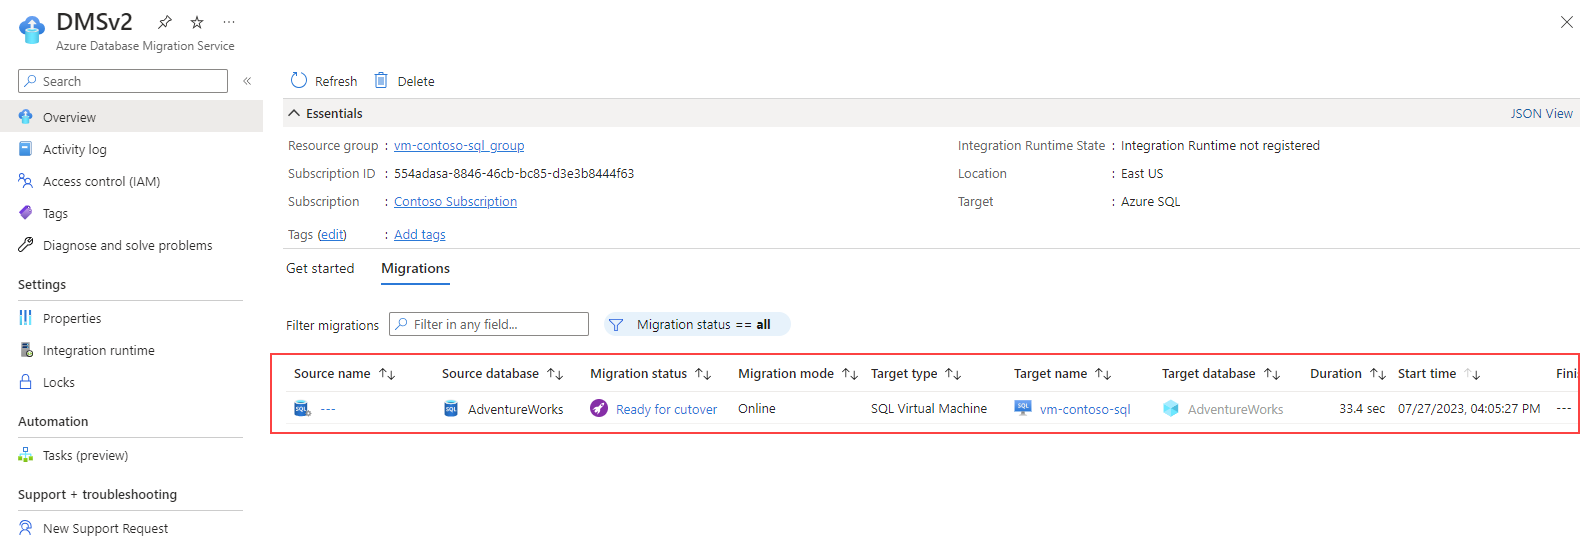
Alternatively, you can also monitor the migration activity using Azure Database Migration Service.
Complete the cutover process
-
Take a tail log backup for the source database.
-
On Azure portal, upload the transaction log backup to the container and folder where the full backup file is located.
-
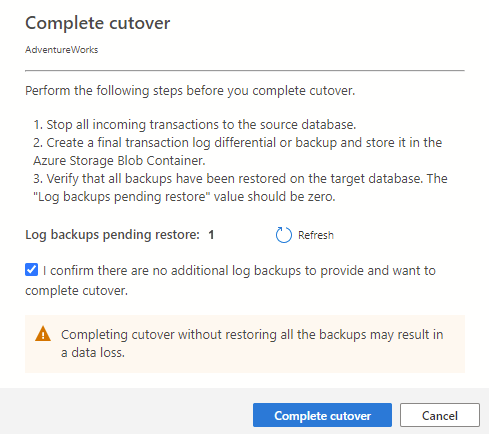
On the Azure migration extension, select Complete cutover in the monitoring page.

-
Verify that all log backups have been restored on the target database. The Log backups pending restore value should be zero. This step completes the migration.

-
The migration status property will change to Completing, then to Succeeded after the migration is completed.
Note: You can complete the cutover using similar steps with Azure Database Migration Service through the Azure portal.
-
After the status is Succeeded, navigate to the target server, and validate the target database. Check the database schema and data.
You’ve learned how to migrate a SQL Server database to a SQL Server running on an Azure Virtual Machine using the Azure migration extension for Azure Data Studio. You’ve also learned how to complete the cutover process to finalize the migration. This ensures that all data has been successfully migrated and that the new database is fully operational. Once the cutover process is complete, you can start using your new SQL Server database running on an Azure Virtual Machine.
Clean up
When you’re working in your own subscription, it’s a good idea at the end of a project to identify whether you still need the resources you created.
Leaving resources running unnecessarily can result in additional costs. You can delete resources individually or delete the entire set of resources in the Azure portal.
More information
For more information about SQL Server on Azure Virtual Machines, see What is SQL Server on Azure Virtual Machines?.
