Implement GraphRAG with Azure Database for PostgreSQL
This hands-on exercise adds a lightweight knowledge-graph layer inside the same Azure Database for PostgreSQL you used in earlier units. You create two small tables for nodes and edges, link them to your existing company_policies rows, and then run a graph-narrowed vector search that first filters by relationships (Topic/Department) and then ranks with pgvector. The goal is higher precision on multi-concept questions without complicating prompts or moving data to a separate store.
Let’s consider the following scenario: An employee wants to know about the company’s policies on remote work for the engineering department. A simple vector search might return general remote work policies, but by using a knowledge graph to filter results specifically related to the engineering department, you can provide more accurate and relevant information.
By the end of this exercise, you will:
- Understand how to create and manage graph structures in PostgreSQL.
- Be able to perform graph-narrowed vector searches.
- Gain experience with integrating knowledge graphs into RAG applications.
Before you start
You need an Azure subscription with administrative rights, and you must be approved for Azure OpenAI access in that subscription. If you need Azure OpenAI access, apply at the Azure OpenAI limited access page.
Deploy resources into your Azure subscription
If you already have a nonproduction Azure Database for PostgreSQL server and a nonproduction Azure OpenAI resource setup, you can skip this section.
This step guides you through using Azure CLI commands from the Azure Cloud Shell to create a resource group and run a Bicep script to deploy the Azure services necessary for completing this exercise into your Azure subscription.
-
Open a web browser and navigate to the Azure portal.
-
Select the Cloud Shell icon in the Azure portal toolbar to open a new Cloud Shell pane at the bottom of your browser window.

If prompted, select the required options to open a Bash shell. If you previously used a PowerShell console, switch it to a Bash shell.
-
At the Cloud Shell prompt, enter the following to clone the GitHub repo containing exercise resources:
git clone https://github.com/MicrosoftLearning/mslearn-postgresql.git -
Next, you run three commands to define variables to reduce redundant typing when using Azure CLI commands to create Azure resources. The variables represent the name to assign to your resource group (
RG_NAME), the Azure region (REGION) into which resources are deployed, and a randomly generated password for the PostgreSQL administrator sign in (ADMIN_PASSWORD).In the first command, the region assigned to the corresponding variable is
westus3, but you can also replace it with a location of your preference. However, if replacing the default, you must select another Azure region that supports abstractive summarization to ensure you can complete all of the tasks in the modules in this learning path.REGION=westus3The following command assigns the name to be used for the resource group that houses all the resources used in this exercise. The resource group name assigned to the corresponding variable is
rg-learn-postgresql-ai-$REGION, where$REGIONis the location you previously specified. However, you can change it to any other resource group name that suits your preference.RG_NAME=rg-learn-postgresql-ai-$REGIONThe final command randomly generates a password for the PostgreSQL admin sign in. Make sure you copy it to a safe place to use later to connect to your PostgreSQL.
a=() for i in {a..z} {A..Z} {0..9}; do a[$RANDOM]=$i done ADMIN_PASSWORD=$(IFS=; echo "${a[*]::18}") echo "Your randomly generated PostgreSQL admin user's password is:" echo $ADMIN_PASSWORD -
Only run this command if you want to change your current subscription. If you have access to more than one Azure subscription, and your default subscription isn’t the one in which you want to create the resource group and other resources for this exercise, run this command to set the appropriate subscription, replacing the
<subscriptionName|subscriptionId>token with either the name or ID of the subscription you want to use:az account set --subscription <subscriptionName|subscriptionId> -
Run the following Azure CLI command to create your resource group:
az group create --name $RG_NAME --location $REGION -
Finally, use the Azure CLI to execute Bicep deployment scripts to provision Azure resources in your resource group:
 #1 Core infra: PostgreSQL + DB + firewall + server param, AOAI account, Language account
 az deployment group create \
   --resource-group "$RG_NAME" \
   --template-file "mslearn-postgresql/Allfiles/Labs/Shared/deploy.core.bicep" \
   --parameters restore=false adminLogin=pgAdmin adminLoginPassword="$ADMIN_PASSWORD" databaseName=ContosoHelpDesk

 AOAI=$(az cognitiveservices account list -g "$RG_NAME" --query "[?kind=='OpenAI'].name | [0]" -o tsv)

 #2 Wait for the parent AOAI account to finish provisioning
 echo "Waiting for AOAI account to be ready..."
 while true; do
   STATE=$(az cognitiveservices account show -g "$RG_NAME" -n "$AOAI" --query "properties.provisioningState" -o tsv)
   echo "provisioningState=$STATE"
   [ "$STATE" = "Succeeded" ] && break
   sleep 10
 done

 #3 OpenAI deployments: embedding + chat
 az deployment group create \
   --resource-group "$RG_NAME" \
   --template-file "mslearn-postgresql/Allfiles/Labs/Shared/deploy.aoai-deployments.bicep" \
   --parameters azureOpenAIServiceName="$AOAI"
The Bicep deployment scripts provisions the Azure services required to complete this exercise into your resource group. The resources deployed include an Azure Database for PostgreSQL server, Azure OpenAI, an Azure AI Language service. The Bicep script also performs some configuration steps, such as adding the
azure_aiandvectorextensions to the PostgreSQL server’s allowlist (via theazure.extensionsserver parameter), creating a database namedContosoHelpDeskon the server, and adding a deployment namedembeddingusing thetext-embedding-ada-002model to your Azure OpenAI service. Finally it adds a deployment namedchatusing thegpt-4o-minimodel to your Azure OpenAI service. The Bicep file shares all modules in this learning path, so you might only use some of the deployed resources in some exercises.The deployment typically takes several minutes to complete. You can monitor it from the Cloud Shell or navigate to the Deployments page for the resource group you previously created and observe the deployment progress there.
-
Throughout this exercise, you authenticate to Azure OpenAI using one of two methods. Choose the one that applies to your environment and follow only those instructions at each step:
- API keys — use a key copied from the Azure portal (works in most environments).
- Managed identity — use Microsoft Entra ID token-based authentication (required when API keys are disabled at the organization level).
If you’re using managed identity, run the following commands now to set it up if you haven’t already. Otherwise skip to the next step.
 # Re-derive all variables (in case your Cloud Shell session was reset)
 PGSERVER=$(az postgres flexible-server list -g "$RG_NAME" --query "[0].name" -o tsv)
 AOAI=$(az cognitiveservices account list -g "$RG_NAME" --query "[?kind=='OpenAI'].name | [0]" -o tsv)
 AOAI_ID=$(az cognitiveservices account show -g "$RG_NAME" -n "$AOAI" --query "id" -o tsv)
 SUB_ID=$(az account show --query "id" -o tsv)

 # Enable system-assigned managed identity on the PostgreSQL server
 # (The az CLI has no direct flag for this, so we use az rest per Microsoft docs)
 az rest --method patch \
   --url "https://management.azure.com/subscriptions/$SUB_ID/resourceGroups/$RG_NAME/providers/Microsoft.DBforPostgreSQL/flexibleServers/$PGSERVER?api-version=2024-08-01" \
   --body '{"identity":{"type":"SystemAssigned"}}'

 # Wait for the identity to be assigned, then get the principal ID
 echo "Waiting for system-assigned managed identity..."
 SYS_MI=""
 while [ -z "$SYS_MI" ] || [ "$SYS_MI" = "null" ]; do
   sleep 15
   SYS_MI=$(az rest --method get \
     --url "https://management.azure.com/subscriptions/$SUB_ID/resourceGroups/$RG_NAME/providers/Microsoft.DBforPostgreSQL/flexibleServers/$PGSERVER?api-version=2024-08-01" \
     --query "identity.principalId" -o tsv)
   echo "principalId=$SYS_MI"
 done

 # Grant 'Cognitive Services OpenAI User' to the system MI (for in-database embeddings)
 az role assignment create \
   --assignee "$SYS_MI" \
   --role "Cognitive Services OpenAI User" \
   --scope "$AOAI_ID"

 # Restart the server so it picks up the new identity
 az postgres flexible-server restart -g "$RG_NAME" -n "$PGSERVER"
Note: Wait 2-3 minutes after the restart for the server to come back up and for role assignments to propagate. If you receive authorization errors in later steps, wait a couple of minutes and retry.
-
Take note of the resource names and their corresponding ID, and the PostgreSQL server’s fully qualified domain name (FQDN), username, and password, as you need them later.
Troubleshooting deployment errors
You could encounter a few errors when running the Bicep deployment script. If no errors are encountered, skip this section.
-
If you previously ran the Bicep deployment script for this learning path and later deleted the resources, you could receive an error message like the following if you’re attempting to rerun the script within 48 hours of deleting the resources:
  {"code": "InvalidTemplateDeployment", "message": "The template deployment 'deploy' is not valid according to the validation procedure. The tracking id is '4e87a33d-a0ac-4aec-88d8-177b04c1d752'. See inner errors for details."}

  Inner Errors:
  {"code": "FlagMustBeSetForRestore", "message": "An existing resource with ID '/subscriptions/{subscriptionId}/resourceGroups/rg-learn-postgresql-ai-eastus/providers/Microsoft.CognitiveServices/accounts/{accountName}' has been soft-deleted. To restore the resource, you must specify 'restore' to be 'true' in the property. If you don't want to restore existing resource, please purge it first."}
If you receive this message, modify the
azure deployment group createcommand previously to set therestoreparameter equal totrueand rerun it. -
If the selected region is restricted from provisioning specific resources, you must set the
REGIONvariable to a different location and rerun the commands to create the resource group and run the Bicep deployment script.{"status":"Failed","error":{"code":"DeploymentFailed","target":"/subscriptions/{subscriptionId}/resourceGroups/{resourceGrouName}/providers/Microsoft.Resources/deployments/{deploymentName}","message":"At least one resource deployment operation failed. Please list deployment operations for details. Please see https://aka.ms/arm-deployment-operations for usage details.","details":[{"code":"ResourceDeploymentFailure","target":"/subscriptions/{subscriptionId}/resourceGroups/{resourceGrouName}/providers/Microsoft.DBforPostgreSQL/flexibleServers/{serverName}","message":"The resource write operation failed to complete successfully, because it reached terminal provisioning state 'Failed'.","details":[{"code":"RegionIsOfferRestricted","message":"Subscriptions are restricted from provisioning in this region. Please choose a different region. For exceptions to this rule please open a support request with Issue type of 'Service and subscription limits'. See https://review.learn.microsoft.com/en-us/azure/postgresql/flexible-server/how-to-request-quota-increase for more details."}]}]}} -
If the script is unable to create an AI resource due to the requirement to accept the responsible AI agreement, you get the following error. If you get that error, use the Azure portal user interface to create an Azure AI Services resource, and then rerun the deployment script.
  {"code": "InvalidTemplateDeployment", "message": "The template deployment 'deploy' is not valid according to the validation procedure. The tracking id is 'f8412edb-6386-4192-a22f-43557a51ea5f'. See inner errors for details."}

  Inner Errors:
  {"code": "ResourceKindRequireAcceptTerms", "message": "This subscription cannot create TextAnalytics until you agree to Responsible AI terms for this resource. You can agree to Responsible AI terms by creating a resource through the Azure Portal then trying again. For more detail go to https://go.microsoft.com/fwlink/?linkid=2164190"}
Connect to your database using psql in the Azure Cloud Shell
You connect to the ContosoHelpDesk database on your Azure Database for PostgreSQL server using the psql command-line utility from the Azure Cloud Shell.
-
In the Azure portal, open the Cloud Shell by selecting the Cloud Shell icon in the toolbar.
-
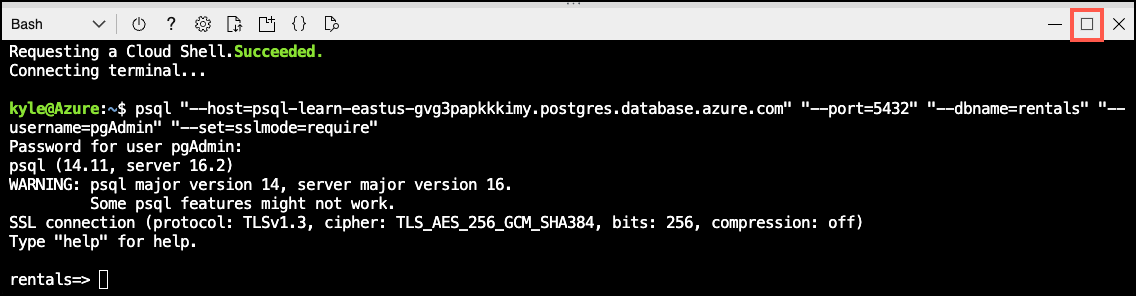
Run the following command to connect to your
ContosoHelpDeskdatabase, replacing<server-name>with the name of your PostgreSQL flexible server (found on the Overview page of your PostgreSQL resource in the Azure portal):psql -h <server-name>.postgres.database.azure.com -U pgAdmin -d ContosoHelpDesk -
At the “Password for user pgAdmin” prompt in the Cloud Shell, enter the randomly generated password for the pgAdmin sign in.
Once you sign in, the
psqlprompt for theContosoHelpDeskdatabase is displayed. -
Throughout the remainder of this exercise, you continue working in the Cloud Shell, so it helps to expand the pane within your browser window by selecting the Maximize button at the top right of the pane.
Setup: Configure extensions
To store and query vectors, and to generate embeddings, you need to allowlist and enable two extensions for Azure Database for PostgreSQL: vector and azure_ai.
-
To allowlist both extensions, add
vectorandazure_aito the server parameterazure.extensions, as per the instructions provided in How to use PostgreSQL extensions. -
Run the following SQL command to enable the
vectorandazure_aiextensions. For detailed instructions, read How to enable and usepgvectoron Azure Database for PostgreSQL.On ContosoHelpDesk prompt, run the following SQL commands:
-- Enable required extensions CREATE EXTENSION vector; CREATE EXTENSION azure_ai; -
Now configure the
azure_aiextension connection to Azure OpenAI. You need the endpoint for your Azure OpenAI resource (found on the Keys and Endpoint page under Resource Management in the Azure portal).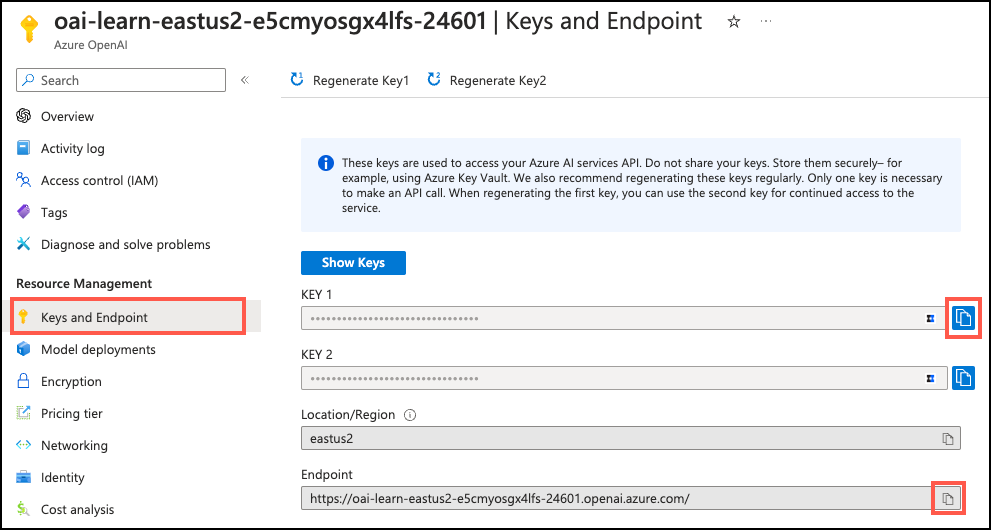
On the ContosoHelpDesk prompt, run the commands for your chosen authentication method:
Using API keys: Copy one of the available keys from the same page. You can use either
KEY 1orKEY 2.SELECT azure_ai.set_setting('azure_openai.endpoint', '{endpoint}'); SELECT azure_ai.set_setting('azure_openai.subscription_key', '{api-key}');Using managed identity: Only set the endpoint. When no
subscription_keyis configured, the extension automatically uses the server’s system-assigned managed identity.SELECT azure_ai.set_setting('azure_openai.endpoint', '{endpoint}'); SELECT azure_ai.set_setting('azure_openai.auth_type', 'managed-identity');
Populate the database with sample data
Before you use the azure_ai extension, add a table to the ContosoHelpDesk database and populate them with sample data so you have information to work with as you create your application.
-
On the ContosoHelpDesk prompt, run the following commands to create the
company_policiestable for storing company policy data:-- Create table for policies and embeddings (matches CSV columns) DROP TABLE IF EXISTS company_policies CASCADE; CREATE TABLE company_policies ( policy_id BIGSERIAL PRIMARY KEY, title TEXT NOT NULL, department TEXT NOT NULL, policy_text TEXT NOT NULL, category TEXT NOT NULL, embedding vector(1536) -- The `text-embedding-ada-002` model is configured to return 1,536 dimensions, so use that number for the vector column size. ); -
In your Azure Cloud Shell, use the
COPYcommand to load data from CSV files into each table you previously created. Run the following command to populate thecompany_policiestable:\COPY company_policies (title, department, policy_text, category) FROM 'mslearn-postgresql/Allfiles/Labs/Shared/company_policies_with_categories.csv' WITH (FORMAT csv, HEADER)The command output should be
COPY 108, indicating that 108 rows were written into the table from the CSV file. -
Backfill embeddings for existing rows.
Run the following command in your psql session (Cloud Shell) to compute embeddings in batches. This avoids 429 Too Many Requests errors by processing rows in small groups with a pause between each batch.
 DO $$
 DECLARE
   batch_size       int := 50;   -- rows per batch (reduce if you still get 429 errors)
   pause_secs       int := 10;   -- seconds to wait between batches
   updated          int;
 BEGIN
   LOOP
     BEGIN
       WITH todo AS (
         SELECT policy_id, policy_text
         FROM company_policies
         WHERE embedding IS NULL
         ORDER BY policy_id
         LIMIT batch_size
       )
       UPDATE company_policies p
       SET embedding = azure_openai.create_embeddings('embedding', t.policy_text)::vector
       FROM todo t
       WHERE p.policy_id = t.policy_id;

       GET DIAGNOSTICS updated = ROW_COUNT;

       IF updated = 0 THEN
         RAISE NOTICE 'All rows embedded.';
         EXIT;
       END IF;

       RAISE NOTICE 'Updated % rows; sleeping % seconds...', updated, pause_secs;
       PERFORM pg_sleep(pause_secs);

     EXCEPTION WHEN OTHERS THEN
       RAISE NOTICE 'Throttled - backing off % seconds...', pause_secs;
       PERFORM pg_sleep(pause_secs);
       pause_secs := LEAST(pause_secs * 2, 60);
     END;
   END LOOP;
 END $$;
Note: If you experience repeated throttling, reduce
batch_size(try 40, 30, or 20) or increasepause_secs(try 20 or 30).Once all 108 rows are backfilled, exit psql by typing
\q.
Add the vector index
To improve the performance of similarity searches, you can add a vector index to the embedding column of the company_policies table.
-
On the Azure Cloud Shell, connect to the ContosoHelpDesk database using psql as before.
-
Create the IVFFlat index:
 -- Drop the IVFFlat index
 DROP INDEX IF EXISTS company_policies_embedding_ivfflat_idx;

 -- Use cosine distance (vector_cosine_ops) for text embeddings
 CREATE INDEX company_policies_embedding_ivfflat_idx
   ON company_policies
   USING ivfflat (embedding vector_cosine_ops)
   WITH (lists = 100);

 ANALYZE company_policies;
Test the vector table with a similarity query
Let’s make sure everything is working by verifying with a similarity search and simple filtering directly from SQL.
-
On the Azure Cloud Shell, connect to the ContosoHelpDesk database using psql as before.
-
Run the following SQL statement:
-- Best match for a question (cosine) SELECT policy_id, title, department, policy_text FROM company_policies ORDER BY embedding <=> azure_openai.create_embeddings('embedding', 'How many vacation days do employees get?')::vector LIMIT 1; -
Add a filter plus a vector search by running the following SQL statement:
-- Filter + vector (hybrid) SELECT policy_id, title, department, policy_text FROM company_policies WHERE department = 'HR' ORDER BY embedding <=> azure_openai.create_embeddings('embedding', 'Does the company help me with college expenses')::vector LIMIT 3; -
Type \q and press Enter to exit psql.
While these answers are a good start, they might not be comprehensive enough for more complex queries. To address this problem, you can create a Python RAG (Retrieval-Augmented Generation) application that retrieves relevant passages from our database and uses them as context for generating answers.
Enable the Apache AGE Extension on the Azure portal
Before you can use the Apache AGE extension, you need to enable it on the Azure portal.
- Go to the Azure portal and navigate to your Azure Database for PostgreSQL instance.
- In the left-hand menu, under Settings, select Server parameters.
- Search for azure.extensions.
- Under the Value column, add
AGEto the list of enabled extensions. - Do a new search for shared_preload_libraries.
- Under the Value column, add
AGEto the list of enabled extensions. - Select Save and then Save and Restart to apply the changes.
It will take a few moments for the server to restart. Once the restart is complete, you should be able to use the Apache AGE extension in your PostgreSQL database.
Build the knowledge graph
A knowledge graph is a structured representation of information that captures entities and their relationships. In this case, you create a knowledge graph from the company policies data. You start by creating the nodes and edges tables.
Enable AGE and create the graph (same session)
Let’s first enable the Apache AGE extension and create a new graph.
-
On the Azure Cloud Shell, connect to the ContosoHelpDesk database using psql as before.
-
Run the following SQL statement:
 -- Enable the AGE extension
 CREATE EXTENSION IF NOT EXISTS age CASCADE;

 -- Put ag_catalog in the session path
 SET search_path = public, ag_catalog;

 -- Create a fresh graph namespace
 SELECT ag_catalog.create_graph('company_policies_graph');
Time to create the nodes and edges for the knowledge graph.
Create the graph nodes
Let’s create the nodes from the company policies data.
-
On the Azure Cloud Shell, connect to the ContosoHelpDesk database using psql as before.
-
First, let’s define the function for upserting the policy nodes. Run the following SQL statement:
DROP FUNCTION IF EXISTS public.policy_graph_upsert(BIGINT, TEXT, TEXT, TEXT, TEXT); -- Create a policy node CREATE OR REPLACE FUNCTION public.policy_graph_upsert( _id BIGINT, _title TEXT, _dept TEXT, _cat TEXT, _text TEXT ) RETURNS void LANGUAGE plpgsql VOLATILE AS $BODY$ BEGIN -- Use ag_catalog just for this statement (doesn't leak outside the function) SET LOCAL search_path TO ag_catalog, public; EXECUTE format( 'SELECT * FROM cypher(''company_policies_graph'', $$ MERGE (p:Policy {policy_id: %s}) SET p.title = %L, p.department = %L, p.category = %L, p.policy_text = %L $$) AS (n agtype);', _id, _title, _dept, _cat, _text ); END $BODY$; -
Next, let’s add a function to upsert the department, category, and topic nodes.
DROP FUNCTION IF EXISTS public.create_entity_in_policies_graph(TEXT, TEXT); -- Create a new department, category, or topic entity node in the graph CREATE OR REPLACE FUNCTION public.create_entity_in_policies_graph( _type TEXT, _name TEXT ) RETURNS void LANGUAGE plpgsql VOLATILE AS $BODY$ BEGIN SET LOCAL search_path TO ag_catalog, public; EXECUTE format( 'SELECT * FROM cypher(''company_policies_graph'', $$ MERGE (e:Entity {type: %L, name: %L}) $$) AS (n agtype);', _type, _name ); END $BODY$; -
Run the following SQL statements to add our nodes:
 -- Disable pagination for better output readability
 \pset pager off
-- Upsert the policy nodes SELECT public.policy_graph_upsert(policy_id, title, department, category, policy_text) FROM public.company_policies ORDER BY policy_id; -- Departments SELECT public.create_entity_in_policies_graph('Department', d.department) FROM (SELECT DISTINCT department FROM public.company_policies) AS d; -- Categories SELECT public.create_entity_in_policies_graph('Category', c.category) FROM (SELECT DISTINCT category FROM public.company_policies) AS c; -- Topics - Group policies by list of common terms that might be mentioned in a policy WITH topics(name) AS ( VALUES ('Employees'), ('Approval'), ('Customer'), ('Meetings'), ('Exit/Termination'), ('Legal'), ('Devices'), ('Events'), ('Expense'), ('New Hires'), ('Reconciled Monthly'), ('Remote'), ('Vendors/Suppliers'), ('Internet/Social Media'), ('Onboarding'), ('Prior Approval'), ('Products'), ('Reviewed Quarterly'), ('Tickets'), ('Training') ) SELECT public.create_entity_in_policies_graph('Topic', name) FROM topics;Note: The functions return
void, so the output shows blank rows — this is expected. What matters is the row counts: 108 policy nodes, 8 departments, 8 categories, and 20 topics.
You should now have all the nodes created, time to create the edges that connect them.
Create the graph edges
So far you added the nodes for policies, departments, categories, and topics. It’s time to create the edges that connect them.
-
On the Azure Cloud Shell, connect to the ContosoHelpDesk database using psql as before.
-
Let’s create a function to establish the edges between the policy nodes and their respective department, category, and topic nodes.
-- Policy -> Entity edge upsert -- rel ∈ ('BELONGS_TO','IN_CATEGORY','MENTIONS') DROP FUNCTION IF EXISTS public.create_policy_link_in_policies_graph(BIGINT, TEXT, TEXT, TEXT); CREATE OR REPLACE FUNCTION public.create_policy_link_in_policies_graph( _policy_id BIGINT, _etype TEXT, _ename TEXT, _rel TEXT ) RETURNS void LANGUAGE plpgsql VOLATILE AS $BODY$ BEGIN SET LOCAL search_path TO ag_catalog, public; EXECUTE format( 'SELECT * FROM cypher(''company_policies_graph'', $$ MATCH (p:Policy {policy_id: %s}) MATCH (e:Entity {type: %L, name: %L}) MERGE (p)-[:%s]->(e) RETURN 1 $$) AS (ok agtype);', _policy_id, _etype, _ename, _rel ); END $BODY$; -
Now, run the following SQL command to create the edges between the policy nodes and their respective department, category, and topic nodes:
 -- Disable pagination for better output readability
 \pset pager off
-- BELONGS_TO SELECT public.create_policy_link_in_policies_graph(policy_id, 'Department', department, 'BELONGS_TO') FROM public.company_policies; -- IN_CATEGORY SELECT public.create_policy_link_in_policies_graph(policy_id, 'Category', category, 'IN_CATEGORY') FROM public.company_policies; -- MENTIONS - Note that you use some regex patterns to match similar terms WITH topics(name, pattern) AS ( VALUES ('Employees', $$\memployee(s)?\M$$), ('Approval', $$\mapprov(e|al|ed|als|ing)?\M$$), ('Customer', $$\mcustomer(s)?\M$$), ('Meetings', $$\mmeeting(s)?\M$$), ('Exit/Termination', $$\m(exit|termination)\M$$), ('Legal', $$\mlegal\M$$), ('Devices', $$\m(device(s)?|laptop(s)?)\M$$), ('Events', $$\mevent(s)?\M$$), ('Expense', $$\mexpense(s)?\M$$), ('New Hires', $$\mnew\M\s+\mhires\M$$), ('Reconciled Monthly', $$\mreconciled\M\s+\mmonthly\M$$), ('Remote', $$\mremote\M(\s+\mwork\M)?$$), ('Vendors/Suppliers', $$\m(vendor(s)?|supplier(s)?)\M$$), ('Internet/Social Media', $$\minternet\M|\msocial\M\s+\mmedia\M$$), ('Onboarding', $$\monboard(ed|ing)?\M|\monboarding\M$$), ('Prior Approval', $$\mprior\M\s+\mapproval\M$$), ('Products', $$\mproduct(s)?\M$$), ('Reviewed Quarterly', $$\mreviewed\M\s+\mquarterly\M$$), ('Tickets', $$\mticket(s)?\M|\mhelp\M\s*\mdesk\M$$), ('Training', $$\mtrain(ing|ed|s)?\M$$) ) SELECT public.create_policy_link_in_policies_graph(p.policy_id, 'Topic', t.name, 'MENTIONS') FROM public.company_policies p JOIN topics t ON p.policy_text ~* t.pattern GROUP BY t.name, p.policy_id ORDER BY t.name, p.policy_id; -
Let’s now check the nodes and edges counts for your graph:
 -- Total policy nodes
 SELECT * FROM cypher('company_policies_graph',
 $$ MATCH (p:Policy) RETURN count(p) $$) AS (count agtype);

 -- Entities by type (Department/Category/Topic)
 SELECT * FROM cypher('company_policies_graph',
 $$ MATCH (e:Entity) RETURN e.type, count(e) ORDER BY e.type $$) AS (type agtype, count agtype);

 -- Edges by relationship type
 SELECT * FROM cypher('company_policies_graph',
 $$ MATCH ()-[r]->() RETURN type(r), count(r) ORDER BY type(r) $$) AS (rel agtype, count agtype);
Now you have a full graph representation of the company policies, including all relevant entities and their relationships.
Run a graph-narrowed vector search
Now that you created policy, department, and topic nodes, and connected them with edges, you can use the graph to narrow candidates and then use pgvector to rank those candidates by semantic similarity to a question. This process keeps the full retrieval flow inside Azure Database for PostgreSQL.
Use department plus topics to narrow candidates
Let’s narrow our search to policies that belong to the Finance department and mention specific topics.
-
On the Azure Cloud Shell, connect to the ContosoHelpDesk database using psql as before.
-
On the ContosoHelpDesk prompt, set a variable with the question you want to search for:
\set question 'What expenses require prior approval for remote work travel?' -
Run the following SQL statement to retrieve the top five policy passages. The graph picks Finance policies that mention any of the selected topics. The vector step ranks those candidates by semantic similarity to your question. A small deduplication step keeps one row per policy, which removes duplicates.
 /* Graph-narrowed vector search: filter by graph, then rank with pgvector */
 WITH
 /* 1) GRAPH FILTER: candidate policy_ids from AGE */
 graph_ids AS (
   SELECT ((pid)::text)::bigint AS policy_id
   FROM ag_catalog.cypher('company_policies_graph'::name, $$
     MATCH (p:Policy)-[:BELONGS_TO]->(:Entity {type:'Department', name:'Finance'})
     MATCH (p)-[:MENTIONS]->(t:Entity {type:'Topic'})
     WHERE t.name IN ['Expense','Approval','Remote']   /* adjust topics as needed */
     RETURN p.policy_id AS pid
   $$::cstring) AS (pid agtype)
 ),

 /* 2) QUESTION EMBEDDING: compute once from the psql 'question' variable */
 q AS (
   SELECT azure_openai.create_embeddings('embedding', :'question')::vector AS qv
 ),

 /* 3) VECTOR RANK: smaller cosine distance is better */
 ranked AS (
   SELECT
     cp.policy_id,
     cp.title,
     cp.department,
     cp.category,
     cp.policy_text,
     (cp.embedding <=> q.qv) AS distance
   FROM public.company_policies cp
   JOIN graph_ids USING (policy_id)
   CROSS JOIN q
   WHERE cp.embedding IS NOT NULL
 ),

 /* 4) DEDUP: keep the best (smallest distance) row per policy */
 dedup AS (
   SELECT *,
          ROW_NUMBER() OVER (PARTITION BY policy_id ORDER BY distance) AS rn
   FROM ranked
 )

 /* 5) RESULT: unique top 5 */
 SELECT policy_id, title, department, category, policy_text
 FROM dedup
 WHERE rn = 1
 ORDER BY distance
 LIMIT 5;
💡 In
psql, run the\set questioncommand on its own line, and press Enter before you run the SQL query. If you paste both at once, the Common Table Expression (CTE) might not run as expected.
This query generates a ranked list of policy passages that are relevant to the specified question. It first uses the graph structure to filter candidates by department and topic, then ranks them by semantic similarity to the question.
Let’s try a different filter.
-
Topic-only (no department filter) — Previously you filtered by the Finance department, now let’s include all departments. Run the following query:
  WITH graph_ids AS (
    SELECT ((pid)::text)::bigint AS policy_id
    FROM ag_catalog.cypher('company_policies_graph'::name, $$
      MATCH (p:Policy)-[:MENTIONS]->(t:Entity {type:'Topic'})
      WHERE t.name IN ['Customer','Meetings','Expense']
      RETURN p.policy_id AS pid
    $$::cstring) AS (pid agtype)
  ),
  q AS (SELECT azure_openai.create_embeddings('embedding', :'question')::vector AS qv),
  ranked AS (
    SELECT cp.policy_id, cp.title, cp.department, cp.category, cp.policy_text,
           (cp.embedding <=> q.qv) AS distance
    FROM public.company_policies cp
    JOIN graph_ids USING (policy_id)
    CROSS JOIN q
    WHERE cp.embedding IS NOT NULL
  ),
  dedup AS (
    SELECT *, ROW_NUMBER() OVER (PARTITION BY policy_id ORDER BY distance) AS rn
    FROM ranked
  )
  SELECT policy_id, title, department, category, policy_text
  FROM dedup
  WHERE rn = 1
  ORDER BY distance
  LIMIT 5;
Notice how the candidate set changed, given a more inclusive topic filter.
-
Change the topic list — Replace
['Expense','Approval','Remote']in the script with any subset of the 20 topics you created earlier (for example,['Customer','Meetings','Expense']). Then rerun the query. Notice how the candidate set changes again based on the topics selected.
You can also change your question by modifying the \set question command in psql. Try some of the following ones and rerun the previous queries:
- What are the policies related to customer interactions?
- How do we handle meeting notes and action items?
- What are the guidelines for remote work and travel?
- How do we ensure compliance with data privacy regulations?
You can also try your own questions and change the topic list as you see fit.
Combining your graph and vector search skills allow you to create powerful search applications. The larger the dataset you work with, the more effective your search capabilities become.
Key takeaways
In this exercise, you used a small graph to add structure to retrieval. Instead of relying on look alike text only, you first pull candidates by connections like department and topic, then rank that list with pgvector against your question. Because it all runs in one database inside Azure Database for PostgreSQL, the flow stays simple to operate and easy to explain since the filters and paths are visible.
To apply the methods discussed here on your own data, start small. Pick a few entities and relationships that matter, link them to your rows, use a short openCypher query to fetch candidate ids, then apply vector ranking. Tighten or relax the filters as needed, swap in other concepts, and keep the workflow in SQL so it’s straightforward to maintain.