Use the REST API to run vector search queries
In this exercise you’ll set up your project, create an index, upload your documents, and run queries.
You’ll need the following to successfully this exercise:
- The Postman app
- An Azure subscription
- Azure AI Search service
- The Postman sample collection located in this repository - Vector-Search-Quickstart.postman_collection v1.0 json.
Note You can find more information about the Postman app here if required.
Set up your project
First set up your project by carrying out the following steps:
-
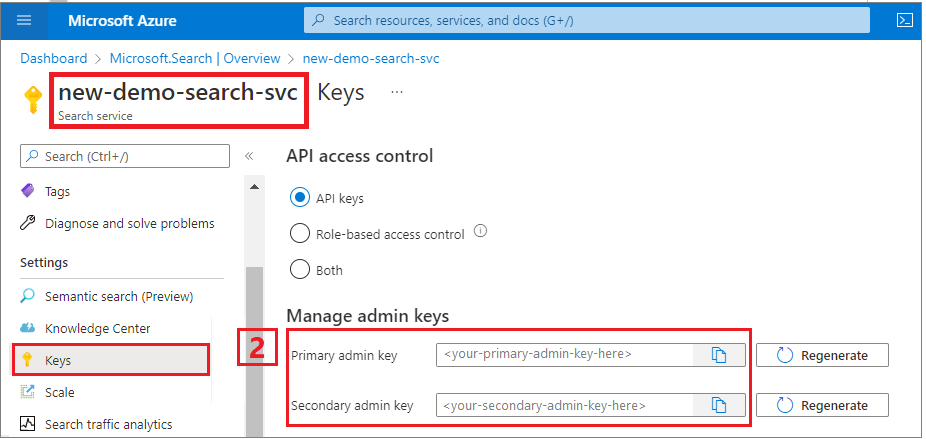
Note the URL and Key from your Azure AI Search service.
- Download the Postman sample collection.
-
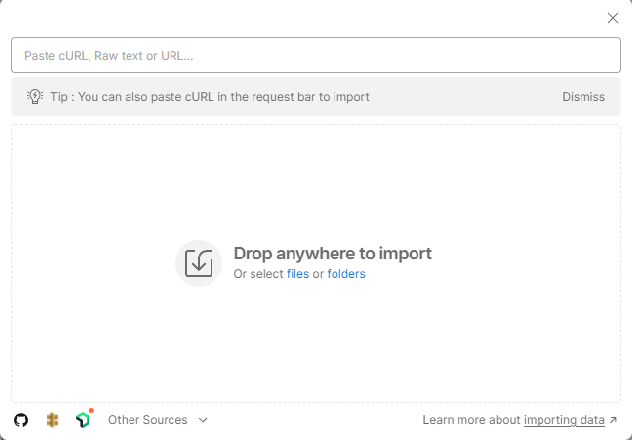
Open Postman and import the collection by selecting the Import button and drag and drop the collection folder into the box.
- Select the Fork button to create a fork of the collection and add a unique name.
- Right-click your collection name and select Edit.
-
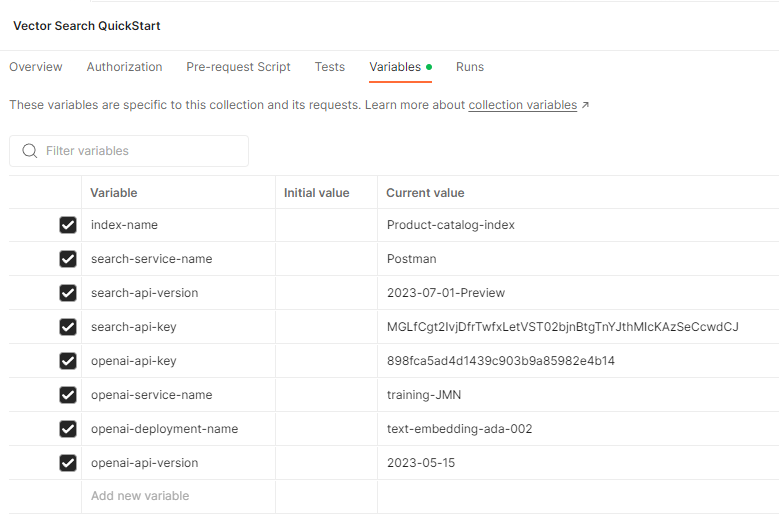
Select the Variables tab and enter the following values using the search service and index names from your Azure AI Search service:
- Save your changes by selecting the Save button.
You’re ready to send your requests to the Azure AI Search service.
Create an Index
Next, create your index in Postman:
- Select PUT Create/Update Index from the side menu.
- Update the URL with your search-service-name, index-name and api-version that you noted earlier.
- Select the Body tab to see the response.
- Set the index-name with your index name value from your URL and select Send.
You should see a status code of type 200 which indicates a successful request.
Upload Documents
There are 108 documents included in the Upload Documents request, each one has a full set of embeddings for the titleVector and contentVector fields.
- Select POST Upload Docs from the side menu.
- Update the URL with your search-service-name, index-name and api-version as before.
- Select the Body tab to see the response and select Send.
You should see a status code of type 200 to show that your request was successful.
Run Queries
-
Now try running the following queries on the side menu. To do this, make sure to update the URL each time as before and send a request by selecting Send:
- Single Vector search
- Single Vector search w/Filter
- Simple hybrid search
- Simple hybrid search w/Filter
- Cross-field search
- Multi-Query search
-
Select the Body tab to see the response and view the results.
You should see a status code of type 200 for a successful request.
Clean-up
Now that you’ve completed the exercise, delete all the resources you no longer need. Start with the code cloned to your machine. Then delete the Azure resources.