Set up semantic ranker
Note To complete this lab, you will need an Azure subscription in which you have administrative access. This exercise also requires the Azure AI Search service with a billable tier.
In this exercise, you will add semantic ranker to an index and use semantic ranker for a query.
Enable semantic ranker
- Open the Azure portal and sign in.
- Select All resources and select your search service.
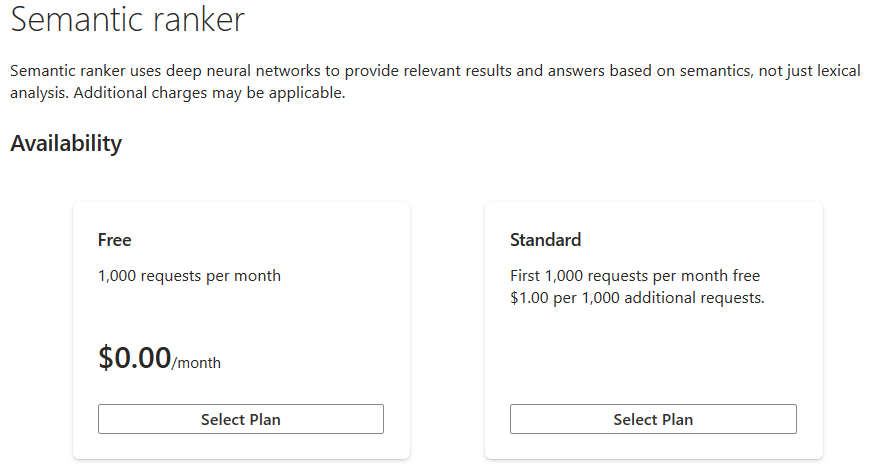
- In the navigation pane, select Semantic ranker.
- In Availability, in the Free option, select Select Plan.
Import a sample index
- Return to the Overview page of your search service.
-
Select Import data.

- In Data Source, select Samples.
- Select hotels-sample and select Next: Add cognitive skills (Optional).
- Select Skip to: Customize target index.
- Select Next: Create an indexer.
- Select Submit.
Configure semantic ranking
Once you have a search index and semantic ranker enabled, you can configure semantic ranking. You require a search client that supports preview APIs on the query request. You could use Search explorer in the Azure portal, the Postman app, the Azure SDK for .NET, or the Azure SDK for Python. In this exercise, you will use Search explorer in the Azure portal.
To configure semantic ranking, follow these steps:
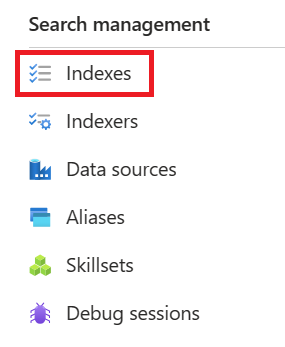
-
On the navigation bar, in Search management, select Indexes.
- Select your index.
- Select Semantic configurations and select Add semantic configuration.
- In Name type hotels-conf.
- In Title field select HotelName.
- Under Content fields, in Field name, select Description.
- Repeat the previous step for the following fields:
- Category
- Address/City
- Under Keyword fields, in Field name, select Tags.
- Select Save.
- On your index page, select Save.
- Select Search explorer.
- Select View and select JSON view.
-
In JSON query editor type the following text:
{ "queryType": "semantic", "queryLanguage" : "en-us", "search": "all hotels near the water" , "semanticConfiguration": "hotels-conf" , "searchFields": "", "speller": "lexicon" , "answers": "extractive|count-3", "count": true } - Select Search.
- Review the results of the query.
Clean-up
If you no longer require the Azure AI Search service, you should delete the resource from your Azure subscription to reduce costs.
Note Deleting your Azure AI Search service ensures your subscription won’t be charged for resources. You will however be charged a small amount for data storage as long as the storage exists in your subscription. If you have finished exploring the Cognitive Search service, you can delete the Cognitive Search service and associated resources. However, if you plan to complete any other labs in this series, you will need to recreate it. To delete your resources:
- In the Azure portal, in the Resource groups page, open the resource group you specified when creating your Cognitive Search service.
- Click Delete resource group, type the resource group name to confirm you want to delete it, and select Delete.