Debug search issues
You’ve built your search solution but have noticed that there are some warnings on the indexer.
In this exercise, you’ll create an Azure AI Search solution, import some sample data, and then resolve a warning on the indexer.
Note To complete this exercise, you will need a Microsoft Azure subscription. If you don’t already have one, you can sign up for a free trial at https://azure.com/free.
Create your search solution
Before you can begin using a Debug Session, you need to create an Azure AI Search service.
-
Deploy resources to Azure - if you’re in a hosted VM, copy this link and paste into the VM browser. Otherwise, select this link to deploy all the resources you need in the Azure portal.

- Under Resource Group, select your provided resource group or select Create new and type debug-search-exercise.
- Select the closest Region to you, or use the default.
- For Resource Prefix, enter debugsearch and add a random combination of numbers or characters to ensure the storage name is unique.
- For the Location, select the same region you used above.
- At the bottom of the pane, select Review + create.
- Wait until the resource is deployed, then select Go to resource group.
Import sample data and configure resources
With your resources created, you can now import your source data.
- In the listed resources, navigate to the storage account. Go to Configuration in the left pane, set Allow Blob anonymous access to Enabled and then select Save.
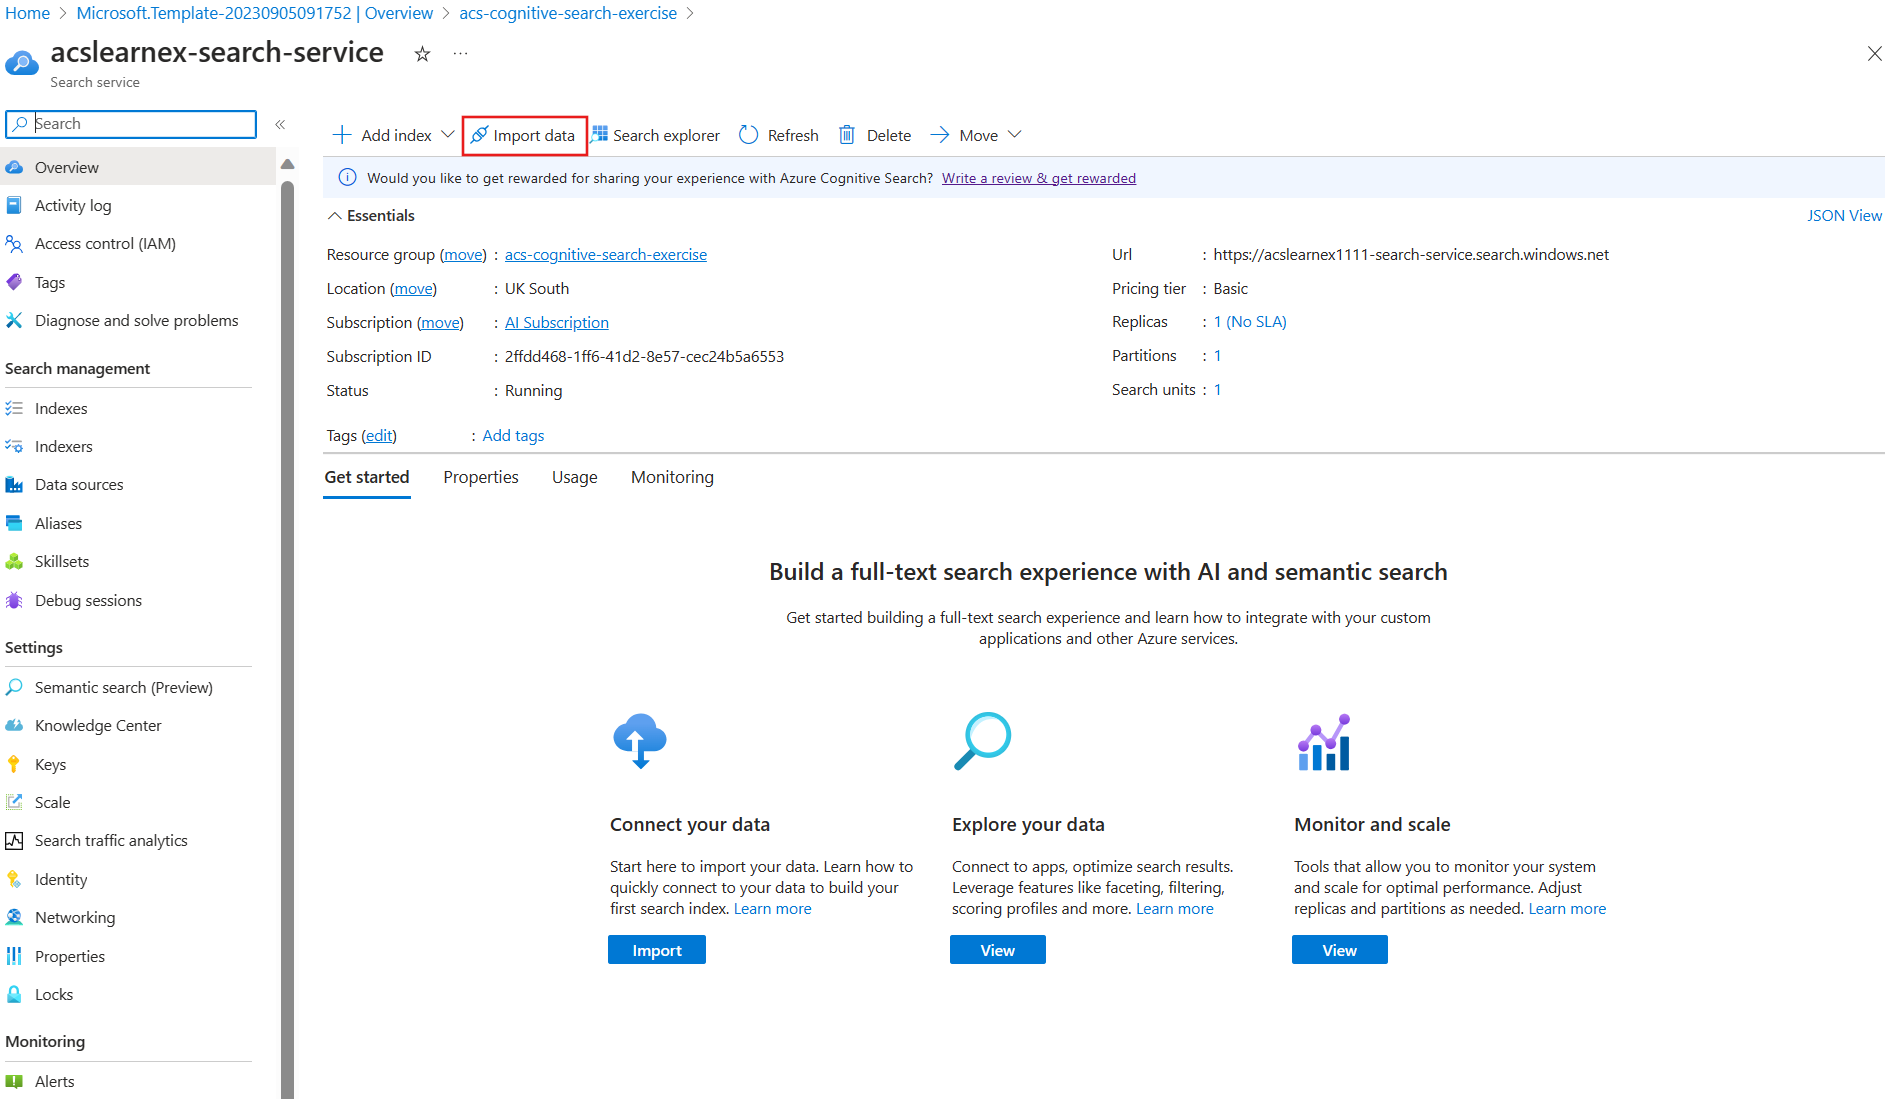
- Navigate back to your resource group, and select the search service.
-
On the Overview pane, select Import data.
-
On the import data pane, for the Data Source, select Samples.
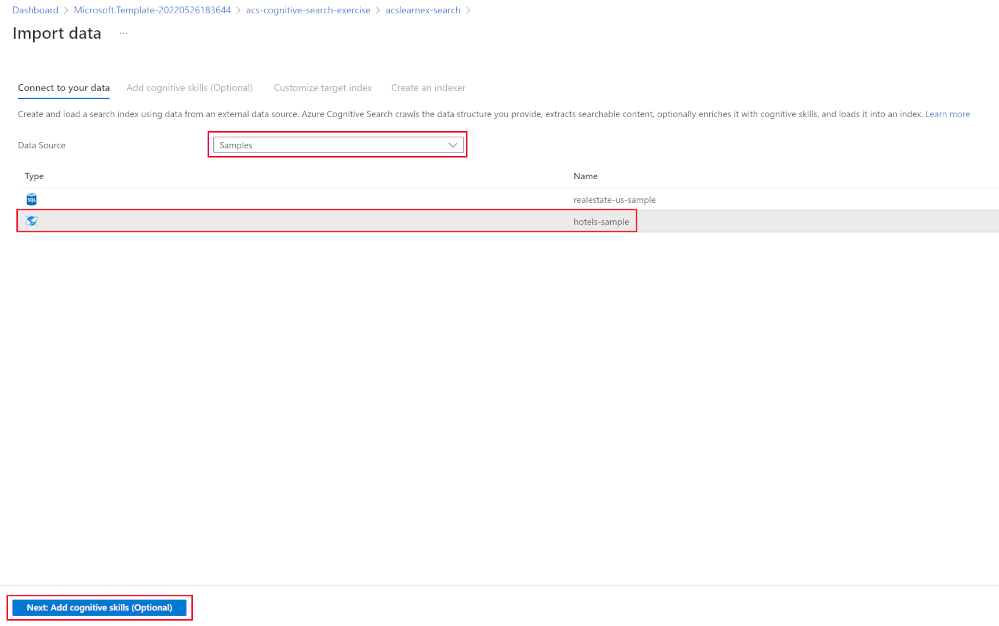
- In the list of samples, select hotels-sample.
- Select Next:Add cognitive skills (Optional).
-
Expand the Add enrichments section.
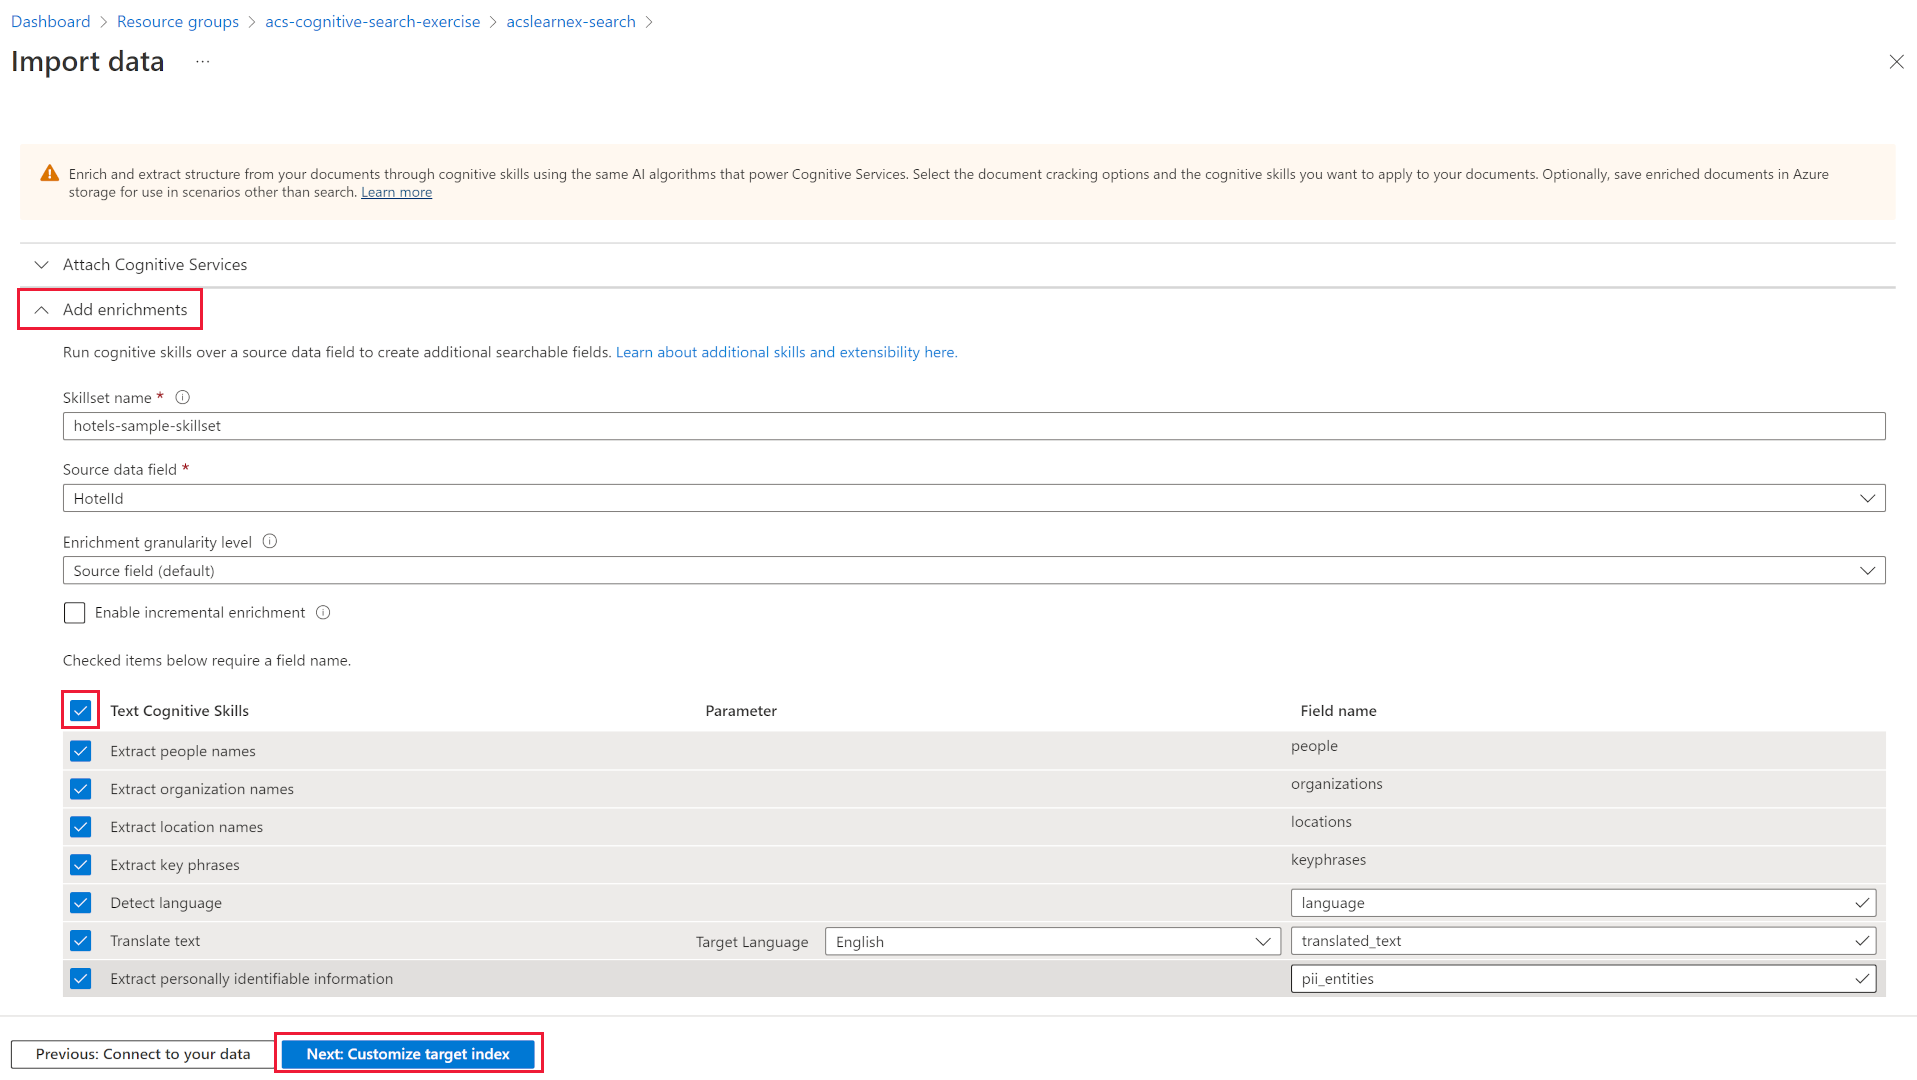
- Select Text Cognitive Skills.
- Select Next:Customize target index.
- Leave the defaults, then select Next:Create an indexer.
- Select Submit.
Use a debug session to resolve warnings on your indexer
The indexer will now begin to ingest 50 documents. However, if you check the status of the indexer you’ll find that there’s warnings.
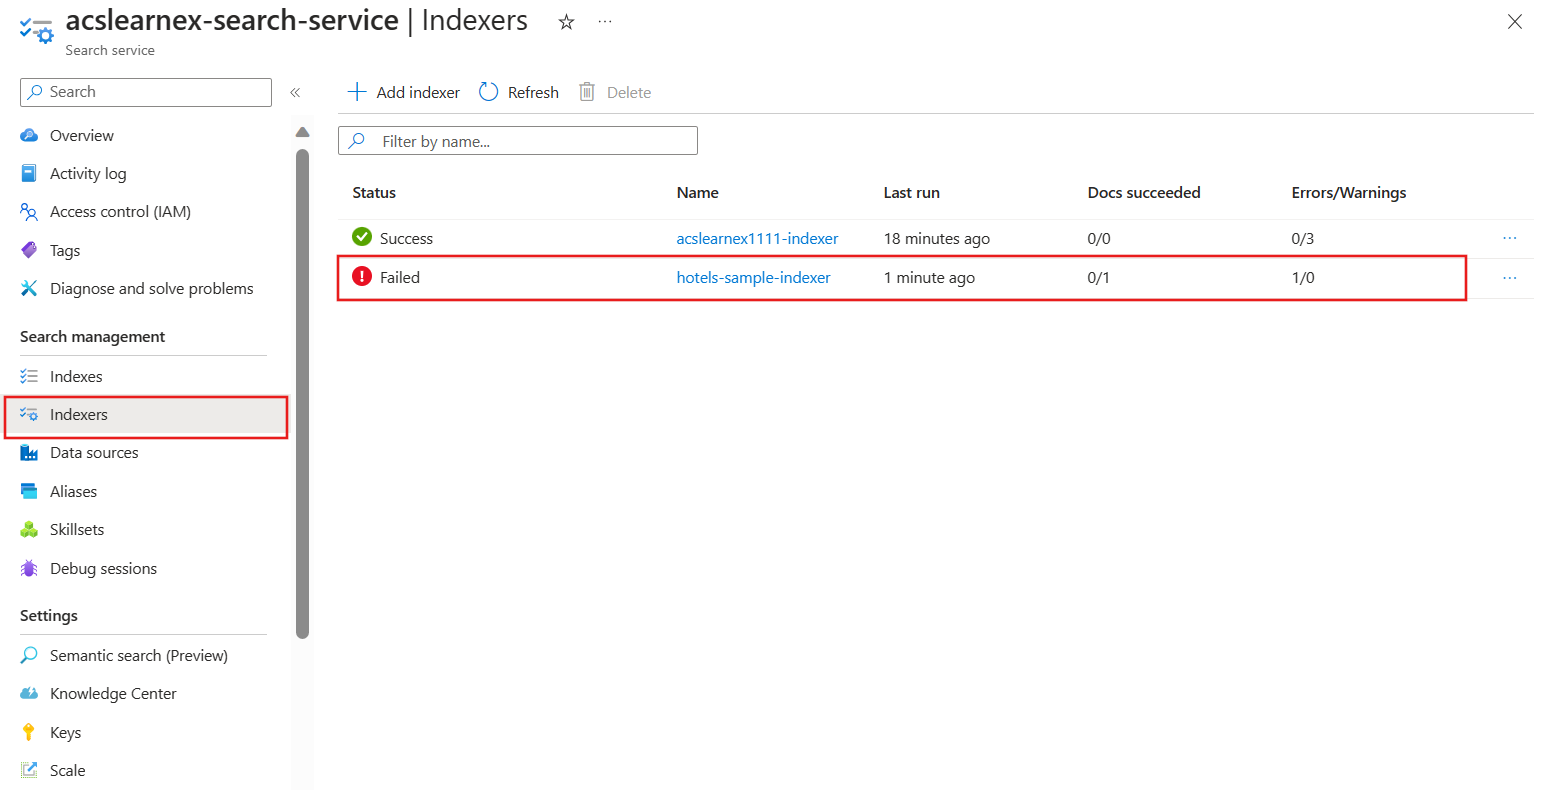
- Select Debug sessions in the left pane.
- Select + Add Debug Session.
- Provide a name for the session, and select hotel-sample-indexer for the Indexer Template.
- Select your storage account from the Storage account field. This will automatically create a storage container for you to hold the debug data.
- Leave the checkbox for authenticating using a managed identity unchecked.
- Select Save.
-
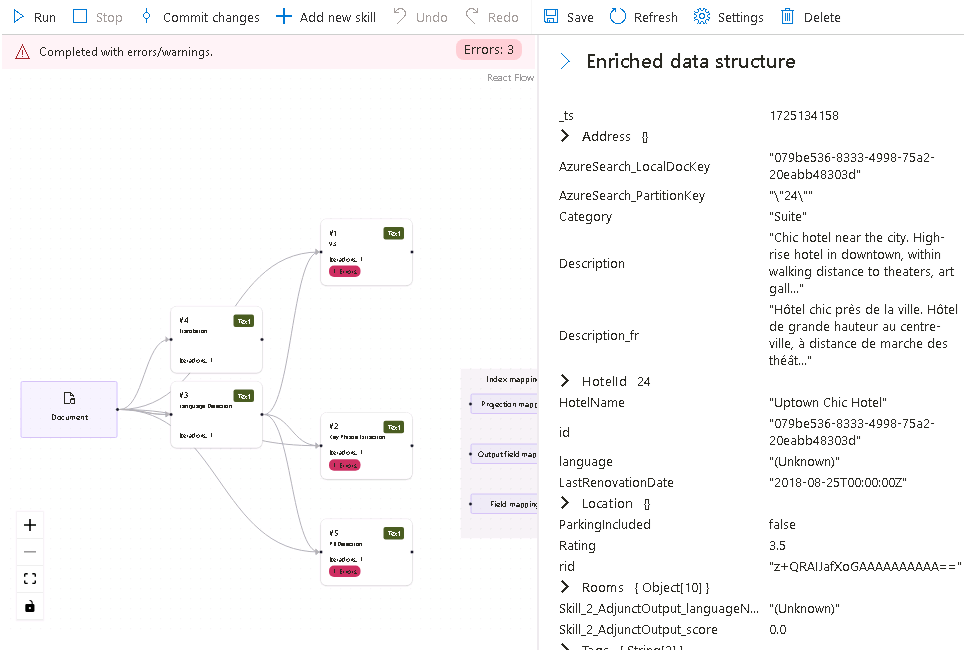
Once created, the debug session will automatically run on the data in your search service. It should complete with errors/warnings.
The dependency graph shows you that for each document there’s an error on three skills.
Note: You may see an error about connecting to the storage account and configuring managed identities. This happens if you try to debug too quickly after enabling anonymous blob access, and running the debug session should still work. Refreshing the browser window after a few minutes should remove the warning.
- In the dependency graph, select one of the skill nodes that have an error.
-
On the skills details pane, select Errors/Warnings(1).
The details are:
Invalid language code ‘(Unknown)’. Supported languages: af,am,ar,as,az,bg,bn,bs,ca,cs,cy,da,de,el,en,es,et,eu,fa,fi,fr,ga,gl,gu,he,hi,hr,hu,hy,id,it,ja,ka,kk,km,kn,ko,ku,ky,lo,lt,lv,mg,mk,ml,mn,mr,ms,my,ne,nl,no,or,pa,pl,ps,pt-BR,pt-PT,ro,ru,sk,sl,so,sq,sr,ss,sv,sw,ta,te,th,tr,ug,uk,ur,uz,vi,zh-Hans,zh-Hant. For additional details see https://aka.ms/language-service/language-support.
If you look back at the dependency graph, the Language Detection skill has outputs to the three skills with errors. If you look at the skill settings with errors, you’ll see the skill input causing the error is
languageCode. -
In the dependency graph, select Language detection.
 Looking at the skill settings JSON, note the field being used to deduce the language is the
 HotelId.This field will be causing the error as the skill can’t work out the language based on an ID.
Resolve the warning on the indexer
- Select source under inputs, and change the field to
/document/Description. - Select Save.
-
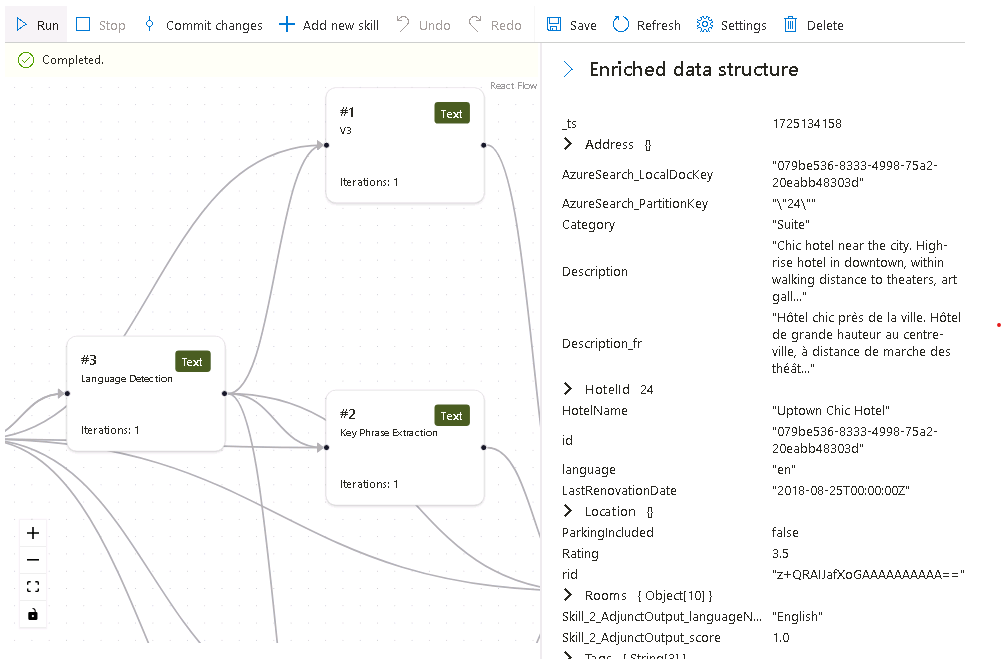
Select Run. The indexer should no longer have any errors or warnings. The skillset can now be updated.
- Select Commit changes to push the changes made in this session to your indexer.
- Select OK. You can now delete your session.
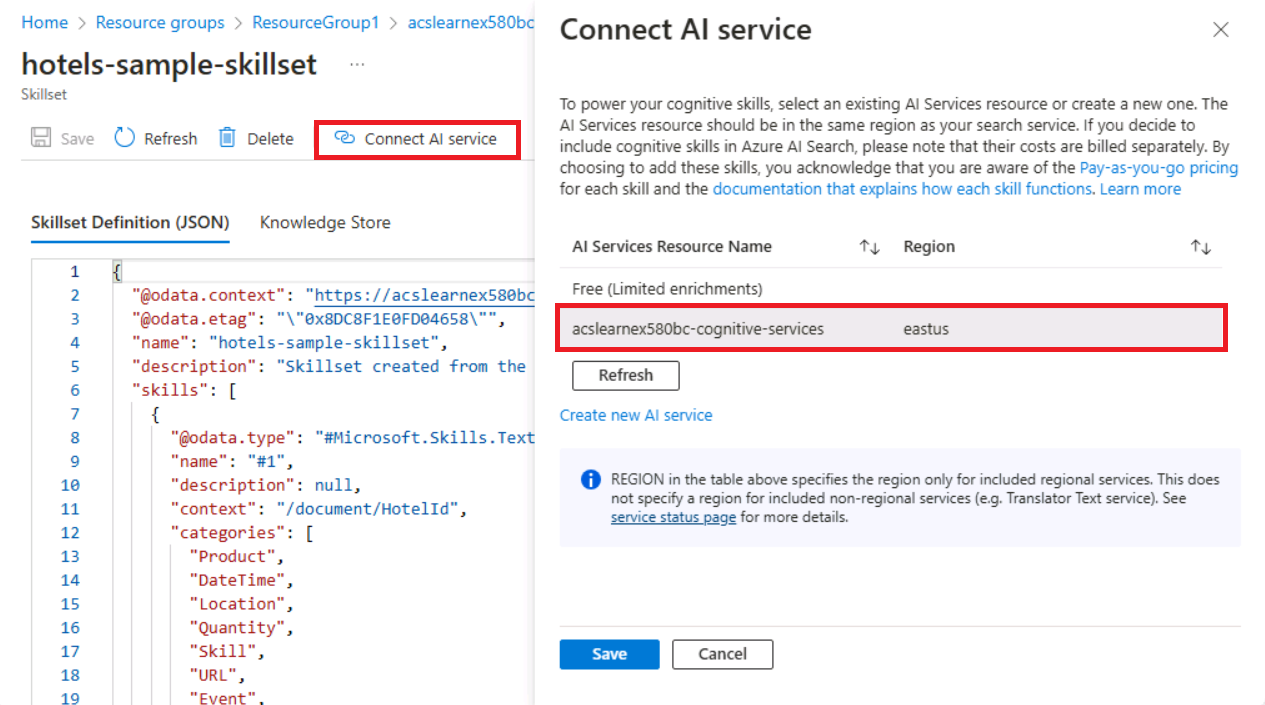
Now you need to make sure that your skillset is attached to an Azure AI Services resource, otherwise you’ll hit the basic quota and the indexer will timeout.
-
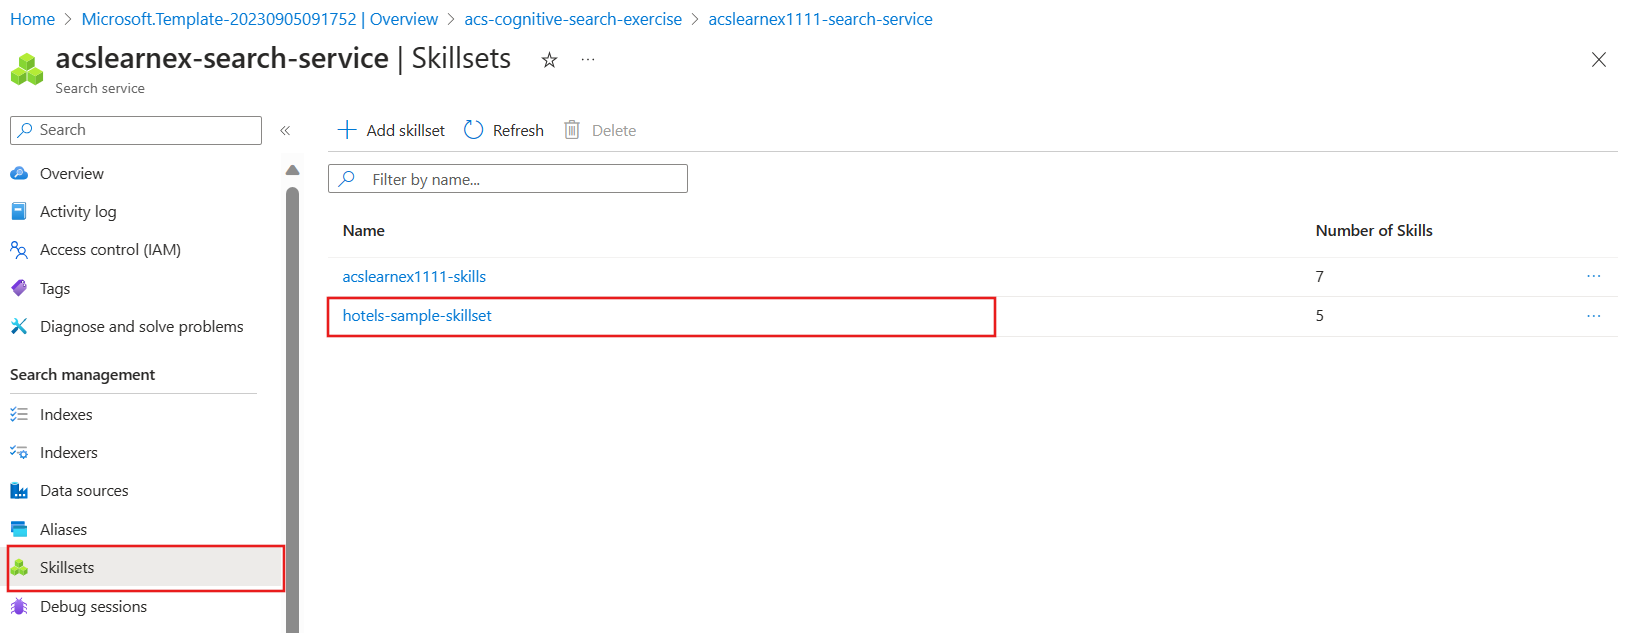
To do this, select Skillsets in the left pane, then select your hotels-sample-skillset.
-
Select Connect AI Service, then select the AI services resource in the list.
-
Select Save.
-
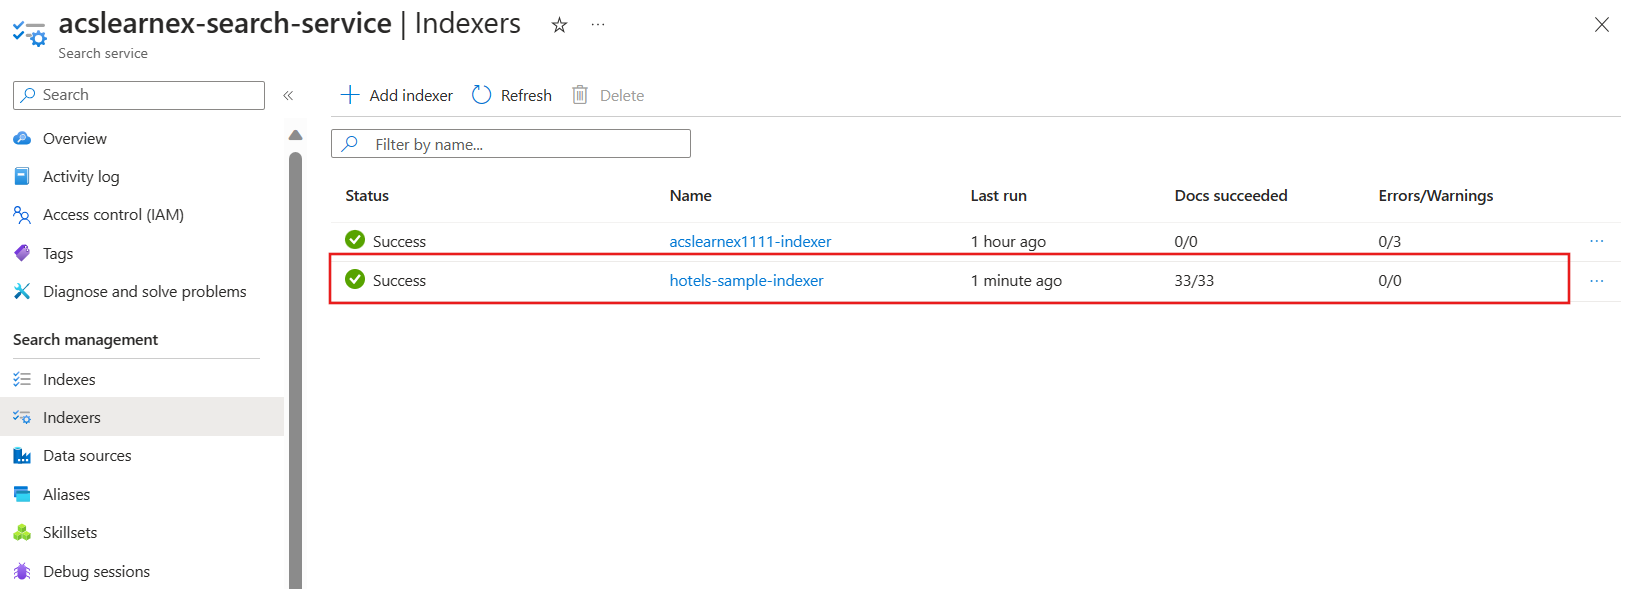
Now run your indexer to update the documents with the fixed AI enrichments. To do this select Indexers in the left pane, select hotels-sample-indexer, then select Run. When it has finished running, you should see that the warnings are now zero.
Clean-up
Now you’ve completed the exercise, if you’ve finished exploring Azure AI Search services, delete the Azure resources that you created during the exercise. The easiest way to do this is delete the debug-search-exercise resource group.