Enrich a search index using Azure Machine Learning model
You can use the power of machine learning to enrich a search index. To do this, you’ll use a model trained in Azure AI Machine Learning studio and call it from a machine learning custom skillset.
In this exercise, you’ll create an Azure AI Machine Learning Studio model, then train, deploy, and test an endpoint using the model. Then you’ll create an Azure Cognitive Search service, create sample data, and enrich an index using the Azure AI Machine Learning studio endpoint.
Note To complete this exercise, you will need a Microsoft Azure subscription. If you don’t already have one, you can sign up for a free trial at https://azure.com/free.
Create an Azure Machine Learning workspace
Before you enrich your search index, create an Azure Machine Learning workspace. The workspace will give you access to the Azure AI Machine Learning studio, a graphical tool you can use to build AI models and deploy them for use.
- Sign into the Azure portal.
- Select + Create a resource.
- Search for machine learning, and then select Azure Machine Learning.
- Select Create.
- Select Create new under Resource group and name it aml-for-acs-enrichment.
- In the Workspace details section, for Name, enter aml-for-acs-workspace.
- Select a supported Region near to you.
- Use the default values for the Storage account, Key vault, Application insights, and Container registry.
- Select Review + create.
- Select Create.
- Wait for the Azure Machine Learning workspace to be deployed, then select Go to resource.
- On the Overview pane, select Launch studio.
Create a regression training pipeline
You’ll now create a regression model and train it using an Azure AI Machine Learning Studio pipeline. You’ll train your model on automobile price data. The model, once trained, will predict the price of an automobile based on its attributes.
-
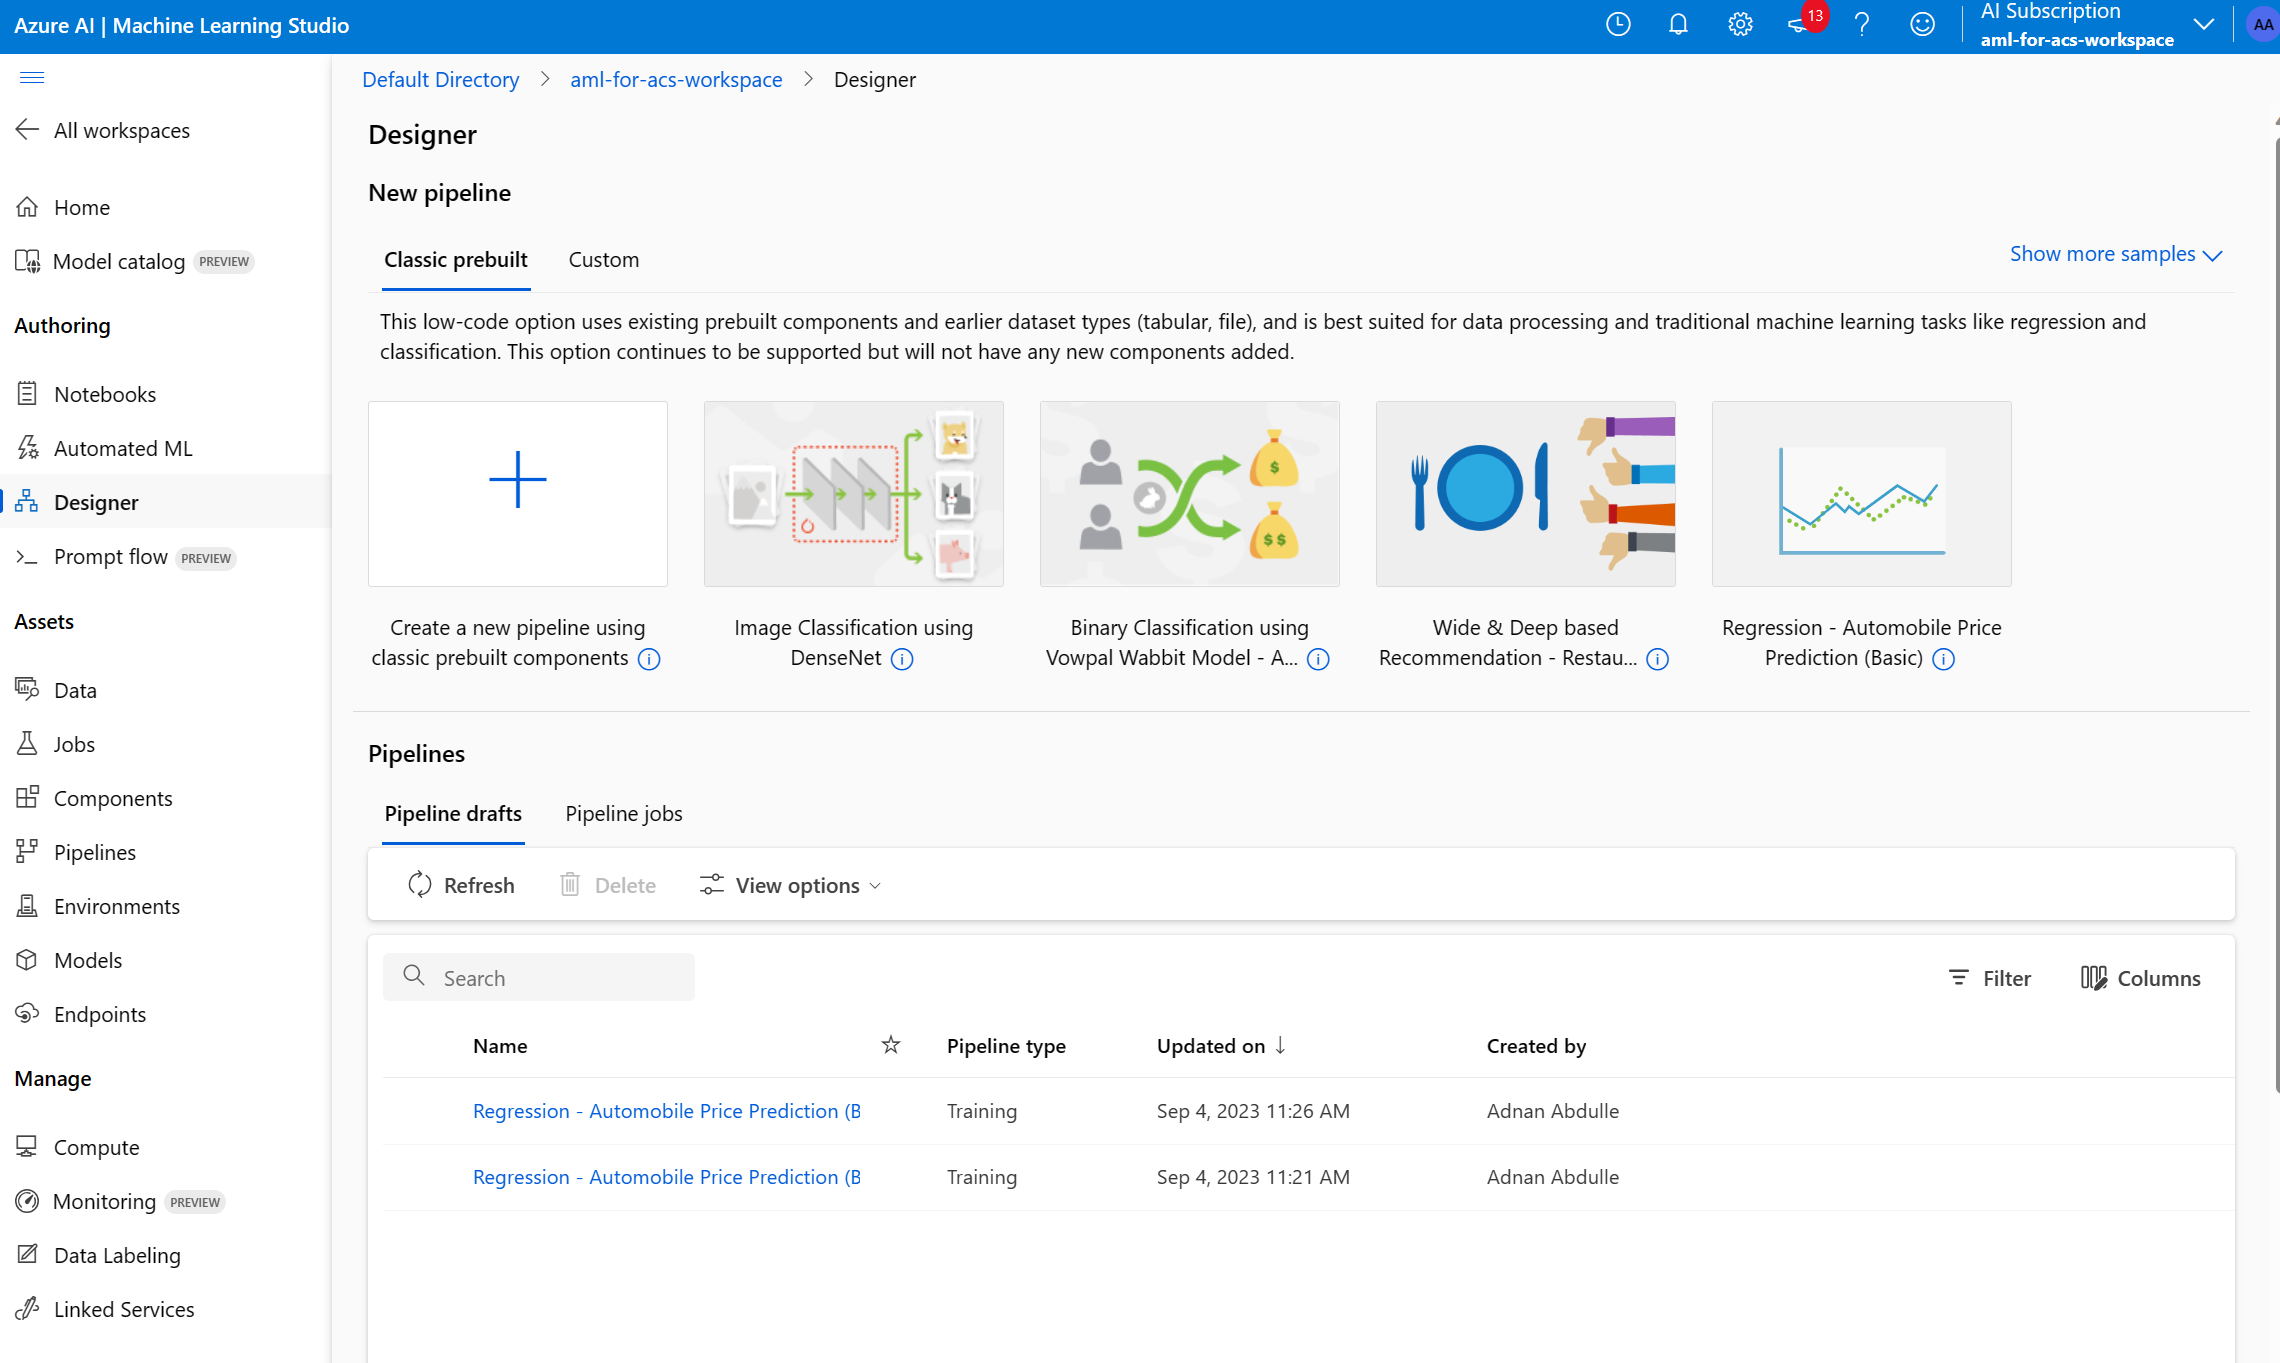
On the home page, select Designer.
-
From the list of prebuilt components, select Regression - Automobile Price Prediction (Basic).
-
Select Validate.
-
On the Graph validation pane, select the error Select compute target in submission wizard.
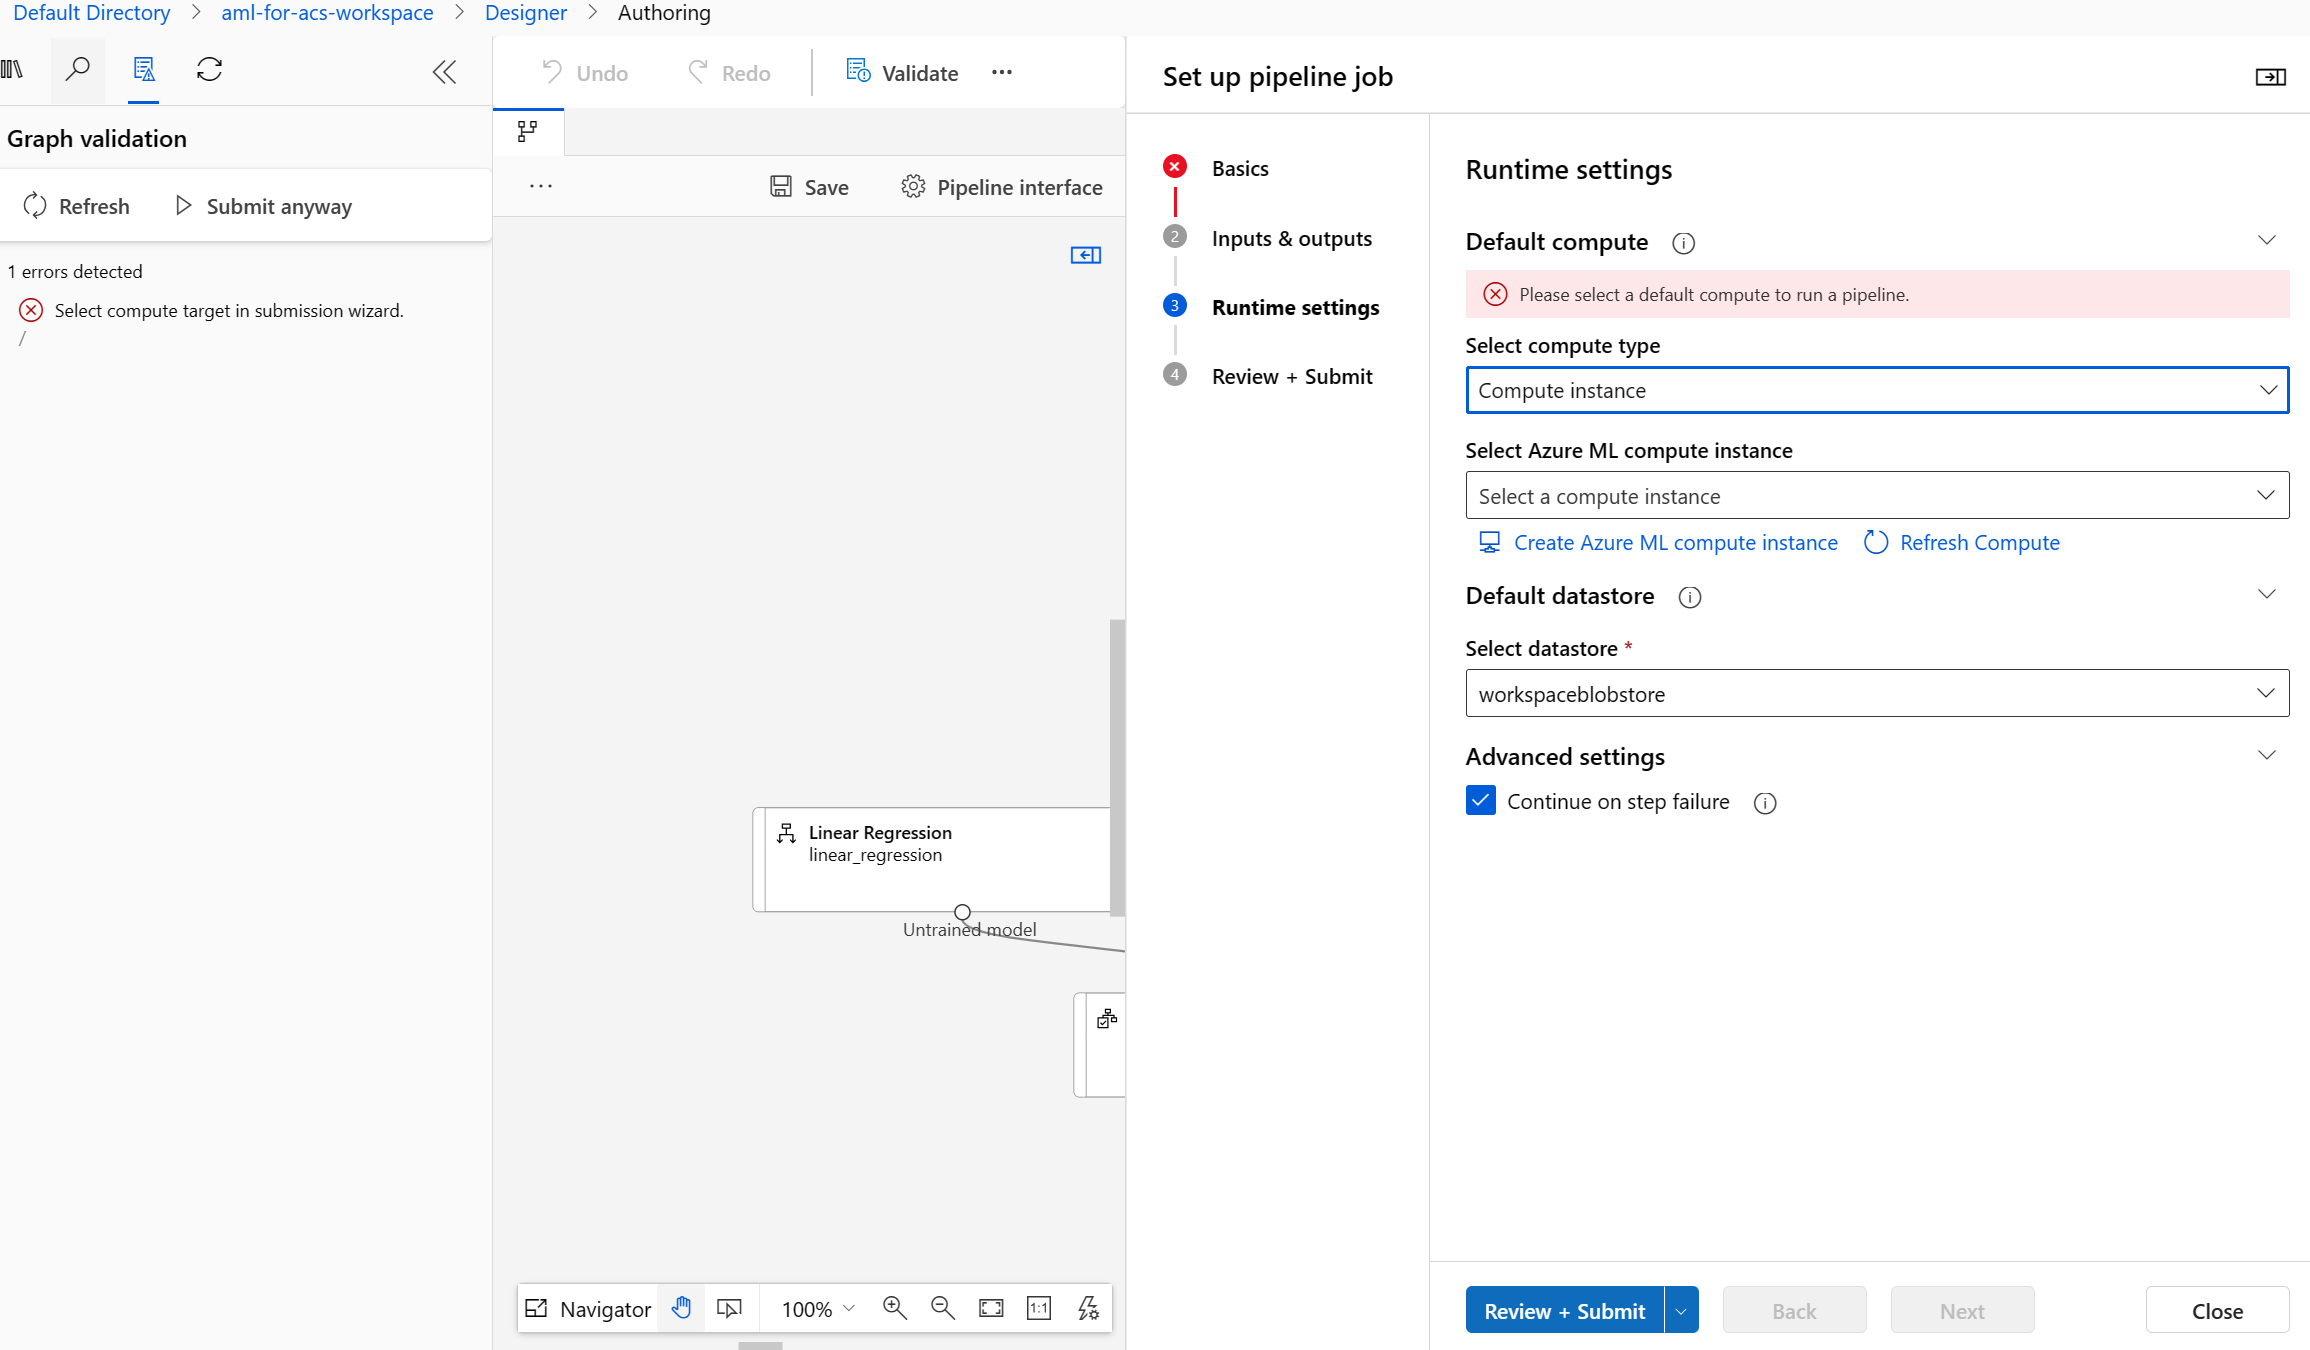
- In the Select compute type dropdown, choose Compute instance. Then select Create Azure ML compute instance underneath.
- In the Compute name field, enter a unique name (such as compute-for-training).
-
Select Review + create, then select Create.
-
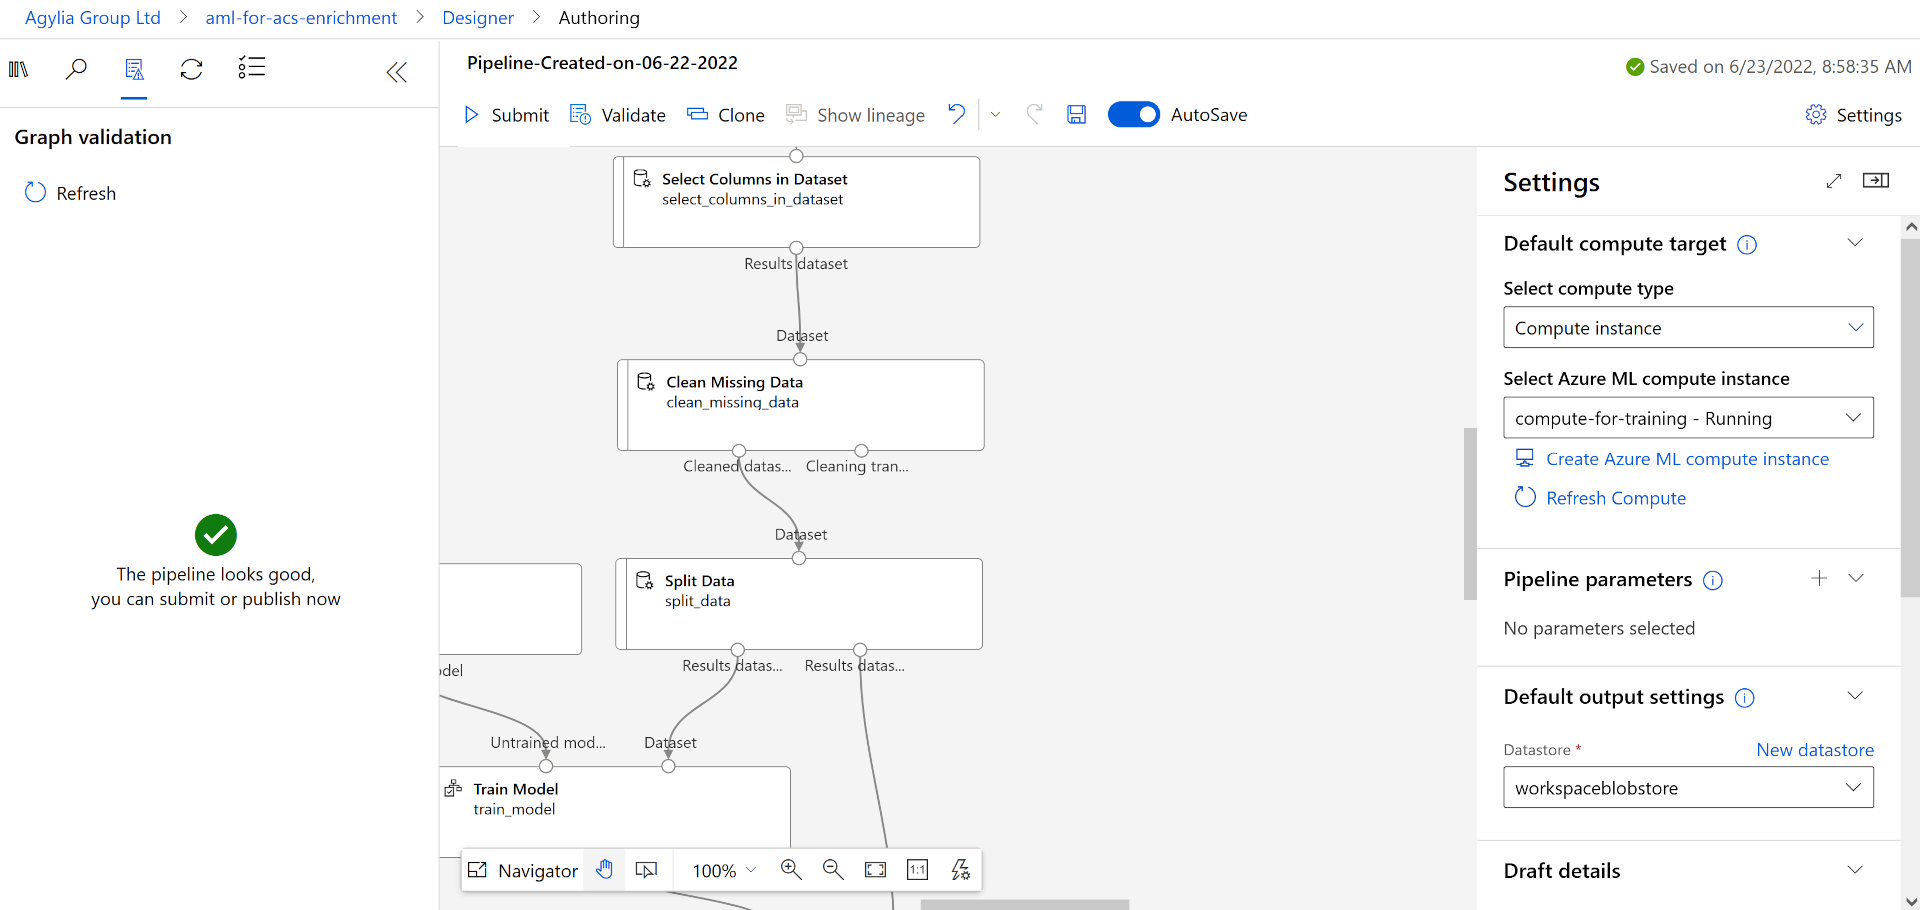
In the Select Azure ML compute instance field, select your instance from the dropdown. You might need to wait until it has finished provisioning.
-
Select Validate again, the pipeline should look good.
- Select Basics in the Set up pipeline job pane.
Note: If you hid the Set up pipeline job pane before, you can open it again by selecting Configure & Submit.
- Select Create new under the Experiment name.
- In New experiment name, enter linear-regression-training.
- Select Review + Submit , then select Submit.
Create an inference cluster for the endpoint
While your pipeline is training a linear regression model, you can create the resources you need for the endpoint. This endpoint needs a Kubernetes cluster to process web requests to your model.
-
On the left, select Compute.
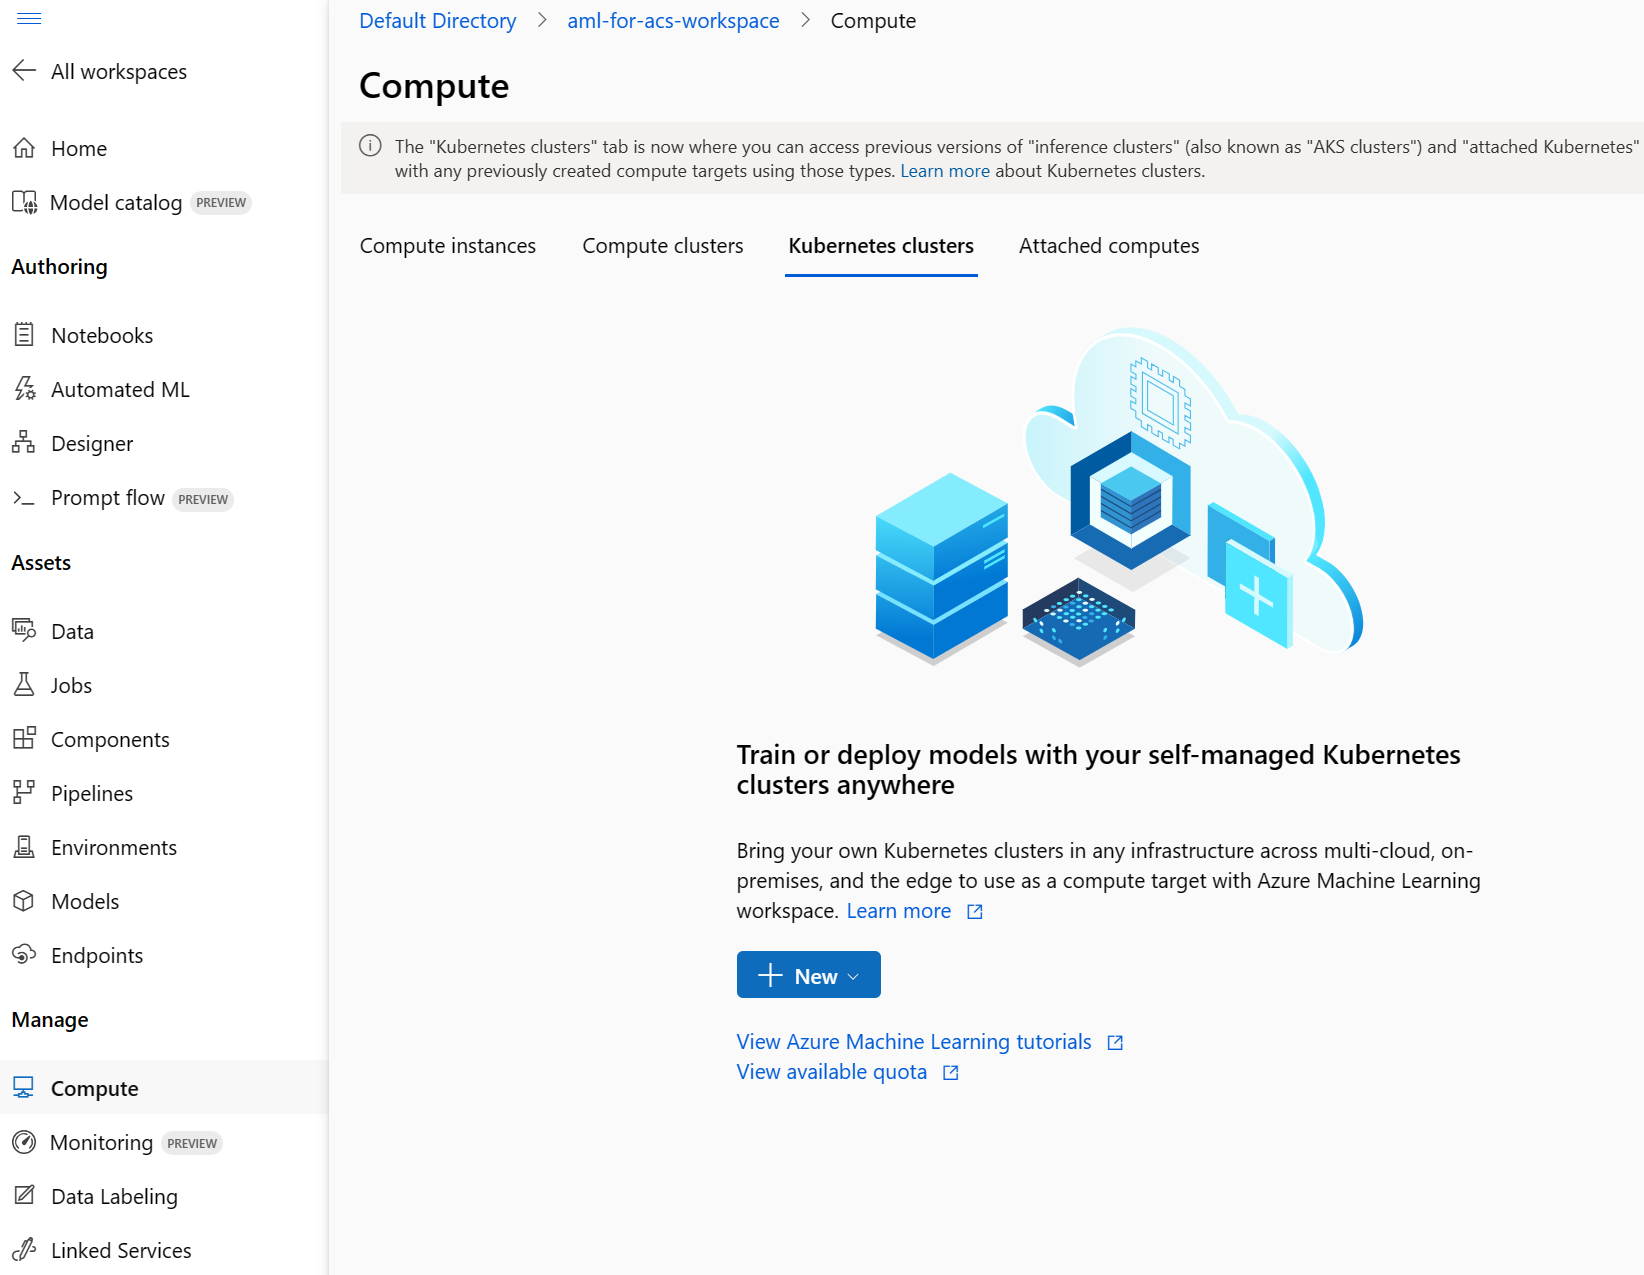
- Select Kubernetes clusters, then select + New.
- In the dropdown, select AksCompute.
- On the Create AksCompute pane, select Create new.
- For Location, select the same region you used to create your other resources.
- In the VM sizes list, select Standard_A2_v2.
- Select Next.
- In Compute name, enter aml-acs-endpoint.
- Select Enable SSL configuration.
- In Leaf domain, enter aml-for-acs.
- Select Create.
Register your trained model
Your pipeline job should have finished. You’ll download the score.py and conda_env.yaml files. Then you’ll register your trained model.
-
On the left, select Jobs.
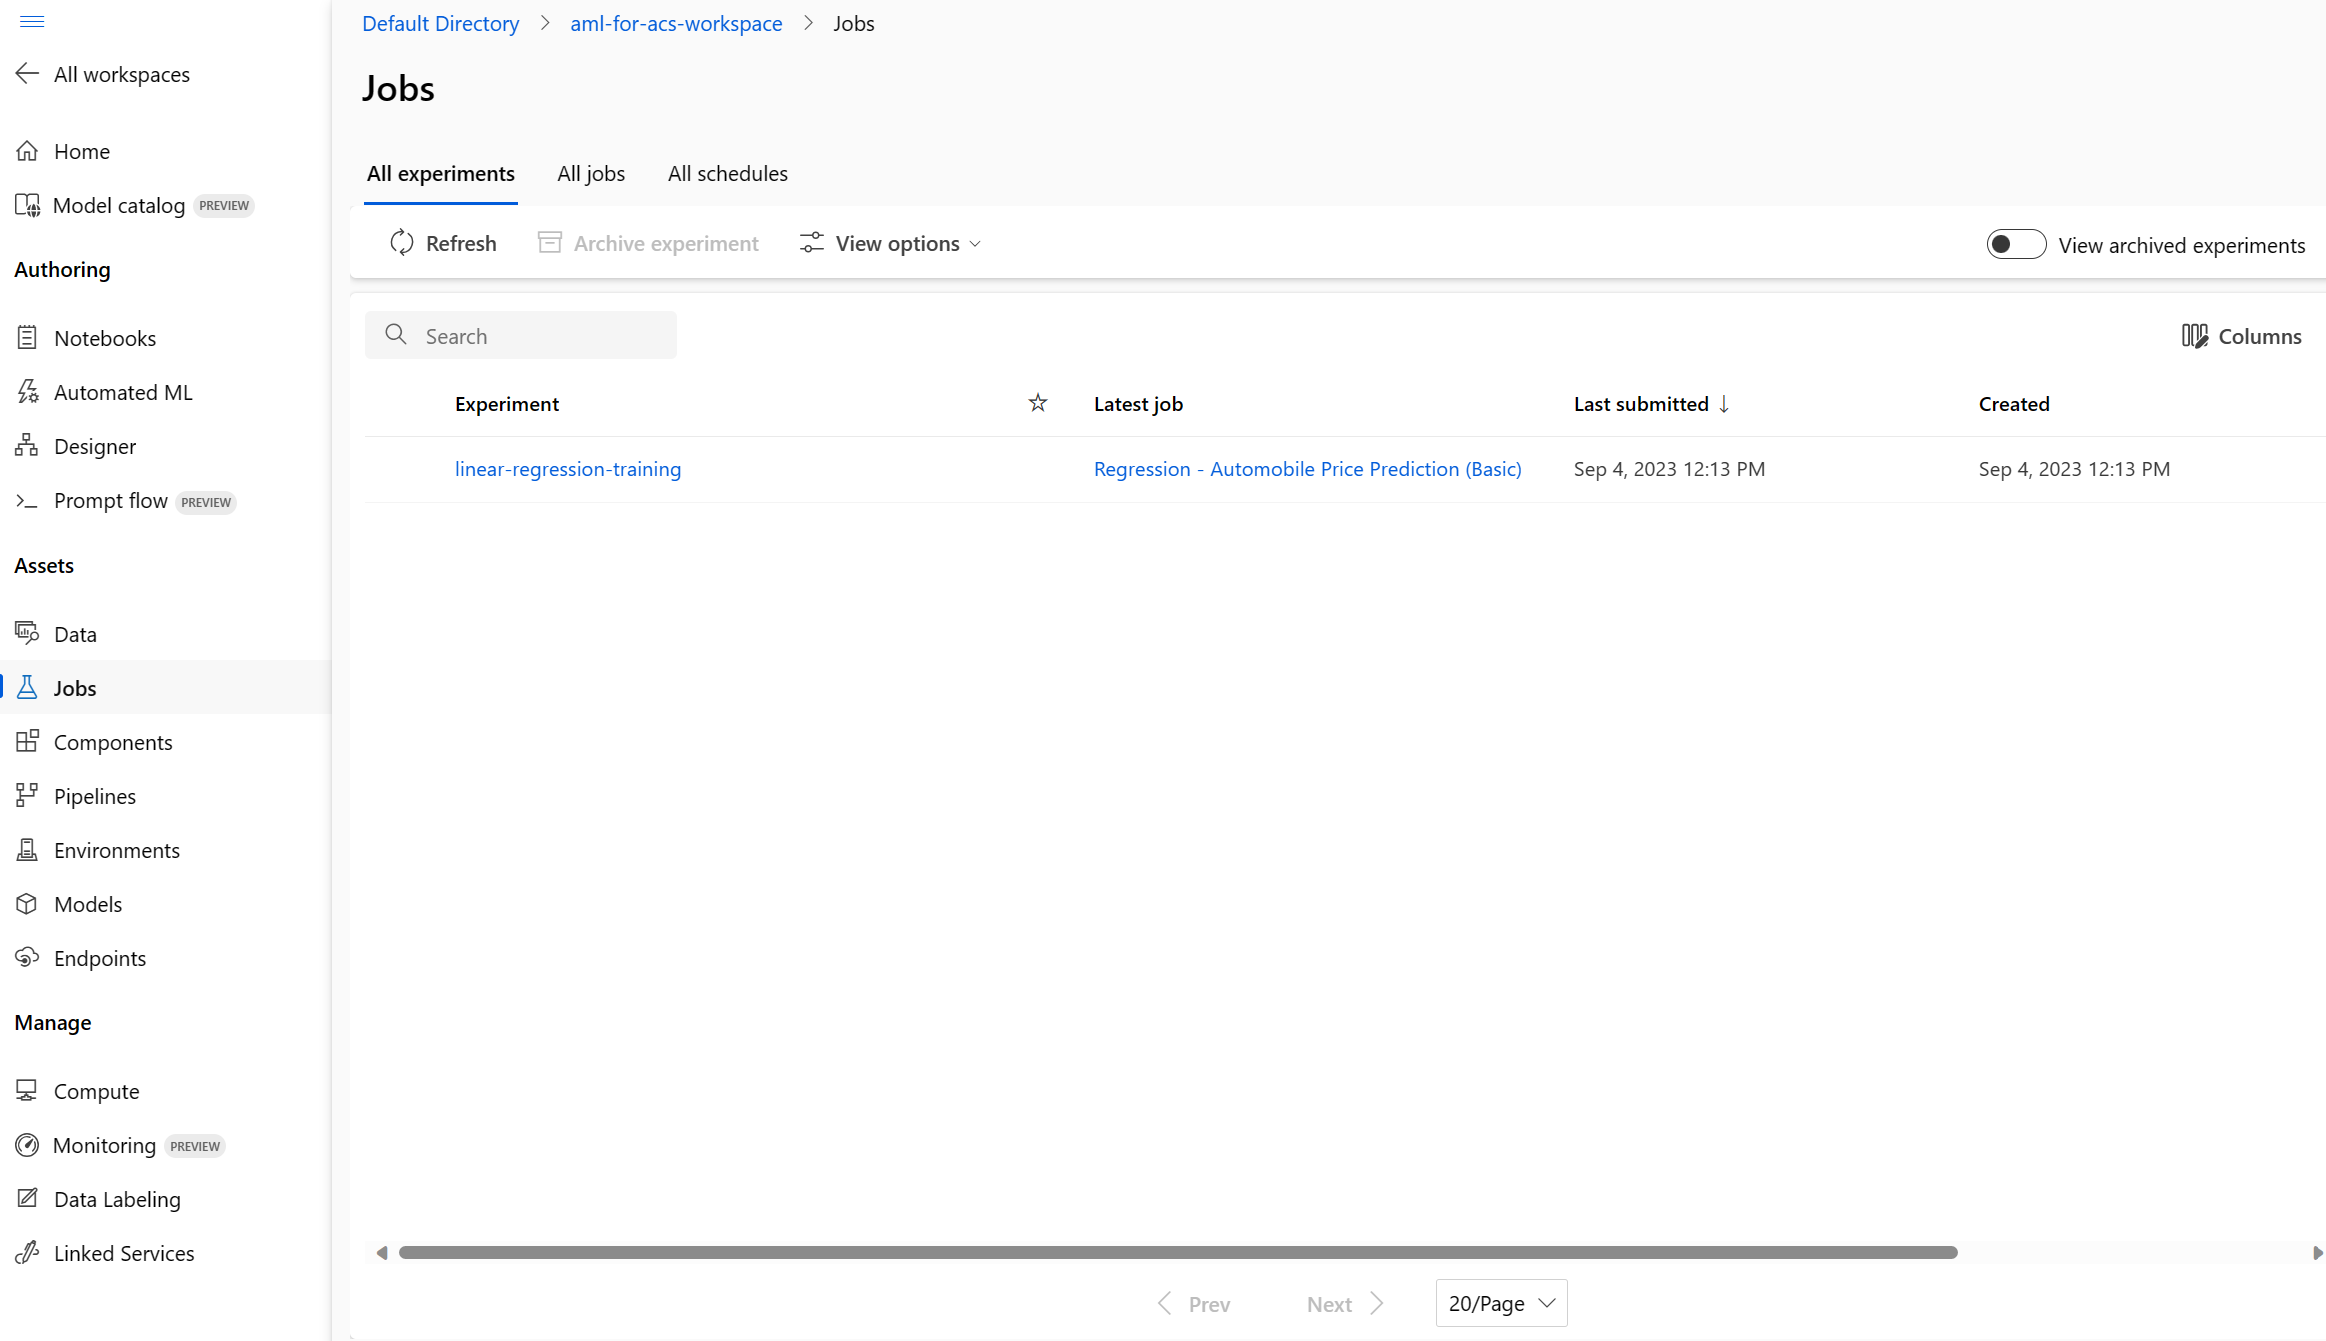
- Select your experiment, then select your completed job in the table, for example, Regression - Automobile Price Prediction (Basic). If you’re prompted to save changes, select Discard for changes.
-
In the designer, select Job overview in the top right, then select the Train Model node.
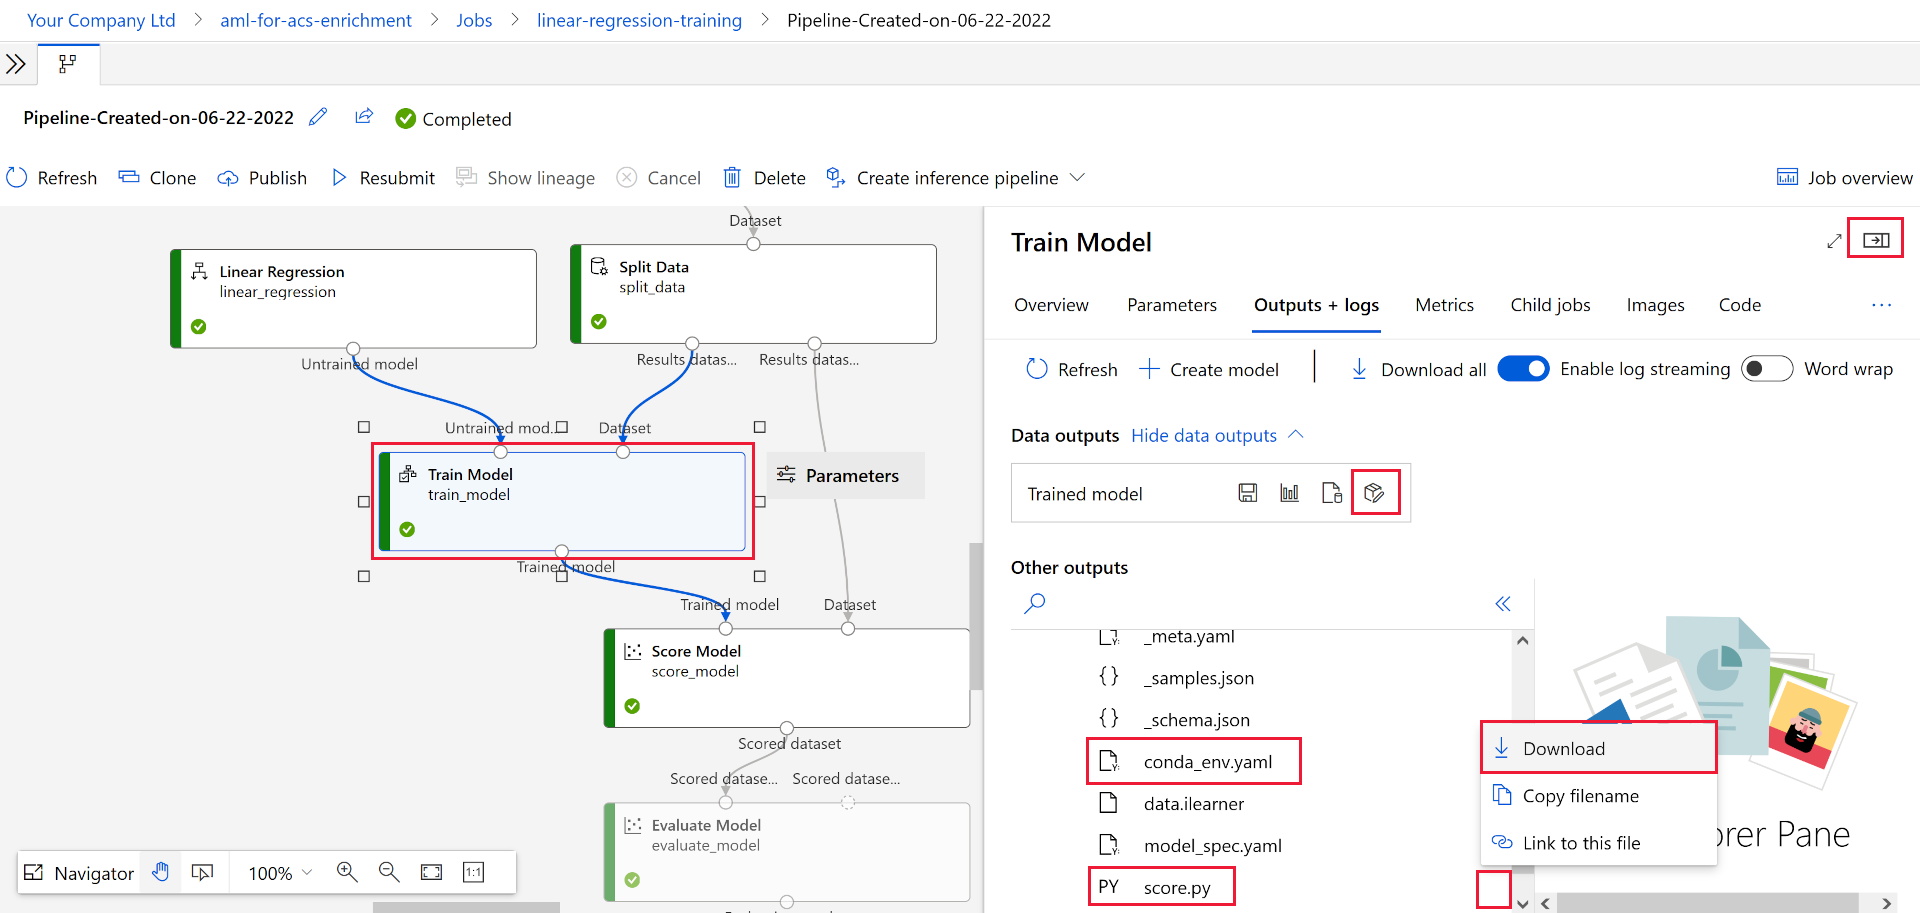
- In the Outputs + logs tab, expand the trained_model_outputs folder.
- Next to
score.py, select the more menu (…), then select Download. - Next to
conda_env.yaml, select the more menu (…), then select Download. - Select + Register model at the top of the tab.
- In the Job output field, select the trained_model_outputs folder. Then select Next at the bottom of the pane.
- For model Name, enter carevalmodel.
- In Description, enter A linear regression model to predict the price of cars..
- Select Next.
- Select Register.
Edit the scoring script to respond to Azure AI Search correctly
Azure Machine Learning Studio has downloaded two files to your web browser’s default download location. You need to edit the score.py file to change how the JSON request and response are handled. You can use a text editor or a code editor like Visual Studio Code.
- In your editor, open the score.py file.
-
Replace all the contents of the run function:
 def run(data):
 data = json.loads(data)
 input_entry = defaultdict(list)
 for row in data:
     for key, val in row.items():
         input_entry[key].append(decode_nan(val))

 data_frame_directory = create_dfd_from_dict(input_entry, schema_data)
 score_module = ScoreModelModule()
 result, = score_module.run(
     learner=model,
     test_data=DataTable.from_dfd(data_frame_directory),
     append_or_result_only=True)
 return json.dumps({"result": result.data_frame.values.tolist()})
With this Python code:
 def run(data):
     data = json.loads(data)
     input_entry = defaultdict(list)

     for key, val in data.items():
             input_entry[key].append(decode_nan(val))

     data_frame_directory = create_dfd_from_dict(input_entry, schema_data)
     score_module = ScoreModelModule()
     result, = score_module.run(
         learner=model,
         test_data=DataTable.from_dfd(data_frame_directory),
         append_or_result_only=True)
     output = result.data_frame.values.tolist()

     return {
             "predicted_price": output[0][-1]
     }
The changes above allow the mode to receive a single JSON object with car attributes instead of an array of cars.
The other change is to only return the predicted price of the car instead of the whole JSON response.
- Save the changes in your text editor.
Create a custom environment
Next, you’ll create a custom environment so you can deploy to a real-time endpoint.
- Select Environments in the navigation pane.
- Select the Custom environments tab.
- Select + Create.
- For Name, enter my-custom-environment.
- In the list of Curated environments under Select environment type, select the latest automl-gpu version.
- Select Next.
- On your local machine, open the
conda_env.yamlfile you downloaded earlier and copy its contents. - Return to browser, and select conda_dependencies.yaml in the Customize pane.
- In the pane on the right, replace its contents with the code you copied earlier.
- Select Next, then select Next again.
- Select Create to create your custom environment.
Deploy the model with the updated scoring code
Your inference cluster should now be ready to use. You’ve also edited the scoring code to handle requests from your Azure Cognitive Search custom skillset. Let’s create and test an endpoint for the model.
- On the left, select Models.
-
Select the model you registered, carevalmodel.
-
Select Deploy, then select Real-time endpoint.
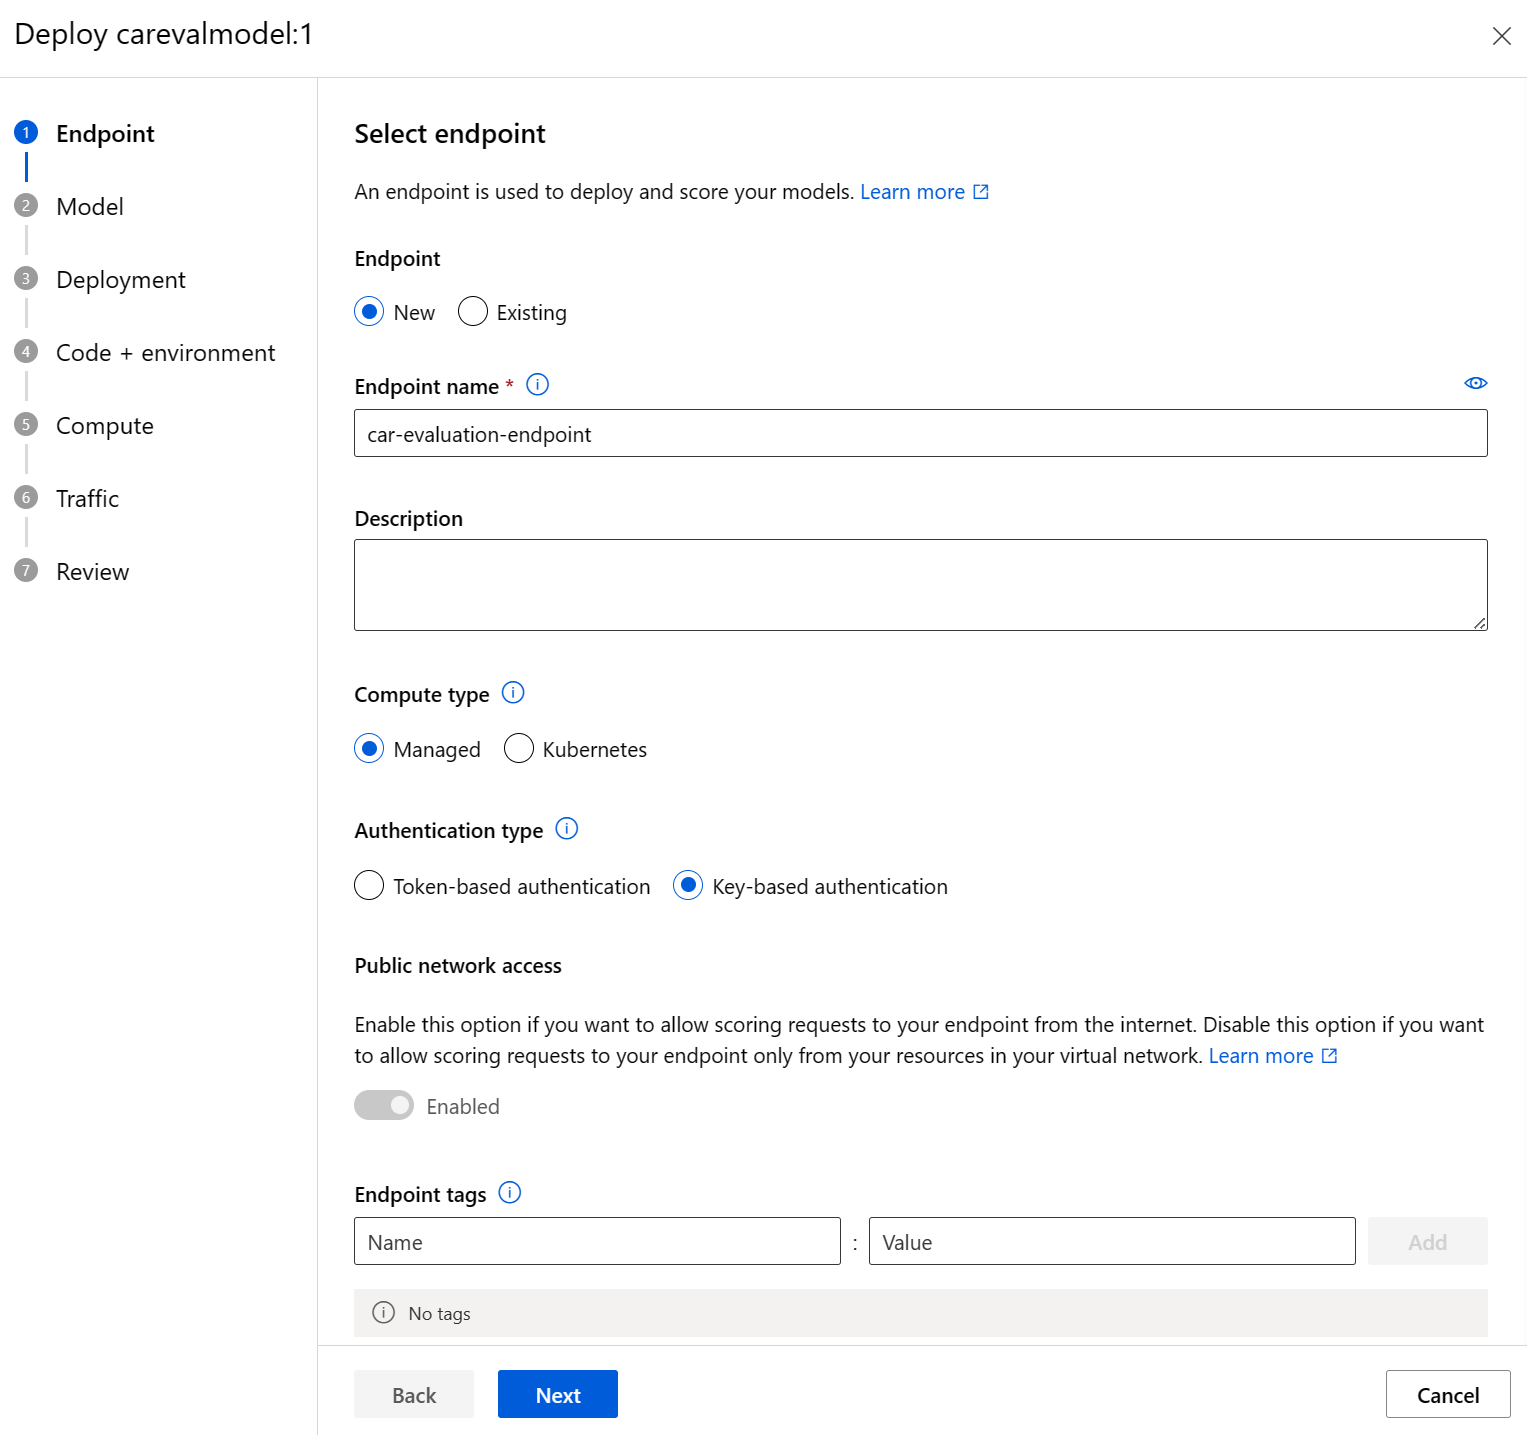
- For Endpoint name, enter a unique name, for example car-evaluation-endpoint-1440637584 .
- For Compute type, select Managed.
- For Authentication type, select Key-based.
- Select Next, then select Next.
- Select Next again.
- In the Select a scoring script for inferencing field, browse to your updated
score.pyfile and select it. - In the Select environment type dropdown, select Custom enviroments.
- Select the checkbox on your custom environment from the list.
- Select Next.
- For Virtual machine, select Standard_D2as_v4.
- Set Instance count to 1.
- Select Next, then select Next again.
- Select Create.
Wait for the model to be deployed, it can take up to 10 minutes. You can check the status in Notifications or the endpoints section of the Azure Machine Learning Studio.
Test your trained model’s endpoint
- On the left, select Endpoints.
- Select car-evaluation-endpoint.
-
Select Test, in Input data to test endpoint paste this example JSON.
{ "symboling": 2, "make": "mitsubishi", "fuel-type": "gas", "aspiration": "std", "num-of-doors": "two", "body-style": "hatchback", "drive-wheels": "fwd", "engine-location": "front", "wheel-base": 93.7, "length": 157.3, "width": 64.4, "height": 50.8, "curb-weight": 1944, "engine-type": "ohc", "num-of-cylinders": "four", "engine-size": 92, "fuel-system": "2bbl", "bore": 2.97, "stroke": 3.23, "compression-ratio": 9.4, "horsepower": 68.0, "peak-rpm": 5500.0, "city-mpg": 31, "highway-mpg": 38, "price": 0.0 } -
Select Test, and you should see a response:
{ "predicted_price": 5852.823214312815 } -
Select Consume.
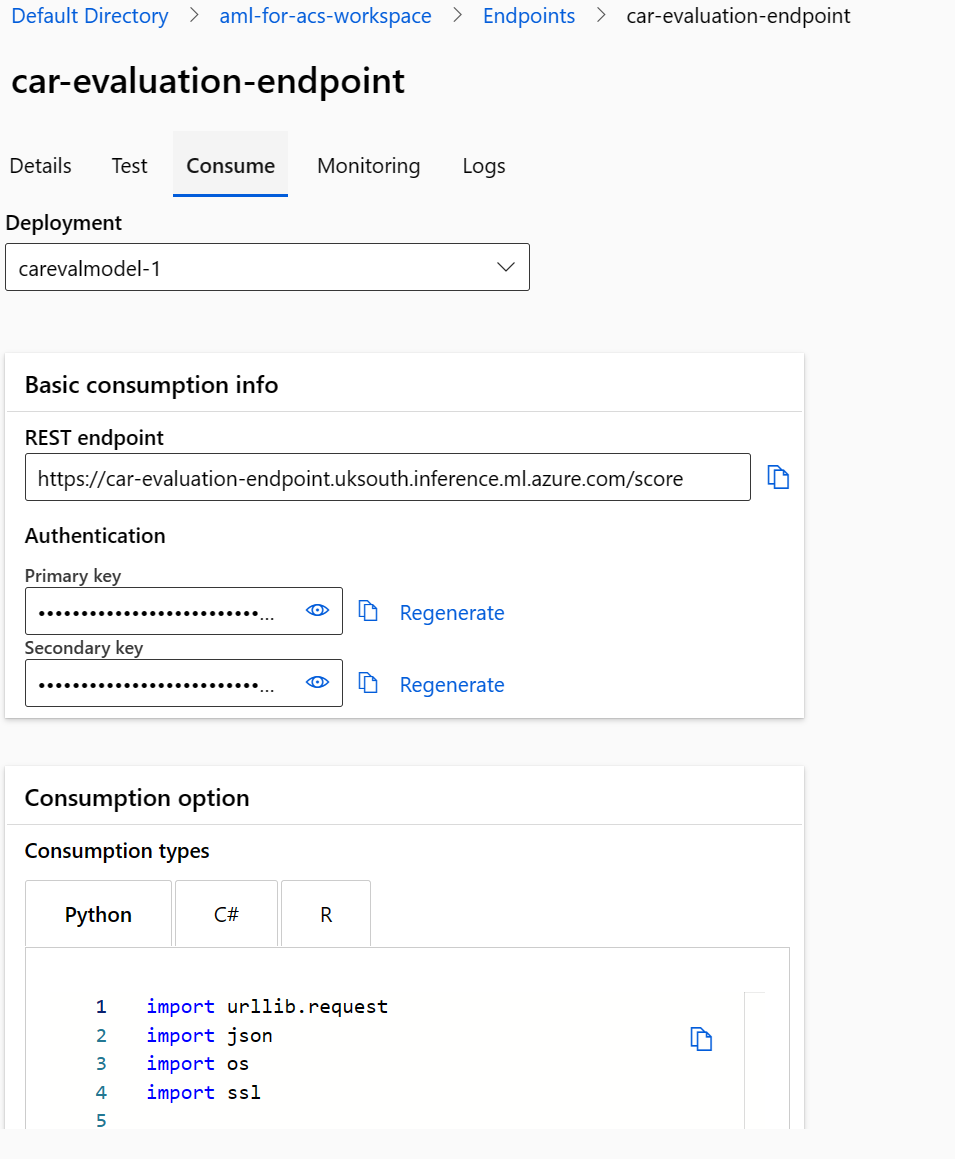
- Copy the REST endpoint.
- Copy the Primary key.
Integrate an Azure Machine Learning model with Azure AI Search
Next, you create a new Cognitive Search service and enrich an index using a custom skillset.
Create a test file
- In the Azure portal, select Resource groups.
-
Select aml-for-acs-enrichment.
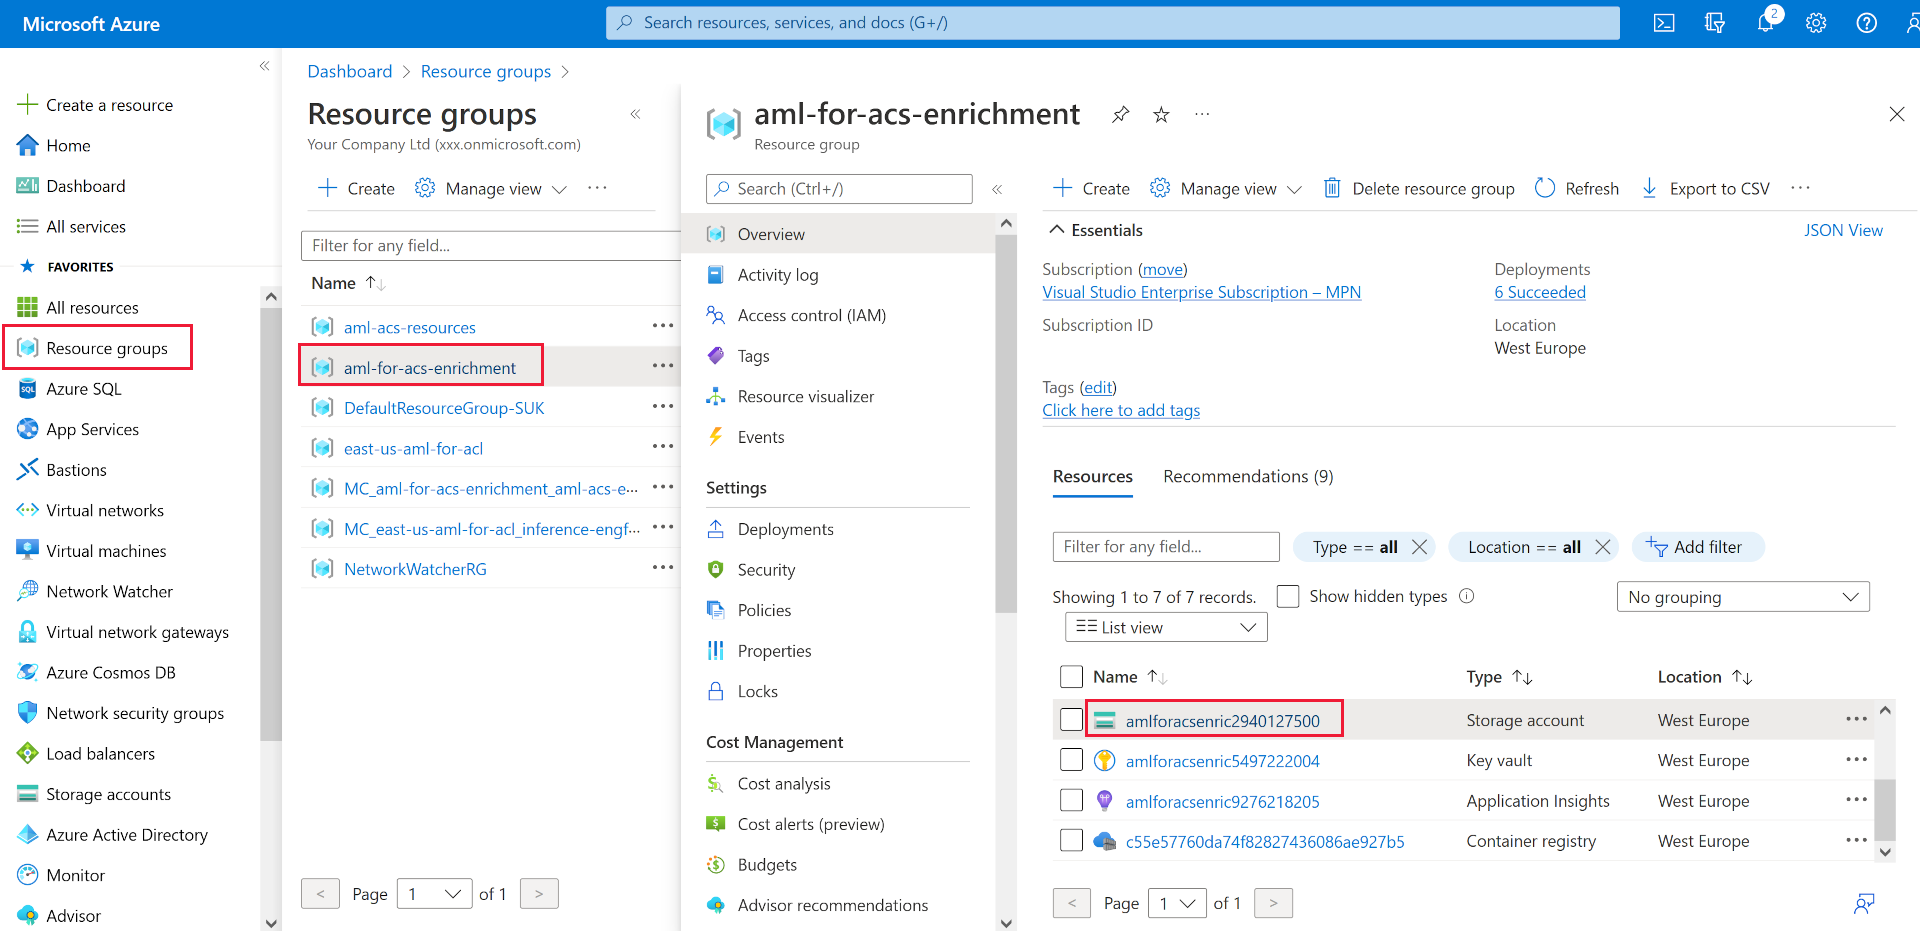
- Select the storage account, for example amlforacsworks1440637584.
- Select Configuration under Settings. Then set Allow Blob anonymous access to Enabled.
- Select Save.
- Under Data storage, select Containers.
- Create a new container to store index data, select + Container.
- In the New container pane, in Name, enter docs-to-search.
- In Anonymous access level, select Container (anonymous read access for containers and blobs).
- Select Create.
- Select the docs-to-search container you created.
-
In a text editor, create a JSON document:
 {
   "symboling": 0,
   "make": "toyota",
   "fueltype": "gas",
   "aspiration": "std",
   "numdoors": "four",
   "bodystyle": "wagon",
   "drivewheels": "fwd",
   "enginelocation": "front",
   "wheelbase": 95.7,
   "length": 169.7,
   "width": 63.6,
   "height": 59.1,
   "curbweight": 2280,
   "enginetype": "ohc",
   "numcylinders": "four",
   "enginesize": 92,
   "fuelsystem": "2bbl",
   "bore": 3.05,
   "stroke": 3.03,
   "compressionratio": 9.0,
   "horsepower": 62.0,
   "peakrpm": 4800.0,
   "citympg": 31,
   "highwaympg": 37,
   "price": 0
 }
Save the document to your machine as
test-car.jsonextension. - In the portal, select Upload.
- In the Upload blob pane, select Brows for files, navigate to where you saved the JSON document, and select it.
- Select Upload.
Create an Azure AI Search resource
- In the Azure portal, on the home page, select + Create a resource.
- Search for Azure AI Search, then select Azure AI Search.
- Select Create.
- In Resource Group, select aml-for-acs-enrichment.
- In Service name, enter a unique name, for example acs-enriched-1440637584.
- For Location, select the same region you used earlier.
- Select Review + create, then select Create.
- Wait for the resources to be deployed, then select Go to resource.
- Select Import data.
- On the Connect to your data pane, for the Data source field, select Azure Blob Storage.
- In Data source name, enter import-docs.
- In Parsing mode, select JSON.
- In Connection string, select Choose an existing connection.
- Select the storage account you uploaded to, for example, amlforacsworks1440637584.
- In the Containers pane, select docs-to-search.
- Select Select.
- Select Next: Add cognitive skills (Optional).
Add cognitive skills
- Expand Add enrichments, then select Extract people names.
- Select Next: Customize target index.
- Select + Add field, in the Field name enter predicted_price at the bottom of the list.
- In Type, select Edm.Double for your new entry.
- Select Retrievable for all fields.
- Select Searchable for make.
- Select Next: Create an indexer.
- Select Submit.
Add the AML Skill to the skillset
You’ll now replace the people names enrichment with the Azure Machine Learning custom skillset.
- On the Overview pane, select Skillsets under Search management.
- Under Name, select azureblob-skillset.
-
Replace the skills definition for the
EntityRecognitionSkillwith this JSON, remember to replace your copied endpoint and primary key values:"@odata.type": "#Microsoft.Skills.Custom.AmlSkill", "name": "AMLenricher", "description": "AML studio enrichment example", "context": "/document", "uri": "PASTE YOUR AML ENDPOINT HERE", "key": "PASTE YOUR PRIMARY KEY HERE", "resourceId": null, "region": null, "timeout": "PT30S", "degreeOfParallelism": 1, "inputs": [ { "name": "symboling", "source": "/document/symboling" }, { "name": "make", "source": "/document/make" }, { "name": "fuel-type", "source": "/document/fueltype" }, { "name": "aspiration", "source": "/document/aspiration" }, { "name": "num-of-doors", "source": "/document/numdoors" }, { "name": "body-style", "source": "/document/bodystyle" }, { "name": "drive-wheels", "source": "/document/drivewheels" }, { "name": "engine-location", "source": "/document/enginelocation" }, { "name": "wheel-base", "source": "/document/wheelbase" }, { "name": "length", "source": "/document/length" }, { "name": "width", "source": "/document/width" }, { "name": "height", "source": "/document/height" }, { "name": "curb-weight", "source": "/document/curbweight" }, { "name": "engine-type", "source": "/document/enginetype" }, { "name": "num-of-cylinders", "source": "/document/numcylinders" }, { "name": "engine-size", "source": "/document/enginesize" }, { "name": "fuel-system", "source": "/document/fuelsystem" }, { "name": "bore", "source": "/document/bore" }, { "name": "stroke", "source": "/document/stroke" }, { "name": "compression-ratio", "source": "/document/compressionratio" }, { "name": "horsepower", "source": "/document/horsepower" }, { "name": "peak-rpm", "source": "/document/peakrpm" }, { "name": "city-mpg", "source": "/document/citympg" }, { "name": "highway-mpg", "source": "/document/highwaympg" }, { "name": "price", "source": "/document/price" } ], "outputs": [ { "name": "predicted_price", "targetName": "predicted_price" } ] - Select Save.
Update the output field mappings
- Go back to the Overview pane of your search service, and select Indexers, then select the azureblob-indexer.
-
Select the Indexer Definition (JSON) tab, then change the outputFieldMappings value to:
"outputFieldMappings": [ { "sourceFieldName": "/document/predicted_price", "targetFieldName": "predicted_price" } ] - Select Save.
- Select Reset, then select Yes.
- Select Run, then select Yes.
Test index enrichment
The updated skillset will now add a predicted value to the test car document in your index. To test this, follow these steps.
- On the Overview pane of your search service, select Search explorer at the top of the pane.
- Select Search.
- Scroll to the bottom of the results.
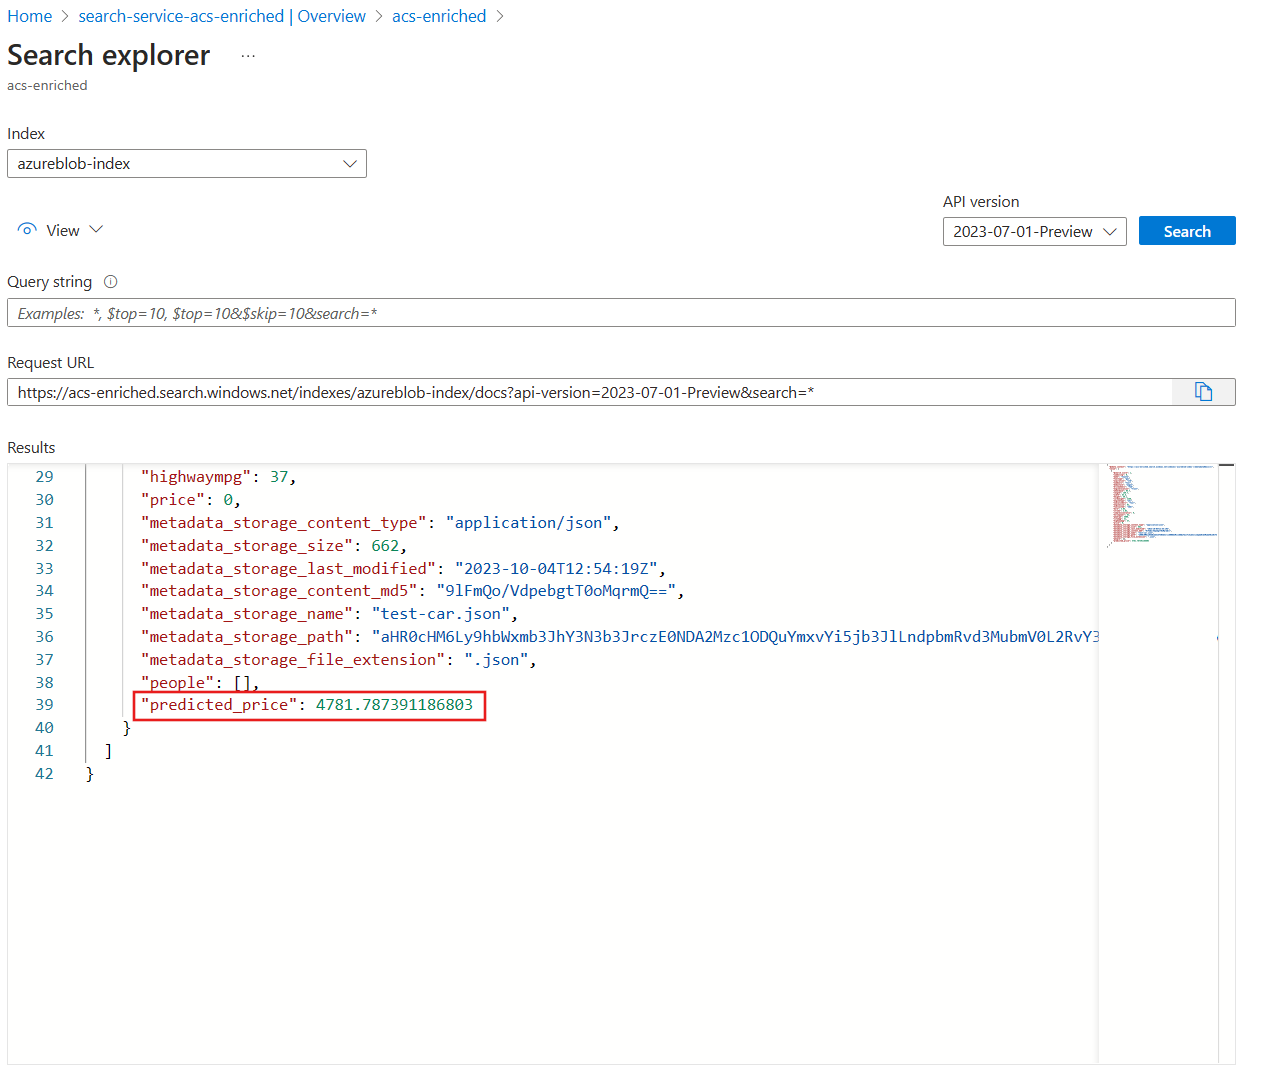 You should see the populated field
 predicted_price.
Clean-up
Now that you’ve completed the exercise, delete all the resources you no longer need. Delete the Azure resources:
- In the Azure portal, select Resource groups.
- Select the resource group you don’t need, then select Delete resource group.