Explore Azure OpenAI
Azure OpenAI Service brings the generative AI models developed by OpenAI to the Azure platform, enabling you to develop powerful AI solutions that benefit from the security, scalability, and integration of services provided by the Azure cloud platform.
In this exercise, you’ll explore Azure OpenAI Service and use it to deploy and experiment with generative AI models.
This exercise will take approximately 25 minutes.
Before you start
You will need an Azure subscription that has been approved for access to the Azure OpenAI service for both text and code models, and DALL-E image generation models.
- To sign up for a free Azure subscription, visit https://azure.microsoft.com/free.
- To request access to the Azure OpenAI service, visit https://aka.ms/oaiapply.
Provision an Azure OpenAI resource
Before you can use Azure OpenAI models, you must provision an Azure OpenAI resource in your Azure subscription.
- Sign into the Azure portal.
- Create an Azure OpenAI resource with the following settings:
- Subscription: An Azure subscription that has been approved for access to the Azure OpenAI service.
- Resource group: Create a new resource group with a name of your choice.
- Region: East US
- Name: A unique name of your choice.
- Pricing tier: Standard S0
- Wait for deployment to complete. Then go to the deployed Azure OpenAI resource in the Azure portal.
Explore Azure AI Studio
You can deploy, manage, and explore models in your Azure OpenAI Service by using Azure AI Studio.
-
On the Overview page for your Azure OpenAI resource, use the Explore button to open Azure AI Studio in a new browser tab. Alternatively, navigate to Azure AI Studio directly.
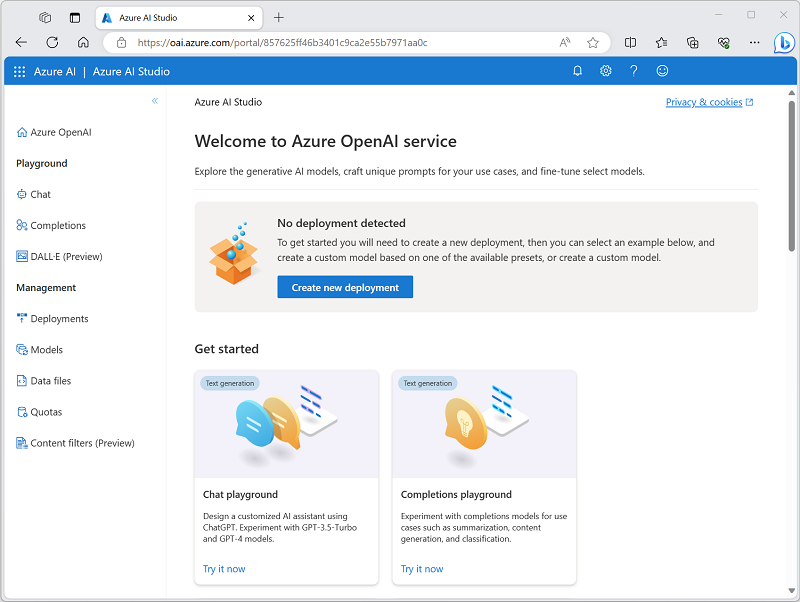
When you first open Azure AI Studio, it should look similar to this:
-
View the pages available in the pane on the left. You can always return to the home page at the top. Additionally, AI Studio provides multiple pages where you can:
- Experiment with models in a playground.
- Manage model deployments and data.
Deploy a model for language generation
To experiment with natural language generation, you must first deploy a model.
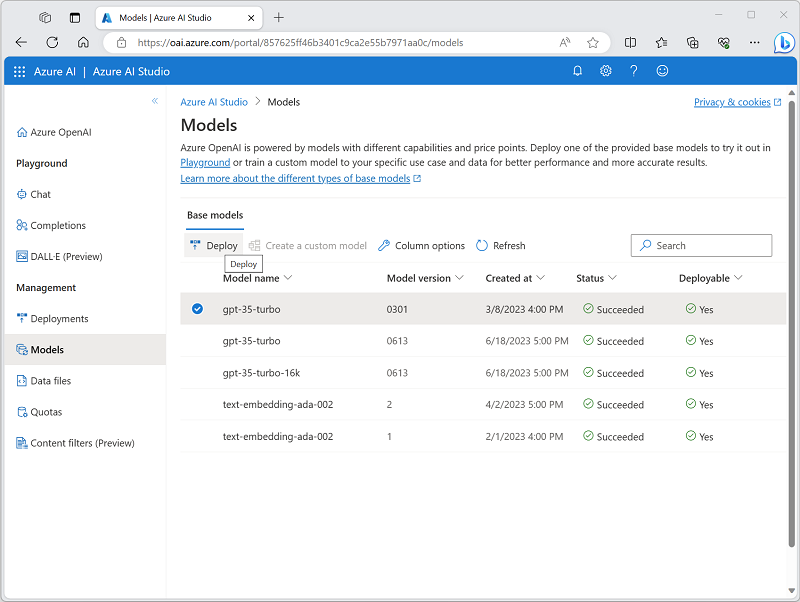
- On the Models page view the available models in your Azure OpenAI service instance.
-
Select any of the gpt-35-turbo models for which the Deployable status is Yes, and then select Deploy:
- Create a new deployment with the following settings:
- Model: gpt-35-turbo
- Model version: Auto-update to default
- Deployment name: A unique name for your model deployment
Note: You can only deploy one instance of each model. If you have already deployed a gpt-35-turbo model, you can use it to complete the rest of this exercise.
Use the Chat playground to work with the model
Now that you have deployed a model, you can use it in the Chat playground to generate natural language output from prompts that you submit in a chat interface.
-
In Azure AI Studio, navigate to the Chat playground in the left pane.
The Chat playground provides a chatbot interface with which you can interact with your deployed model, as shown here:
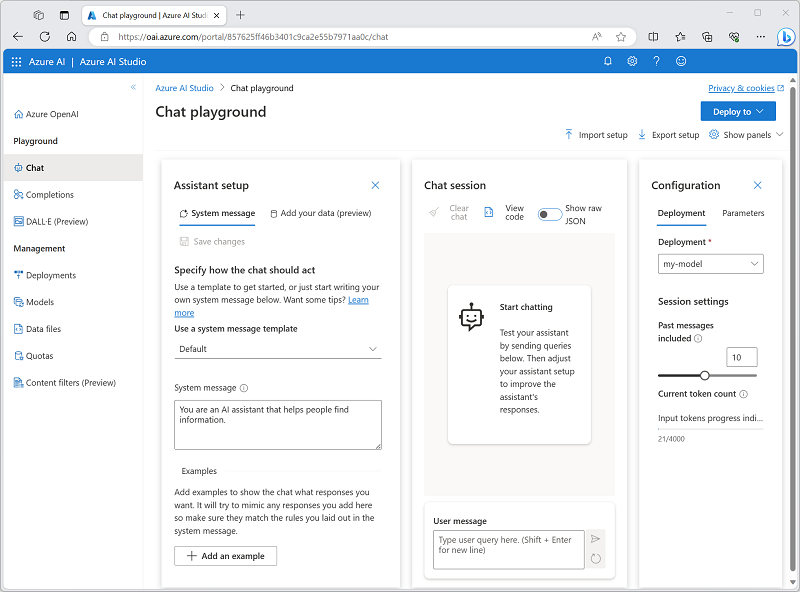
- In the Configuration pane, ensure that your model deployment is selected.
- In the Assistant setup pane, select the Default system message template, and view the system message this template creates. The system message defines how the model will behave in your chat session.
-
In the Chat session section, enter the following user message.
What is generative AI? - Observe the output returned by the model, which should provide a definition of generative AI.
-
Enter the following user message as a follow-up question:
What are three benefits it provides? - Review the output, noting that the chat session has kept track of the previous input and response to provide context (so it correctly interprets “it” as referring to “generative AI”) and that it provides a suitable response based on what was requested (it should return three benefits of generative AI).
Use the DALL-E playground to generate images
In addition to language generation models, Azure OpenAI Service supports the DALL-E 2 model for image generation.
Note: You must have applied for and received access to DALL-E functionality in your Azure OpenAI service access application to complete this section of the exercise.
- In Azure AI Studio, navigate to the DALL-E playground in the left pane.
-
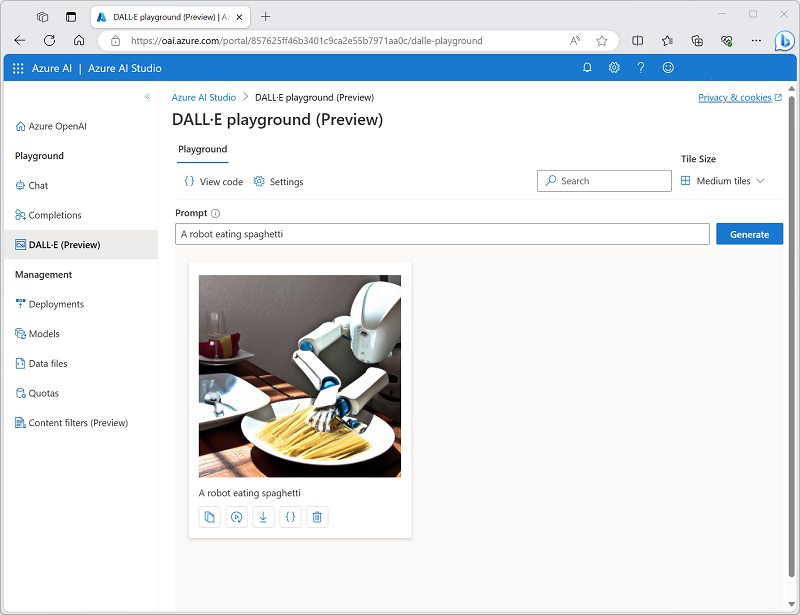
Enter the following prompt:
A robot eating spaghetti -
Select Generate and view the results, which should consist of an image based on the description you provided in the prompt, similar to this:
-
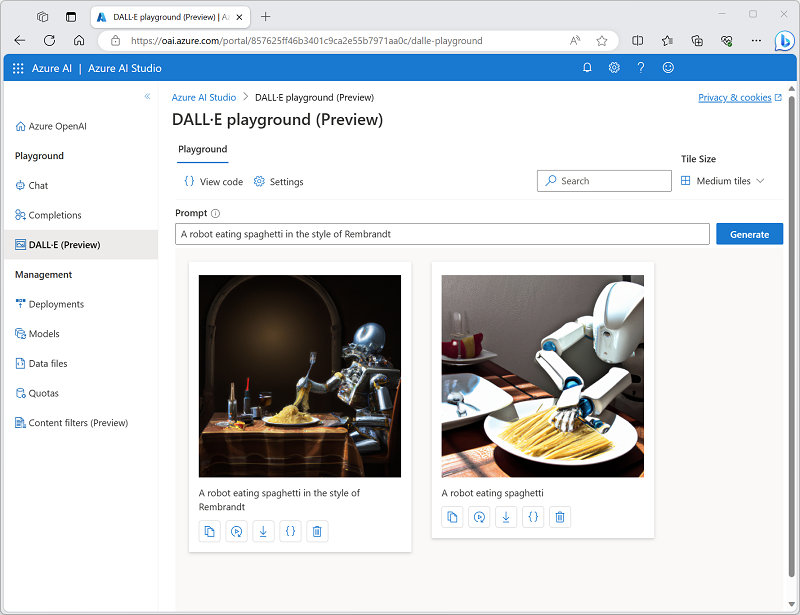
Generate a second image by modifying the prompt to:
A robot eating spaghetti in the style of Rembrandt -
Verify that the new image matches the requirements of the prompt, similar to this:
Clean up
When you’re done with your Azure OpenAI resource, remember to delete the deployment or the entire resource in the Azure portal.