Compare language models from the model catalog
When you have defined your use case, you can use the model catalog to explore whether an AI model solves your problem. You can use the model catalog to select models to deploy, which you can then compare to explore which model best meets your needs.
In this exercise, you compare two language models through the model catalog in Azure AI Foundry portal.
This exercise will take approximately 30 minutes.
Scenario
Imagine you want to build an app to help students learn how to code in Python. In the app, you want an automated tutor that can help students write and evaluate code. In one exercise, students need to come up with the necessary Python code to plot a pie chart, based on the following example image:
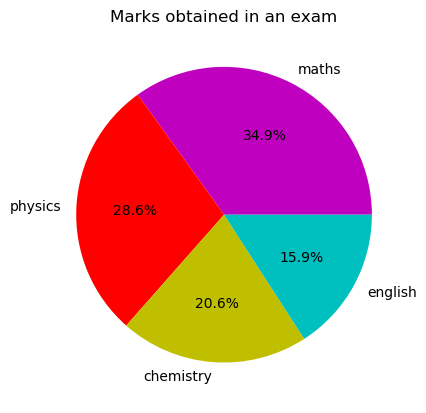
You need to select a language model that accepts images as input, and is able to generate accurate code. The available models that meet those criteria are GPT-4o, and GPT-4o mini.
Let’s start by deploying the necessary resources to work with these models in the Azure AI Foundry portal.
Create an Azure AI hub and project
You can create an Azure AI hub and project manually through the Azure AI Foundry portal, as well as deploy the models used in the exercise. However, you can also automate this process through the use of a template application with Azure Developer CLI (azd).
-
In a web browser, open Azure portal at
https://portal.azure.comand sign in using your Azure credentials. -
Use the [>_] button to the right of the search bar at the top of the page to create a new Cloud Shell in the Azure portal, selecting a PowerShell environment. The cloud shell provides a command line interface in a pane at the bottom of the Azure portal. For more information about using the Azure Cloud Shell, see the Azure Cloud Shell documentation.
Note: If you have previously created a cloud shell that uses a Bash environment, switch it to PowerShell.
-
In the Cloud Shell toolbar, in the Settings menu, select Go to Classic version.
Ensure you've switched to the Classic version of the Cloud Shell before continuing.
-
In the PowerShell pane, enter the following commands to clone this exercise’s repo:
rm -r mslearn-genaiops -f git clone https://github.com/MicrosoftLearning/mslearn-genaiops -
After the repo has been cloned, enter the following commands to initialize the Starter template.
cd ./mslearn-genaiops/Starter azd init -
Once prompted, give the new environment a name as it will be used as basis for giving unique names to all the provisioned resources.
-
Next, enter the following command to run the Starter template. It will provision an AI Hub with dependent resources, AI project, AI Services and an online endpoint. It will also deploy the models GPT-4o, and GPT-4o mini.
azd up - When prompted, choose which subscription you want to use and then choose one of the following locations for resource provision:
- East US
- East US 2
- North Central US
- South Central US
- Sweden Central
- West US
- West US 3
-
Wait for the script to complete - this typically takes around 10 minutes, but in some cases may take longer.
Note: Azure OpenAI resources are constrained at the tenant level by regional quotas. The listed regions above include default quota for the model type(s) used in this exercise. Randomly choosing a region reduces the risk of a single region reaching its quota limit. In the event of a quota limit being reached, there’s a possibility you may need to create another resource group in a different region. Learn more about model availability per region
Troubleshooting tip: No quota available in a given region
If you receive a deployment error for any of the models due to no quota available in the region you chose, try running the following commands:
Replacingazd env set AZURE_ENV_NAME new_env_name azd env set AZURE_RESOURCE_GROUP new_rg_name azd env set AZURE_LOCATION new_location azd upnew_env_name,new_rg_name, andnew_locationwith new values. The new location must be one of the regions listed at the beginning of the exercise, e.geastus2,northcentralus, etc.
Compare the models
You know that there are three models that accept images as input whose inference infrastructure is fully managed by Azure. Now, you need to compare them to decide which one is ideal for our use case.
- In a new browser tab, open Azure AI Foundry portal at
https://ai.azure.comand sign in using your Azure credentials. - If prompted, select the AI project created earlier.
- Navigate to the Model catalog page using the menu on the left.
- Select Compare models (find the button next to the filters in the search pane).
- Remove the selected models.
- One by one, add the three models you want to compare: gpt-4o, and gpt-4o-mini. For gpt-4, make sure that the selected version is turbo-2024-04-09, as it is the only version that accepts images as input.
- Change the x-axis to Accuracy.
- Ensure the y-axis is set to Cost.
Review the plot and try to answer the following questions:
- Which model is more accurate?
- Which model is cheaper to use?
The benchmark metric accuracy is calculated based on publicly available generic datasets. From the plot we can already filter out one of the models, as it has the highest cost per token but not the highest accuracy. Before making a decision, let’s explore the quality of outputs of the two remaining models specific to your use case.
Set up your development environment in Cloud Shell
To quickly experiment and iterate, you’ll use a set of Python scripts in Cloud Shell.
- Back in the Azure Portal tab, navigate to the resource group created by the deployment script earlier and select your Azure AI Foundry resource.
- In the Overview page for your resource, select Click here to view endpoints and copy the AI Foundry API endpoint.
- Save the endpoint in a notepad. You’ll use it to connect to your project in a client application.
-
Back in the Azure Portal tab, open Cloud Shell if you closed it before and run the following command to navigate to the folder with the code files used in this exercise:
cd ~/mslearn-genaiops/Files/02/ -
In the Cloud Shell command-line pane, enter the following command to install the libraries you need:
python -m venv labenv ./labenv/bin/Activate.ps1 pip install python-dotenv azure-identity azure-ai-projects openai matplotlib -
Enter the following command to open the configuration file that has been provided:
code .envThe file is opened in a code editor.
- In the code file, replace the your_project_endpoint placeholder with the endpoint for your project that you copied earlier. Observe that the first and second model used in the exercise are gpt-4o and gpt-4o-mini respectively.
- After you’ve replaced the placeholder, in the code editor, use the CTRL+S command or Right-click > Save to save your changes and then use the CTRL+Q command or Right-click > Quit to close the code editor while keeping the cloud shell command line open.
Send prompts to your deployed models
You’ll now run multiple scripts that send different prompts to your deployed models. These interactions generate data that you can later observe in Azure Monitor.
-
Run the following command to view the first script that has been provided:
code model1.py
The script will encode the image used in this exercise into a data URL. This URL will be used to embed the image directly in the chat completion request together with the first text prompt. Next, the script will output the model’s response and add it to the chat history and then submit a second prompt. The second prompt is submitted and stored for the purpose of making the metrics observed later on more significant, but you can uncomment the optional section of the code to have the second response as an output as well.
-
In the cloud shell command-line pane, enter the following command to sign into Azure.
az loginYou must sign into Azure - even though the cloud shell session is already authenticated.
Note: In most scenarios, just using az login will be sufficient. However, if you have subscriptions in multiple tenants, you may need to specify the tenant by using the –tenant parameter. See Sign into Azure interactively using the Azure CLI for details.
- When prompted, follow the instructions to open the sign-in page in a new tab and enter the authentication code provided and your Azure credentials. Then complete the sign in process in the command line, selecting the subscription containing your Azure AI Foundry hub if prompted.
-
After you have signed in, enter the following command to run the application:
python model1.pyThe model will generate a response, which will be captured with Application Insights for further analysis. Let’s use the second model to explore their differences.
-
In the Cloud Shell command-line pane beneath the code editor, enter the following command to run the second script:
python model2.pyNow that you have outputs from both models, are they in any way different?
Note: Optionally, you can test the scripts given as answers by copying the code blocks, running the command
code your_filename.py, pasting the code in the editor, saving the file and then running the commandpython your_filename.py. If the script ran successfully, you should have a saved image that can be downloaded withdownload imgs/gpt-4o.jpgordownload imgs/gpt-4o-mini.jpg.
Compare token usage of models
Lastly, you will run a third script that will plot the number of processed tokens over time for each model. This data is obtained from Azure Monitor.
-
Before running the last script, you need to copy the resource ID for your Azure AI Foundry resource from the Azure Portal. Go to the overview page of your Azure AI Foundry resource and select JSON View. Copy the Resource ID and replace the
your_resource_idplaceholder in the code file:code plot.py -
Save your changes.
-
In the Cloud Shell command-line pane beneath the code editor, enter the following command to run the third script:
python plot.py -
Once the script is finished, enter the following command to download the metrics plot:
download imgs/plot.png
Conclusion
After reviewing the plot and remembering the benchmark values in the Accuracy vs. Cost chart observed before, can you conclude which model is best for your use case? Does the difference in the outputs’ accuracy outweight the difference in tokens generated and therefore cost?
Clean up
If you’ve finished exploring Azure AI Services, you should delete the resources you have created in this exercise to avoid incurring unnecessary Azure costs.
- Return to the browser tab containing the Azure portal (or re-open the Azure portal in a new browser tab) and view the contents of the resource group where you deployed the resources used in this exercise.
- On the toolbar, select Delete resource group.
- Enter the resource group name and confirm that you want to delete it.