Work with SQL Database in Microsoft Fabric
SQL database in Microsoft Fabric is a developer-friendly transactional database, based on Azure SQL Database, that allow you to easily create your operational database in Fabric. A SQL database in Fabric uses the SQL Database engine as Azure SQL Database.
This lab will take approximately 30 minutes to complete.
Note: You need a Microsoft Fabric trial to complete this exercise.
Create a workspace
Before working with data in Fabric, create a workspace with the Fabric trial enabled.
- Navigate to the Microsoft Fabric home page at
https://app.fabric.microsoft.com/home?experience=fabricin a browser and sign in with your Fabric credentials. - In the menu bar on the left, select New workspace.
- Create a new workspace with a name of your choice, selecting a licensing mode that includes Fabric capacity (Trial, Premium, or Fabric).
-
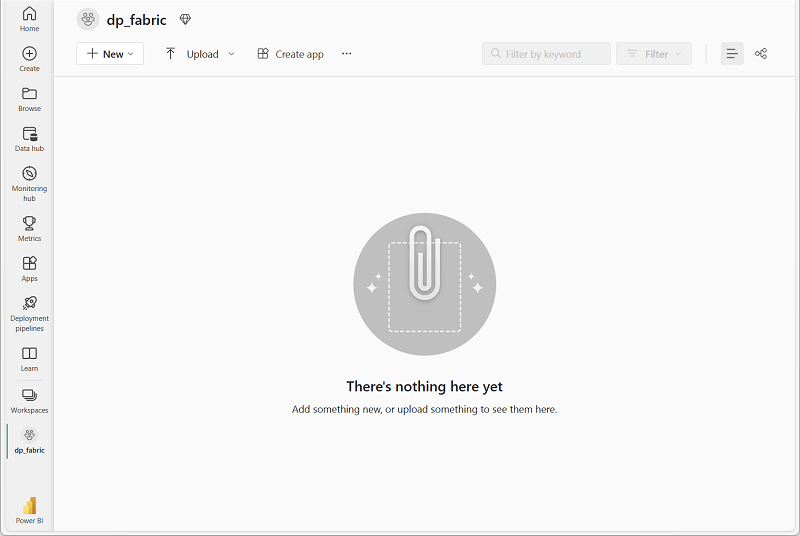
When your new workspace opens, it should be empty.

Create a SQL database with sample data
Now that you have a workspace, it’s time to create a SQL database.
-
On the menu bar on the left, select Create. In the New page, under the Databases section, select SQL database.
Note: If the Create option is not pinned to the sidebar, you need to select the ellipsis (…) option first.
- Enter AdventureWorksLT as the database name, and select Create.
-
Once you have created your database, you can load sample data into your database from Sample data card.
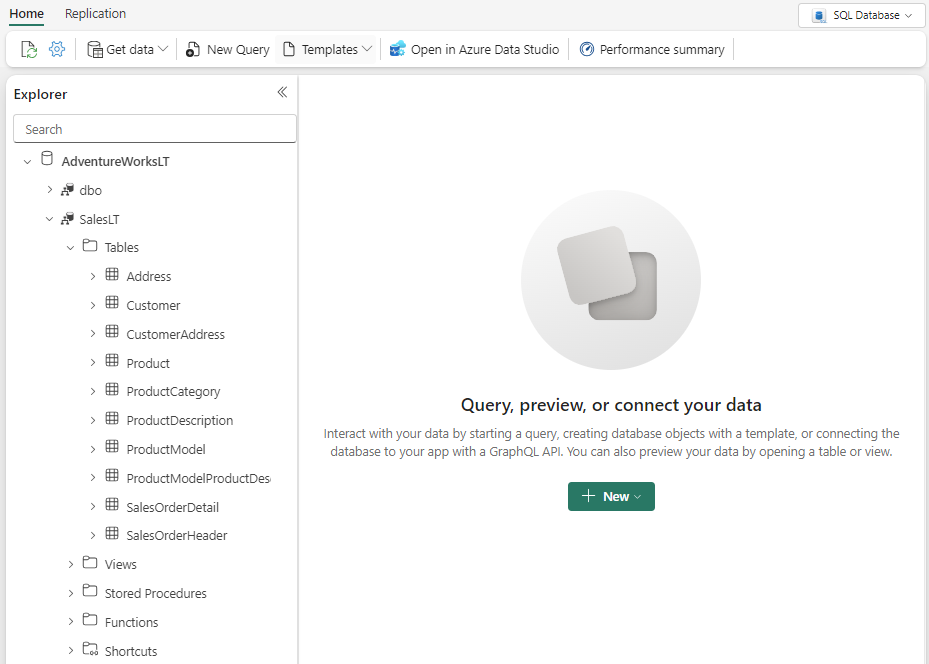
After a minute or so, your database will be populated with sample data for your scenario.

Query a SQL database
The SQL query editor provides support for IntelliSense, code completion, syntax highlighting, client-side parsing, and validation. You can run Data Definition Language (DDL), Data Manipulation Language (DML) and Data Control Language (DCL) statements.
-
In the AdventureWorksLT database page, navigate to Home, and select New query.
-
In the new blank query pane, enter and run the following T-SQL code.
 SELECT
     p.Name AS ProductName,
     pc.Name AS CategoryName,
     p.ListPrice
 FROM
     SalesLT.Product p
 INNER JOIN
     SalesLT.ProductCategory pc ON p.ProductCategoryID = pc.ProductCategoryID
 ORDER BY
 p.ListPrice DESC;
This query joins the
ProductandProductCategorytables to display the product names, their categories, and their list prices, sorted by price in descending order. -
In a new query editor, enter and run the following T-SQL code.
SELECT
     c.FirstName,
     c.LastName,
     soh.OrderDate,
     soh.SubTotal
 FROM
     SalesLT.Customer c
 INNER JOIN
     SalesLT.SalesOrderHeader soh ON c.CustomerID = soh.CustomerID
 ORDER BY
     soh.OrderDate DESC;
This query retrieves a list of customers along with their order dates and subtotals, sorted by the order date in descending order.
-
Close all query tabs.
Integrate data with external data sources
You will integrate an external data about public holidays with sales order. Then, you’ll identify sales orders that coincide with public holidays, providing insights into how holidays might impact sales activities.
-
Navigate to Home, and select New query.
-
In the new blank query pane, enter and run the following T-SQL code.
 CREATE TABLE SalesLT.PublicHolidays (
     CountryOrRegion NVARCHAR(50),
     HolidayName NVARCHAR(100),
     Date DATE,
     IsPaidTimeOff BIT
 );
This query creates the
SalesLT.PublicHolidaystable in preparation to the next step. -
In a new query editor, enter and run the following T-SQL code.
 INSERT INTO SalesLT.PublicHolidays (CountryOrRegion, HolidayName, Date, IsPaidTimeOff)
 VALUES
     ('Canada', 'Victoria Day', '2024-02-19', 1),
     ('United Kingdom', 'Christmas Day', '2024-12-25', 1),
     ('United Kingdom', 'Spring Bank Holiday', '2024-05-27', 1),
     ('United States', 'Thanksgiving Day', '2024-11-28', 1);
In this example, this query inserts holidays for Canada, the United Kingdom, and the United States for the year 2024 into the
SalesLT.PublicHolidaystable. -
In a new or existing query editor, enter and execute the following T-SQL code.
 -- Insert new addresses into SalesLT.Address
 INSERT INTO SalesLT.Address (AddressLine1, City, StateProvince, CountryRegion, PostalCode, rowguid, ModifiedDate)
 VALUES
     ('123 Main St', 'Seattle', 'WA', 'United States', '98101', NEWID(), GETDATE()),
     ('456 Maple Ave', 'Toronto', 'ON', 'Canada', 'M5H 2N2', NEWID(), GETDATE()),
     ('789 Oak St', 'London', 'England', 'United Kingdom', 'EC1A 1BB', NEWID(), GETDATE());

 -- Insert new orders into SalesOrderHeader
 INSERT INTO SalesLT.SalesOrderHeader (
     SalesOrderID, RevisionNumber, OrderDate, DueDate, ShipDate, Status, OnlineOrderFlag,
     PurchaseOrderNumber, AccountNumber, CustomerID, ShipToAddressID, BillToAddressID,
     ShipMethod, CreditCardApprovalCode, SubTotal, TaxAmt, Freight, Comment, rowguid, ModifiedDate
 )
 VALUES
     (1001, 1, '2024-12-25', '2024-12-30', '2024-12-26', 1, 1, 'PO12345', 'AN123', 1, (SELECT TOP 1 AddressID FROM SalesLT.Address WHERE AddressLine1 = '789 Oak St'), (SELECT TOP 1 AddressID FROM SalesLT.Address WHERE AddressLine1 = '123 Main St'), 'Ground', '12345', 100.00, 10.00, 5.00, 'New Order 1', NEWID(), GETDATE()),
     (1002, 1, '2024-11-28', '2024-12-03', '2024-11-29', 1, 1, 'PO67890', 'AN456', 2, (SELECT TOP 1 AddressID FROM SalesLT.Address WHERE AddressLine1 = '123 Main St'), (SELECT TOP 1 AddressID FROM SalesLT.Address WHERE AddressLine1 = '456 Maple Ave'), 'Air', '67890', 200.00, 20.00, 10.00, 'New Order 2', NEWID(), GETDATE()),
     (1003, 1, '2024-02-19', '2024-02-24', '2024-02-20', 1, 1, 'PO54321', 'AN789', 3, (SELECT TOP 1 AddressID FROM SalesLT.Address WHERE AddressLine1 = '456 Maple Ave'), (SELECT TOP 1 AddressID FROM SalesLT.Address WHERE AddressLine1 = '789 Oak St'), 'Sea', '54321', 300.00, 30.00, 15.00, 'New Order 3', NEWID(), GETDATE()),
     (1004, 1, '2024-05-27', '2024-06-01', '2024-05-28', 1, 1, 'PO98765', 'AN321', 4, (SELECT TOP 1 AddressID FROM SalesLT.Address WHERE AddressLine1 = '789 Oak St'), (SELECT TOP 1 AddressID FROM SalesLT.Address WHERE AddressLine1 = '789 Oak St'), 'Ground', '98765', 400.00, 40.00, 20.00, 'New Order 4', NEWID(), GETDATE());
This code adds new addresses and orders to the database, simulating fictitious orders from different countries.
-
In a new or existing query editor, enter and execute the following T-SQL code.
 SELECT DISTINCT soh.SalesOrderID, soh.OrderDate, ph.HolidayName, ph.CountryOrRegion
 FROM SalesLT.SalesOrderHeader AS soh
 INNER JOIN SalesLT.Address a
     ON a.AddressID = soh.ShipToAddressID
 INNER JOIN SalesLT.PublicHolidays AS ph
     ON soh.OrderDate = ph.Date AND a.CountryRegion = ph.CountryOrRegion
Take a moment to observe the results, noting how the query identifies sales orders that coincide with public holidays in the respective countries. This can provide valuable insights into order patterns and potential impacts of holidays on sales activities.
-
Close all query tabs.
Secure data
Suppose a specific group of users should only have access to data from the United States to generate reports.
Let’s create a view based on the query we used earlier, and add a filter to it.
-
In the new blank query pane, enter and run the following T-SQL code.
CREATE VIEW SalesLT.vw_SalesOrderHoliday AS SELECT DISTINCT soh.SalesOrderID, soh.OrderDate, ph.HolidayName, ph.CountryOrRegion FROM SalesLT.SalesOrderHeader AS soh INNER JOIN SalesLT.Address a ON a.AddressID = soh.ShipToAddressID INNER JOIN SalesLT.PublicHolidays AS ph ON soh.OrderDate = ph.Date AND a.CountryRegion = ph.CountryOrRegion WHERE a.CountryRegion = 'United Kingdom'; -
In a new or existing query editor, enter and execute the following T-SQL code.
 -- Create the role
 CREATE ROLE SalesOrderRole;

 -- Grant select permission on the view to the role
 GRANT SELECT ON SalesLT.vw_SalesOrderHoliday TO SalesOrderRole;
Any user added as a member to the
SalesOrderRolerole will have access only to the filtered view. If a user in this role attempts to access any other user objects, they will receive an error message similar to this:Msg 229, Level 14, State 5, Line 1 The SELECT permission was denied on the object 'ObjectName', database 'DatabaseName', schema 'SchemaName'.
Further Information: See What is Microsoft Fabric? in the Microsoft Fabric documentation to learn more about other components available in the platform.
In this exercise, you have created, queried, and secured data in a SQL database in Microsoft Fabric.
Clean up resources
If you’ve finished exploring your database, you can delete the workspace you created for this exercise.
- In the bar on the left, select the icon for your workspace to view all of the items it contains.
- In the … menu on the toolbar, select Workspace settings.
- In the General section, select Remove this workspace.