Enforce semantic model security
In this exercise, you implement row-level security (RLS) on a Power BI semantic model. You start by reviewing the model and creating static roles, then import a salesperson mapping table and configure a dynamic role that filters data based on user identity.
In this exercise, you learn how to:
- Import and prepare a security mapping table using Power Query.
- Configure a bi-directional relationship with security filter propagation.
- Create static and dynamic roles using DAX.
- Validate role behavior by testing with different user identities.
This lab takes approximately 30 minutes to complete.
Tip: For related training content, see Enforce semantic model security.
Set up the environment
You need Power BI Desktop (November 2025 or newer) installed to complete this exercise. Note: UI elements might vary slightly depending on your version.
-
Open a web browser and enter the following URL to download the 17-enforce-security zip folder:
https://github.com/MicrosoftLearning/mslearn-fabric/raw/refs/heads/main/Allfiles/Labs/17/17-enforce-security.zip -
Save the file in Downloads and extract the zip file to the 17-enforce-security folder.
-
Open 17-Starter-Sales Analysis.pbix from the extracted folder.
Note: If a security warning asks you to apply changes, select Ignore or Close. Don’t select Discard changes. If prompted about a data source connection, dismiss the warning — you won’t need to refresh data in this lab.
Review the data model
In this task, you review the semantic model structure to understand how the tables relate and where security filters must be applied.
-
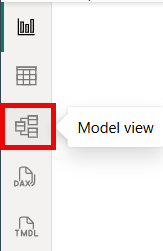
In Power BI Desktop, at the left, switch to Model view.
-
Review the model diagram to see the table relationships.
The model comprises six dimension tables and one fact table in a star schema. The
Salesfact table stores sales order details.
-
Expand the
Sales Territorytable to view its columns. -
Locate the
Regioncolumn in the table. TheRegioncolumn stores the Adventure Works sales regions.
At this organization, salespeople are only allowed to see data related to their assigned sales region.
Create static roles
The simplest form of RLS is a static role, where a DAX filter hardcodes a field value. Static roles are useful for understanding the RLS mechanics before moving to a data-driven approach. In this section, you create two static roles—one per region—and validate that each one filters correctly.
In this task, you define a static filter on the Sales Territory table for two regions.
-
Switch to Report view.
-
Notice the stacked column chart shows data for all regions. That changes once RLS is applied.

-
On the Modeling ribbon, in the Security group, select Manage roles.

-
Select + New, name the role
Australia, and select theSales Territorytable. -
In the Rules section, select + New and configure the filter:
- Column =
Region - Condition = Equals
- Value =
Australia

- Column =
-
Select + New again in the Roles section to add a second role named
Canada, applying the same filter forCanadaand Save.
Validate the static roles
In this task, you confirm that each role restricts the report to its assigned region.
-
On the Modeling ribbon, select View as, select the
Australiarole, and select OK. -
Verify the chart shows only Australia data, then select Stop viewing.
-
Repeat for the
Canadarole and confirm it shows only Canada data, then select Stop viewing.
Static roles work, but they don’t scale. Every new region requires a new role definition, and any change means updating and republishing the semantic model. For 11 Adventure Works regions, that’s 11 roles to create and maintain—and the number grows with the business.
Clean up resources
Delete the static roles Australia and Canada created in this lab before proceeding to the next step.
Add the Salesperson table
Dynamic RLS requires a mapping table that links each user identity to a sales territory. In this section, you import the Salesperson table from a CSV file, prepare it in Power Query, and configure the relationship so security filters propagate correctly.
Import the CSV
In this task, you use Power Query to import Salesperson data from the CSV file included in the extracted zip folder.
-
On the Home ribbon, select Get data > Text/CSV.
-
Navigate to the extracted 17-enforce-security folder and select Salesperson.csv, then select Open.
-
In the preview window, verify you see three columns:
EmployeeKey,SalesTerritoryKey, andEmailAddress. -
Select Transform Data to open Power Query Editor.
Note: Selecting Transform Data instead of Load lets you rename the column before loading it into the model.
Rename the column
In this task, you rename the EmailAddress column to UPN (User Principal Name) to clarify its purpose as the identity field for dynamic RLS.
-
In Power Query Editor, right-click the
EmailAddresscolumn header and select Rename. -
Replace the text with
UPNand press Enter.UPN stands for User Principal Name. The values in this column match Microsoft Entra account names, which is what the USERPRINCIPALNAME() DAX function returns.
-
On the Home ribbon, select Close & Apply to load the table into the model.
Create and configure the relationship
In this task, you create a relationship between the Salesperson table and the Sales Territory table, then configure it so security filters propagate in both directions.
-
Switch to Model view.
-
Drag the
SalesTerritoryKeyfield from theSalespersontable to theSalesTerritoryKeyfield on theSales Territorytable to create a relationship.Note: If the relationship was created automatically when you loaded the table, you can skip the drag step and proceed to configuring its properties.
-
Right-click the relationship line between
SalespersonandSales Territory, then select Properties. -
In the Edit relationship window, set Cross filter direction to Both.
-
Check the Apply security filter in both directions checkbox and OK.
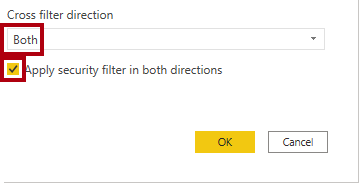
The Sales Territory table has a one-to-many relationship to the Salesperson table. By default, filters only flow from the “one” side (Sales Territory) to the “many” side (Salesperson).
To make a security filter on Salesperson propagate back to Sales Territory — and then down to Sales — you must enable bi-directional cross-filtering with the security filter option.
Hide the Salesperson table
In this task, you hide the Salesperson table so it doesn’t appear in report authoring tools or Q&A.
-
In Model view, select the
Salespersontable header. -
Right-click and select Hide in report view (or select the eye icon at the top-right of the table).
The
Salespersontable exists solely to enforce data permissions. Hiding it prevents report authors from accidentally using it in visuals or exposingUPNdata.
Create the dynamic role
Dynamic RLS avoids creating and maintaining one role per region. A single role can serve all users by filtering rows to the signed-in identity.
In this section, you create one dynamic role that filters the Salesperson table by user principal name.
-
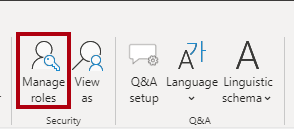
On the Modeling ribbon, in the Security group, select Manage roles.
-
Select + New, name the role
Salespeople, select theSalespersontable, and then select Switch to DAX editor.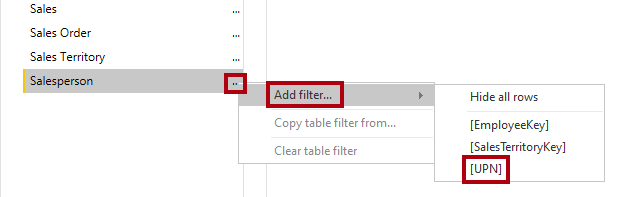
-
Enter the following expression:
[UPN] = USERPRINCIPALNAME() -
Select Save.
This expression keeps only rows where the UPN value matches the authenticated user’s identity. Because of the bi-directional security filter you configured earlier, this filter propagates from Salesperson -> Sales Territory -> Sales, restricting the user to only their assigned region’s data.
Validate the dynamic role
In this section, you test the dynamic role for a mapped user and an unmapped user to demonstrate how a single role returns different results based on user identity.
Test the role as another model user
In this task, you confirm that the same role returns a different filtered result when evaluated for another identity.
-
On the Modeling ribbon, select View as.
-
Select Other user and enter
michael9@adventure-works.com. -
Check the
Salespeoplerole, then select OK.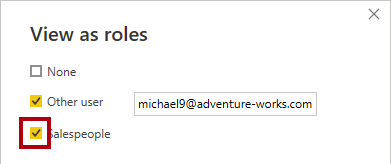
-
Verify the report now shows data for only the
Northeastregion (michael9’s assigned territory). -
Select Stop viewing.
Test as an unmapped user
In this task, you confirm that dynamic RLS denies data when no matching UPN row exists.
-
Select View as > Other user.
-
Enter
nomatch@adventure-works.com, checkSalespeople, and select OK. -
Verify the report shows no data.
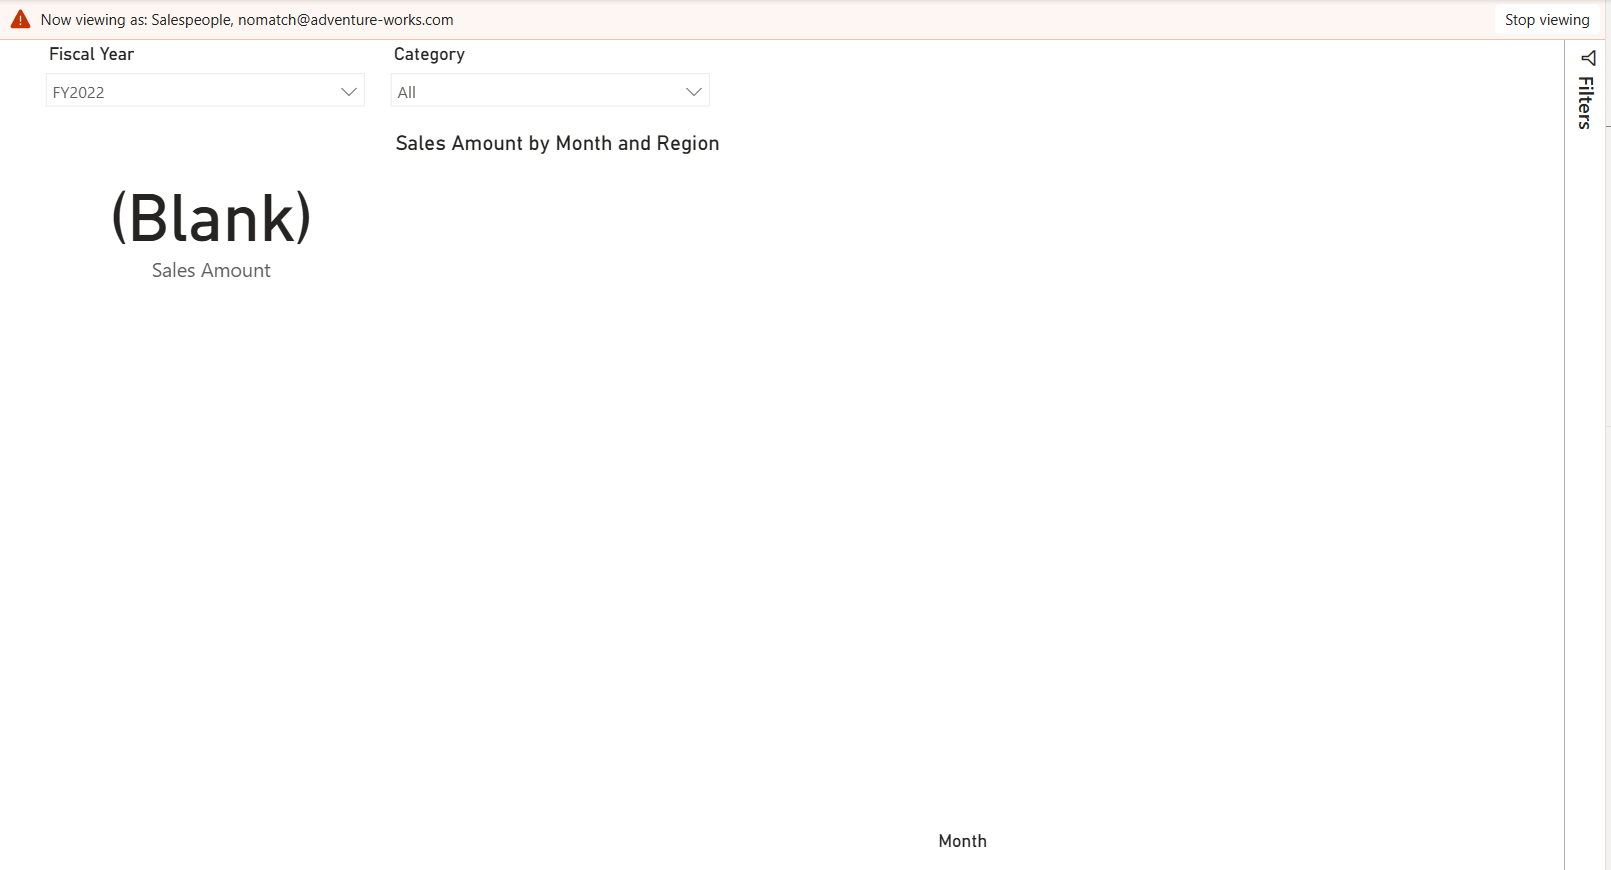
-
Select Stop viewing.
Clean up resources
- Close Power BI Desktop without saving.