Share Team Knowledge using Azure Project Wiki
Estimated time: 45 minutes
You will learn how to create and configure wikis in Azure DevOps, including managing markdown content and creating Mermaid diagrams. Azure DevOps wikis provide a centralized place for teams to share knowledge, document processes, and maintain project information.
This lab takes approximately 45 minutes to complete.
Before you start
You need:
- Microsoft Edge or an Azure DevOps supported browser
- Azure DevOps organization: Create one if you don't have one
- eShopOnWeb project: Use the sample project from previous labs or create a new one
About Azure DevOps Wikis
Azure DevOps provides two types of wikis:
- Project wiki - A wiki that exists separately from your repositories
- Code wiki - A wiki created from content stored in a Git repository
Key features:
- Markdown support with rich formatting capabilities
- Mermaid diagrams for creating flowcharts and sequence diagrams
- Image support with drag-and-drop functionality
- Version control with revision history
- Cross-reference links to work items, code, and other wikis
- Collaborative editing with concurrent user support
Set up the project and repository
First, ensure you have the eShopOnWeb project ready for this lab.
Set up Azure DevOps organization (if needed)
If you don't already have an Azure DevOps organization, follow these steps:
-
Use a private browser session to get a new personal Microsoft Account (MSA) at
https://account.microsoft.com(skip if you already have one). -
Using the same browser session, sign up for a free Azure subscription at
https://azure.microsoft.com/free(skip if you already have one). -
Open a browser and navigate to Azure portal at
https://portal.azure.com, then search at the top of the Azure portal screen for Azure DevOps. In the resulting page, select Azure DevOps organizations. -
Next, select the link labelled My Azure DevOps Organizations or navigate directly to
https://aex.dev.azure.com. -
On the We need a few more details page, select Continue.
-
In the drop-down box on the left, choose Default Directory, instead of Microsoft Account.
-
If prompted ("We need a few more details"), provide your name, e-mail address, and location and select Continue.
-
Back at
https://aex.dev.azure.comwith Default Directory selected select the blue button Create new organization. -
Accept the Terms of Service by selecting Continue.
-
If prompted ("Almost done"), leave the name for the Azure DevOps organization at default (it needs to be a globally unique name) and pick a hosting location close to you from the list.
-
Once the newly created organization opens in Azure DevOps, select Organization settings in the bottom left corner.
-
At the Organization settings screen select Billing (opening this screen takes a few seconds).
-
Select Setup billing and on the right-hand side of the screen, select your Azure Subscription and then select Save to link the subscription with the organization.
-
Once the screen shows the linked Azure Subscription ID at the top, change the number of Paid parallel jobs for MS Hosted CI/CD from 0 to 1. Then select SAVE button at the bottom.
Note: You may wait a couple of minutes before using the CI/CD capabilities so that the new settings are reflected in the backend. Otherwise, you will still see the message "No hosted parallelism has been purchased or granted".
-
In Organization Settings, go to section Pipelines and select Settings.
-
Toggle the switch to Off for Disable creation of classic build pipelines and Disable creation of classic release pipelines.
-
In Organization Settings, go to section Security and select Policies.
-
Toggle the switch to On for Allow public projects.
Create and configure the Azure DevOps project (if needed)
-
Open your browser and navigate to your Azure DevOps organization.
-
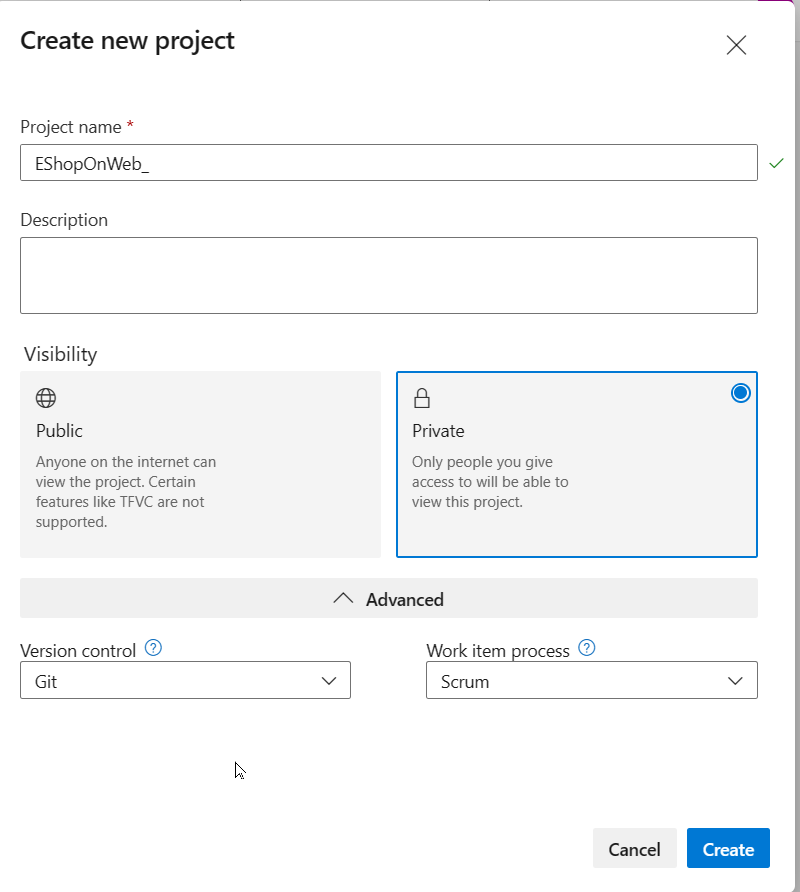
Select the New Project option and use the following settings:
- name: eShopOnWeb
- visibility: Private
- Advanced: Version Control: Git
- Advanced: Work Item Process: Scrum
-
Select Create.
Import eShopOnWeb git repository (if needed)
-
Open the previously created eShopOnWeb project.
-
Select the Repos > Files, Import a Repository and then select Import.
-
On the Import a Git Repository window, paste the following URL
https://github.com/MicrosoftLearning/eShopOnWeb.gitand select Import: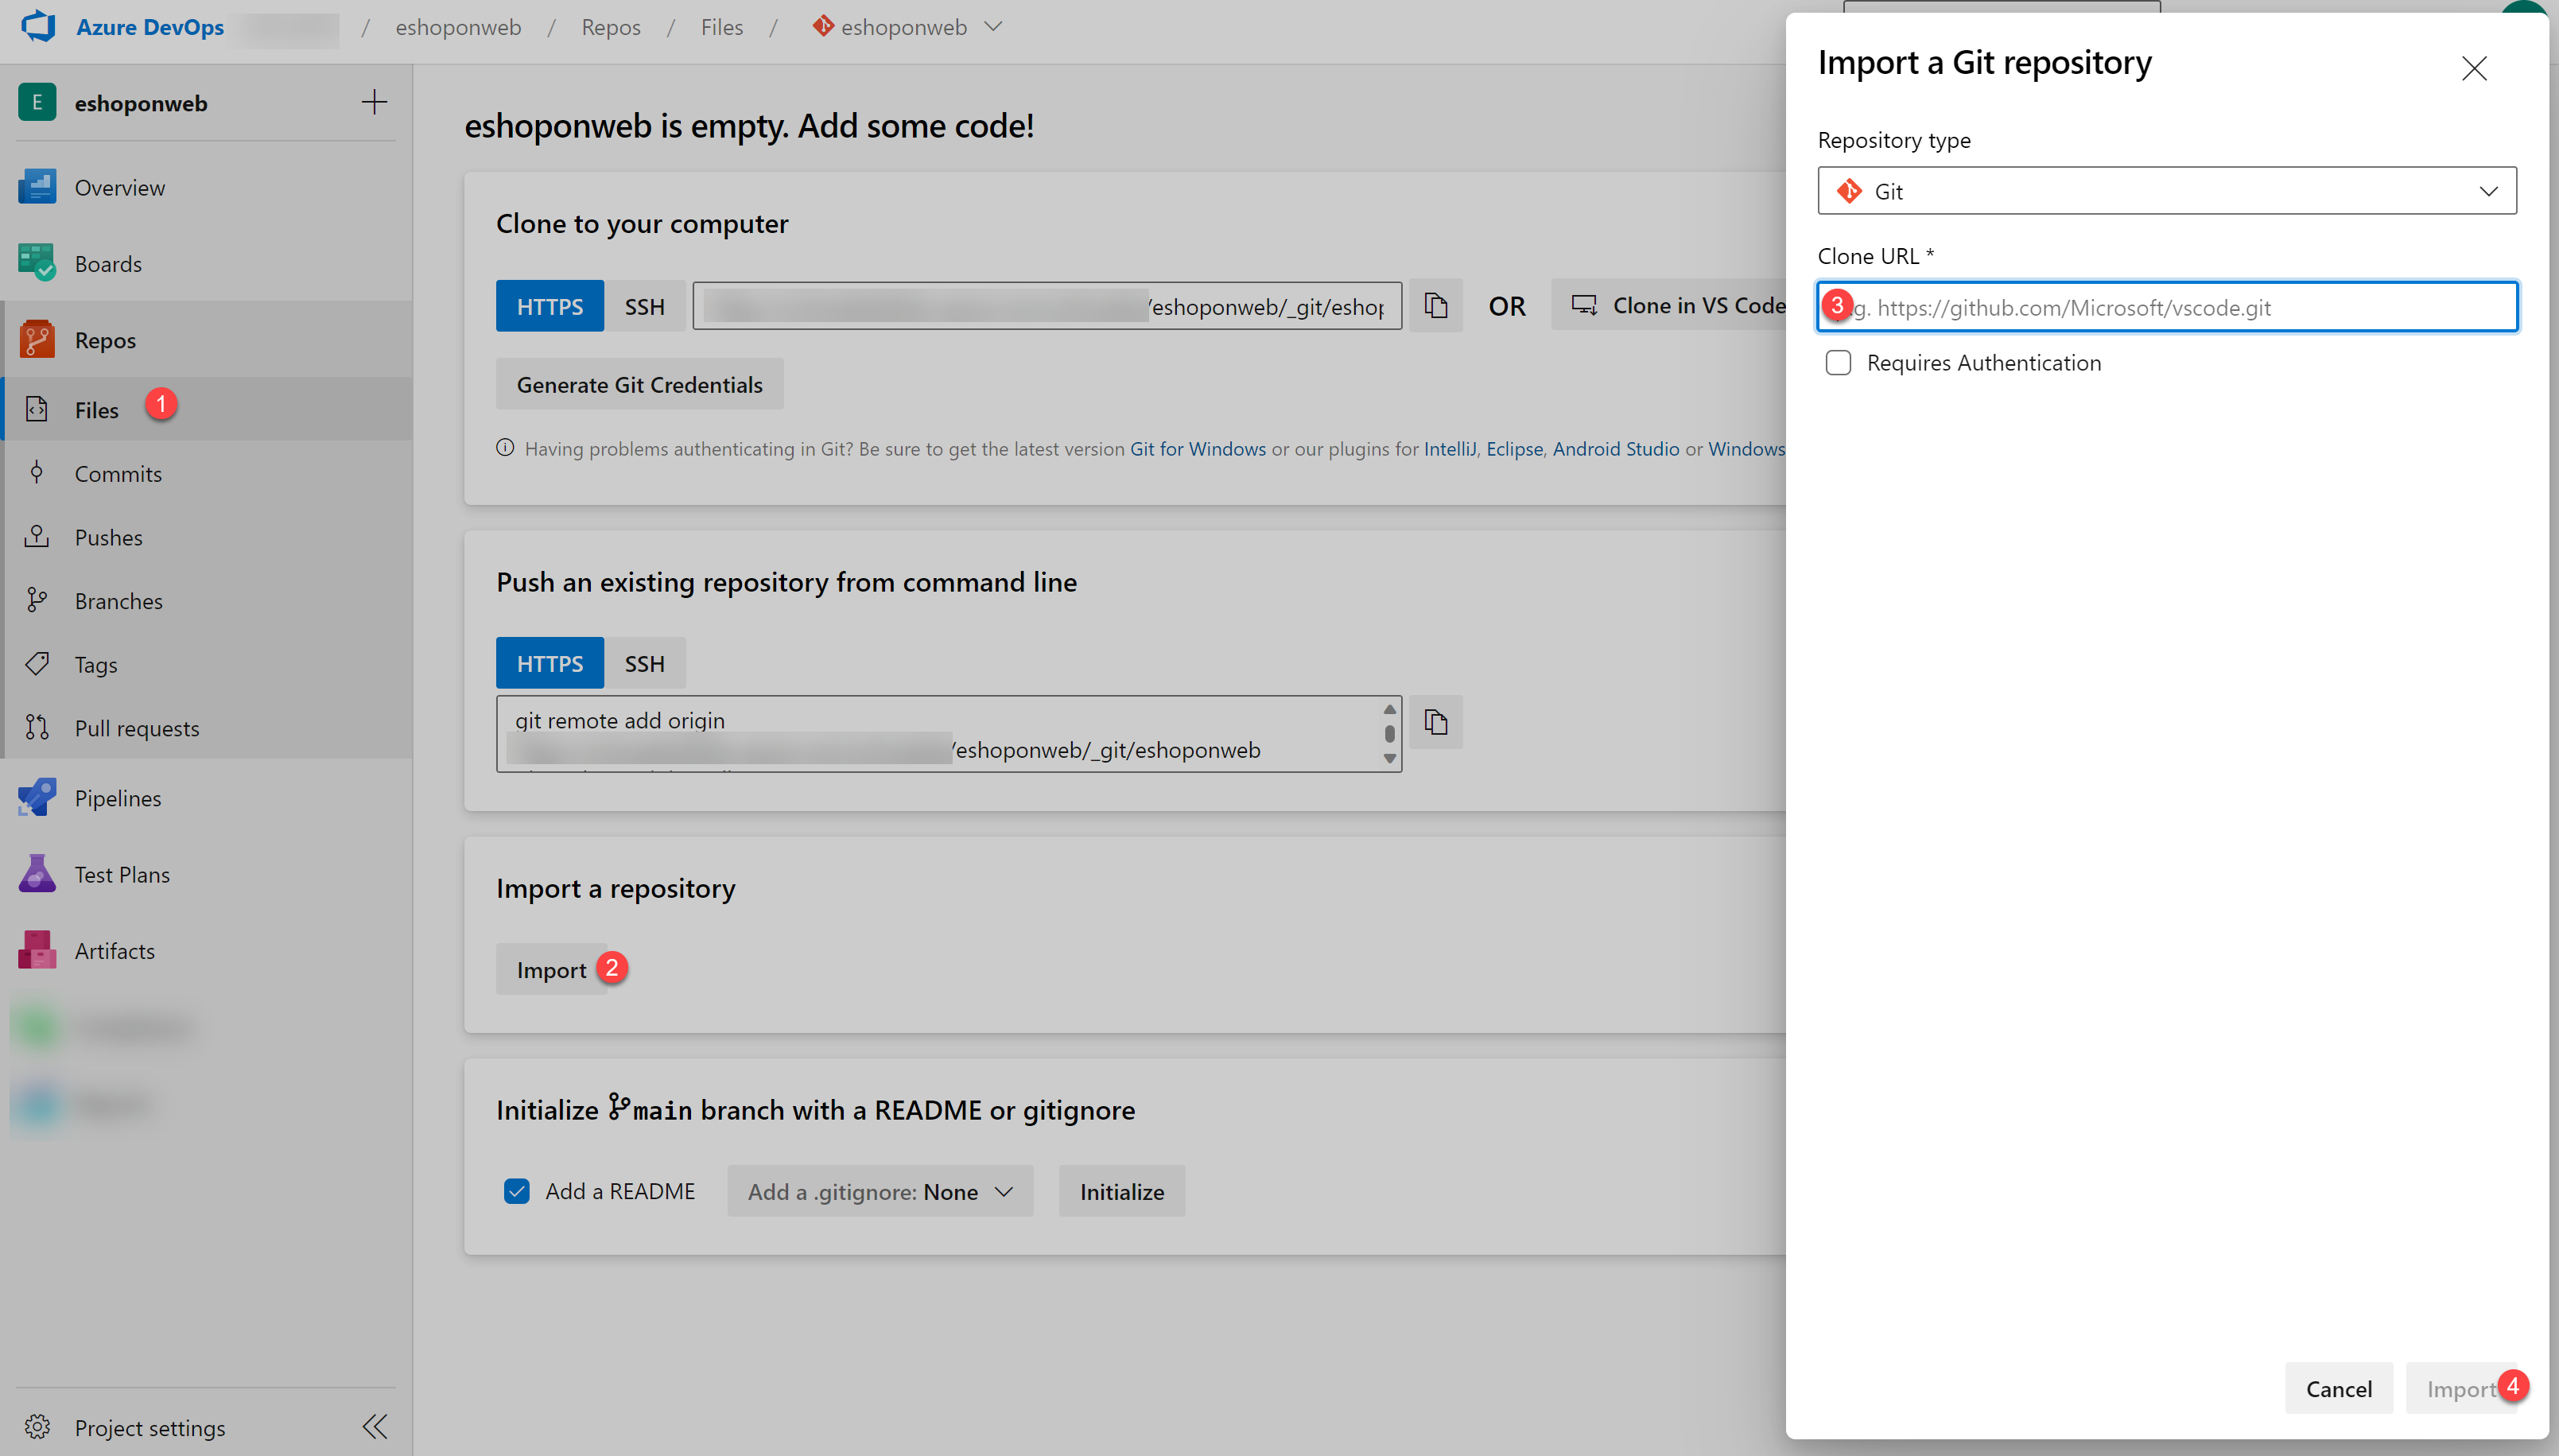
-
The repository is organized the following way:
- .ado folder contains Azure DevOps YAML pipelines.
- .devcontainer folder container setup to develop using containers (either locally in VS Code or GitHub Codespaces).
- .azure folder contains Bicep & ARM infrastructure as code templates.
- .github folder container YAML GitHub workflow definitions.
- src folder contains the .NET 8 website used on the lab scenarios.
-
Leave the web browser window open.
-
Go to Repos > Branches.
-
Hover on the main branch then select the ellipsis on the right of the column.
-
Select Set as default branch.
Download brand image for later use
- In the Files pane, expand the src folder and browse to Web > wwwroot > images subfolder
- In the Images subfolder, locate the brand.png entry
- Hover over its right end to reveal the vertical ellipsis (three dots) menu
- Select Download to download the brand.png file to your local computer
Note: You will use this image in the next exercise.
Create a Documents folder
- From within Repos, select Files
- Notice the eShopOnWeb Repo title on top of the folder structure
- Select the ellipsis (3 dots), Choose New > Folder
- Provide
Documentsas title for the New Folder name - As a repo doesn't allow empty folders, provide
README.mdas New File name - Select Create to confirm the creation
- The README.md file will open in view mode
- Select the Commit button to save the changes
- In the Commit window, confirm by pressing Commit
Publish code as a wiki
You can publish content from a Git repository as a wiki. This is useful for maintaining documentation alongside your code.
Publish a branch as wiki
-
In the Azure DevOps vertical menu on the left side, select Overview
-
In the Overview section, select Wiki
-
Select Publish code as wiki
-
On the Publish code as wiki pane, specify the following settings and select Publish:
Setting Value Repository eShopOnWeb Branch main Folder /Documents Wiki name eShopOnWeb (Documents)
This will automatically open the Wiki section with the editor.
Note: If the editor doesn't open automatically, select + New page at the bottom of the file explorer.
Create wiki content
-
In the Wiki Page Title field, enter:
Welcome to our Online Retail Store! -
In the body of the Wiki Page, paste the following content:
## Welcome to Our Online Retail Store! At our online retail store, we offer a **wide range of products** to meet the **needs of our customers**. Our selection includes everything from _clothing and accessories to electronics, home decor, and more_. We pride ourselves on providing a seamless shopping experience for our customers. Our website offers the following benefits: 1. user-friendly, 1. and easy to navigate, 1. allowing you to find what you're looking for, 1. quickly and easily. We also offer a range of **_payment and shipping options_** to make your shopping experience as convenient as possible. ### About the team Our team is dedicated to providing exceptional customer service. If you have any questions or concerns, our knowledgeable and friendly support team is always available to assist you. We also offer a hassle-free return policy, so if you're not completely satisfied with your purchase, you can easily return it for a refund or exchange. ### Physical Stores | Location | Area | Hours | | ----------- | --------------------- | --------------- | | New Orleans | Home and DIY | 07.30am-09.30pm | | Seattle | Gardening | 10.00am-08.30pm | | New York | Furniture Specialists | 10.00am-09.00pm | ## Our Store Qualities - We're committed to providing high-quality products - Our products are offered at affordable prices - We work with reputable suppliers and manufacturers - We ensure that our products meet our strict standards for quality and durability. - Plus, we regularly offer sales and discounts to help you save even more. # Summary Thank you for choosing our online retail store for your shopping needs. We look forward to serving you! -
This sample text demonstrates several common Markdown syntax features:
- Titles and subtitles (## and ###)
- Bold text (**)
- Italic text (*)
- Numbered lists (1.)
- Bullet lists (-)
- Tables with headers and data
-
Once finished, press the Save button in the upper right corner
-
Refresh your browser, or select any other DevOps portal option and return to the Wiki section
-
Notice you are now presented with the eShopOnWeb (Documents) Wiki, with Welcome to our Online Retail Store as the HomePage
Manage published wiki content
- In the vertical menu on the left side, select Repos
- Ensure the dropdown menu displays the eShopOnWeb repo and main branch
- In the repo folder hierarchy, select the Documents folder
- Select the Welcome-to-our-Online-Retail-Store!.md file
- Notice how the Markdown format is visible as raw text, allowing you to edit the file content from here as well
Note: Since the Wiki source files are handled as source code, all traditional source control practices (Clone, Pull Requests, Approvals, etc.) can be applied to Wiki pages.
Create and manage a project wiki
You can create and manage wikis independently of existing repositories. This provides flexibility for documentation that doesn't need to be version-controlled with your code.
Create a project wiki with Mermaid diagram
- In the Azure DevOps portal, navigate to the Wiki pane of the eShopOnWeb project
- With the eShopOnWeb (Documents) wiki content selected, select the dropdown list header at the top
- In the dropdown list, select Create new project wiki
- In the Page title text box, type:
Project Design - Place the cursor in the body of the page
- Select the left-most icon in the toolbar (header setting) and select Header 1
- This adds the hash character (#) at the beginning of the line
- After the # character, type:
Authentication and Authorizationand press Enter - Select the header setting icon again and select Header 2
- After the ## characters, type:
Azure DevOps OAuth 2.0 Authorization Flowand press Enter
Add a Mermaid diagram
Mermaid is a diagramming and charting tool that renders Markdown-inspired text definitions to create diagrams dynamically.
-
Copy and paste the following code to insert a Mermaid diagram:
::: mermaid
sequenceDiagram
 participant U as User
 participant A as Your app
 participant D as Azure DevOps
 U->>A: Use your app
 A->>D: Request authorization for user
 D-->>U: Request authorization
 U->>D: Grant authorization
 D-->>A: Send authorization code
 A->>D: Get access token
 D-->>A: Send access token
 A->>D: Call REST API with access token
 D-->>A: Respond to REST API
 A-->>U: Relay REST API response
:::
Note: For details about Mermaid syntax, refer to About Mermaid
- In the preview pane, select Load diagram and review the outcome
- The output should resemble a flowchart that illustrates OAuth 2.0 authorization flow
Save with revision message
- In the upper right corner of the editor pane, select the down-facing caret next to the Save button
- In the dropdown menu, select Save with revision message
- In the Save page dialog box, type:
Authentication and authorization section with the OAuth 2.0 Mermaid diagram - Select Save
Add an image section
- Place the cursor at the end of the Mermaid element and press Enter to add a new line
- Select the header setting icon and select Header 2
- After the ## characters, type:
User Interfaceand press Enter - In the toolbar, select the paper clip icon representing Insert a file
- In the Open dialog box, navigate to where you downloaded the brand.png file
- Select the brand.png file and select Open
- Review the preview pane and verify that the image displays properly
- Select the down-facing caret next to Save and select Save with revision message
- In the Save page dialog box, type:
User Interface section with the eShopOnWeb image - Select Save
- In the upper right corner, select Close
Manage a project wiki
You'll now learn how to manage wiki content, including reverting changes and organizing pages.
Revert changes using revision history
- With the Project Design wiki selected, in the upper right corner, select the vertical ellipsis symbol
- In the dropdown menu, select View revisions
- On the Revisions pane, select the entry representing the most recent change
- On the resulting pane, review the comparison between the previous and current version
- Select Revert
- When prompted for confirmation, select Revert again
- Then select Browse Page
- Back on the Project Design pane, verify that the change was successfully reverted
Add and organize wiki pages
- On the Project Design pane, at the bottom left corner, select + New page
- In the Page title text box, type:
Project Design Overview - Select Save, then select Close
- Back in the pane listing the pages within the Project Design project wiki, locate the Project Design Overview entry
- Select it with the mouse pointer and drag and drop it above the Project Design page entry
- Verify that the Project Design Overview entry is listed as the top level page with the home icon designating it as the wiki home page
Best practices for wiki management
- Use clear, descriptive titles for pages and sections
- Organize content hierarchically with proper heading levels
- Link between pages using wiki syntax
[[Page Name]] - Include images and diagrams to enhance understanding
- Use tables for structured data presentation
- Maintain consistency in formatting and style
- Review and update content regularly to keep it current
- Use revision messages to track changes meaningfully
Summary
In this lab, you learned how to:
- Create and publish code as a wiki from a Git repository
- Manage markdown content with rich formatting
- Create Mermaid diagrams for visual documentation
- Add and organize images in wiki pages
- Manage project wikis independently of code repositories
- Use revision history to track and revert changes
- Organize wiki pages with hierarchical structure
Azure DevOps wikis provide a powerful platform for team knowledge sharing, combining the flexibility of markdown with the structure of organized documentation. They integrate seamlessly with your development workflow while providing the collaboration features needed for effective team communication.