Deployments using Azure Bicep templates
Estimated time: 45 minutes
You will learn how to create an Azure Bicep template and modularize it using the Azure Bicep Modules concept. You'll modify the main deployment template to use the module and deploy all the resources to Azure using Azure YAML pipelines.
This lab takes approximately 30 minutes to complete.
Before you start
You need:
- Microsoft Edge or an Azure DevOps supported browser
- Azure subscription: You need an active Azure subscription or can create a new one
- Azure DevOps organization: Create one at Create an organization or project collection if you don't have one
-
Account permissions: You need a Microsoft account or Microsoft Entra account with:
- Owner role in the Azure subscription
- Global Administrator role in the Microsoft Entra tenant
- For details, see List Azure role assignments using the Azure portal and View and assign administrator roles in Azure Active Directory
About Azure Bicep
Azure Bicep is a domain-specific language (DSL) that uses declarative syntax to deploy Azure resources. It provides a more concise syntax compared to JSON templates while maintaining all the capabilities of Azure Resource Manager (ARM) templates.
Key benefits of Bicep:
- Simplified syntax: More readable and easier to write than JSON ARM templates
- Modular design: Support for modules to create reusable components
- Strong typing: IntelliSense support and compile-time validation
- No state management: Declarative syntax means you describe what you want, not how to get there
Create and configure the team project
First, you'll create an Azure DevOps project for this lab.
-
In your browser, open your Azure DevOps organization
-
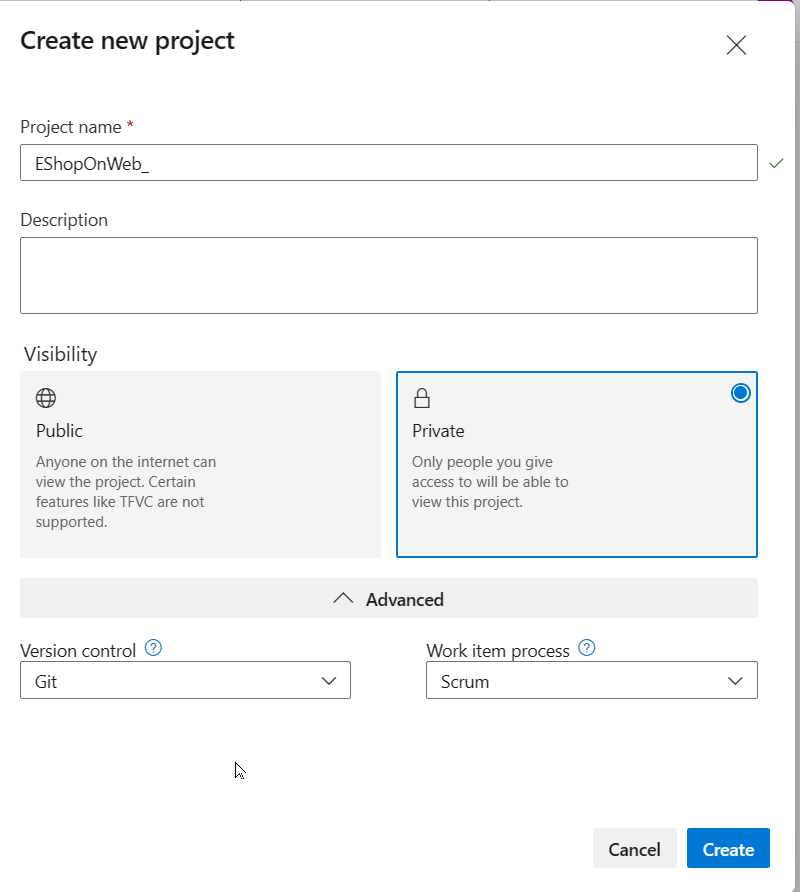
Select New Project
-
Give your project the name eShopOnWeb
-
Leave other fields with defaults
-
Select Create
Import the eShopOnWeb Git Repository
Next, you'll import the sample repository that contains the application code and infrastructure templates.
-
In your Azure DevOps organization, open the eShopOnWeb project
-
Select Repos > Files
-
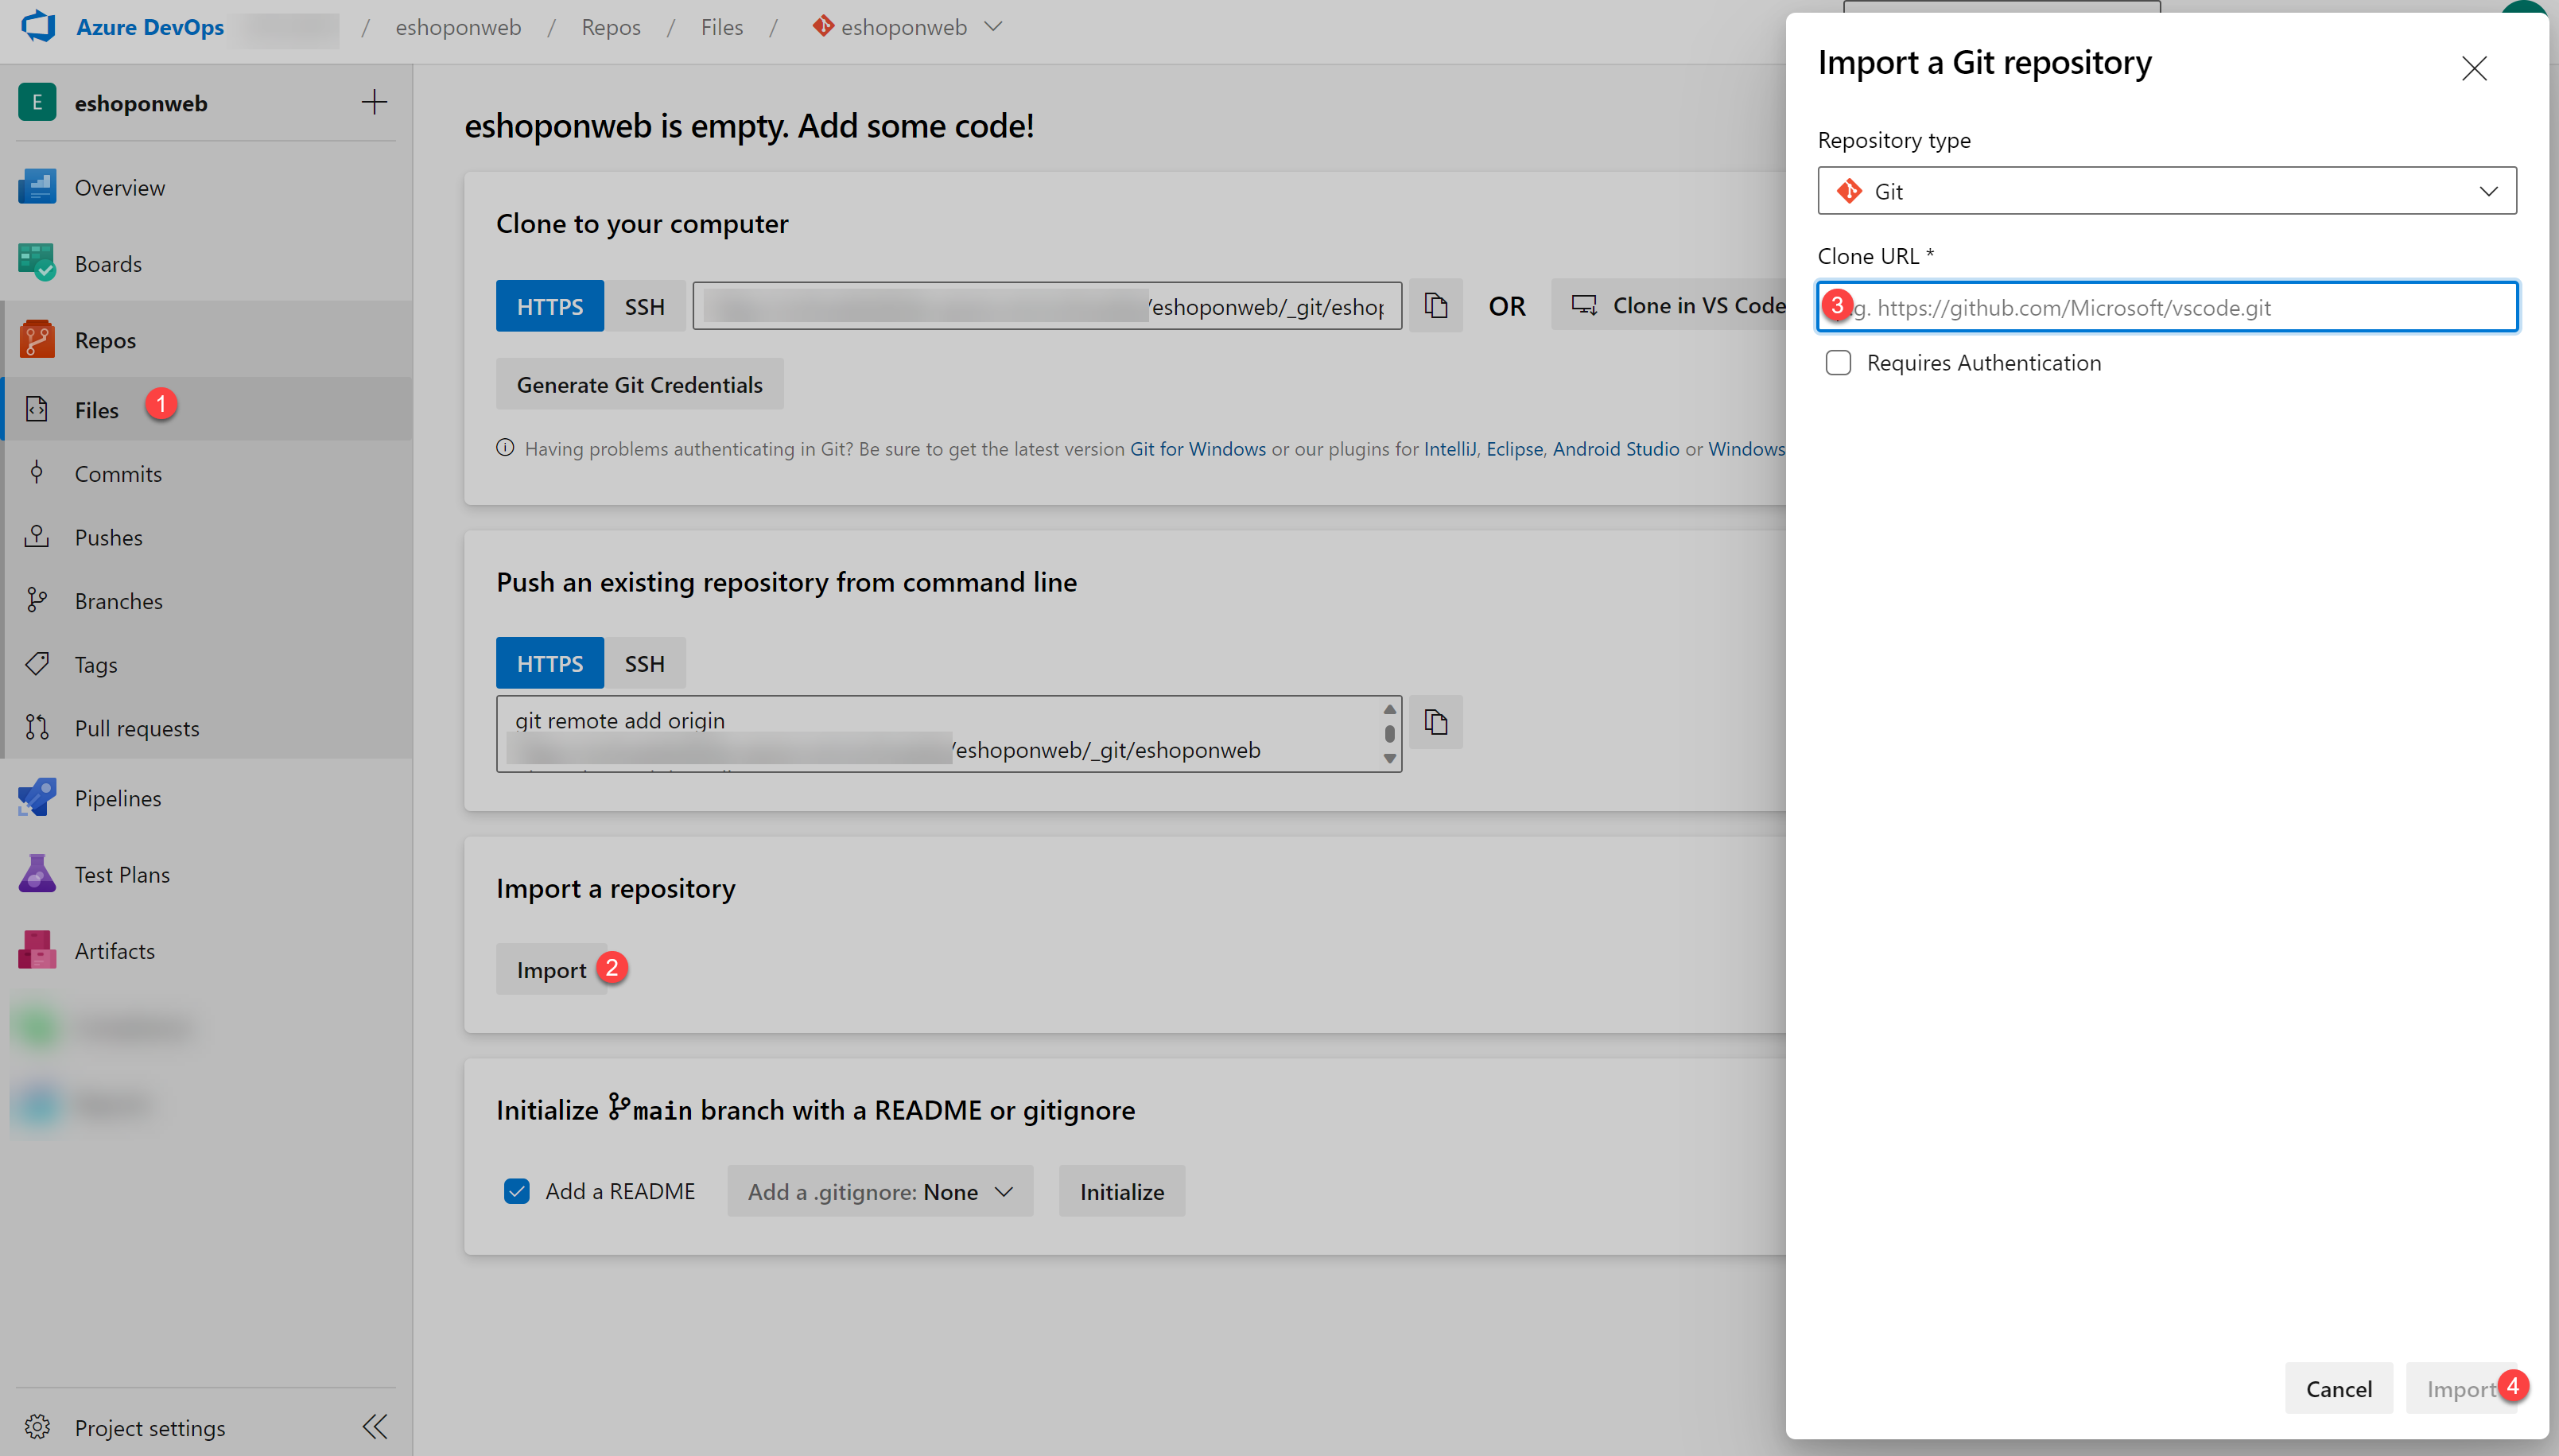
Select Import a Repository
-
Select Import
-
In the Import a Git Repository window, paste this URL:
https://github.com/MicrosoftLearning/eShopOnWeb.git -
Select Import
The repository is organized this way:
- .ado folder contains Azure DevOps YAML pipelines
- .devcontainer folder contains setup to develop using containers
- infra folder contains Bicep & ARM infrastructure as code templates used in lab scenarios
- .github folder contains YAML GitHub workflow definitions
- src folder contains the .NET 8 website used in the lab scenarios
- Go to Repos > Branches
- Hover on the main branch then select the ellipsis on the right
- Select Set as default branch
Understand an Azure Bicep template and simplify it using a reusable module
You'll review an Azure Bicep template and simplify it using a reusable module.
Create Azure Bicep template
You'll use the Azure DevOps editor to examine an Azure Bicep template.
-
In your Azure DevOps project, navigate to Repos and Files
-
Open the
infrafolder and find thesimple-windows-vm.bicepfile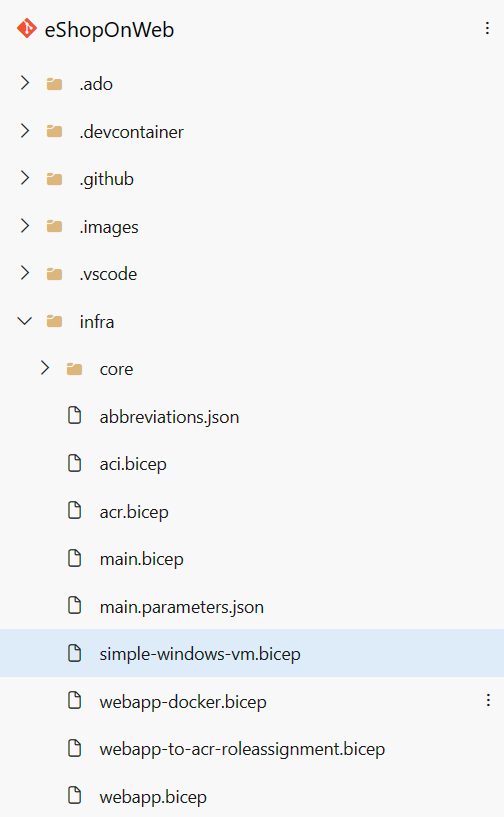
-
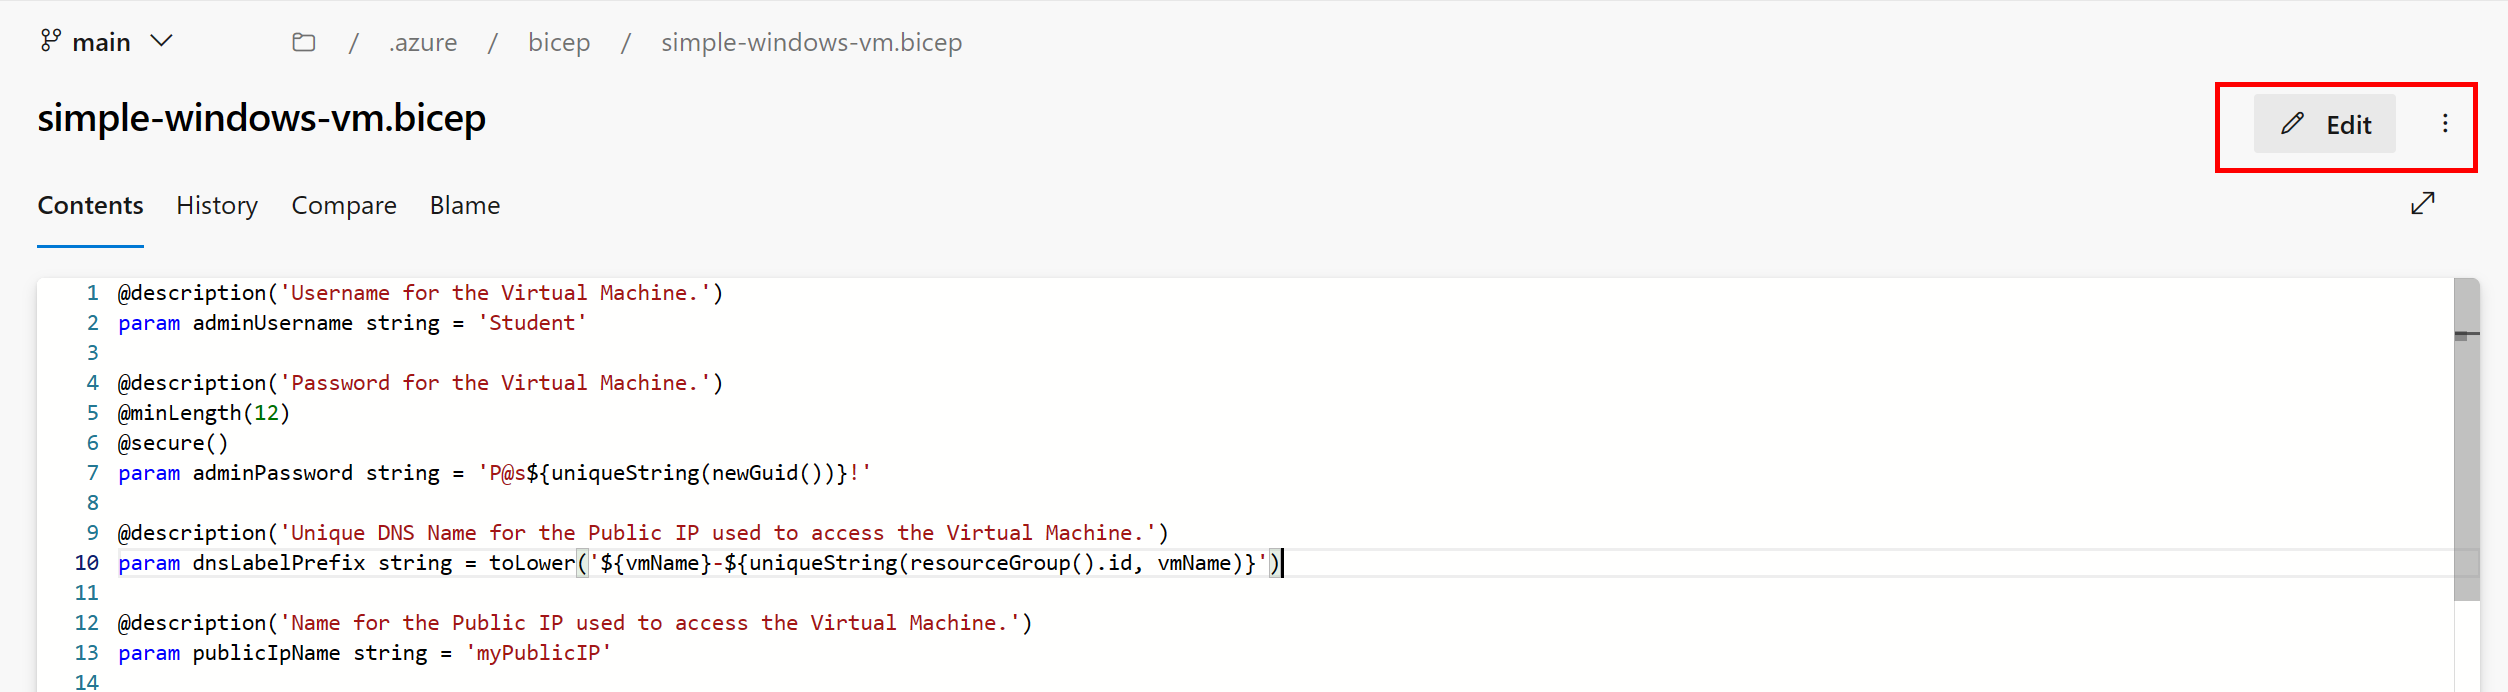
Review the template to get a better understanding of its structure
The template includes:
- Parameters with types, default values and validation
- Variables for computed values
-
Resources with these types:
- Microsoft.Storage/storageAccounts
- Microsoft.Network/publicIPAddresses
- Microsoft.Network/virtualNetworks
- Microsoft.Network/networkInterfaces
- Microsoft.Compute/virtualMachines
Notice how simple the resource definitions are and the ability to implicitly reference symbolic names instead of explicit dependsOn throughout the template.
Create a bicep module for storage resources
You'll create a storage template module storage.bicep which will create a storage account only and will be imported by the main template.
-
First, remove the storage resource from the main template. Select the Edit button:
-
Delete the storage resource:
resource storageAccount 'Microsoft.Storage/storageAccounts@2022-05-01' = { name: storageAccountName location: location sku: { name: 'Standard_LRS' } kind: 'Storage' } -
Change the default value of the
publicIPAllocationMethodparameter fromDynamictoStaticat line 20 -
Change the default value of the
publicIpSkuparameter fromBasictoStandardat line 27 -
Commit the file (we're not done with it yet)

-
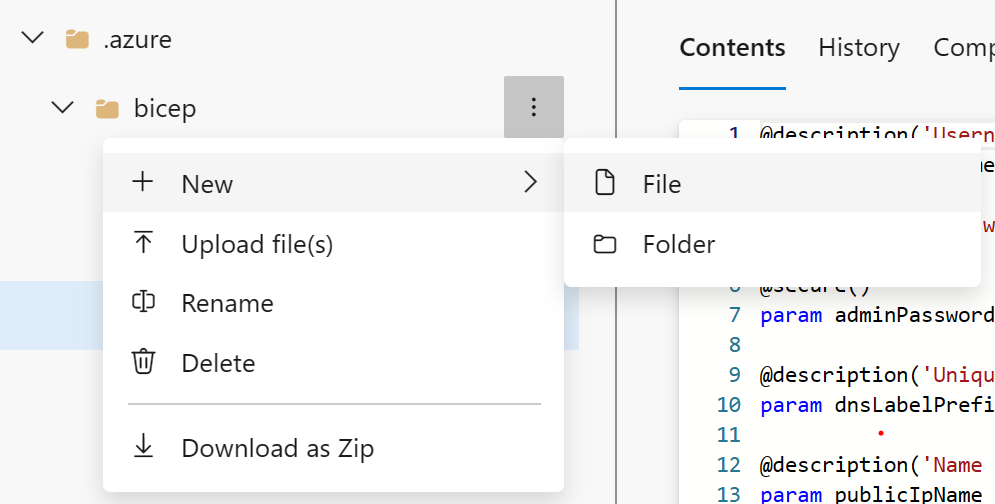
Next, hover your mouse over the
Infrafolder and select the ellipsis icon -
Select New, and File
-
Enter storage.bicep for the name and select Create
-
Copy the following code snippet into the file and commit your changes:
@description('Location for all resources.')
param location string = resourceGroup().location

@description('Name for the storage account.')
param storageAccountName string

resource storageAccount 'Microsoft.Storage/storageAccounts@2022-05-01' = {
  name: storageAccountName
  location: location
  sku: {
    name: 'Standard_LRS'
  }
  kind: 'Storage'
}

output storageURI string = storageAccount.properties.primaryEndpoints.blob
Modify the simple-windows-vm template to use the template module
You'll modify the simple-windows-vm.bicep template to reference the template module you created.
-
Navigate back to the
simple-windows-vm.bicepfile and select Edit -
Add the following code after the variables:
module storageModule './storage.bicep' = { name: 'linkedTemplate' params: { location: location storageAccountName: storageAccountName } } -
Modify the reference to the storage account blob URI in the virtual machine resource to use the output of the module
-
Find the virtual machine resource and replace the diagnosticsProfile section with:
diagnosticsProfile: { bootDiagnostics: { enabled: true storageUri: storageModule.outputs.storageURI } } -
Review the following details in the main template:
- A module in the main template is used to link to another template
- The module has a symbolic name called
storageModuleused for configuring dependencies - You can only use Incremental deployment mode when using template modules
- A relative path is used for your template module
- Parameters pass values from the main template to the template modules
-
Commit the template
Deploy the templates to Azure using YAML pipelines
You'll use an Azure DevOps YAML pipeline to deploy your template to your Azure environment.
Deploy resources to Azure by YAML pipelines
-
Navigate back to the Pipelines pane in the Pipelines hub
-
In the Create your first Pipeline window, select Create pipeline
-
On the Where is your code? pane, select Azure Repos Git (YAML)
-
On the Select a repository pane, select eShopOnWeb
-
On the Configure your pipeline pane, scroll down and select Existing Azure Pipelines YAML File
-
In the Selecting an existing YAML File blade, specify:
- Branch: main
- Path: .ado/eshoponweb-cd-windows-cm.yml
-
Select Continue to save these settings
-
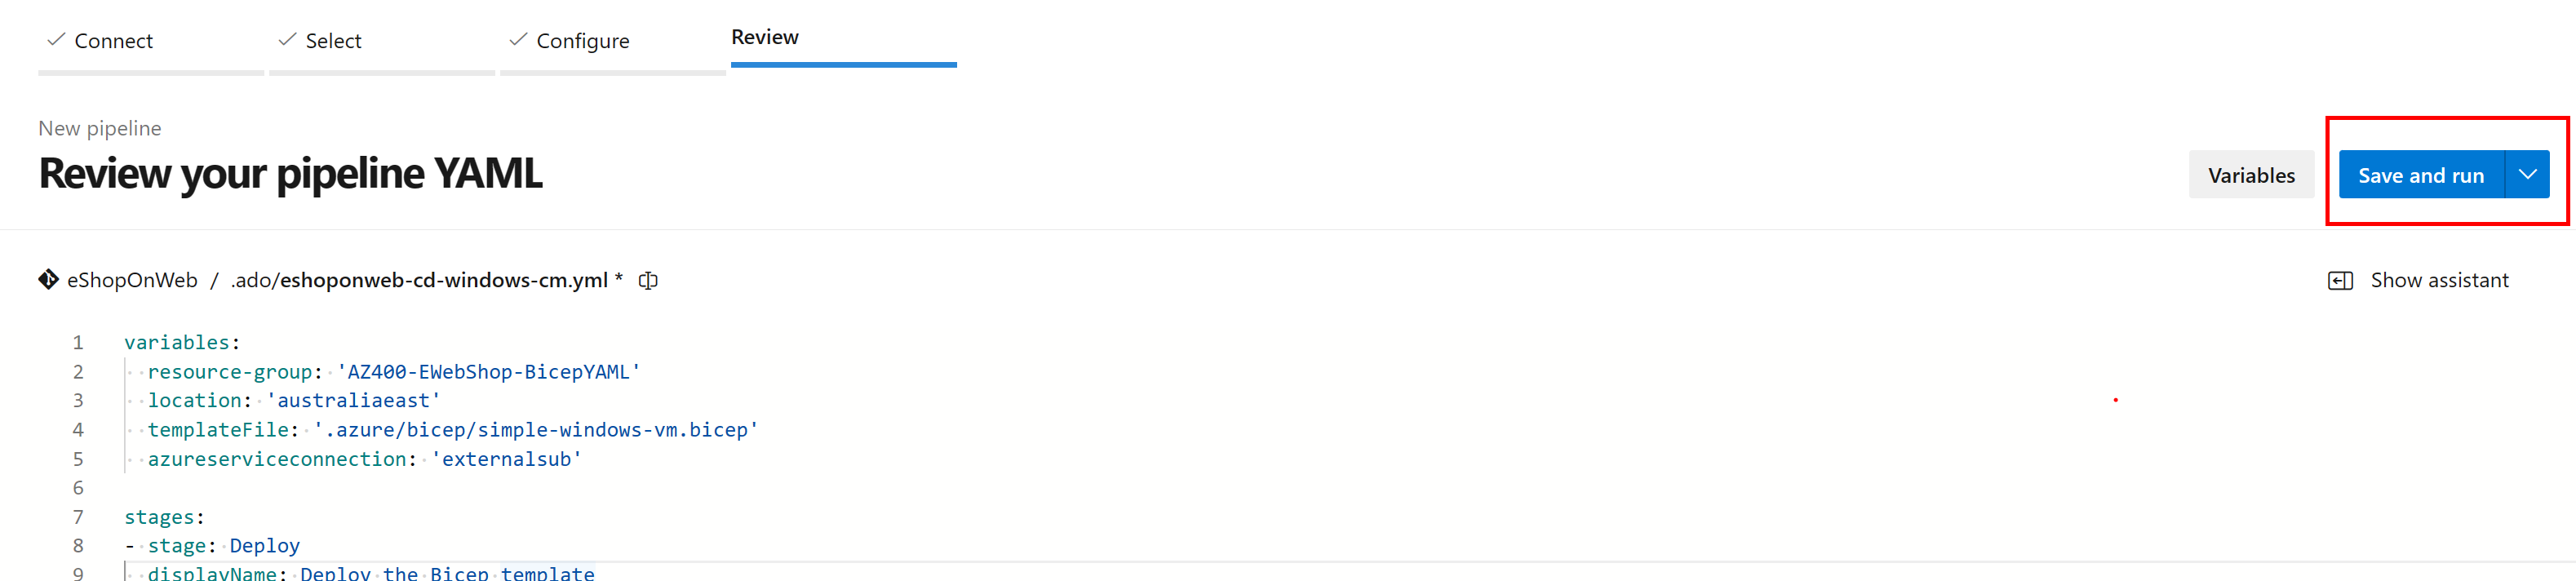
In the variables section:
- Choose a name for your resource group
- Set the desired location
- Replace the value of the service connection with one of your existing service connections
-
Select the Save and run button from the top right corner
-
When the commit dialog appears, select Save and run again
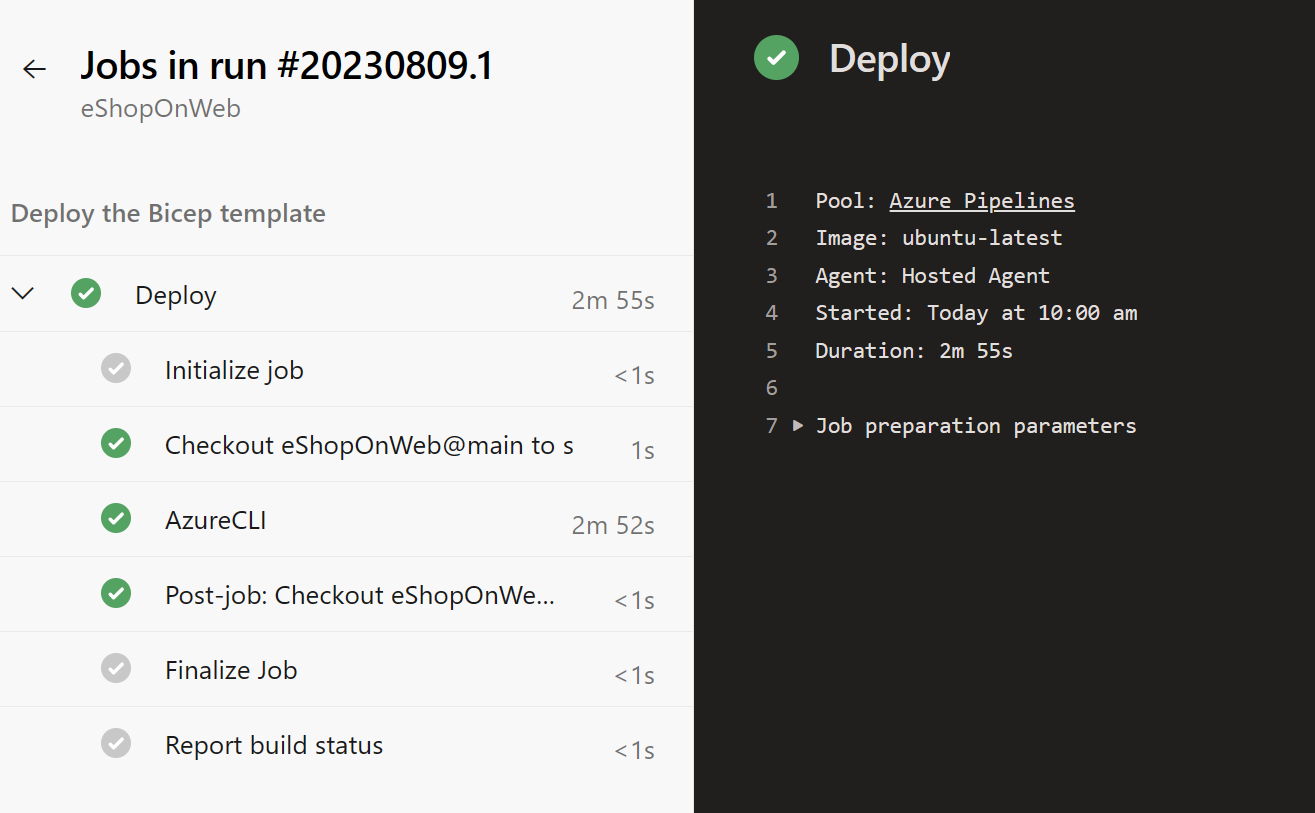
-
Wait for the deployment to finish and review the results
Note: Remember to give the pipeline permission to use the previously created Service Connection if prompted.
Clean up resources
Remember to delete the resources created in the Azure portal to avoid unnecessary charges:
- In the Azure portal, navigate to the resource group you created
- Select Delete resource group
- Type the resource group name to confirm deletion
- Select Delete
Summary
In this lab, you learned how to:
- Understand an Azure Bicep template's structure including parameters, variables, and resources
- Create a reusable Bicep module for storage resources
- Modify the main template to use the module and updated dependencies
- Deploy templates to Azure using YAML pipelines
Azure Bicep provides a powerful way to define and deploy Azure infrastructure as code. By using modules, you can create reusable components that make your infrastructure templates more maintainable and organized. The integration with Azure DevOps pipelines enables automated deployment of your infrastructure alongside your applications.