Integrate Azure Key Vault with Azure DevOps
Estimated time: 40 minutes
You will learn how to integrate Azure Key Vault with an Azure Pipeline to securely store and retrieve sensitive data such as passwords and keys. You'll create an Azure Key Vault, store an Azure Container Registry password as a secret, and configure a pipeline to retrieve and use that secret for container deployment.
This lab takes approximately 40 minutes to complete.
Before you start
You need:
- Microsoft Edge or an Azure DevOps supported browser
- Azure subscription: You need an active Azure subscription or can create a new one
- Azure DevOps organization: Create one at Create an organization or project collection if you don't have one
About Azure Key Vault
Azure Key Vault provides secure storage and management of sensitive data, such as keys, passwords, and certificates. It includes support for hardware security modules, as well as a range of encryption algorithms and key lengths. By using Azure Key Vault, you can minimize the possibility of disclosing sensitive data through source code, which is a common mistake made by developers. Access to Azure Key Vault requires proper authentication and authorization, supporting fine-grained permissions to its content.
Create and configure the team project
First, you'll create an Azure DevOps project for this lab.
-
In your browser, open your Azure DevOps organization
-
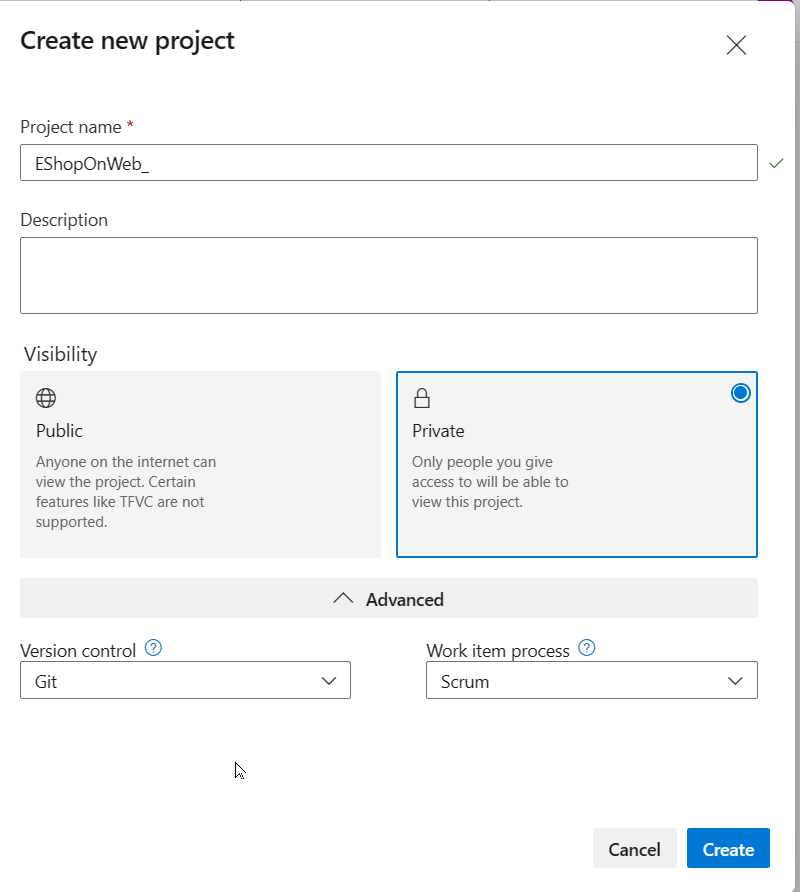
Select New Project
-
Give your project the name eShopOnWeb
-
Leave other fields with defaults
-
Select Create
Import the eShopOnWeb Git Repository
Next, you'll import the sample repository that contains the application code.
-
In your Azure DevOps organization, open the eShopOnWeb project
-
Select Repos > Files
-
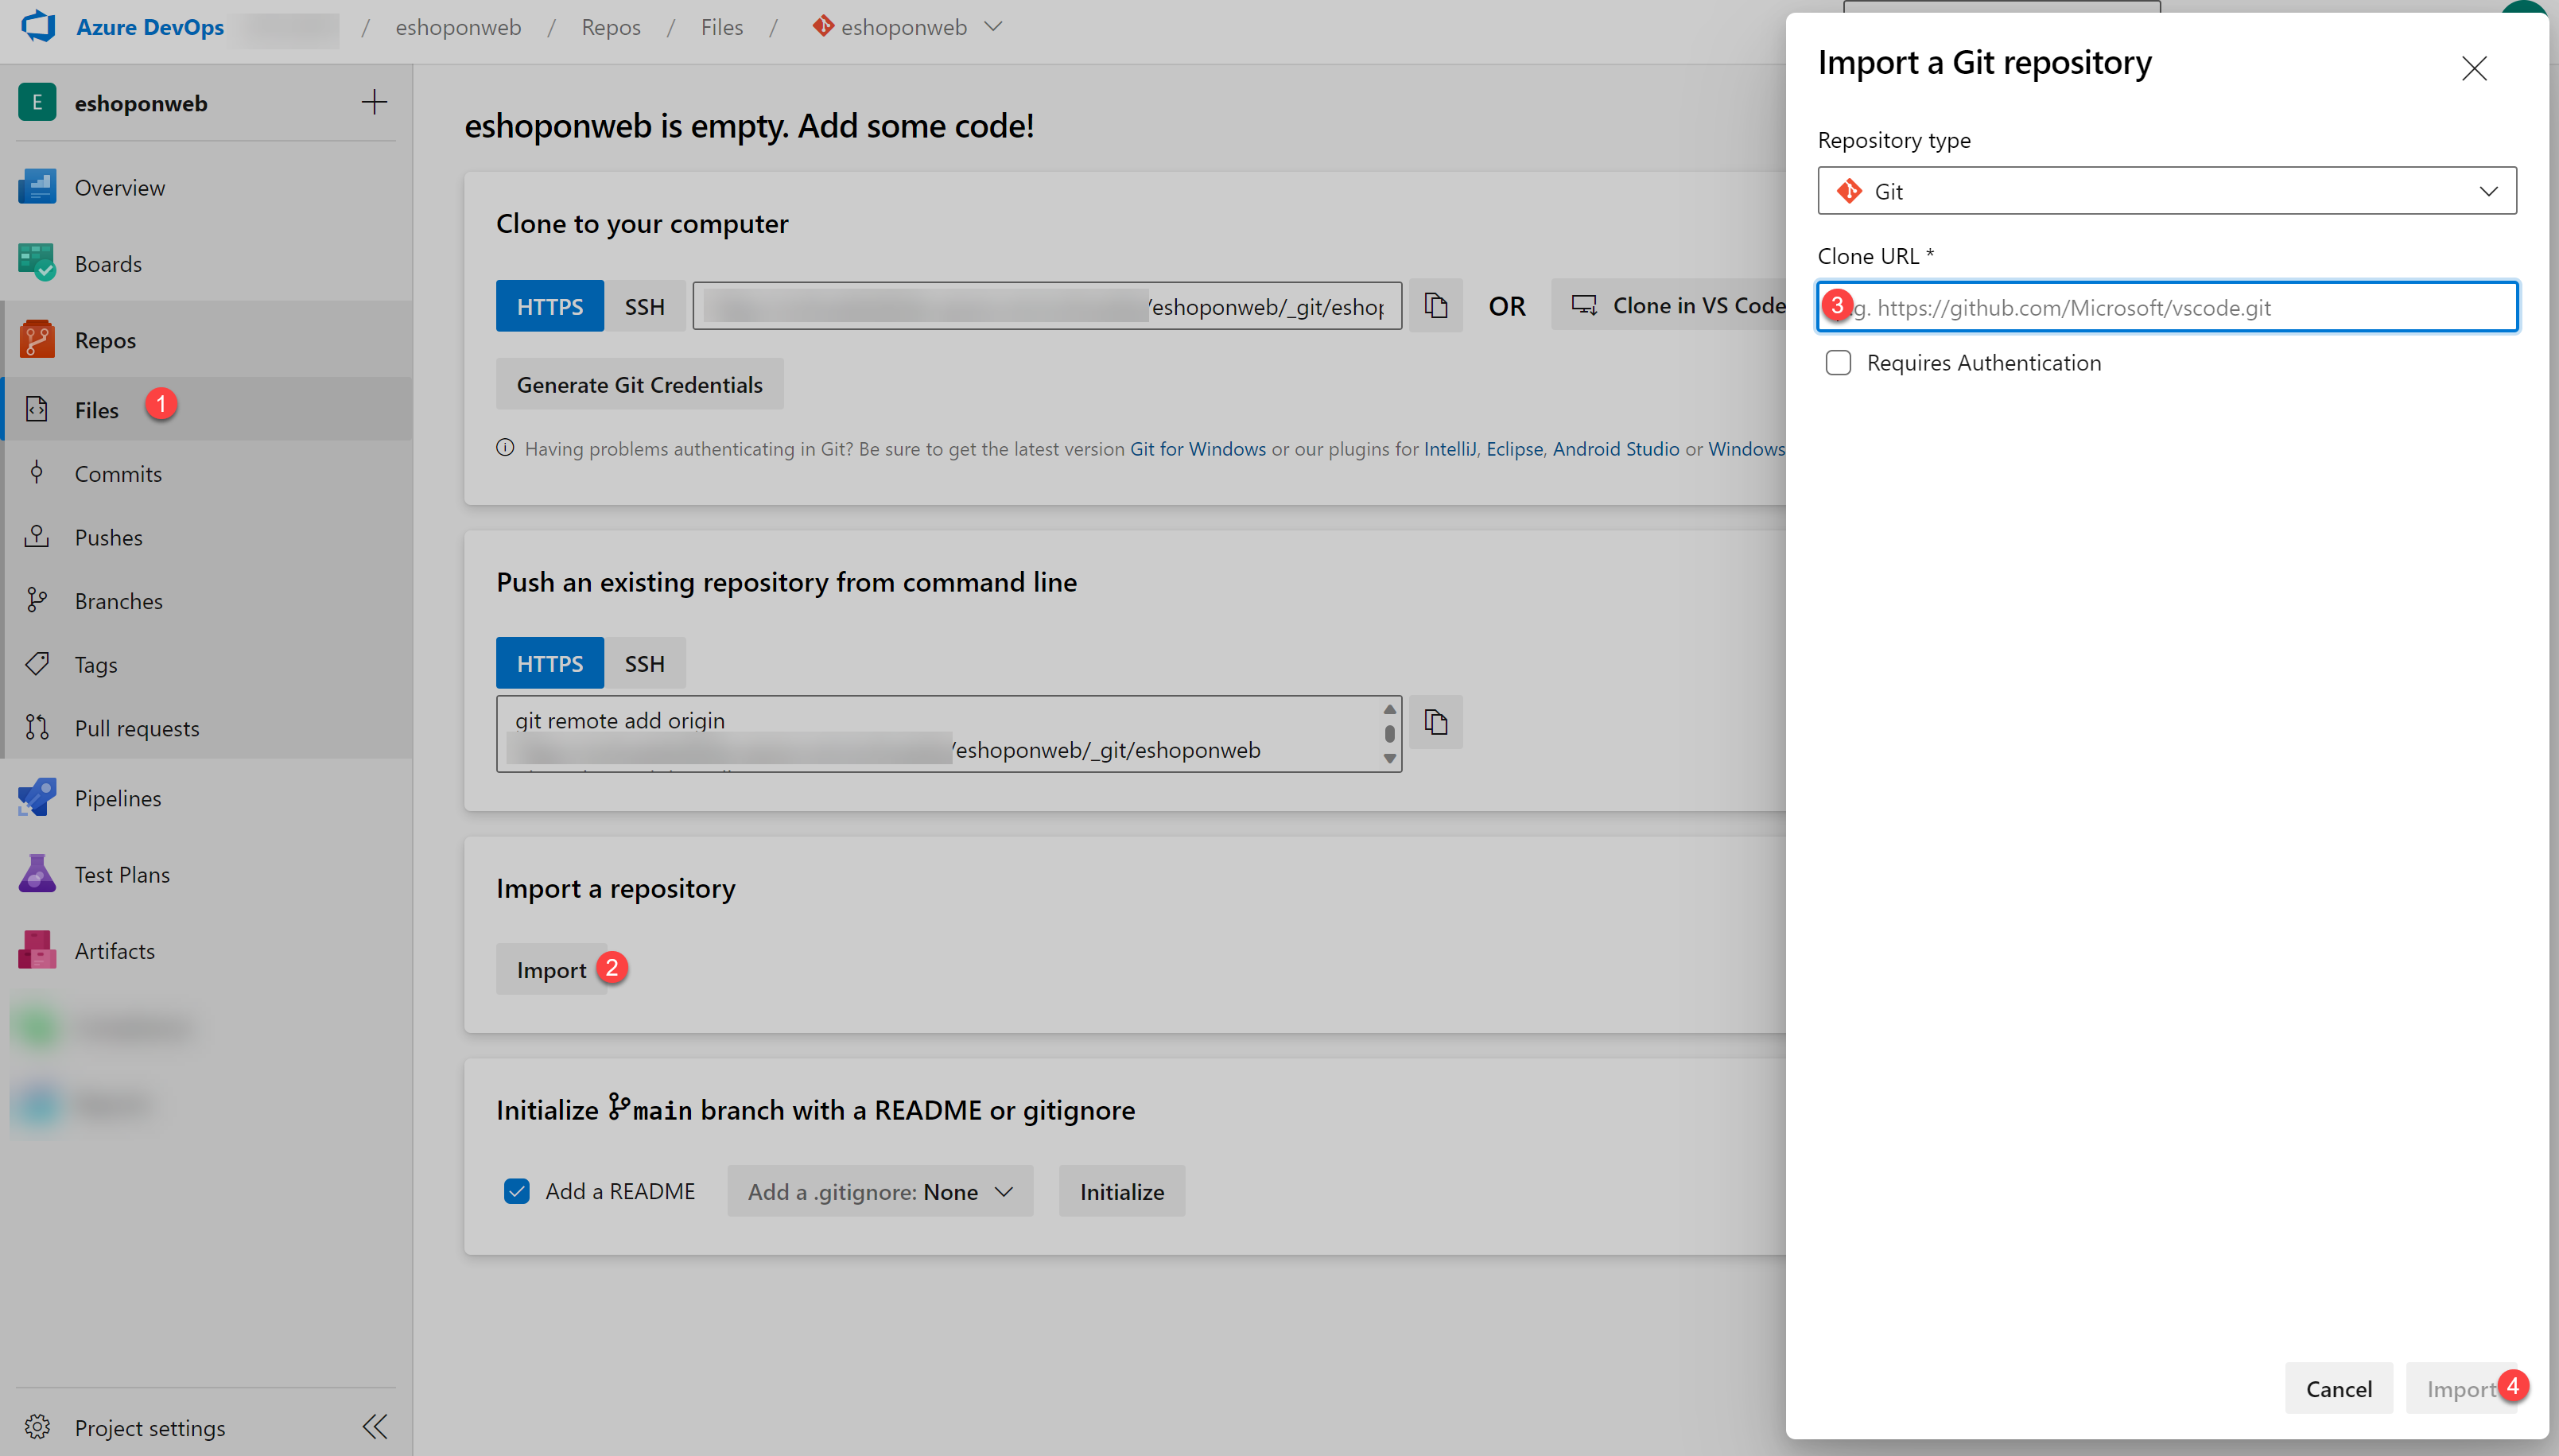
Select Import
-
In the Import a Git Repository window, paste this URL:
https://github.com/MicrosoftLearning/eShopOnWeb.git -
Select Import
The repository is organized this way:
- .ado folder contains Azure DevOps YAML pipelines
- .devcontainer folder contains setup to develop using containers
- infra folder contains Bicep & ARM infrastructure as code templates
- .github folder contains YAML GitHub workflow definitions
- src folder contains the .NET 8 website used in the lab scenarios
- Go to Repos > Branches
- Hover on the main branch then select the ellipsis on the right
- Select Set as default branch
Setup CI pipeline to build eShopOnWeb container
You'll create a CI pipeline that builds and pushes container images to an Azure Container Registry (ACR).
Setup service connection
An Azure Resource Manager service connection allows you to connect to Azure resources like Azure Key Vault from your pipeline. This connection lets you use a pipeline to deploy to Azure resources, such as an Azure App Service app, without needing to authenticate each time.
- In the Azure DevOps project, go to Project settings > Service connections.
- Select Create service connection, then select Azure Resource Manager and Next.
- In the New Azure service connection pane, verify the following settings and then select Save:
- Identity type: App registration (automatic)
- Credential: Workload identity federation
- Scope level: Subscription
- Subscription: Select the subscription you are using for this lab
- Service Connection Name:
azure subs - Grant access permission to all pipelines: Enabled
Setup and Run CI pipeline
You'll import an existing CI YAML pipeline definition that creates an Azure Container Registry and builds/publishes container images.
-
From your lab computer, navigate to the Azure DevOps eShopOnWeb project
-
Go to Pipelines > Pipelines and select Create Pipeline (or New pipeline)
-
On the Where is your code? window, select Azure Repos Git (YAML)
-
Select the eShopOnWeb repository
-
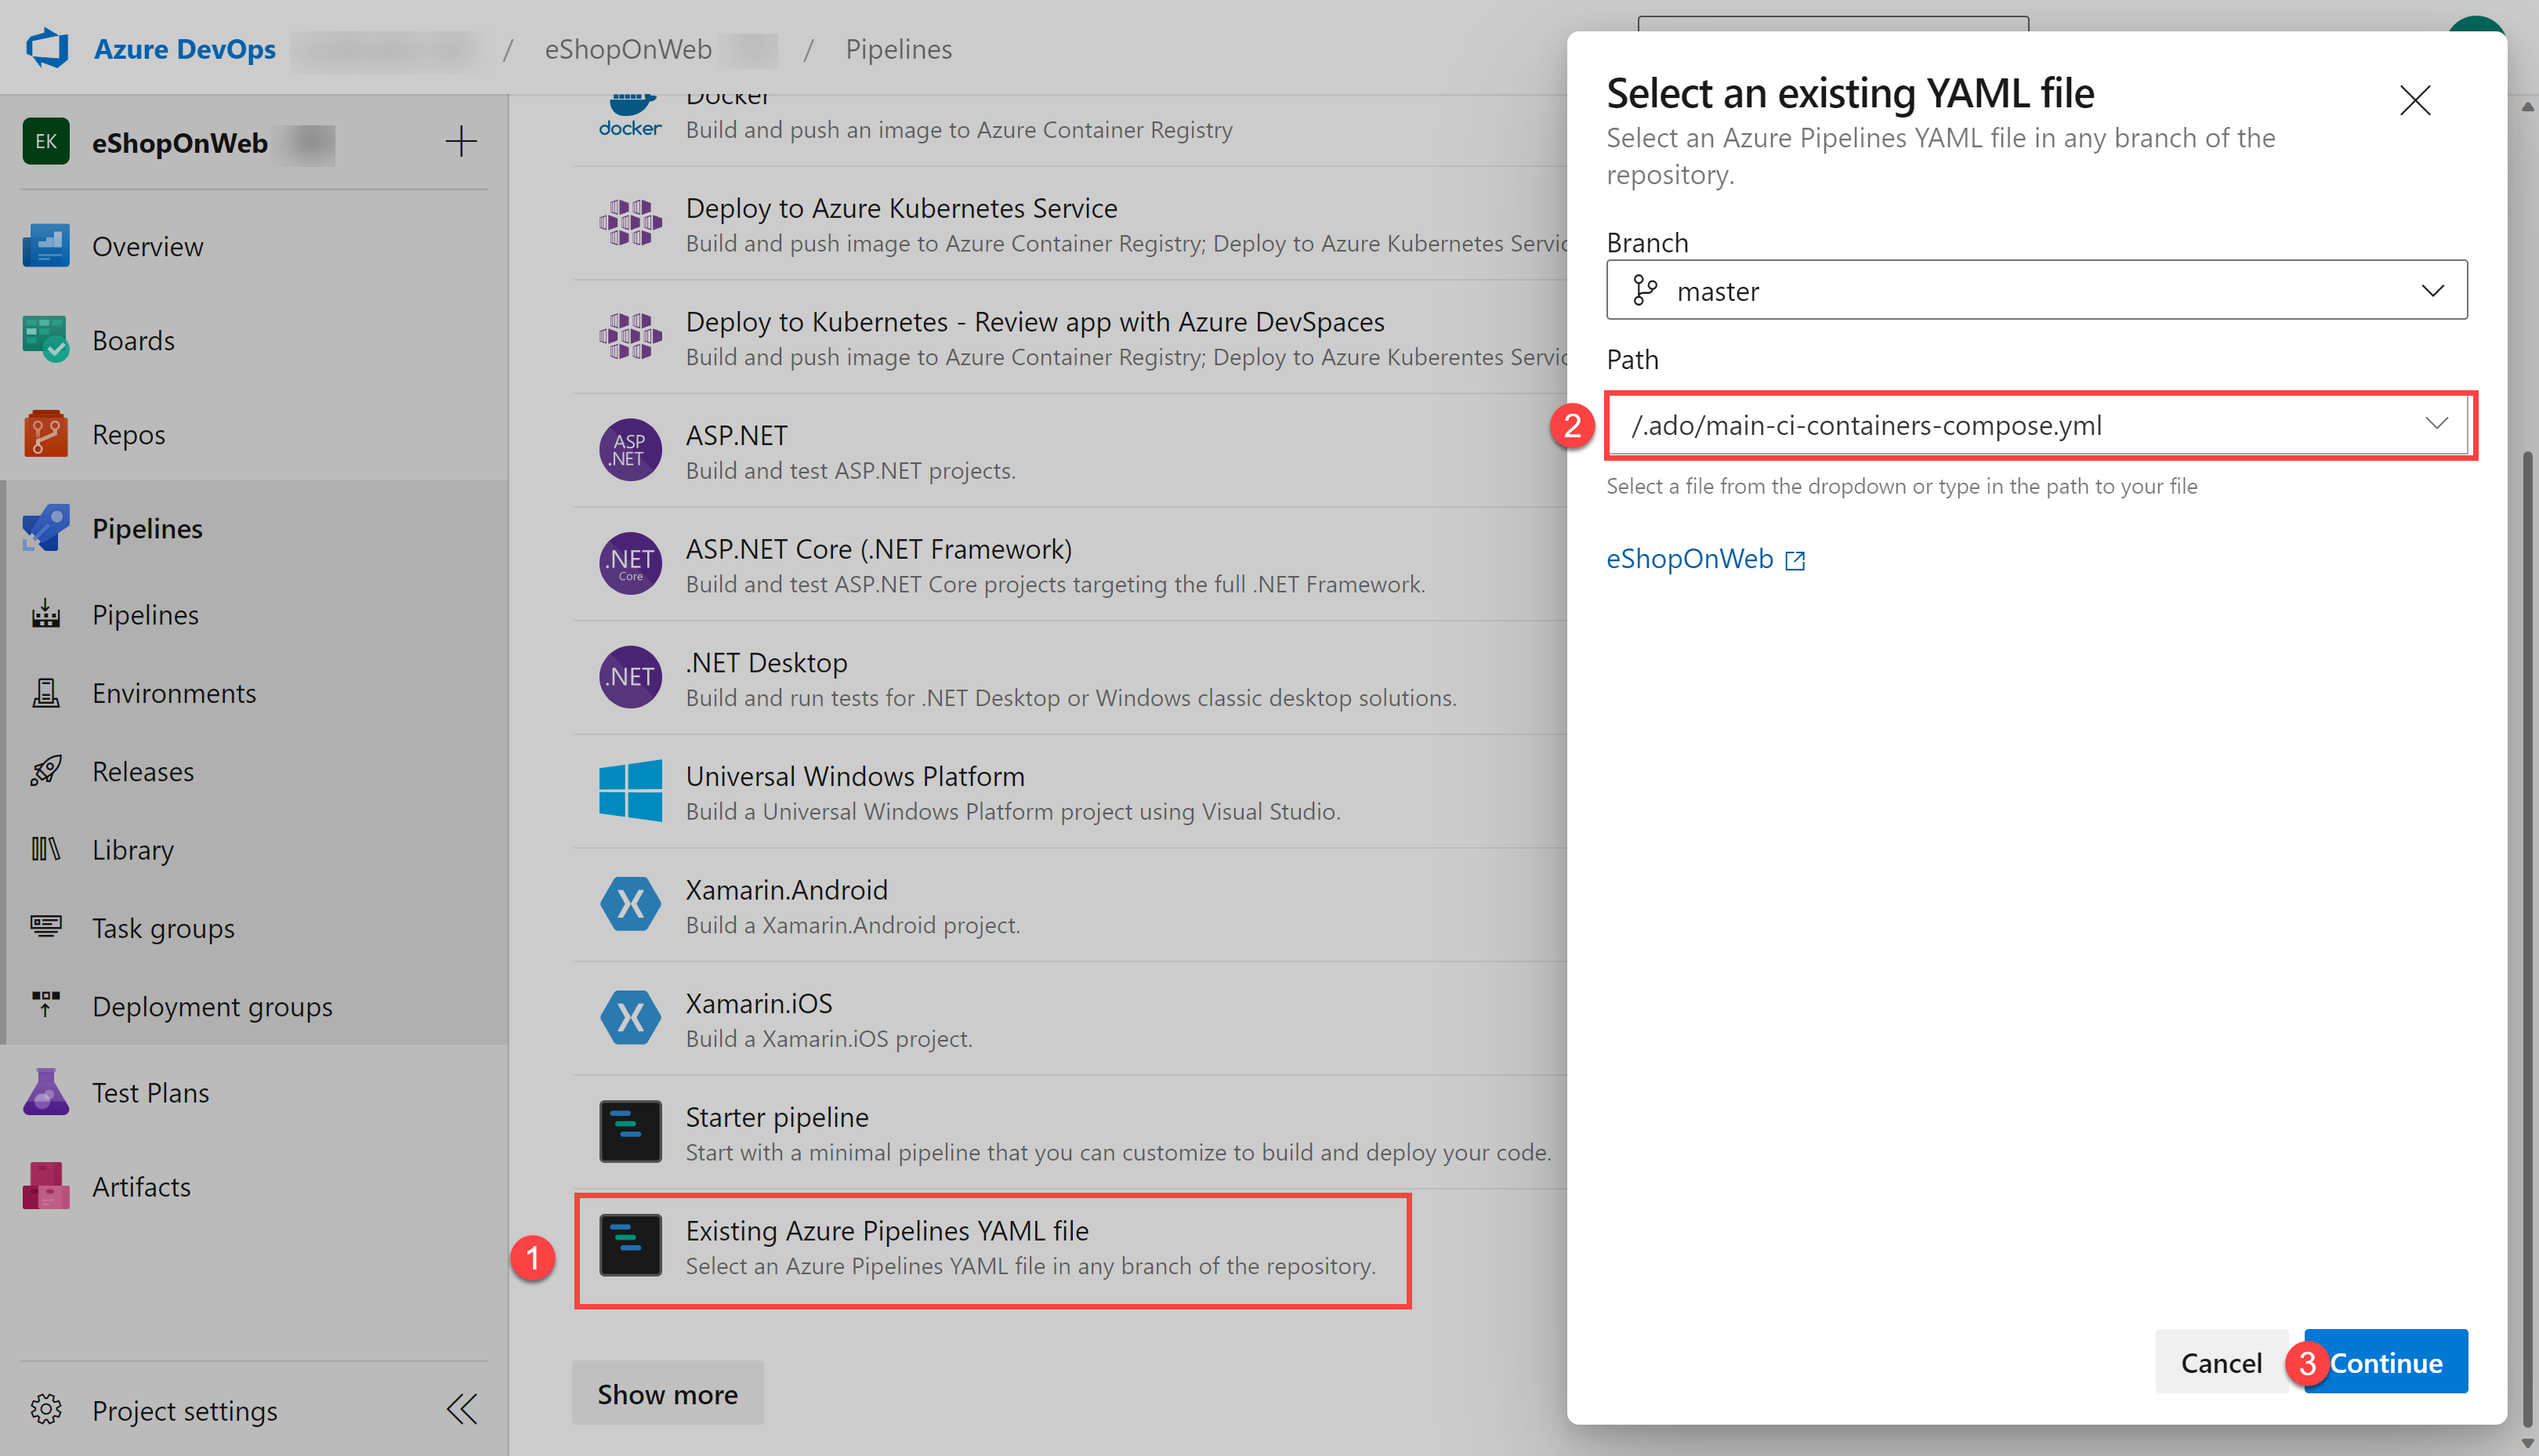
On the Configure section, choose Existing Azure Pipelines YAML file
-
Select branch: main
-
Provide the path: /.ado/eshoponweb-ci-dockercompose.yml
-
Select Continue
-
In the YAML pipeline definition, customize your Resource Group name by replacing NAME in AZ400-EWebShop-NAME with a unique value
-
Replace YOUR-SUBSCRIPTION-ID with your own Azure subscription ID
-
Select Save and Run and wait for the pipeline to execute successfully
Important: If you see the message "This pipeline needs permission to access resources before this run can continue to Docker Compose to ACI", select on View, Permit and Permit again. This is needed to allow the pipeline to create the resource.
The build definition consists of these tasks:
- AzureResourceManagerTemplateDeployment uses bicep to deploy an Azure Container Registry
- PowerShell task takes the bicep output (ACR login server) and creates pipeline variable
- DockerCompose task builds and pushes the container images for eShopOnWeb to the Azure Container Registry
-
Your pipeline will take a name based on the project name. Let's rename it for better identification
-
Go to Pipelines > Pipelines and select the recently created pipeline
-
Select the ellipsis and Rename/Remove option
-
Name it eshoponweb-ci-dockercompose and select Save
-
Once execution is finished, in the Azure Portal, open the previously defined Resource Group
-
You should find an Azure Container Registry (ACR) with the created container images eshoppublicapi and eshopwebmvc
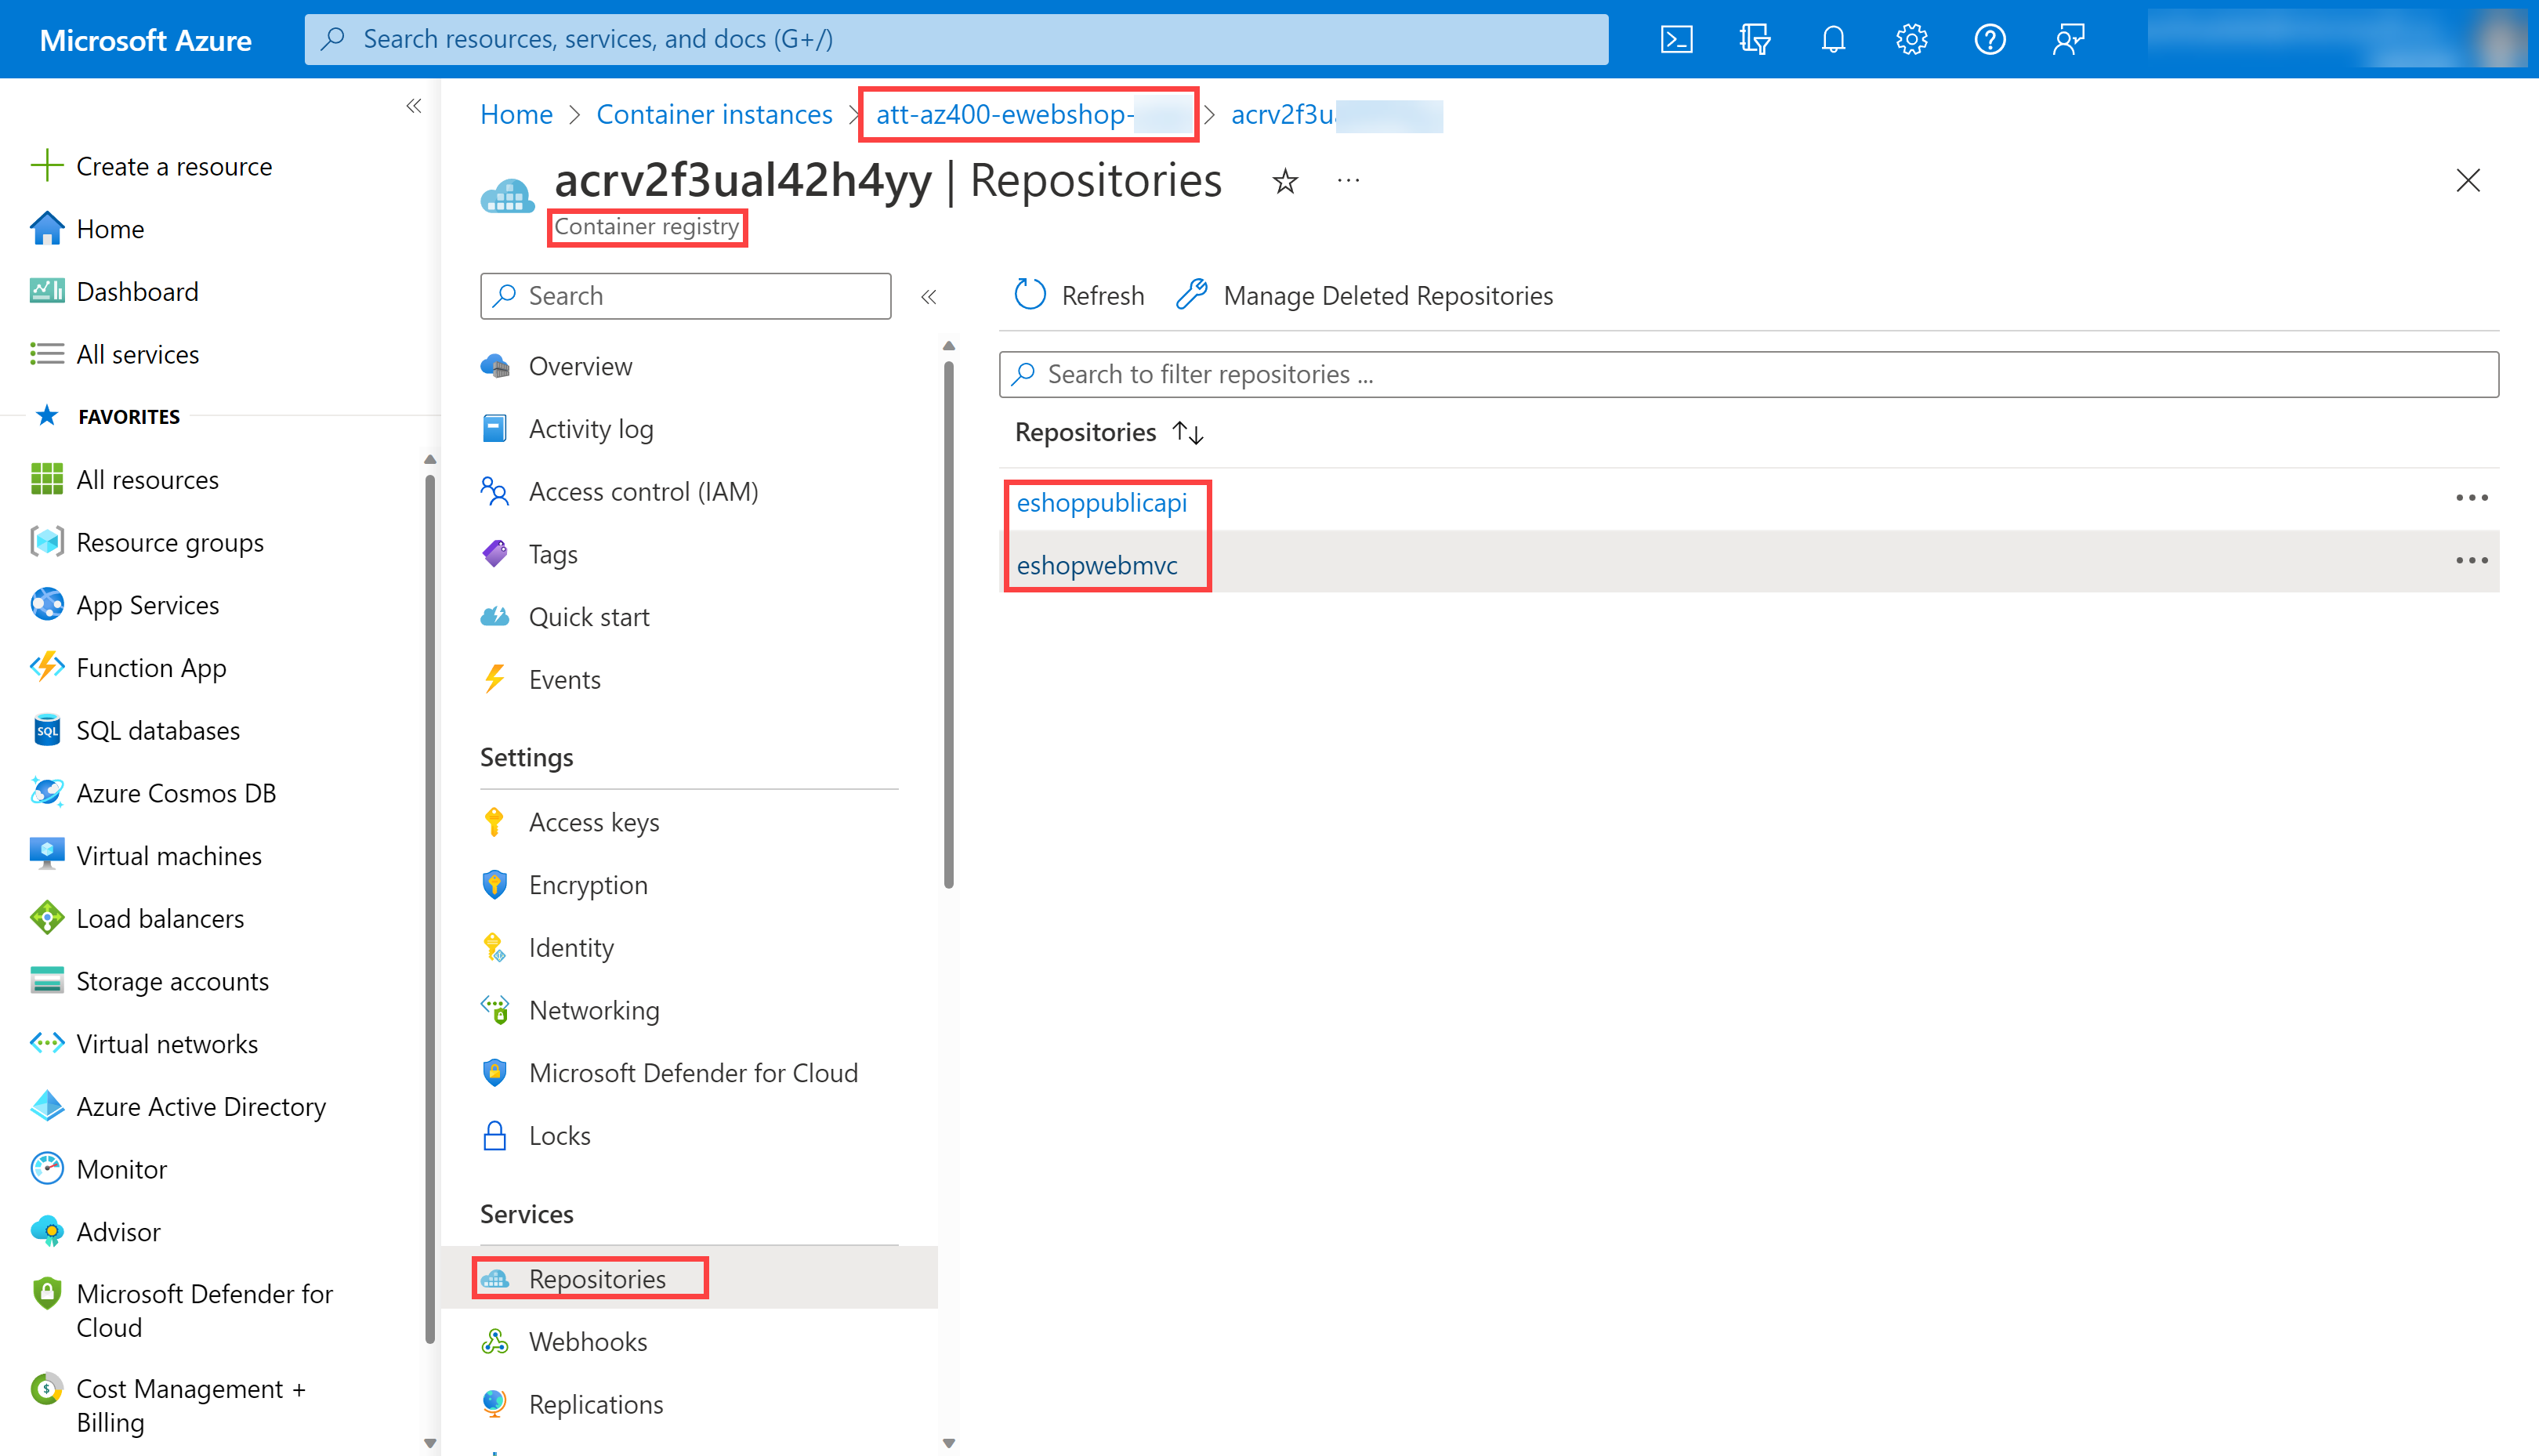
- Select Access Keys, enable the Admin user if not done already, and copy the password value
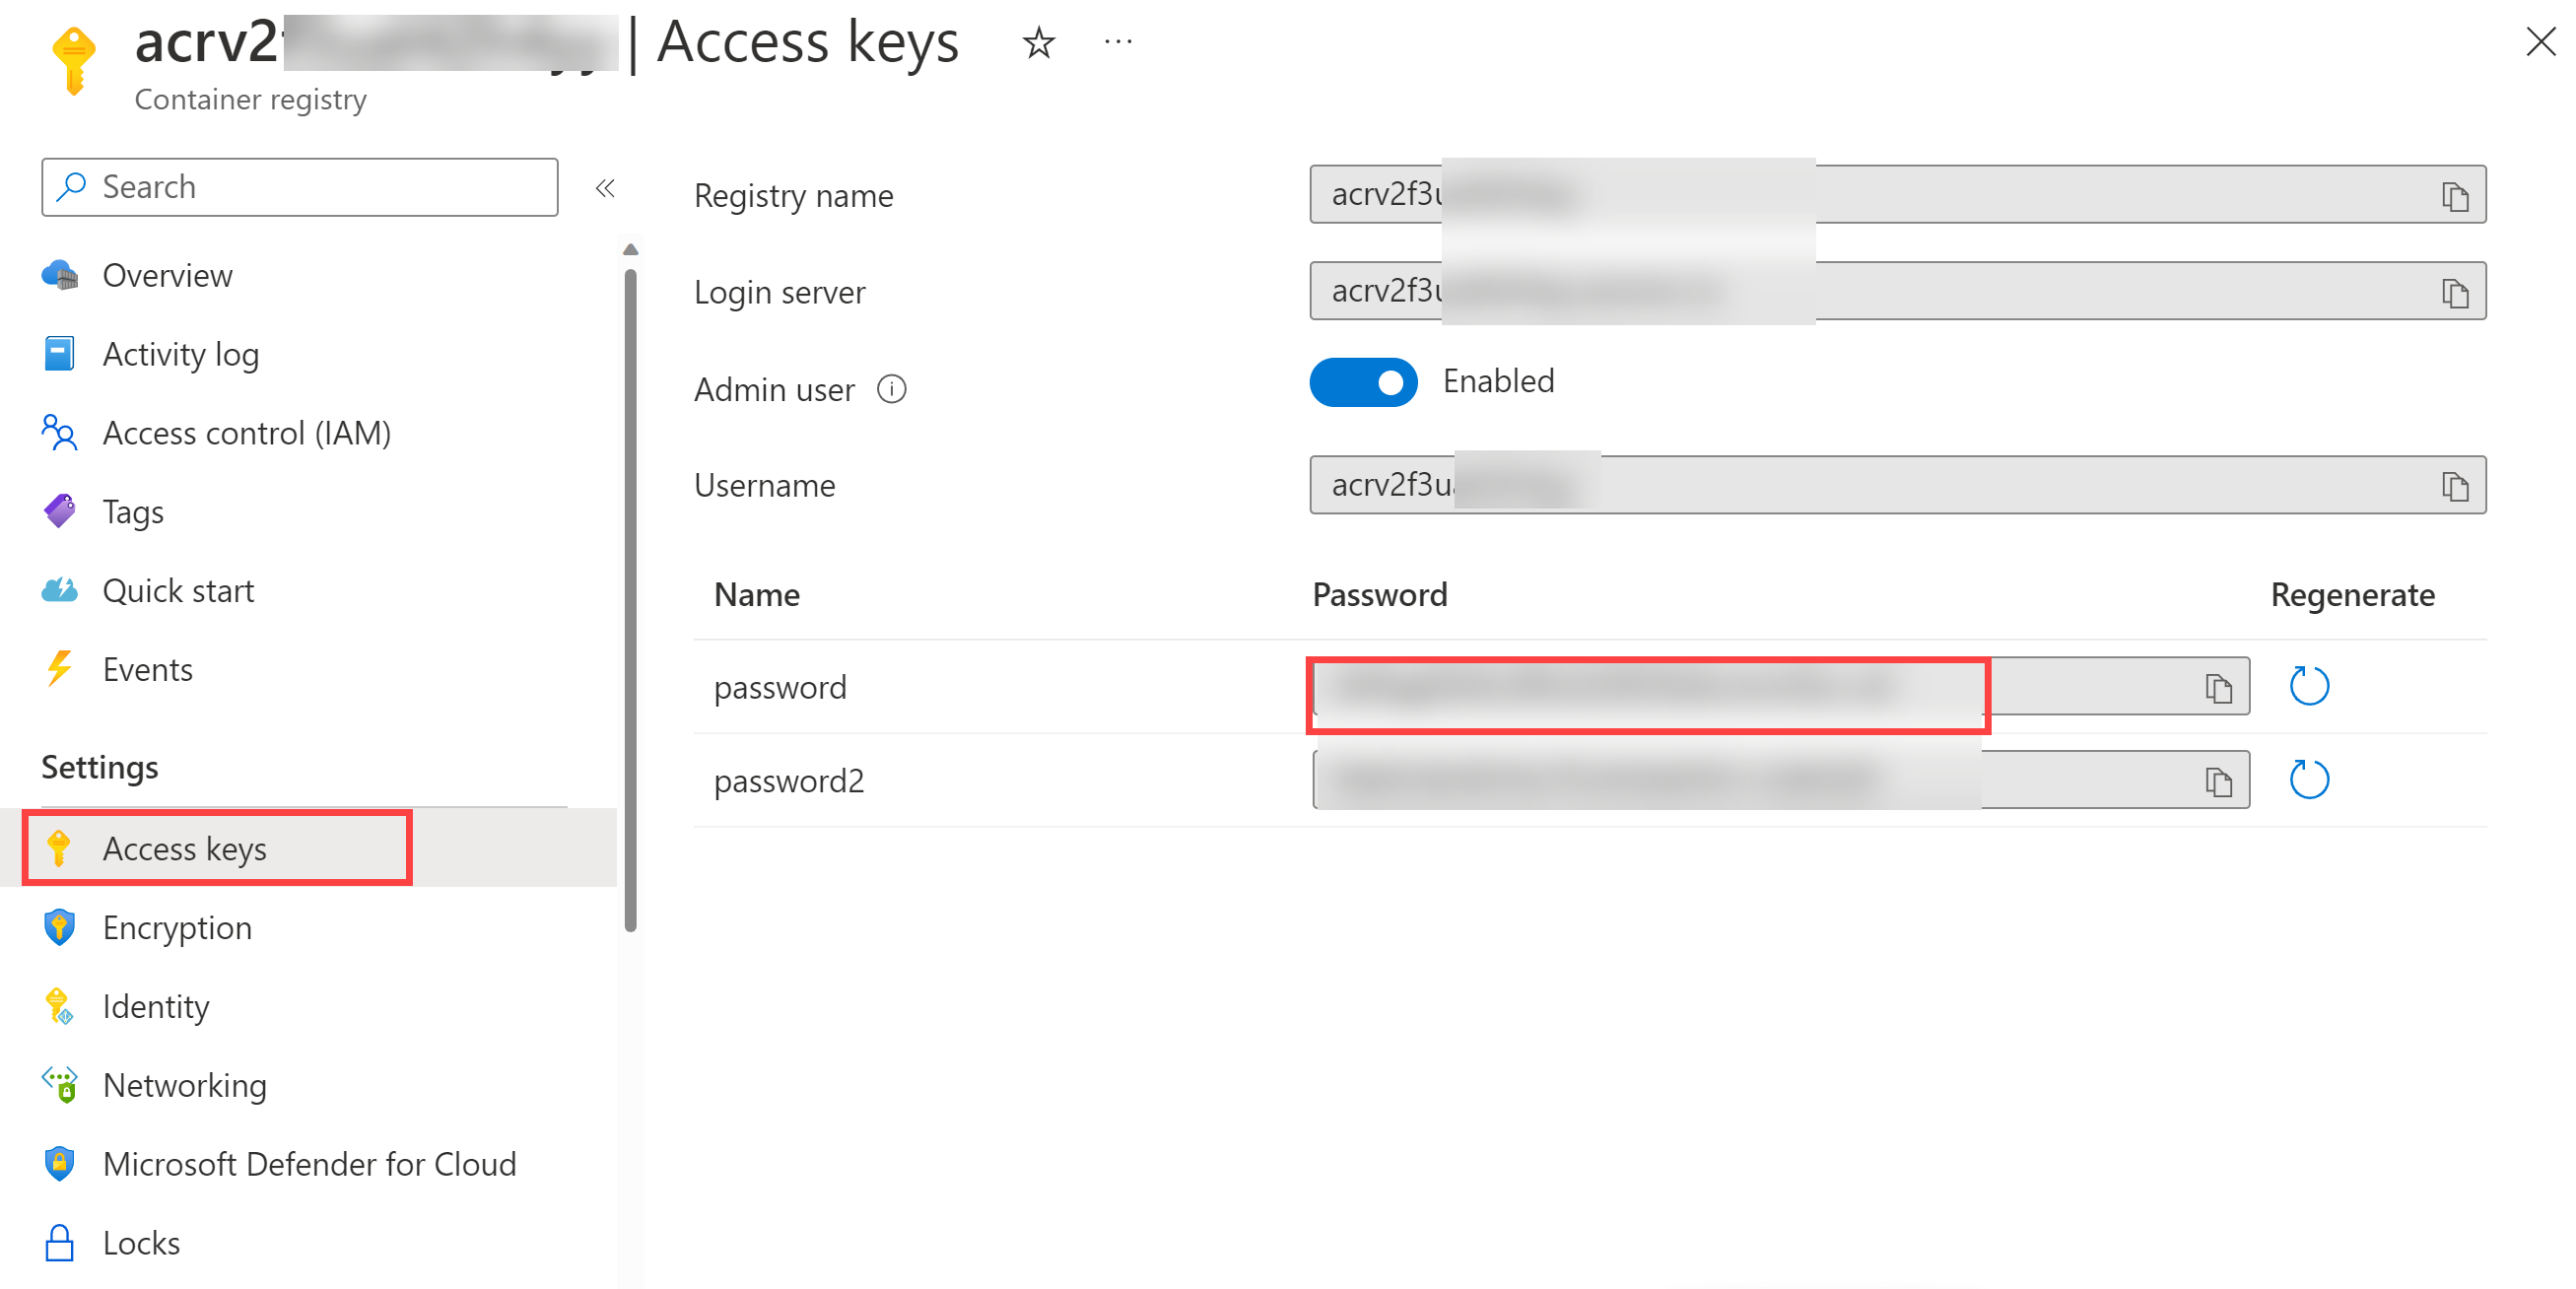
You'll use this password in the following task as a secret in Azure Key Vault.
Create an Azure Key Vault
You'll create an Azure Key Vault to store the ACR password as a secret.
-
In the Azure portal, in the Search resources, services, and docs text box, type Key vault and press Enter
-
Select Key vault blade, select Create > Key Vault
-
On the Basics tab of the Create a key vault blade, specify these settings and select Next:
Setting Value Subscription the name of the Azure subscription you are using in this lab Resource group the name of your resource group AZ400-EWebShop-NAME Key vault name any unique valid name, like ewebshop-kv-NAME (replace NAME) Region an Azure region close to the location of your lab environment Pricing tier Standard Days to retain deleted vaults 7 Purge protection Disable purge protection -
On the Access configuration tab, select Vault access policy
-
In the Access policies section, select + Create to setup a new policy
Note: You need to secure access to your key vaults by allowing only authorized applications and users. To access the data from the vault, you need to provide read (Get/List) permissions to the service connection for authentication in the pipeline.
-
On the Permission blade, below Secret permissions, check Get and List permissions
-
Select Next
-
On the Principal blade, search for your Azure subscription service connection
Note: To see how the principal for your service connection is identified, in Azure DevOps, you can navigate to Project settings > Service connections > azure subs and open the link Manage App registration. This will open a new Azure Portal tab with the principal's name and Application ID that you can use to find it in the previous step.
-
Select it from the list and select Next, Next, Create (access policy)
-
Back on the Create a key vault blade, select Review + Create > Create
Note: Wait for the Azure Key Vault to be provisioned. This should take less than 1 minute.
-
On the Your deployment is complete blade, select Go to resource
-
On the Azure Key Vault blade, in the vertical menu on the left side, in the Objects section, select Secrets
-
On the Secrets blade, select Generate/Import
-
On the Create a secret blade, specify these settings and select Create:
| Setting | Value |
|---|---|
| Upload options | Manual |
| Name | acr-secret |
| Secret value | ACR access password copied in previous task |
Create a Variable Group connected to Azure Key Vault
You'll create a Variable Group in Azure DevOps that will retrieve the ACR password secret from Key Vault.
-
On your lab computer, navigate to the Azure DevOps project eShopOnWeb
-
In the vertical navigational pane, select Pipelines > Library
-
Select + Variable Group
-
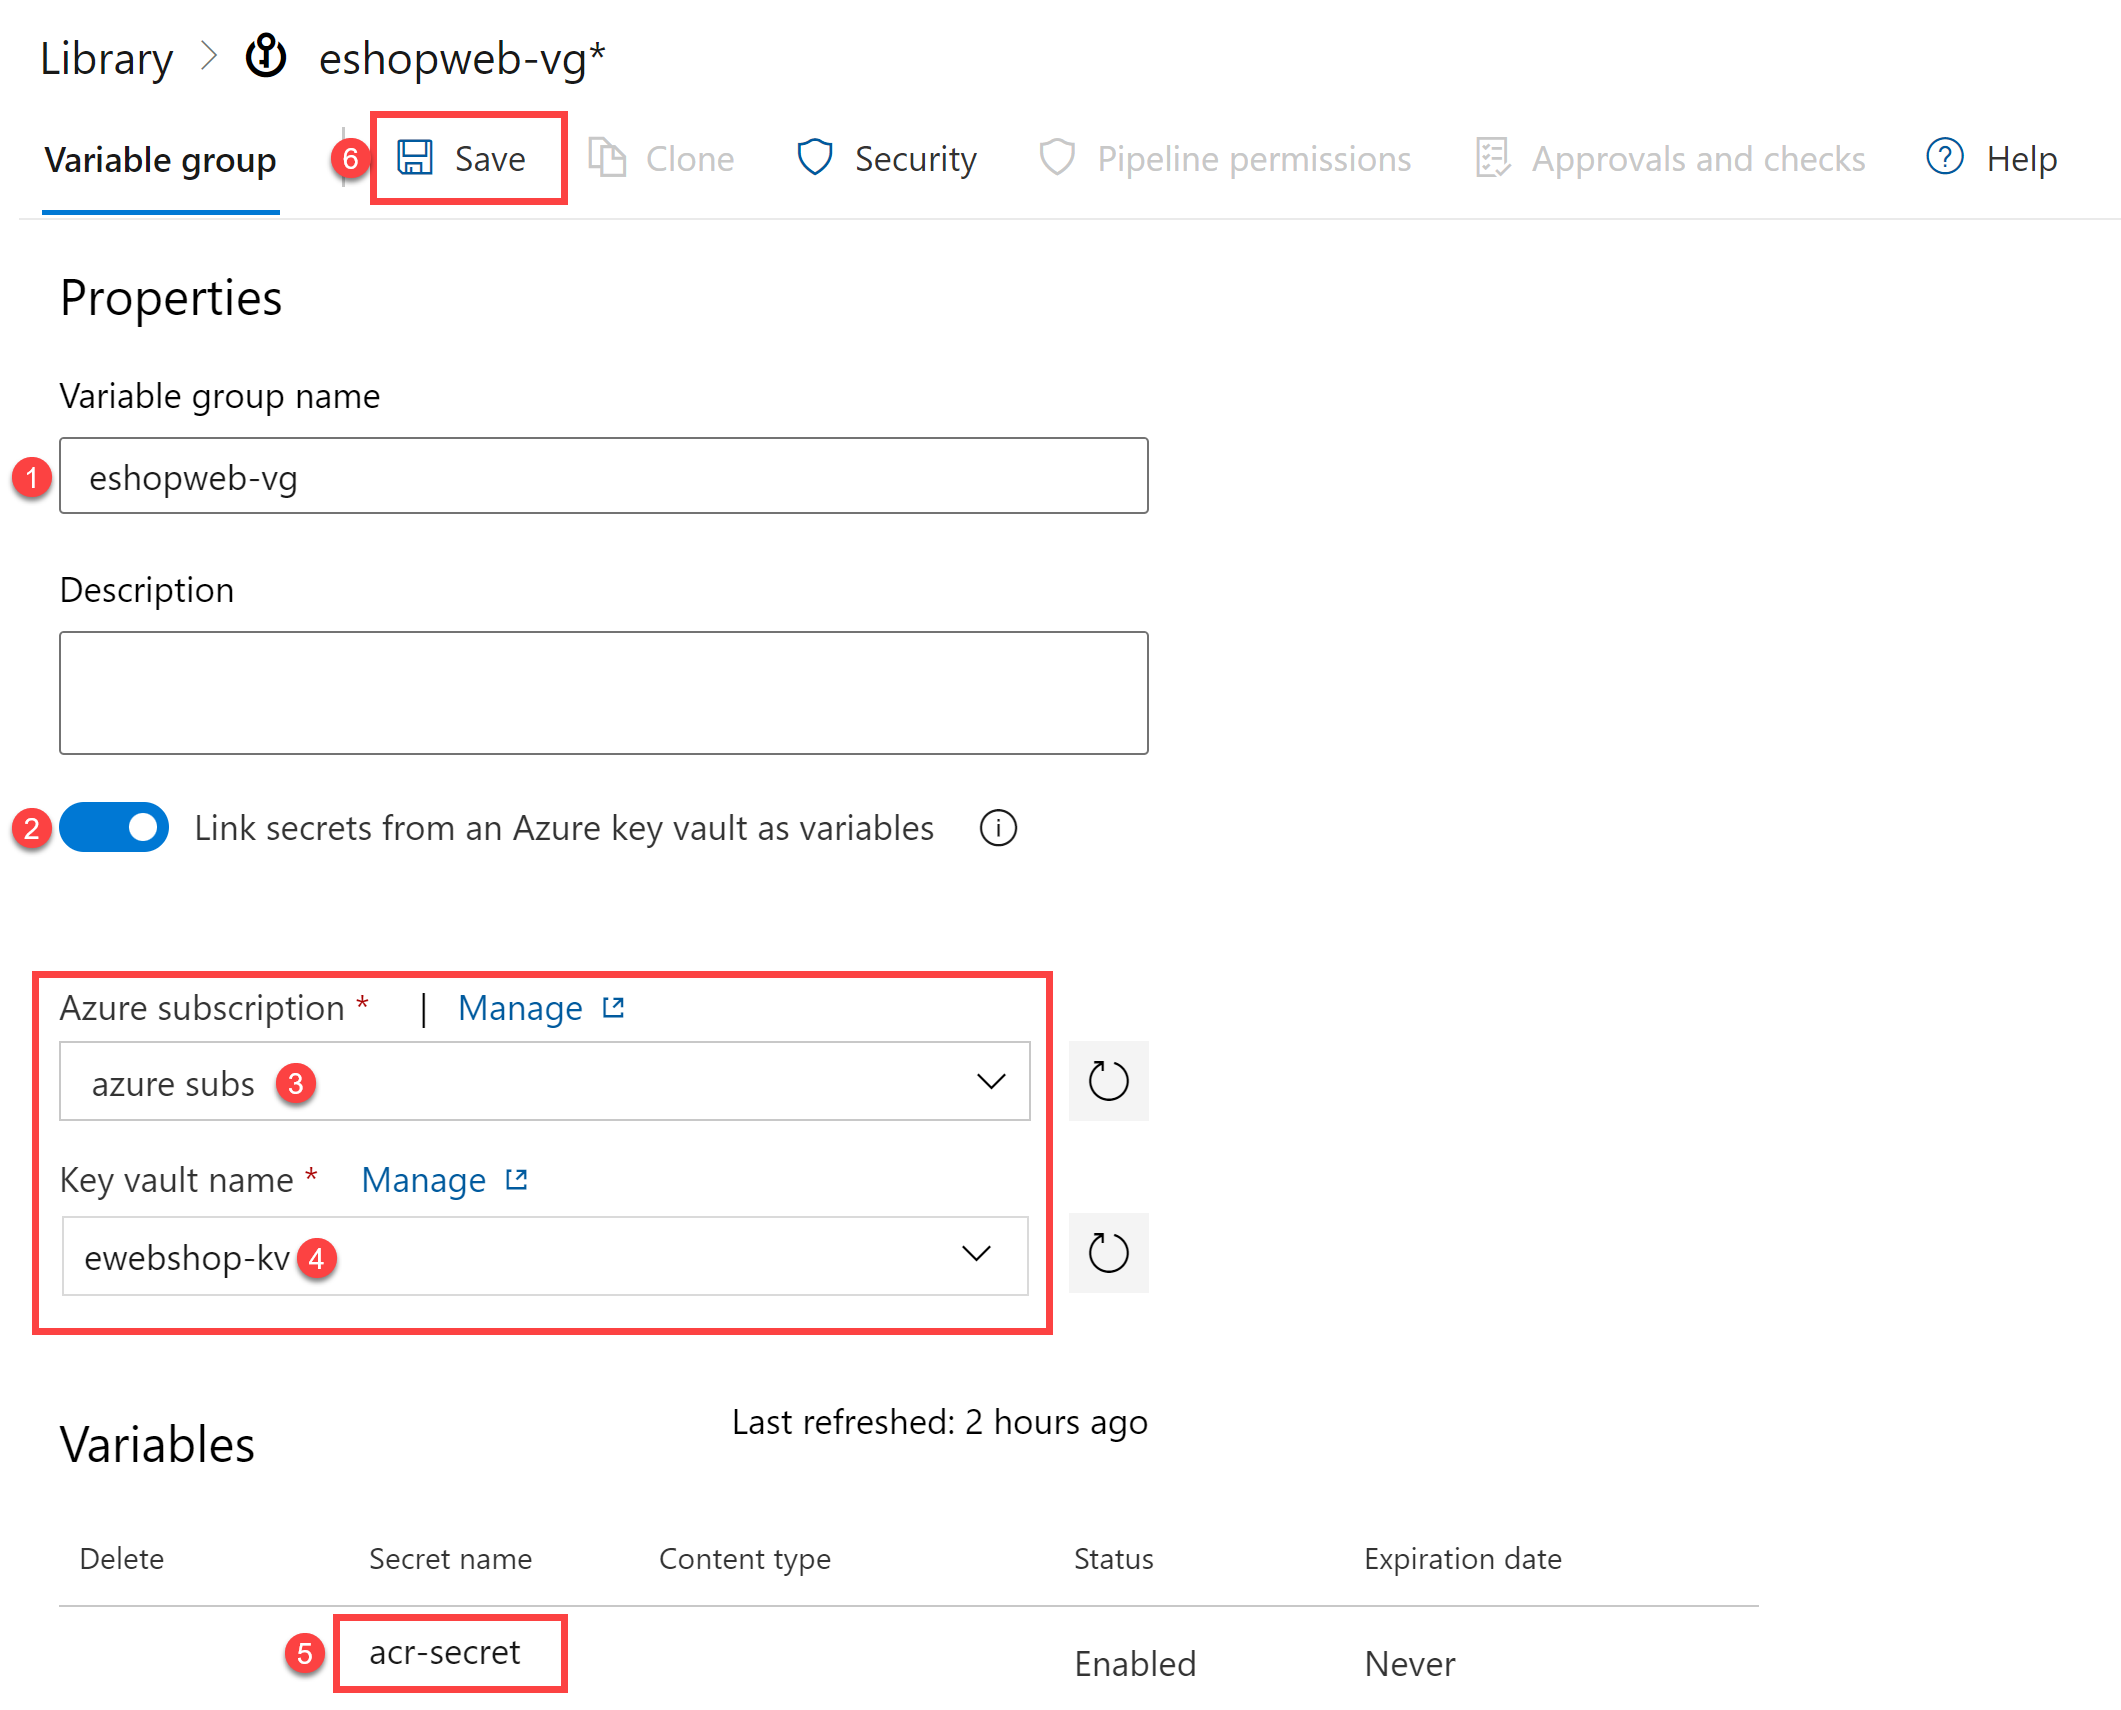
On the New variable group blade, specify these settings:
Setting Value Variable Group Name eshopweb-vg Link secrets from an Azure Key Vault enable Azure subscription Available Azure service connection > Azure subs Key vault name Your key vault name -
Under Variables, select + Add and select the acr-secret secret
-
Select OK
-
Select Save
Setup CD Pipeline to deploy container in Azure Container Instance (ACI)
You'll import a CD pipeline, customize it, and run it to deploy the container image in an Azure Container Instance.
-
From your lab computer, navigate to the Azure DevOps eShopOnWeb project
-
Go to Pipelines > Pipelines and select New Pipeline
-
On the Where is your code? window, select Azure Repos Git (YAML)
-
Select the eShopOnWeb repository
-
On the Configure section, choose Existing Azure Pipelines YAML file
-
Select branch: main
-
Provide the path: /.ado/eshoponweb-cd-aci.yml
-
Select Continue
-
In the YAML pipeline definition, customize:
- YOUR-SUBSCRIPTION-ID with your Azure subscription id
- az400eshop-NAME replace NAME to make it globally unique
- YOUR-ACR.azurecr.io and ACR-USERNAME with your ACR login server (both need the ACR name, can be reviewed on the ACR > Access Keys)
- AZ400-EWebShop-NAME with the resource group name defined before in the lab
-
Select Save and Run
-
Open the pipeline and wait for it to execute successfully
Important: If you see the message "This pipeline needs permission to access resources before this run can continue to Docker Compose to ACI", select on View, Permit and Permit again. This is needed to allow the pipeline to create the resource.
The CD definition consists of these tasks:
- Resources: prepared to automatically trigger based on CI pipeline completion. It also downloads the repository for the bicep file
- Variables (for Deploy stage) connects to the variable group to consume the Azure Key Vault secret acr-secret
- AzureResourceManagerTemplateDeployment deploys the Azure Container Instance (ACI) using bicep template and provides the ACR login parameters to allow ACI to download the previously created container image from Azure Container Registry (ACR)
- To verify the results of the pipeline deployment, in the Azure portal, search for and select the AZ400-EWebShop-NAME resource group
- In the list of resources, verify that the az400eshop container instance was created by the pipeline
- Rename the pipeline to eshoponweb-cd-aci for better identification
Clean up resources
Remember to delete the resources created in the Azure portal to avoid unnecessary charges:
- In the Azure portal, navigate to the AZ400-EWebShop-NAME resource group
- Select Delete resource group
- Type the resource group name to confirm deletion
- Select Delete
Summary
In this lab, you integrated Azure Key Vault with Azure DevOps pipeline by:
- Creating an Azure Key Vault to store an ACR password as a secret
- Providing access to secrets in the Azure Key Vault
- Configuring permissions to read the secret
- Configuring a pipeline to retrieve the password from the Azure Key Vault and pass it to subsequent tasks
- Deploying a container image to Azure Container Instance (ACI) using the secret
- Creating a Variable Group connected to Azure Key Vault
Azure Key Vault integration with Azure DevOps enables secure handling of sensitive data in your CI/CD pipelines, following security best practices by keeping secrets out of your source code and configuration files.