Deploy Triton with an ONNX model to a managed online endpoint
To deploy a model to an endpoint in Azure Machine Learning, you can use NVIDIA Triton Inference Server. In this exercise, you’ll register an ONNX model that is already trained to the workspace. Deploying to an endpoint will be easy thanks to Triton’s no-code-deployment option in Azure Machine Learning.
Before you start
If you have not already done so, complete the Set-up exercise to create an Azure Machine Learning workspace, compute instance, and to clone the notebooks required for this exercise. A compute cluster is not needed for this exercise.
Register the model
For Triton no-code-deployment, a model needs to be registered to the Azure Machine Learning workspace with format set to Triton. To do this, you’ll use the CLI v2 in the terminal hosted by the compute instance. The model you’ll register is a DenseNet model trained to identify images.
- In Azure Machine Learning studio, view the Compute page for your workspace.
- On the Compute Instances tab, start your compute instance if it is not already running.
- Navigate to the Notebooks page in the Studio.
- Select Terminal or the Open terminal icon to open a terminal, and ensure that its Compute is set to your compute instance.
- In the terminal, browse to the /users/your-user-name/mslearn-deep-learning/Allfiles/Labs/03-deploy-model folder with the following command:
cd mslearn-deep-learning/Allfiles/Labs/03-deploy-model -
Enter the following command to avoid any conflicts with previous versions, remove any ML CLI extensions (both version 1 and 2) with this command:
az extension remove -n azure-cli-ml az extension remove -n ml - Install the Azure Machine Learning extension with the following command:
az extension add -n ml -y - To use the CLI to register a model, you need to give access to your subscription. Run the command below and follow the instructions in the output to sign in with the email account that has access to the Azure subscription you’re using for this exercise.
az loginThe model is stored in the models folder (note the folder structure required for Triton).
You’ll also find create-triton-model.yml which contains the configuration for registering the model. Explore the contents of this YAML file to learn that the registered model will be named densenet-onnx-model and the model_format is set to Triton.
- In the terminal, run the following command to register the model:
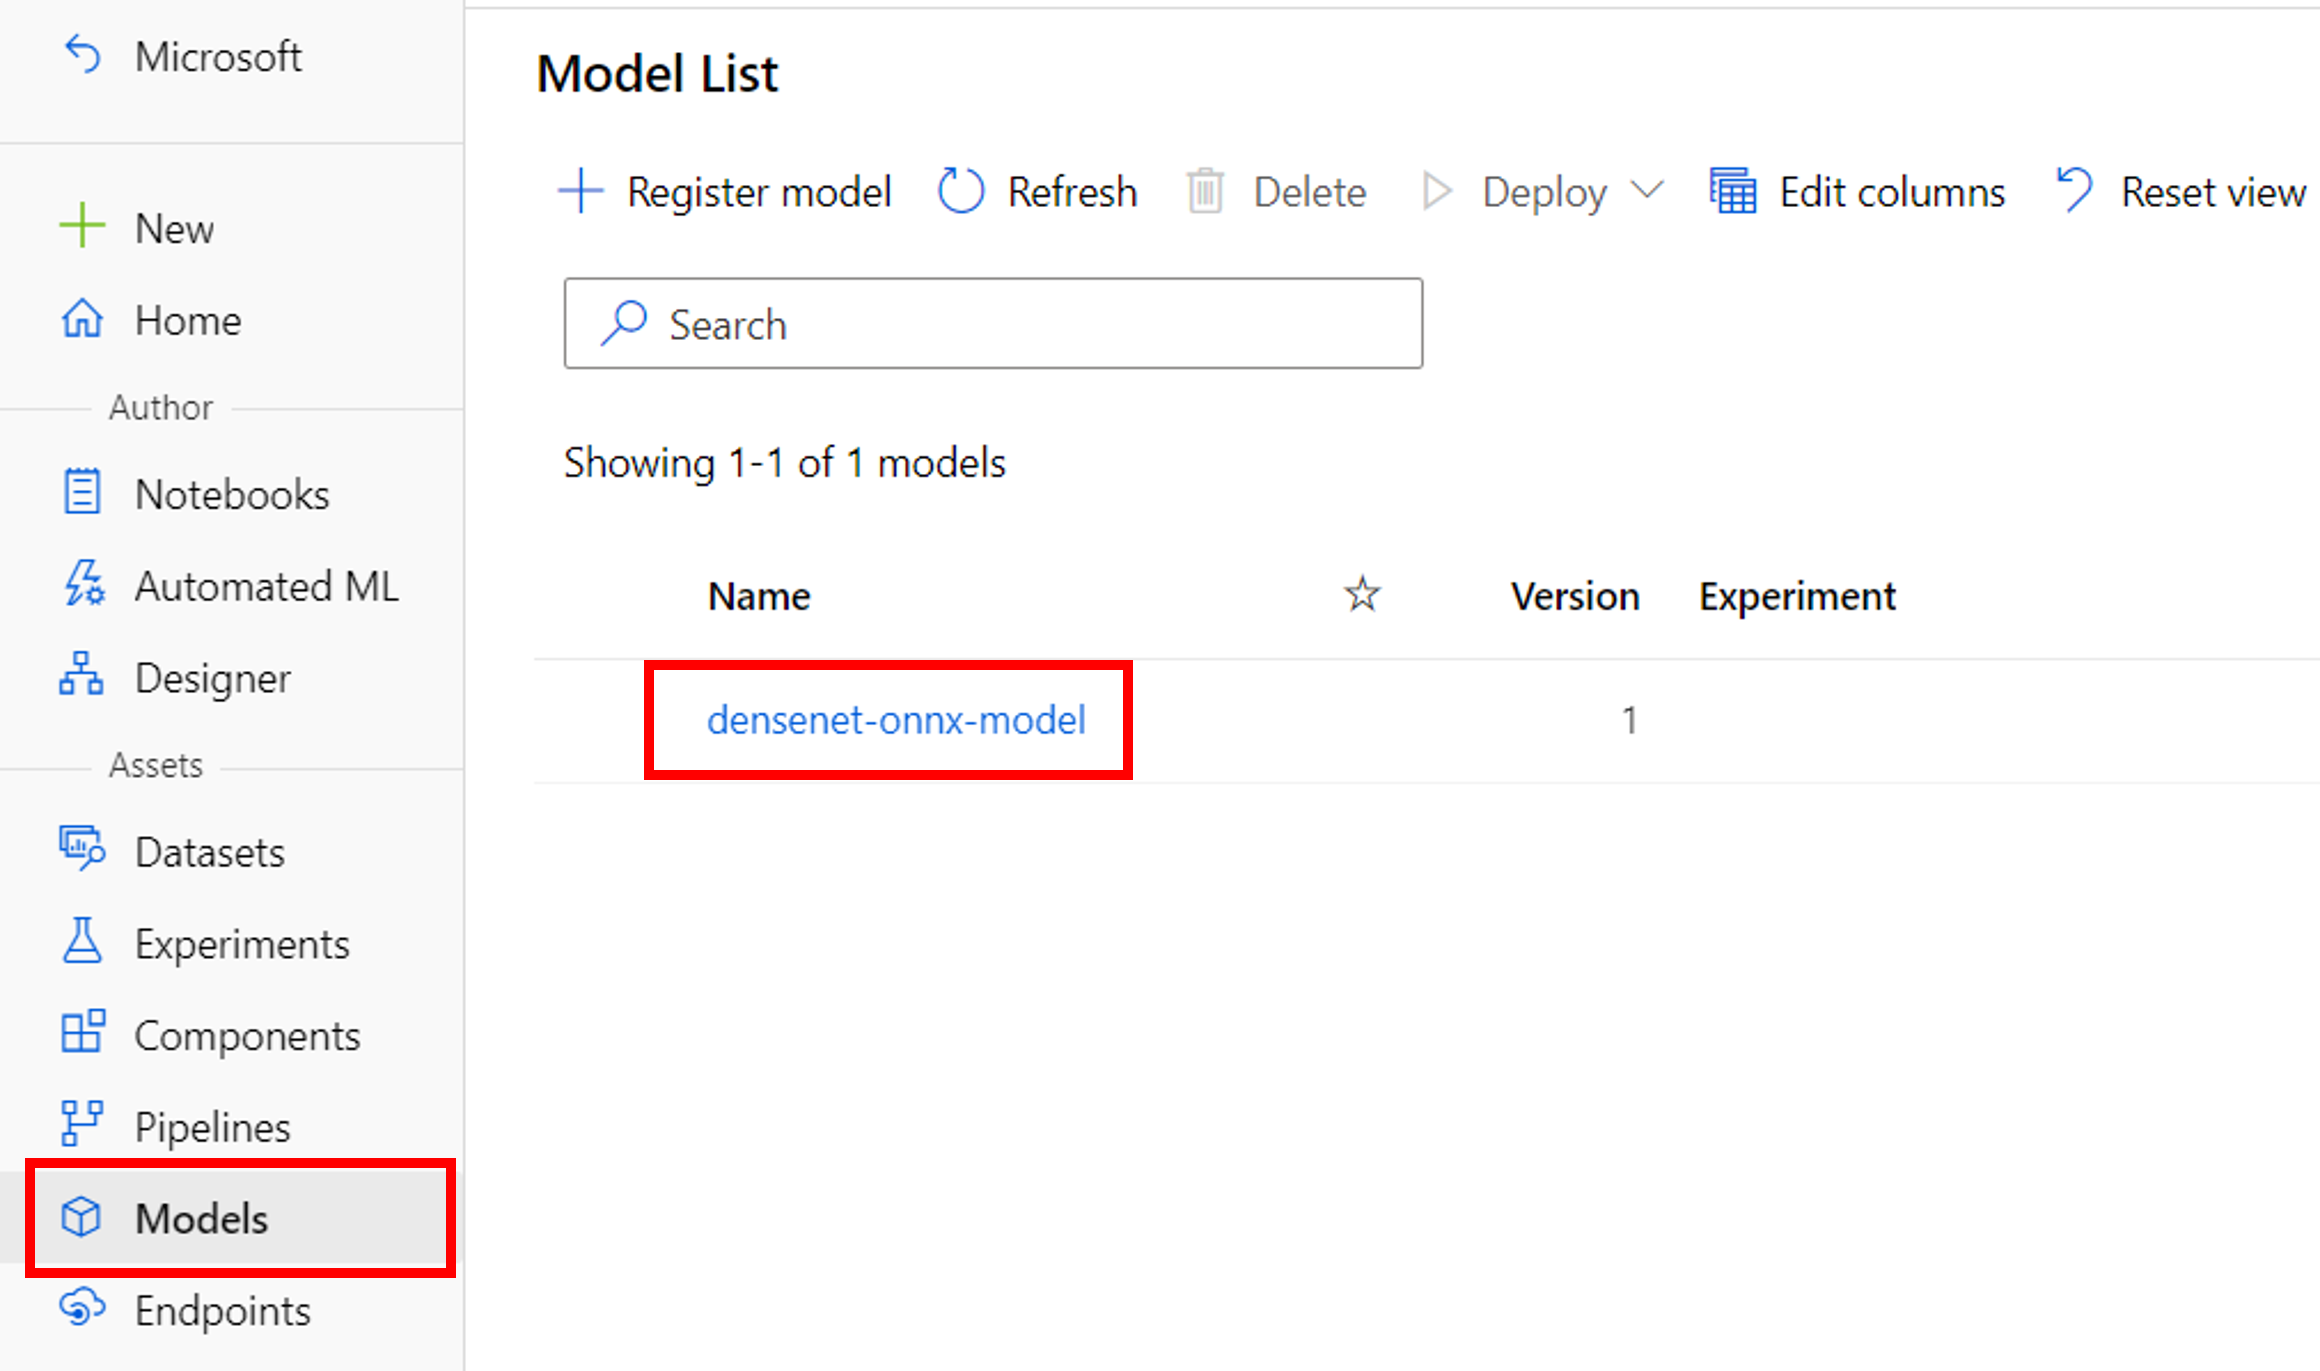
az ml model create -f create-triton-model.yaml - When the command has completed, go to the Models pane to find a new model named densenet-onnx-model.
- Back on the Notebooks page, close the terminal pane to terminating the session.
Create the endpoint
To create a managed online endpoint, you’ll use the Azure Machine Learning Studio. Follow the steps below to deploy the previously registered model.
- Navigate to the Models page, and select the densenet-onnx-model to view its details.
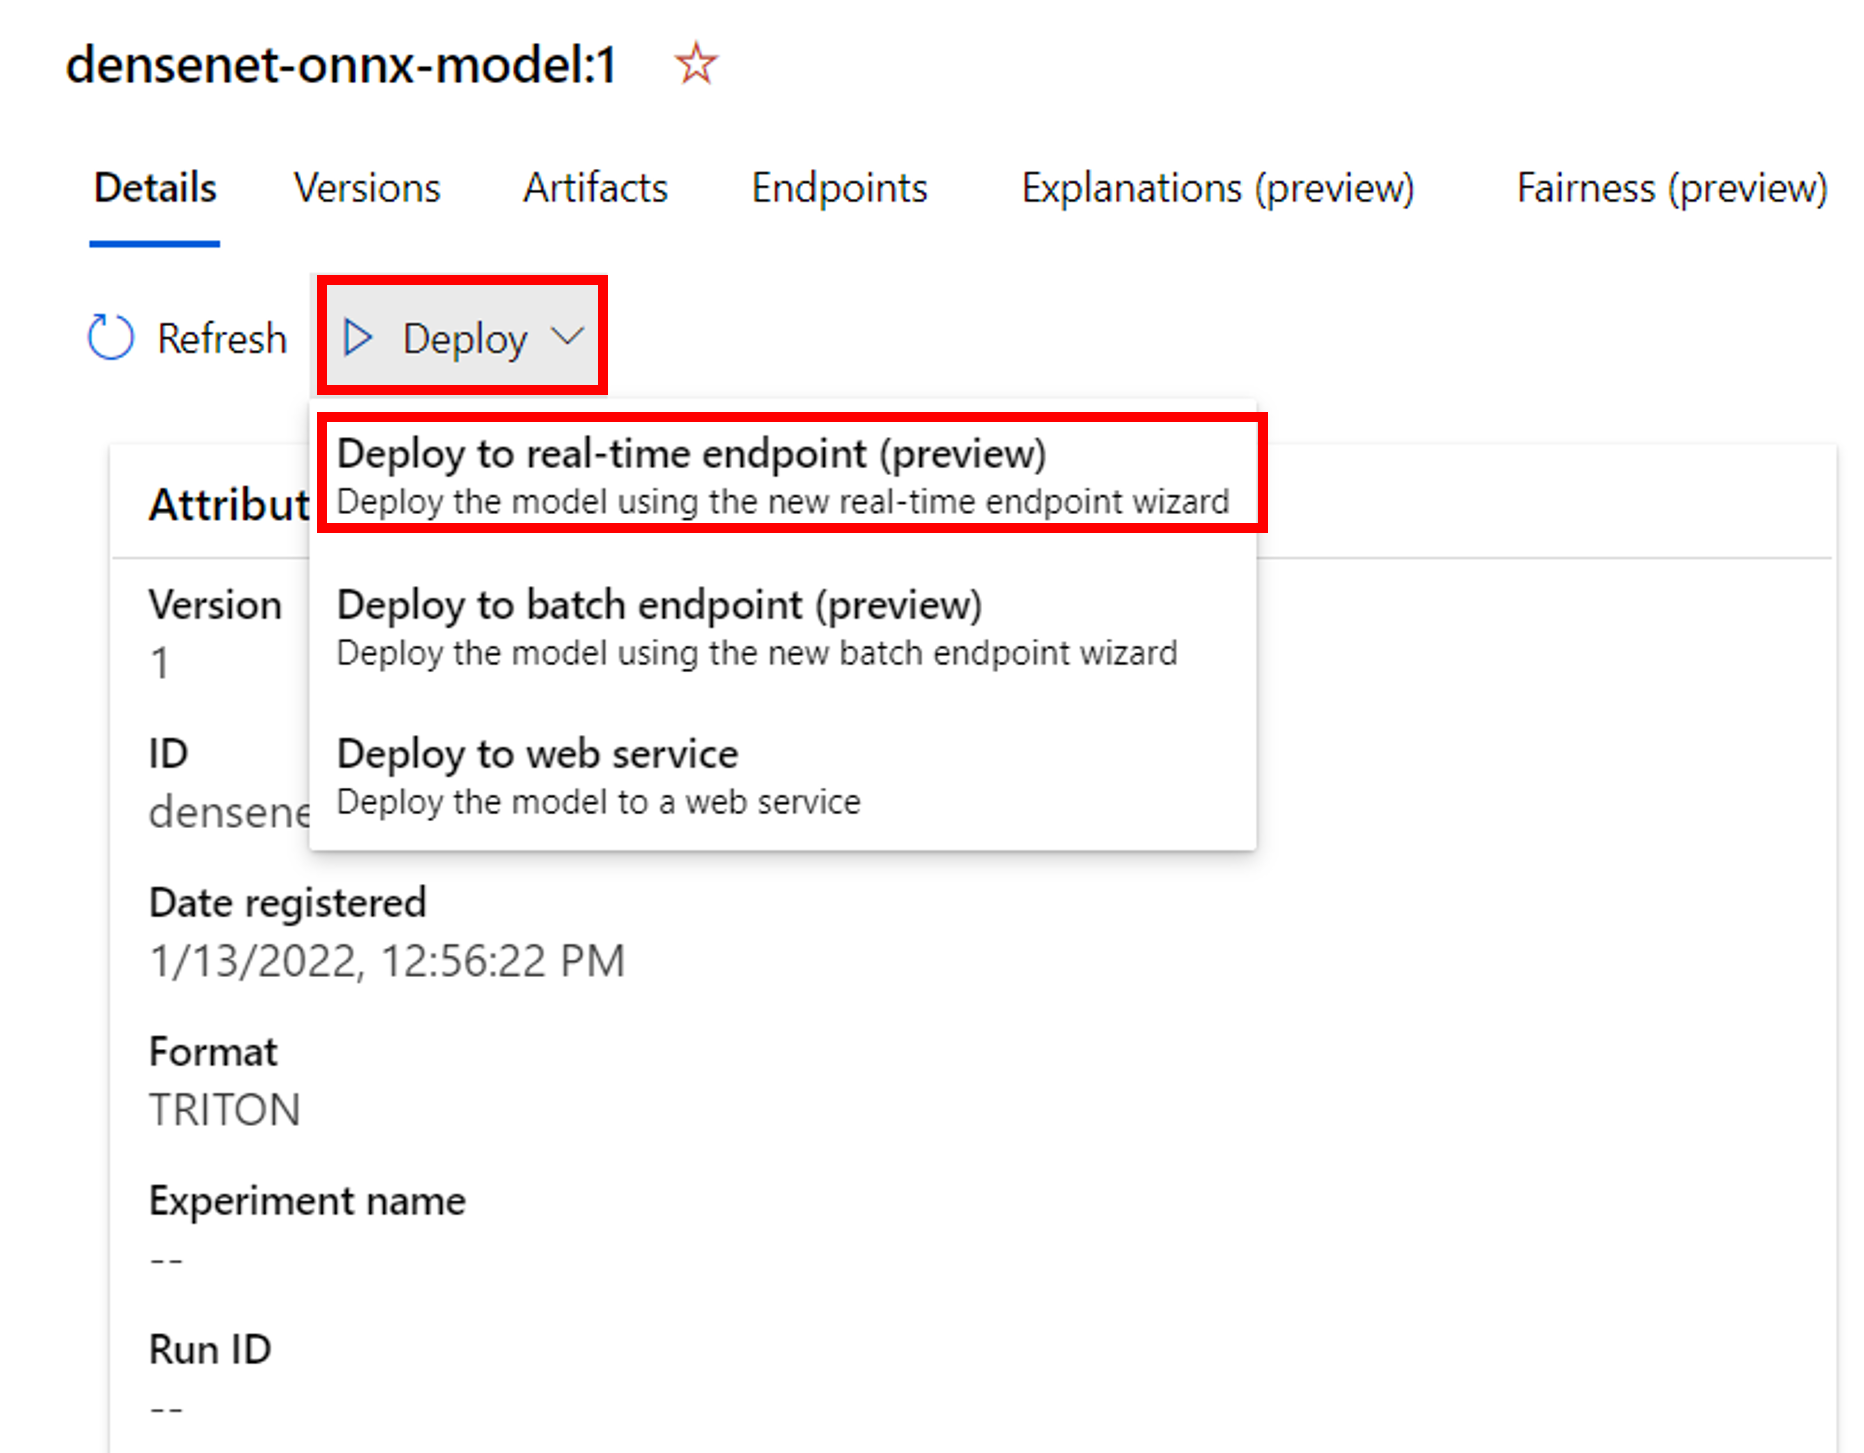
- In the Details tab, click on Deploy. Then, select Deploy to real-time endpoint.
- In the Create deployment pane, create a managed online endpoint with the following settings:
- Endpoint: New
- Endpoint name: Enter a unique name. Add random numbers to ensure uniqueness.
- Compute type: Managed
-
Authentication type Key
-
Select model: densenet-onnx-model
-
Keep all default settings for the Deployment and Environment.
- Virtual machine size: Choose Standard_NC6s_v3 if possible to use GPU. Alternatively, choose Standard_F4s_v2 to use CPU.
- Instance count: 1
- Wait for the endpoint to be created and the deployment to be completed. This usually takes around 10 minutes.
Tip! If deployment takes exceptionally long, it may be because the name is not unique. Select the information icon under Provisioning state to go to the Azure portal and get an overview of the deployment of resources. If you see this error, delete the endpoint and deployment, and recreate the endpoint with the Studio.
- Once deployment is ready, you can find it on the Endpoints page of the Azure Machine Learning Studio.
- In the details overview of your endpoint, go to the Consume tab and copy and save the REST endpoint.
- Copy and save the Primary key under Authentication.
- Save the endpoint and key for the next part of the exercise, where you’ll invoke the endpoint to get the model’s predictions.
Invoke the endpoint
After registering and deploying the model, you now have a managed online endpoint that you can use to get real-time predictions. You can integrate the endpoint with any app. To test that it works, you’ll invoke the endpoint from a Python notebook.
- Go to the Notebooks page in the Studio.
- Navigate to the /users/your-user-name/mslearn-deep-learning/Allfiles/Labs/03-deploy-model folder and open the 01-invoke-endpoint.ipynb notebook.
- Read the instructions carefully to update necessary parameters and run all cells.
Stop your compute instance when done with the exercises
If you’ve finished exploring Azure Machine Learning for now, you should shut down your compute instance to avoid incurring unnecessary charges in your Azure subscription. The compute cluster automatically scales down to 0 nodes when idle.
- In Azure Machine Learning studio, on the Compute page, select your compute instance.
- Click Stop to stop your compute instance. When it has shut down, its status will change to Stopped.
Note: Stopping your compute ensures your subscription won’t be charged for compute resources. You will however be charged a small amount for data storage as long as the Azure Machine Learning workspace exists in your subscription. If you have finished exploring Azure Machine Learning, you can delete the Azure Machine Learning workspace and associated resources. However, if you plan to complete any other labs in this series, you will need to repeat this lab to create the workspace and prepare the environment first.