Securing Data in Unity Catalog
Data security is a critical concern for organizations managing sensitive information in their data lakehouse. As data teams collaborate across different roles and departments, ensuring that the right people have access to the right data—while protecting sensitive information from unauthorized access—becomes increasingly complex.
This hands-on lab will demonstrate two powerful Unity Catalog security features that go beyond basic access control:
- Row Filtering and Column Masking: Learn how to protect sensitive data at the table level by hiding specific rows or masking column values based on user permissions
- Dynamic Views: Create intelligent views that automatically adjust what data users can see based on their group memberships and access levels
This lab will take approximately 45 minutes to complete.
Note: The Azure Databricks user interface is subject to continual improvement. The user interface may have changed since the instructions in this exercise were written.
Provision an Azure Databricks workspace
Tip: If you already have an Azure Databricks workspace, you can skip this procedure and use your existing workspace.
This exercise includes a script to provision a new Azure Databricks workspace. The script attempts to create a Premium tier Azure Databricks workspace resource in a region in which your Azure subscription has sufficient quota for the compute cores required in this exercise; and assumes your user account has sufficient permissions in the subscription to create an Azure Databricks workspace resource.
If the script fails due to insufficient quota or permissions, you can try to create an Azure Databricks workspace interactively in the Azure portal.
- In a web browser, sign into the Azure portal at
https://portal.azure.com. -
Use the [>_] button to the right of the search bar at the top of the page to create a new Cloud Shell in the Azure portal, selecting a PowerShell environment. The cloud shell provides a command line interface in a pane at the bottom of the Azure portal, as shown here:
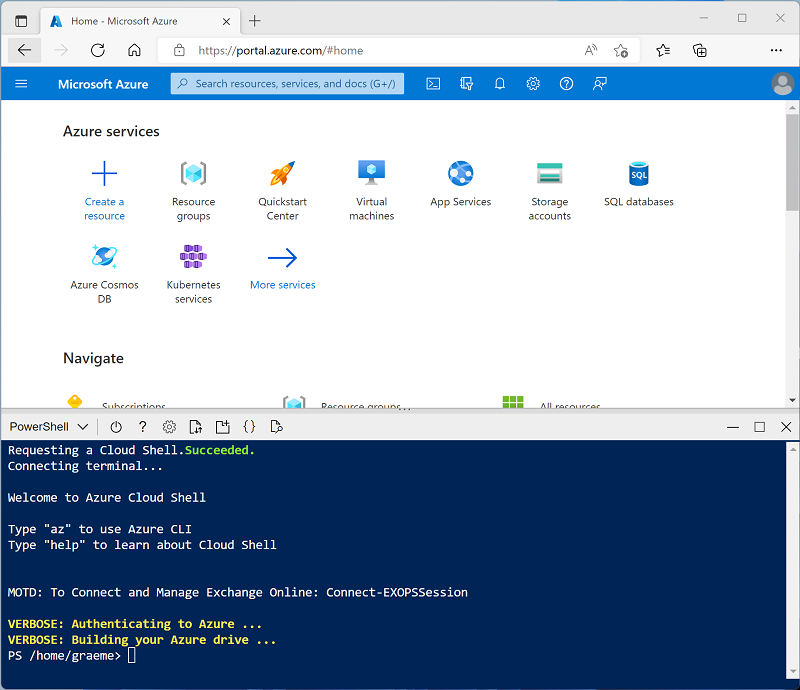
Note: If you have previously created a cloud shell that uses a Bash environment, switch it to PowerShell.
-
Note that you can resize the cloud shell by dragging the separator bar at the top of the pane, or by using the —, ⤢, and X icons at the top right of the pane to minimize, maximize, and close the pane. For more information about using the Azure Cloud Shell, see the Azure Cloud Shell documentation.
-
In the PowerShell pane, enter the following commands to clone this repo:
rm -r mslearn-databricks -f git clone https://github.com/MicrosoftLearning/mslearn-databricks -
After the repo has been cloned, enter the following command to run the setup-serverless.ps1 script, which provisions an Azure Databricks workspace in an available region:
./mslearn-databricks/setup-serverless.ps1 - If prompted, choose which subscription you want to use (this will only happen if you have access to multiple Azure subscriptions).
- Wait for the script to complete - this typically takes around 5 minutes, but in some cases may take longer. While you are waiting, review the Implement Security and Access Control in Unity Catalog learn module in the Microsoft Learn.
Create a Catalog
- Log in to a workspace that is linked to the metastore.
- Select Catalog from the left menu.
- Select Catalogs below Quick access.
- Select Create catalog.
- On the Create a new catalog dialog, enter a Catalog name and select the catalog Type that you want to create: Standard catalog.
- Specify a managed Storage location.
Create a Notebook
-
In the sidebar, use the (+) New link to create a Notebook.
-
Change the default notebook name (Untitled Notebook [date]) to
Secure data in Unity Catalogand in the Connect drop-down list, select the Serverless cluster if it is not already selected. Be aware that Serverless is enabled by default. -
Copy and run the following code to a new cell in your notebook, in order to configure your working environment for this course. It will also set your default catalog to your specific catalog and the schema to the schema name shown below using the
USEstatements.
USE CATALOG `<your catalog>`;
USE SCHEMA `default`;
- Run the code below and confirm that your current catalog is set to your unique catalog name and that the current schema is default.
SELECT current_catalog(), current_schema()
Protect Columns and Rows with Column Masking and Row Filtering
Create the Table Customers
- Run the code below to create the customers table in your default schema.
CREATE OR REPLACE TABLE customers AS
SELECT *
FROM samples.tpch.customer;
- Run a query to view 10 rows from the customers table in your default schema. Notice that the table contains information such as c_name, c_phone, and c_mktsegment.
SELECT *
FROM customers
LIMIT 10;
Create a Function to Perform Column Masking
View the Filter sensitive table data using row filters and column masks documentation for additional help.
- Create a function named phone_mask that redacts the c_phone column in the customers table if the user is not a member of the (‘admin’) group using the
is_account_group_memberfunction. The phone_mask function should return the string REDACTED PHONE NUMBER if the user is not a member.
CREATE OR REPLACE FUNCTION phone_mask(c_phone STRING)
  RETURN CASE WHEN is_account_group_member('metastore_admins')
    THEN c_phone
    ELSE 'REDACTED PHONE NUMBER'
  END;
- Apply the column masking function phone_mask to the customers table using the
ALTER TABLEstatement.
ALTER TABLE customers
  ALTER COLUMN c_phone
  SET MASK phone_mask;
- Run the query below to view the customers table with the column mask applied. Confirm that the c_phone column displays the value REDACTED PHONE NUMBER.
SELECT *
FROM customers
LIMIT 10;
Create a Function to Perform Row Filtering
View the Filter sensitive table data using row filters and column masks documentation for additional help.
- Run the code below to count the total number of rows in the customers table. Confirm that the table contains 750,000 rows of data.
SELECT count(*) AS TotalRows
FROM customers;
-
Create a function named nation_filter that filters on c_nationkey in the customers table if the user is not a member of the (‘admin’) group using the
is_account_group_memberfunction. The function should only return rows where c_nationkey equals 21.View the if function documentation for additional help.
CREATE OR REPLACE FUNCTION nation_filter(c_nationkey INT)
  RETURN IF(is_account_group_member('admin'), true, c_nationkey = 21);
- Apply the function row filtering function
nation_filterto the customers table using theALTER TABLEstatement.
ALTER TABLE customers
SET ROW FILTER nation_filter ON (c_nationkey);
- Run the query below to count the number of rows in the customers table for you since you’ve filtered out rows for users not admins. Confirm you can only view 29,859 rows (where c_nationkey = 21).
SELECT count(*) AS TotalRows
FROM customers;
-
Run the query below to view the customers table.
Confirm the final table:
- redactes the c_phone column and
- filters rows based on the c_nationkey column for users who are not admins.
SELECT *
FROM customers;
Protecting Columns and Rows with Dynamic Views
Create the Table Customers_new
- Run the code below to create the customers_new table in your default schema.
CREATE OR REPLACE TABLE customers_new AS
SELECT *
FROM samples.tpch.customer;
- Run a query to view 10 rows from the customers_new table in your default schema. Notice that the table contains information such as c_name, c_phone, and c_mktsegment.
SELECT *
FROM customers_new
LIMIT 10;
Create the Dynamic View
Let’s create a view named vw_customers that presents a processed view of the customers_new table data with the following transformations:
-
Selects all columns from the customers_new table.
- Redact all values in the c_phone column to REDACTED PHONE NUMBER unless you are in the
is_account_group_member('admins')- HINT: Use a
CASE WHENstatement in theSELECTclause.
- HINT: Use a
- Restrict the rows where c_nationkey is equal to 21 unless you are in the
is_account_group_member('admins').- HINT: Use a
CASE WHENstatement in theWHEREclause.
- HINT: Use a
-- Create a movies_gold view by redacting the "votes" column and restricting the movies with a rating below 6.0

CREATE OR REPLACE VIEW vw_customers AS
SELECT
  c_custkey,
  c_name,
  c_address,
  c_nationkey,
  CASE
    WHEN is_account_group_member('admins') THEN c_phone
    ELSE 'REDACTED PHONE NUMBER'
  END as c_phone,
  c_acctbal,
  c_mktsegment,
  c_comment
FROM customers_new
WHERE
  CASE WHEN
    is_account_group_member('admins') THEN TRUE
    ELSE c_nationkey = 21
  END;
- Display the data in the vw_customers view. Confirm the c_phone column is redacted. Confirm the c_nationkey is equal to 21 unless you’re the administrator.
SELECT *
FROM vw_customers;
- Count the number of rows in the vw_customers view. Confirm the view contains 29,859 rows.
SELECT count(*)
FROM vw_customers;
Issue Grant Access to View
- Let us issue a grant for “account users” to view the vw_customers view.
NOTE: You will also need to provide users access to the catalog and schema. In this shared training environment, you are unable to grant access to your catalog to other users.
GRANT SELECT ON VIEW vw_customers TO `account users`
-
Use the
SHOWstatement to displays all privileges (inherited, denied, and granted) that affect the vw_customers view. Confirm that the Principal column contains account users.View the SHOW GRANTS documentation for help.
SHOW GRANTS ON vw_customers