Populate and navigate the Metastore in Unity Catalog
Unity Catalog provides a centralized governance solution for data assets in Azure Databricks. The metastore serves as the top-level container in Unity Catalog, organizing data objects using a three-level namespace that provides boundaries for data isolation and access control.
In this exercise, you’ll create catalogs using Catalog Explorer, populate schemas and tables using SQL commands, then navigate the hierarchy using both SQL queries and the Catalog Explorer interface.
This exercise should take approximately 30 minutes to complete.
Note: The Azure Databricks user interface is subject to continual improvement. The user interface may have changed since the instructions in this exercise were written.
Provision an Azure Databricks workspace
Tip: If you already have an Azure Databricks workspace, you can skip this procedure and use your existing workspace.
This exercise includes a script to provision a new Azure Databricks workspace. The script attempts to create a Premium tier Azure Databricks workspace resource in a region in which your Azure subscription has sufficient quota for the compute cores required in this exercise; and assumes your user account has sufficient permissions in the subscription to create an Azure Databricks workspace resource.
If the script fails due to insufficient quota or permissions, you can try to create an Azure Databricks workspace interactively in the Azure portal.
-
In a web browser, sign into the Azure portal at
https://portal.azure.com. -
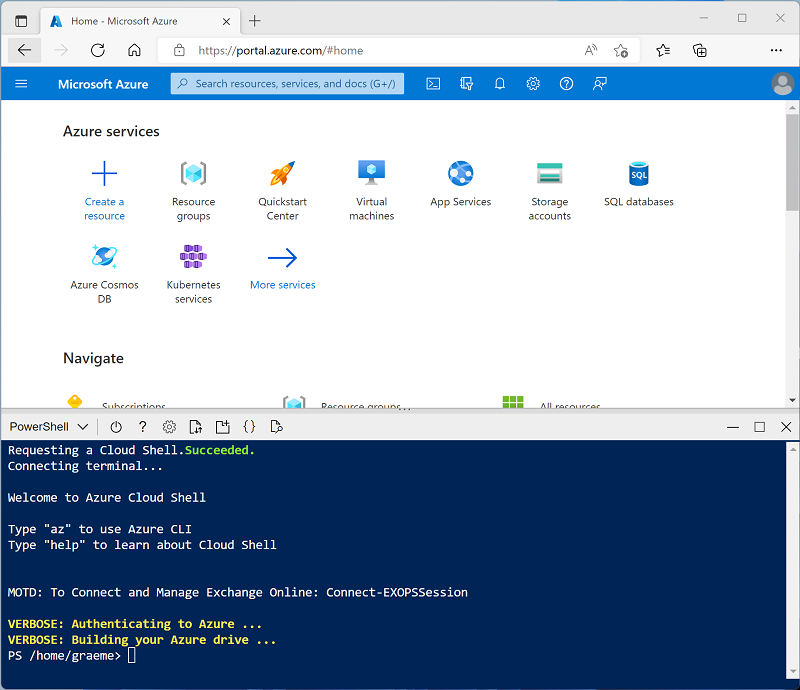
Use the [>_] button to the right of the search bar at the top of the page to create a new Cloud Shell in the Azure portal, selecting a PowerShell environment. The cloud shell provides a command line interface in a pane at the bottom of the Azure portal, as shown here:
Note: If you have previously created a cloud shell that uses a Bash environment, switch it to PowerShell.
-
Note that you can resize the cloud shell by dragging the separator bar at the top of the pane, or by using the —, ⤢, and X icons at the top right of the pane to minimize, maximize, and close the pane. For more information about using the Azure Cloud Shell, see the Azure Cloud Shell documentation.
-
In the PowerShell pane, enter the following commands to clone this repo:
rm -r mslearn-databricks -f git clone https://github.com/MicrosoftLearning/mslearn-databricks -
After the repo has been cloned, enter the following command to run the setup.ps1 script, which provisions an Azure Databricks workspace in an available region:
./mslearn-databricks/setup.ps1 - If prompted, choose which subscription you want to use (this will only happen if you have access to multiple Azure subscriptions).
- Wait for the script to complete - this typically takes around 5 minutes, but in some cases may take longer. While you are waiting, review the What is Unity Catalog? article in the Azure Databricks documentation.
Open your Azure Databricks workspace
-
In the Azure portal, browse to the msl-xxxxxxx resource group that was created by the script (or the resource group containing your existing Azure Databricks workspace).
-
Select your Azure Databricks Service resource (named databricks-xxxxxxx if you used the setup script to create it).
-
In the Overview page for your workspace, use the Launch Workspace button to open your Azure Databricks workspace in a new browser tab; signing in if prompted.
Explore the default catalog
-
In the left sidebar menu, click Catalog to open Catalog Explorer.
- Notice that some catalogs are already created for you:
- A system catalog that contains built-in metadata
- A default catalog with the same name as your workspace (e.g., databricks-xxxxxxx)
-
Click on the default catalog (the one with the same name as your workspace) to explore its structure.
- Notice that two schemas are already created in the default catalog:
- default - A default schema for organizing data objects
- information_schema - A system schema containing metadata
- Click the Details button in the catalog details panel and observe the Storage location and Type fields. The type MANAGED_CATALOG indicates that Azure Databricks automatically manages the storage and lifecycle of data assets within this catalog.
Create a new catalog
Now that you’ve explored the default catalog, you’ll create your own catalog for organizing data.
-
Select Catalog from the left menu.
- Select Catalogs below Quick access.
- Select Create catalog.
- In the Create a new catalog dialog:
- Enter a Catalog name (for example,
my_catalog) - Select Standard as the catalog Type
- For Storage location, select your default catalog name (e.g., databricks-xxxxxxx) to use the same storage location it uses.
- Click Create
- Enter a Catalog name (for example,
-
In the Catalog created window that appears, click View catalog.
- Click on your newly created catalog to view its structure. Notice it contains default default and information_schema schemas, similar to the workspace catalog you explored earlier.
Create a Notebook
You’ll use a notebook to run SQL commands that create and explore Unity Catalog objects in your new catalog.
-
In the sidebar, use the (+) New link to create a Notebook.
-
Change the default notebook name (Untitled Notebook [date]) to
Populate and navigate the metastoreand in the Connect drop-down list, select the Serverless cluster if it is not already selected. Note that Serverless is enabled by default. -
In the first cell of your notebook, enter and run the following code to set your new catalog as the default and verify:
 %sql
 USE CATALOG <your_catalog_name>;
 SELECT current_catalog();
Create and manage schemas
-
Add a new cell and run the following code to create a schema named sales and set it as default:
%sql CREATE SCHEMA IF NOT EXISTS sales COMMENT 'Schema for sales data'; USE SCHEMA sales; SELECT current_schema(); -
In Catalog Explorer, navigate to your catalog and expand it to see the sales schema you just created alongside the default and information_schema schemas.
-
Return to your notebook by selecting Workspace from the left menu, then navigating to your notebook.
Create and manage tables
-
Add a new cell and run the following code to create a managed table for customer data:
%sql CREATE OR REPLACE TABLE customers ( customer_id INT, customer_name STRING, email STRING, city STRING, country STRING ) COMMENT 'Customer information table'; -
Add a new cell and run the following code to insert sample data and verify it was inserted:
%sql INSERT INTO customers VALUES (1, 'Aaron Gonzales', 'aaron@contoso.com', 'Seattle', 'USA'), (2, 'Anne Patel', 'anne@contoso.com', 'London', 'UK'), (3, 'Casey Jensen', 'casey@contoso.com', 'Toronto', 'Canada'), (4, 'Elizabeth Moore', 'elizabeth@contoso.com', 'Sydney', 'Australia'), (5, 'Liam Davis', 'liam@contoso.com', 'Berlin', 'Germany'); SELECT * FROM customers; - Switch to Catalog Explorer and navigate to your catalog > sales schema > customers table. Click on the table to explore:
- Schema tab - View the column definitions and data types
- Sample Data tab - See a preview of the data you inserted
- Details tab - View table metadata including storage location and table type (MANAGED)
- Return to your notebook by selecting Workspace from the left menu, then navigating to your notebook.
Create and manage views
-
Add a new cell and run the following code to create a view that filters customers:
%sql CREATE OR REPLACE VIEW usa_customers AS SELECT customer_id, customer_name, email, city FROM customers WHERE country = 'USA'; SELECT * FROM usa_customers; -
Switch to Catalog Explorer and navigate to your catalog > sales schema. Notice that both the customers table and usa_customers view are now listed.
-
Click on the usa_customers view and select the Lineage tab, then select See lineage graph. Observe how the lineage graph shows the dependency relationship between the view and its source table. Unity Catalog tracks these object dependencies, which helps you understand data flow and assess the impact of changes to underlying tables.
Explore the metastore with SQL commands
Now that you’ve created objects using SQL and verified them in Catalog Explorer, let’s use SQL commands to inspect the metastore structure programmatically.
-
Return to your notebook by selecting Workspace from the left menu, then navigating to your notebook.
-
Add a new cell and run the following code to list all catalogs you have access to:
 %sql
 SHOW CATALOGS;
This lists all catalogs you have access to, including the system catalog, your workspace catalog, and your custom catalog.
-
Add a new cell and run the following code to list all schemas in your current catalog:
%sql SHOW SCHEMAS; -
Add a new cell and run the following code to list all tables and views in your current schema:
%sql SHOW TABLES; -
Add a new cell and run the following code to use DESCRIBE to get detailed table metadata:
 %sql
 DESCRIBE EXTENDED customers;
The DESCRIBE EXTENDED command provides comprehensive information about the table including column definitions, table properties, storage location, and more.
-
Switch back to Catalog Explorer one final time. Compare what you see in the visual interface with the SQL output. Notice how both approaches - SQL commands and Catalog Explorer - provide different views of the same metadata, giving you flexibility in how you navigate and manage your Unity Catalog metastore.
Clean Up
When you’ve finished exploring Unity Catalog, you can delete the resources you created to avoid unnecessary Azure costs.
- Close the Azure Databricks workspace browser tab and return to the Azure portal.
- On the Azure portal, on the Home page, select Resource groups.
- Select the resource group containing your Azure Databricks workspace (not the managed resource group).
- At the top of the Overview page for your resource group, select Delete resource group.
-
Enter the resource group name to confirm you want to delete it, and select Delete.
After a few minutes, your resource group and the managed workspace resource group associated with it will be deleted.