Optimize Data Pipelines for Better Performance in Azure Databricks
Optimizing data pipelines in Azure Databricks can significantly enhance performance and efficiency. Utilizing Auto Loader for incremental data ingestion, coupled with the storage layer of Delta Lake, ensures reliability and ACID transactions. Implementing salting can prevent data skew, while Z-order clustering optimizes file reads by collocating related information. Azure Databricks’ auto-tuning capabilities and the cost-based optimizer can further enhance performance by adjusting settings based on workload requirements.
This lab will take approximately 30 minutes to complete.
Note: The Azure Databricks user interface is subject to continual improvement. The user interface may have changed since the instructions in this exercise were written.
Provision an Azure Databricks workspace
Tip: If you already have an Azure Databricks workspace, you can skip this procedure and use your existing workspace.
This exercise includes a script to provision a new Azure Databricks workspace. The script attempts to create a Premium tier Azure Databricks workspace resource in a region in which your Azure subscription has sufficient quota for the compute cores required in this exercise; and assumes your user account has sufficient permissions in the subscription to create an Azure Databricks workspace resource. If the script fails due to insufficient quota or permissions, you can try to create an Azure Databricks workspace interactively in the Azure portal.
- In a web browser, sign into the Azure portal at
https://portal.azure.com. -
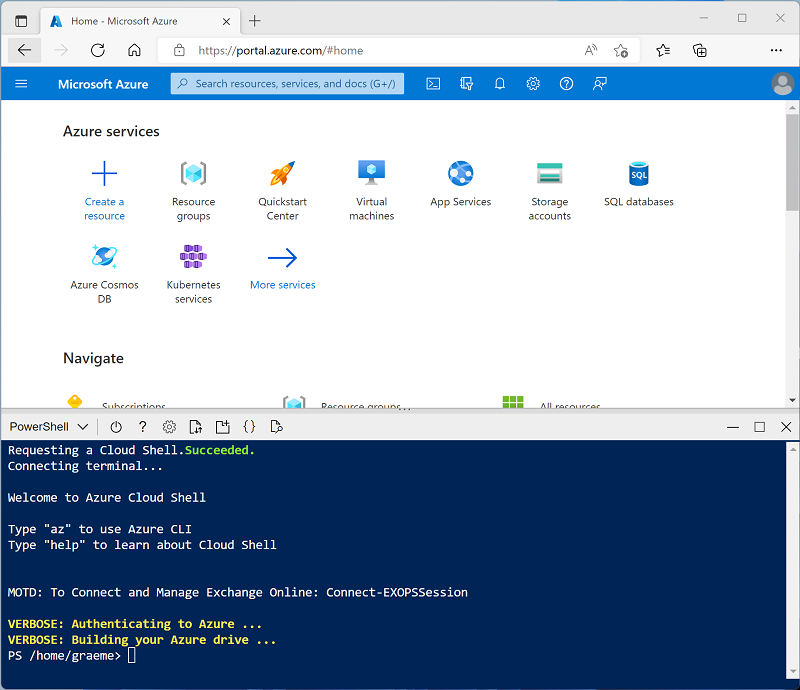
Use the [>_] button to the right of the search bar at the top of the page to create a new Cloud Shell in the Azure portal, selecting a PowerShell environment. The cloud shell provides a command line interface in a pane at the bottom of the Azure portal, as shown here:
Note: If you have previously created a cloud shell that uses a Bash environment, switch it to PowerShell.
-
Note that you can resize the cloud shell by dragging the separator bar at the top of the pane, or by using the —, ⤢, and X icons at the top right of the pane to minimize, maximize, and close the pane. For more information about using the Azure Cloud Shell, see the Azure Cloud Shell documentation.
-
In the PowerShell pane, enter the following commands to clone this repo:
rm -r mslearn-databricks -f git clone https://github.com/MicrosoftLearning/mslearn-databricks -
After the repo has been cloned, enter the following command to run the setup.ps1 script, which provisions an Azure Databricks workspace in an available region:
./mslearn-databricks/setup.ps1 -
If prompted, choose which subscription you want to use (this will only happen if you have access to multiple Azure subscriptions).
- Wait for the script to complete - this typically takes around 5 minutes, but in some cases may take longer. While you are waiting, review the What is Auto Loader? and Optimize data file layout articles in the Azure Databricks documentation.
Create a cluster
Azure Databricks is a distributed processing platform that uses Apache Spark clusters to process data in parallel on multiple nodes. Each cluster consists of a driver node to coordinate the work, and worker nodes to perform processing tasks. In this exercise, you’ll create a single-node cluster to minimize the compute resources used in the lab environment (in which resources may be constrained). In a production environment, you’d typically create a cluster with multiple worker nodes.
Tip: If you already have a cluster with a 13.3 LTS or higher runtime version in your Azure Databricks workspace, you can use it to complete this exercise and skip this procedure.
-
In the Azure portal, browse to the msl-xxxxxxx resource group that was created by the script (or the resource group containing your existing Azure Databricks workspace)
-
Select your Azure Databricks Service resource (named databricks-xxxxxxx if you used the setup script to create it).
-
In the Overview page for your workspace, use the Launch Workspace button to open your Azure Databricks workspace in a new browser tab; signing in if prompted.
Tip: As you use the Databricks Workspace portal, various tips and notifications may be displayed. Dismiss these and follow the instructions provided to complete the tasks in this exercise.
-
In the sidebar on the left, select the (+) New task, and then select Cluster (you may need to look in the More submenu).
- In the New Cluster page, create a new cluster with the following settings:
- Cluster name: User Name’s cluster (the default cluster name)
- Policy: Unrestricted
- Cluster mode: Single Node
- Access mode: Single user (with your user account selected)
- Databricks runtime version: 13.3 LTS (Spark 3.4.1, Scala 2.12) or later
- Use Photon Acceleration: Selected
- Node type: Standard_D4ds_v5
- Terminate after 20 minutes of inactivity
-
Wait for the cluster to be created. It may take a minute or two.
Note: If your cluster fails to start, your subscription may have insufficient quota in the region where your Azure Databricks workspace is provisioned. See CPU core limit prevents cluster creation for details. If this happens, you can try deleting your workspace and creating a new one in a different region. You can specify a region as a parameter for the setup script like this:
./mslearn-databricks/setup.ps1 eastus
Create a notebook and ingest data
-
In the sidebar, use the (+) New link to create a Notebook and change the default notebook name (Untitled Notebook [date]) to Optimize Data Ingestion. Then, in the Connect drop-down list, select your cluster if it is not already selected. If the cluster is not running, it may take a minute or so to start.
-
In the first cell of the notebook, enter the following code, which uses shell commands to download data files from GitHub into the file system used by your cluster.
%sh rm -r /dbfs/nyc_taxi_trips mkdir /dbfs/nyc_taxi_trips wget -O /dbfs/nyc_taxi_trips/yellow_tripdata_2021-01.parquet https://github.com/MicrosoftLearning/mslearn-databricks/raw/main/data/yellow_tripdata_2021-01.parquet -
Under the output from the first cell, use the + Code icon to add a new cell and run the following code in it to load the dataset into a dataframe:
# Load the dataset into a DataFrame df = spark.read.parquet("/nyc_taxi_trips/yellow_tripdata_2021-01.parquet") display(df) -
Use the ▸ Run Cell menu option at the left of the cell to run it. Then wait for the Spark job run by the code to complete.
Optimize Data Ingestion with Auto Loader:
Optimizing data ingestion is crucial for handling large datasets efficiently. Auto Loader is designed to process new data files as they arrive in cloud storage, supporting various file formats and cloud storage services.
Auto Loader provides a Structured Streaming source called cloudFiles. Given an input directory path on the cloud file storage, the cloudFiles source automatically processes new files as they arrive, with the option of also processing existing files in that directory.
-
In a new cell, run the following code to create a stream based on the folder containing the sample data:
df = (spark.readStream .format("cloudFiles") .option("cloudFiles.format", "parquet") .option("cloudFiles.schemaLocation", "/stream_data/nyc_taxi_trips/schema") .load("/nyc_taxi_trips/")) df.writeStream.format("delta") \ .option("checkpointLocation", "/stream_data/nyc_taxi_trips/checkpoints") \ .option("mergeSchema", "true") \ .start("/delta/nyc_taxi_trips") display(df) -
In a new cell, run the following code to add a new parquet file to the stream:
 %sh
 rm -r /dbfs/nyc_taxi_trips
 mkdir /dbfs/nyc_taxi_trips
 wget -O /dbfs/nyc_taxi_trips/yellow_tripdata_2021-02_edited.parquet https://github.com/MicrosoftLearning/mslearn-databricks/raw/main/data/yellow_tripdata_2021-02_edited.parquet
The new file has a new column, so the stream stops with an
UnknownFieldExceptionerror. Before your stream throws this error, Auto Loader performs schema inference on the latest micro-batch of data and updates the schema location with the latest schema by merging new columns to the end of the schema. The data types of existing columns remain unchanged. -
Run the streaming code cell again and verify that two new columns (new_column and *_rescued_data) were added to the table. The **_rescued_data column contains any data that isn’t parsed due to type mismatch, case mismatch or column missing from schema.
-
Select Interrupt to stop the data streaming.
The streaming data is written in Delta tables. Delta Lake provides a set of enhancements over traditional Parquet files, including ACID transactions, schema evolution, time travel, and unifies streaming and batch data processing, making it a powerful solution for managing big data workloads.
Optimize Data Transformation
Data skew is a significant challenge in distributed computing, particularly in big data processing with frameworks like Apache Spark. Salting is an effective technique to optimize data skew by adding a random component, or ‘salt’, to keys before partitioning. This process helps distribute data more evenly across partitions, leading to a more balanced workload and improved performance.
-
In a new cell, run the following code to break a large skewed partition into smaller partitions by appending a salt column with random integers:
 from pyspark.sql.functions import lit, rand

 # Convert streaming DataFrame back to batch DataFrame
 df = spark.read.parquet("/nyc_taxi_trips/*.parquet")

 # Add a salt column
 df_salted = df.withColumn("salt", (rand() * 100).cast("int"))

 # Repartition based on the salted column
 df_salted.repartition("salt").write.format("delta").mode("overwrite").save("/delta/nyc_taxi_trips_salted")

 display(df_salted)
Optimize Storage
Delta Lake offers a suite of optimization commands that can significantly enhance the performance and management of data storage. The optimize command is designed to improve query speed by organizing data more efficiently through techniques like compaction and Z-Ordering.
Compaction consolidates smaller files into larger ones, which can be particularly beneficial for read queries. Z-Ordering involves arranging data points so that related information is stored close together, reducing the time it takes to access this data during queries.
-
In a new cell, run the following code to perform compaction to the Delta table:
from delta.tables import DeltaTable delta_table = DeltaTable.forPath(spark, "/delta/nyc_taxi_trips") delta_table.optimize().executeCompaction() -
In a new cell, run the following code to perform Z-Order clustering:
delta_table.optimize().executeZOrderBy("tpep_pickup_datetime")
This technique will co-locate related information in the same set of files, improving query performance.
Clean up
In Azure Databricks portal, on the Compute page, select your cluster and select ■ Terminate to shut it down.
If you’ve finished exploring Azure Databricks, you can delete the resources you’ve created to avoid unnecessary Azure costs and free up capacity in your subscription.