Explore Large Language Models with Azure Databricks
Large Language Models (LLMs) can be a powerful asset for Natural Language Processing (NLP) tasks when integrated with Azure Databricks and Hugging Face Transformers. Azure Databricks provides a seamless platform to access, fine-tune, and deploy LLMs, including pre-trained models from Hugging Face’s extensive library. For model inference, Hugging Face’s pipelines class simplifies the use of pre-trained models, supporting a wide range of NLP tasks directly within the Databricks environment.
This lab will take approximately 30 minutes to complete.
Note: The Azure Databricks user interface is subject to continual improvement. The user interface may have changed since the instructions in this exercise were written.
Before you start
You’ll need an Azure subscription in which you have administrative-level access.
Provision an Azure Databricks workspace
Tip: If you already have an Azure Databricks workspace, you can skip this procedure and use your existing workspace.
This exercise includes a script to provision a new Azure Databricks workspace. The script attempts to create a Premium tier Azure Databricks workspace resource in a region in which your Azure subscription has sufficient quota for the compute cores required in this exercise; and assumes your user account has sufficient permissions in the subscription to create an Azure Databricks workspace resource. If the script fails due to insufficient quota or permissions, you can try to create an Azure Databricks workspace interactively in the Azure portal.
- In a web browser, sign into the Azure portal at
https://portal.azure.com. -
Use the [>_] button to the right of the search bar at the top of the page to create a new Cloud Shell in the Azure portal, selecting a PowerShell environment. The cloud shell provides a command line interface in a pane at the bottom of the Azure portal, as shown here:
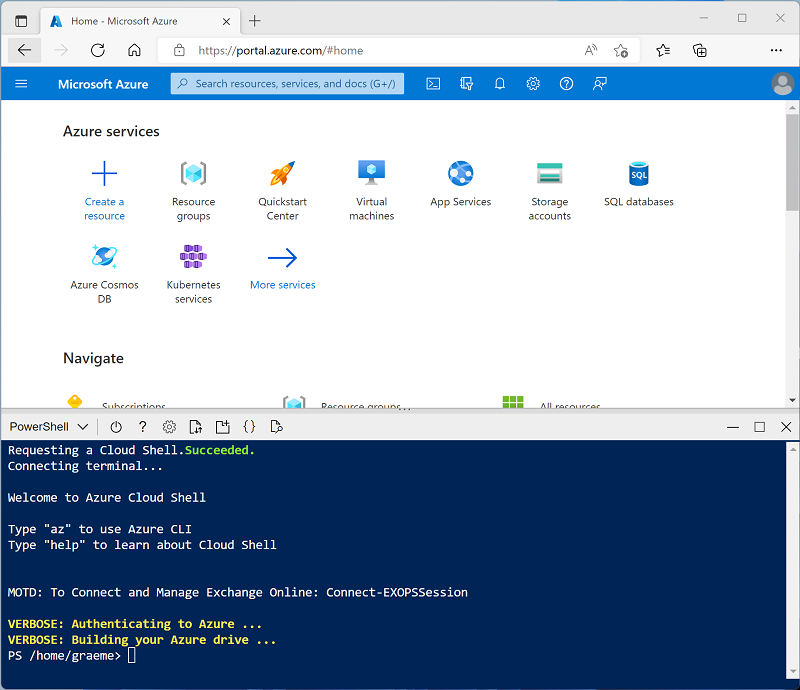
Note: If you have previously created a cloud shell that uses a Bash environment, switch it to PowerShell.
-
Note that you can resize the cloud shell by dragging the separator bar at the top of the pane, or by using the —, ⤢, and X icons at the top right of the pane to minimize, maximize, and close the pane. For more information about using the Azure Cloud Shell, see the Azure Cloud Shell documentation.
-
In the PowerShell pane, enter the following commands to clone this repo:
rm -r mslearn-databricks -f git clone https://github.com/MicrosoftLearning/mslearn-databricks -
After the repo has been cloned, enter the following command to run the setup-serverless.ps1 script, which provisions an Azure Databricks workspace in an available region:
./mslearn-databricks/setup-serverless.ps1 -
If prompted, choose which subscription you want to use (this will only happen if you have access to multiple Azure subscriptions).
- Wait for the script to complete - this typically takes around 5 minutes, but in some cases may take longer.
Create a notebook and install required libraries
-
In the Azure portal, browse to the msl-xxxxxxx resource group that was created by the script (or the resource group containing your existing Azure Databricks workspace).
-
Select your Azure Databricks Service resource (named databricks-xxxxxxx if you used the setup script to create it).
-
In the Overview page for your workspace, use the Launch Workspace button to open your Azure Databricks workspace in a new browser tab; signing in if prompted.
Tip: As you use the Databricks Workspace portal, various tips and notifications may be displayed. Dismiss these and follow the instructions provided to complete the tasks in this exercise.
-
In the sidebar on the left, use the (+) New link to create a Notebook.
-
Name your notebook and verify that
Pythonis selected as the language. Select Serverless as the default compute. -
In the first code cell, enter and run the following code to install the required libraries:
%pip install transformers==4.53.0 torch dbutils.library.restartPython() -
In a new cell, enter and run the following code to load the pre-trained models:
from transformers import pipeline

# Load the summarization model with PyTorch weights
summarizer = pipeline("summarization", model="facebook/bart-large-cnn", framework="pt")

# Load the sentiment analysis model
sentiment_analyzer = pipeline("sentiment-analysis", model="distilbert/distilbert-base-uncased-finetuned-sst-2-english", revision="714eb0f")

# Load the translation model
translator = pipeline("translation_en_to_fr", model="google-t5/t5-base", revision="a9723ea")

# Load a general purpose model for zero-shot classification and few-shot learning
classifier = pipeline("zero-shot-classification", model="facebook/bart-large-mnli", revision="d7645e1")
Summarize Text
A summarization pipeline generates concise summaries from longer texts. By specifying a length range (min_length, max_length) and whether it will use sampling or not (do_sample), we can determine how precise or creative the generated summary will be.
-
In a new code cell, enter the following code:
text = "Large language models (LLMs) are advanced AI systems capable of understanding and generating human-like text by learning from vast datasets. These models, which include OpenAI's GPT series and Google's BERT, have transformed the field of natural language processing (NLP). They are designed to perform a wide range of tasks, from translation and summarization to question-answering and creative writing. The development of LLMs has been a significant milestone in AI, enabling machines to handle complex language tasks with increasing sophistication. As they evolve, LLMs continue to push the boundaries of what's possible in machine learning and artificial intelligence, offering exciting prospects for the future of technology." summary = summarizer(text, max_length=75, min_length=25, do_sample=False) print(summary) -
Run the cell to see the summarized text.
Analyze Sentiment
The sentiment analysis pipeline determines the sentiment of a given text. It classifies the text into categories such as positive, negative, or neutral.
-
In a new code cell, enter the following code:
text = "I love using Azure Databricks for NLP tasks!" sentiment = sentiment_analyzer(text) print(sentiment) -
Run the cell to see the sentiment analysis result.
Translate Text
The translation pipeline converts text from one language to another. In this exercise, the task used was translation_en_to_fr, which means it will translate any given text from English to French.
-
In a new code cell, enter the following code:
text = "Hello, how are you?" translation = translator(text) print(translation) -
Run the cell to see the translated text in French.
Classify Text
The zero-shot classification pipeline allows a model to classify text into categories it hasn’t seen during training. Therefore, it requires predefined labels as a candidate_labels parameter.
-
In a new code cell, enter the following code:
text = "Azure Databricks is a powerful platform for big data analytics." labels = ["technology", "health", "finance"] classification = classifier(text, candidate_labels=labels) print(classification) -
Run the cell to see the zero-shot classification results.
Clean up
If you’ve finished exploring Azure Databricks, you can delete the resources you’ve created to avoid unnecessary Azure costs and free up capacity in your subscription.