Automate an Azure Databricks Notebook with Azure Data Factory
You can use notebooks in Azure Databricks to perform data engineering tasks, such as processing data files and loading data into tables. When you need to orchestrate these tasks as part of a data engineering pipeline, you can use Azure Data Factory.
This exercise should take approximately 40 minutes to complete.
Provision an Azure Databricks workspace
Tip: If you already have an Azure Databricks workspace, you can skip this procedure and use your existing workspace.
This exercise includes a script to provision a new Azure Databricks workspace. The script attempts to create a Premium tier Azure Databricks workspace resource in a region in which your Azure subscription has sufficient quota for the compute cores required in this exercise; and assumes your user account has sufficient permissions in the subscription to create an Azure Databricks workspace resource. If the script fails due to insufficient quota or permissions, you can try to create an Azure Databricks workspace interactively in the Azure portal.
- In a web browser, sign into the Azure portal at
https://portal.azure.com. -
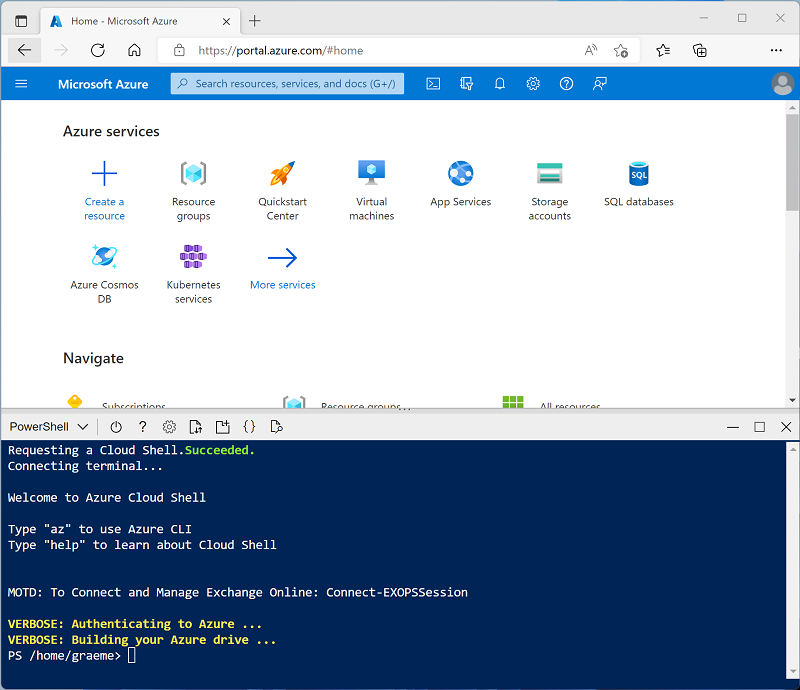
Use the [>_] button to the right of the search bar at the top of the page to create a new Cloud Shell in the Azure portal, selecting a PowerShell environment and creating storage if prompted. The cloud shell provides a command line interface in a pane at the bottom of the Azure portal, as shown here:
Note: If you have previously created a cloud shell that uses a Bash environment, use the the drop-down menu at the top left of the cloud shell pane to change it to PowerShell.
-
Note that you can resize the cloud shell by dragging the separator bar at the top of the pane, or by using the —, ◻, and X icons at the top right of the pane to minimize, maximize, and close the pane. For more information about using the Azure Cloud Shell, see the Azure Cloud Shell documentation.
-
In the PowerShell pane, enter the following commands to clone this repo:
rm -r mslearn-databricks -f git clone https://github.com/MicrosoftLearning/mslearn-databricks -
After the repo has been cloned, enter the following command to run the setup.ps1 script, which provisions an Azure Databricks workspace in an available region:
./mslearn-databricks/setup.ps1 - If prompted, choose which subscription you want to use (this will only happen if you have access to multiple Azure subscriptions).
- Wait for the script to complete - this typically takes around 5 minutes, but in some cases may take longer. While you are waiting, review What is Azure Data Factory?.
Create an Azure Data Factory resource
In addition to your Azure Databricks workspace, you will need to provision an Azure Data Factory resource in your subscription.
- In the Azure portal, close the cloud shell pane and browse to the msl-xxxxxxx* resource group created by the setup script (or the resource group containing your existing Azure Databricks workspace).
- In the toolbar, select + Create and search for
Data Factory. Then create a new Data Factory resource with the following settings:- Subscription: Your subscription
- Resource group: msl-xxxxxxx (or the resource group containing your existing Azure Databricks workspace)
- Name: A unique name, for example adf-xxxxxxx
- Region: The same region as your Azure databricks workspace (or any other available region if this one is not listed)
- Version: V2
- When the new resource is created, verify that the resource group contains both the Azure Databricks workspace and Azure Data Factory resources.
Create a notebook
You can create notebooks in your Azure Databricks workspace to run code written in a range of programming languages. In this exercise, you’ll create a simple notebook that ingests data from a file and saves it in a folder in Databricks File System (DBFS).
- In the Azure portal, browse to the msl-xxxxxxx resource group that was created by the script (or the resource group containing your existing Azure Databricks workspace)
- Select your Azure Databricks Service resource (named databricks-xxxxxxx if you used the setup script to create it).
-
In the Overview page for your workspace, use the Launch Workspace button to open your Azure Databricks workspace in a new browser tab; signing in if prompted.
Tip: As you use the Databricks Workspace portal, various tips and notifications may be displayed. Dismiss these and follow the instructions provided to complete the tasks in this exercise.
- View the Azure Databricks workspace portal and note that the sidebar on the left side contains icons for the various tasks you can perform.
- In the sidebar, use the (+) New link to create a Notebook.
- Change the default notebook name (Untitled Notebook [date]) to Process Data.
-
In the first cell of the notebook, enter (but don’t run) the following code to set up a variable for the folder where this notebook will save data.
# Use dbutils.widget define a "folder" variable with a default value dbutils.widgets.text("folder", "data") # Now get the parameter value (if no value was passed, the default set above will be used) folder = dbutils.widgets.get("folder") -
Under the existing code cell, use the + icon to add a new code cell. Then in the new cell, enter (but don’t run) the following code to download data and save it to the folder:
import urllib3 # Download product data from GitHub response = urllib3.PoolManager().request('GET', 'https://raw.githubusercontent.com/MicrosoftLearning/mslearn-databricks/main/data/products.csv') data = response.data.decode("utf-8") # Save the product data to the specified folder path = "dbfs:/{0}/products.csv".format(folder) dbutils.fs.put(path, data, True) -
In the sidebar on the left, select Workspace and ensure your Process Data notebooks is listed. You’ll use Azure data Factory to run the notebook as part of a pipeline.
Note: The notebook could contain practically any data processing logic you need. This simple example is designed to show the key principles.
Enable Azure Databricks integration with Azure Data Factory
To use Azure Databricks from an Azure Data Factory pipeline, you need to create a linked service in Azure Data Factory that enables access to your Azure Databricks workspace.
Generate an access token
- In the Azure Databricks portal, at on the top right menu bar, select the username and then select User Settings from the drop-down.
- In the User Settings page, select Developer. Then next to Access tokens select Manage.
- Select Generate new token and generate a new token with the comment Data Factory and a blank lifetime (so the token doesn’t expire). Be careful to copy the token when it is displayed before selecting Done.
- Paste the copied token to a text file so you have it handy for later in this exercise.
Create a linked service in Azure Data Factory
- Return to the Azure portal, and in the msl-xxxxxxx resource group, select the adfxxxxxxx Azure Data Factory resource.
- On the Overview page, select the Launch studio to open the Azure Data Factory Studio. Sign in if prompted.
- In Azure Data Factory Studio, use the » icon to expand the navigation pane on the left. Then select the Manage page.
- On the Manage page, in the Linked services tab, select + New to add a new linked service.
- In the New linked service pane, select the Compute tab at the top. Then select Azure Databricks.
- Continue, and create the linked service with the following settings:
- Name: AzureDatabricks
- Description: Azure Databricks workspace
- Connect via integration runtime: AutoResolveInegrationRuntime
- Account selection method: From Azure subscription
- Azure subscription: Select your subscription
- Databricks workspace: Select your databricksxxxxxxx workspace
- Select cluster: New job cluster
- Databrick Workspace URL: Automatically set to your Databricks workspace URL
- Authentication type: Access token
- Access token: Paste your access token
- Cluster version: 13.3 LTS (Spark 3.4.1, Scala 2.12)
- Cluster node type: Standard_DS3_v2
- Python version: 3
- Worker options: Fixed
- Workers: 1
Use a pipeline to run the Azure Databricks notebook
Now that you have created a linked service, you can use it in a pipeline to run the notebook you viewed previously.
Create a pipeline
- In Azure Data Factory Studio, in the navigation pane, select Author.
- On the Author page, in the Factory Resources pane, use the + icon to add a Pipeline.
- In the Properties pane for the new pipeline, change its name to Process Data with Databricks. Then use the Properties button (which looks similar to 🗏*) on the right end of the toolbar to hide the Properties pane.
- In the Activities pane, expand Databricks and drag a Notebook activity to the pipeline designer surface.
- With the new Notebook1 activity selected, set the following properties in the bottom pane:
- General:
- Name: Process Data
- Azure Databricks:
- Databricks linked service: Select the AzureDatabricks linked service you created previously
- Settings:
- Notebook path: Browse to the Users/your_user_name folder and select the Process Data notebook
- Base parameters: Add a new parameter named
folderwith the valueproduct_data
- General:
- Use the Validate button above the pipeline designer surface to validate the pipeline. Then use the Publish all button to publish (save) it.
Run the pipeline
- Above the pipeline designer surface, select Add trigger, and then select Trigger now.
- In the Pipeline run pane, select OK to run the pipeline.
-
In the navigation pane on the left, select Monitor and observe the Process Data with Databricks pipeline on the Pipeline runs tab. It may take a while to run as it dynamically creates a Spark cluster and runs the notebook. You can use the ↻ Refresh button on the Pipeline runs page to refresh the status.
Note: If your pipeline fails, your subscription may have insufficient quota in the region where your Azure Databricks workspace is provisioned to create a job cluster. See CPU core limit prevents cluster creation for details. If this happens, you can try deleting your workspace and creating a new one in a different region. You can specify a region as a parameter for the setup script like this:
./setup.ps1 eastus -
When the run succeeds, select its name to view the run details. Then, on the Process Data with Databricks page, in the Activity Runs section, select the Process Data activity and use its output icon to view the output JSON from the activity, which should resemble this:
{ "runPageUrl": "https://adb-..../run/...", "runOutput": "dbfs:/product_data/products.csv", "effectiveIntegrationRuntime": "AutoResolveIntegrationRuntime (East US)", "executionDuration": 61, "durationInQueue": { "integrationRuntimeQueue": 0 }, "billingReference": { "activityType": "ExternalActivity", "billableDuration": [ { "meterType": "AzureIR", "duration": 0.03333333333333333, "unit": "Hours" } ] } } - Note the runOutput value, which is the path variable to which the notebook saved the data.
Clean up
If you’ve finished exploring Azure Databricks, you can delete the resources you’ve created to avoid unnecessary Azure costs and free up capacity in your subscription.