Use Delta Lake in Azure Databricks
Delta Lake is an open source project to build a transactional data storage layer for Spark on top of a data lake. Delta Lake adds support for relational semantics for both batch and streaming data operations, and enables the creation of a Lakehouse architecture in which Apache Spark can be used to process and query data in tables that are based on underlying files in the data lake.
This lab will take approximately 40 minutes to complete.
Provision an Azure Databricks workspace
Tip: If you already have an Azure Databricks workspace, you can skip this procedure and use your existing workspace.
This exercise includes a script to provision a new Azure Databricks workspace. The script attempts to create a Premium tier Azure Databricks workspace resource in a region in which your Azure subscription has sufficient quota for the compute cores required in this exercise; and assumes your user account has sufficient permissions in the subscription to create an Azure Databricks workspace resource. If the script fails due to insufficient quota or permissions, you can try to create an Azure Databricks workspace interactively in the Azure portal.
- In a web browser, sign into the Azure portal at
https://portal.azure.com. -
Use the [>_] button to the right of the search bar at the top of the page to create a new Cloud Shell in the Azure portal, selecting a PowerShell environment and creating storage if prompted. The cloud shell provides a command line interface in a pane at the bottom of the Azure portal, as shown here:
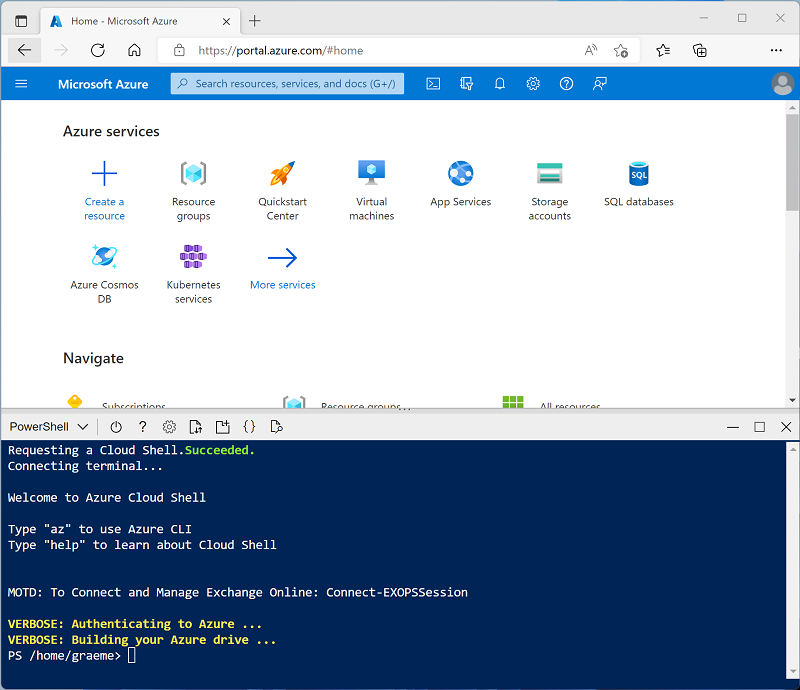
Note: If you have previously created a cloud shell that uses a Bash environment, use the the drop-down menu at the top left of the cloud shell pane to change it to PowerShell.
-
Note that you can resize the cloud shell by dragging the separator bar at the top of the pane, or by using the —, ◻, and X icons at the top right of the pane to minimize, maximize, and close the pane. For more information about using the Azure Cloud Shell, see the Azure Cloud Shell documentation.
-
In the PowerShell pane, enter the following commands to clone this repo:
rm -r mslearn-databricks -f git clone https://github.com/MicrosoftLearning/mslearn-databricks -
After the repo has been cloned, enter the following command to run the setup.ps1 script, which provisions an Azure Databricks workspace in an available region:
./mslearn-databricks/setup.ps1 - If prompted, choose which subscription you want to use (this will only happen if you have access to multiple Azure subscriptions).
- Wait for the script to complete - this typically takes around 5 minutes, but in some cases may take longer. While you are waiting, review the Introduction to Delta Lake article in the Azure Databricks documentation.
Create a cluster
Azure Databricks is a distributed processing platform that uses Apache Spark clusters to process data in parallel on multiple nodes. Each cluster consists of a driver node to coordinate the work, and worker nodes to perform processing tasks. In this exercise, you’ll create a single-node cluster to minimize the compute resources used in the lab environment (in which resources may be constrained). In a production environment, you’d typically create a cluster with multiple worker nodes.
Tip: If you already have a cluster with a 13.3 LTS or higher runtime version in your Azure Databricks workspace, you can use it to complete this exercise and skip this procedure.
- In the Azure portal, browse to the msl-xxxxxxx resource group that was created by the script (or the resource group containing your existing Azure Databricks workspace)
- Select your Azure Databricks Service resource (named databricks-xxxxxxx if you used the setup script to create it).
-
In the Overview page for your workspace, use the Launch Workspace button to open your Azure Databricks workspace in a new browser tab; signing in if prompted.
Tip: As you use the Databricks Workspace portal, various tips and notifications may be displayed. Dismiss these and follow the instructions provided to complete the tasks in this exercise.
- In the sidebar on the left, select the (+) New task, and then select Cluster.
- In the New Cluster page, create a new cluster with the following settings:
- Cluster name: User Name’s cluster (the default cluster name)
- Policy: Unrestricted
- Cluster mode: Single Node
- Access mode: Single user (with your user account selected)
- Databricks runtime version: 13.3 LTS (Spark 3.4.1, Scala 2.12) or later
- Use Photon Acceleration: Selected
- Node type: Standard_DS3_v2
- Terminate after 20 minutes of inactivity
- Wait for the cluster to be created. It may take a minute or two.
Note: If your cluster fails to start, your subscription may have insufficient quota in the region where your Azure Databricks workspace is provisioned. See CPU core limit prevents cluster creation for details. If this happens, you can try deleting your workspace and creating a new one in a different region. You can specify a region as a parameter for the setup script like this:
./mslearn-databricks/setup.ps1 eastus
Create a notebook and ingest data
Now let’s create a Spark notebook and import the data that we’ll work with in this exercise.
- In the sidebar, use the (+) New link to create a Notebook.
- Change the default notebook name (Untitled Notebook [date]) to Explore Delta Lake and in the Connect drop-down list, select your cluster if it is not already selected. If the cluster is not running, it may take a minute or so to start.
-
In the first cell of the notebook, enter the following code, which uses shell commands to download data files from GitHub into the file system used by your cluster.
%sh rm -r /dbfs/delta_lab mkdir /dbfs/delta_lab wget -O /dbfs/delta_lab/products.csv https://raw.githubusercontent.com/MicrosoftLearning/mslearn-databricks/main/data/products.csv - Use the ▸ Run Cell menu option at the left of the cell to run it. Then wait for the Spark job run by the code to complete.
-
Under the existing code cell, use the + icon to add a new code cell. Then in the new cell, enter and run the following code to load the data from the file and view the first 10 rows.
df = spark.read.load('/delta_lab/products.csv', format='csv', header=True)
display(df.limit(10))
Load the file data into a delta table
The data has been loaded into a dataframe. Let’s persist it into a delta table.
-
Add a new code cell and use it to run the following code:
delta_table_path = "/delta/products-delta"
df.write.format("delta").save(delta_table_path)
The data for a delta lake table is stored in Parquet format. A log file is also created to track modifications made to the data.
-
Add a new code cell and use it to run the following shell commands to view the contents of the folder where the delta data has been saved.
%sh ls /dbfs/delta/products-delta -
The file data in Delta format can be loaded into a DeltaTable object, which you can use to view and update the data in the table. Run the following code in a new cell to update the data; reducing the price of product 771 by 10%.
from delta.tables import *
from pyspark.sql.functions import *

# Create a deltaTable object
deltaTable = DeltaTable.forPath(spark, delta_table_path)
# Update the table (reduce price of product 771 by 10%)
deltaTable.update(
    condition = "ProductID == 771",
    set = { "ListPrice": "ListPrice * 0.9" })
# View the updated data as a dataframe
deltaTable.toDF().show(10)
The update is persisted to the data in the delta folder, and will be reflected in any new dataframe loaded from that location.
-
Run the following code to create a new dataframe from the delta table data:
new_df = spark.read.format("delta").load(delta_table_path)
new_df.show(10)
Explore logging and time-travel
Data modifications are logged, enabling you to use the time-travel capabilities of Delta Lake to view previous versions of the data.
-
In a new code cell, use the following code to view the original version of the product data:
new_df = spark.read.format("delta").option("versionAsOf", 0).load(delta_table_path) new_df.show(10) -
The log contains a full history of modifications to the data. Use the following code to see a record of the last 10 changes:
deltaTable.history(10).show(10, False, True)
Create catalog tables
So far you’ve worked with delta tables by loading data from the folder containing the parquet files on which the table is based. You can define catalog tables that encapsulate the data and provide a named table entity that you can reference in SQL code. Spark supports two kinds of catalog tables for delta lake:
- External tables that are defined by the path to the files containing the table data.
- Managed tables, that are defined in the metastore.
Create an external table
-
Use the following code to create a new database named AdventureWorks and then creates an external tabled named ProductsExternal in that database based on the path to the Delta files you defined previously:
spark.sql("CREATE DATABASE AdventureWorks")
spark.sql("CREATE TABLE AdventureWorks.ProductsExternal USING DELTA LOCATION '{0}'".format(delta_table_path))
spark.sql("DESCRIBE EXTENDED AdventureWorks.ProductsExternal").show(truncate=False)
Note that the Location property of the new table is the path you specified.
-
Use the following code to query the table:
%sql
USE AdventureWorks;
SELECT * FROM ProductsExternal;
Create a managed table
-
Run the following code to create (and then describe) a managed tabled named ProductsManaged based on the dataframe you originally loaded from the products.csv file (before you updated the price of product 771).
df.write.format("delta").saveAsTable("AdventureWorks.ProductsManaged")
spark.sql("DESCRIBE EXTENDED AdventureWorks.ProductsManaged").show(truncate=False)
You did not specify a path for the parquet files used by the table - this is managed for you in the Hive metastore, and shown in the Location property in the table description.
-
Use the following code to query the managed table, noting that the syntax is just the same as for a managed table:
%sql
USE AdventureWorks;
SELECT * FROM ProductsManaged;
Compare external and managed tables
-
Use the following code to list the tables in the AdventureWorks database:
%sql USE AdventureWorks; SHOW TABLES; -
Now use the following code to see the folders on which these tables are based:
%sh echo "External table:" ls /dbfs/delta/products-delta echo echo "Managed table:" ls /dbfs/user/hive/warehouse/adventureworks.db/productsmanaged -
Use the following code to delete both tables from the database:
%sql USE AdventureWorks; DROP TABLE IF EXISTS ProductsExternal; DROP TABLE IF EXISTS ProductsManaged; SHOW TABLES; -
Now rerun the cell containing the following code to view the contents of the delta folders:
 %sh
 echo "External table:"
 ls /dbfs/delta/products-delta
 echo
 echo "Managed table:"
 ls /dbfs/user/hive/warehouse/adventureworks.db/productsmanaged
The files for the managed table are deleted automatically when the table is dropped. However, the files for the external table remain. Dropping an external table only removes the table metadata from the database; it does not delete the data files.
-
Use the following code to create a new table in the database that is based on the delta files in the products-delta folder:
%sql USE AdventureWorks; CREATE TABLE Products USING DELTA LOCATION '/delta/products-delta'; -
Use the following code to query the new table:
%sql
USE AdventureWorks;
SELECT * FROM Products;
Because the table is based on the existing delta files, which include the logged history of changes, it reflects the modifications you previously made to the products data.
Use delta tables for streaming data
Delta lake supports streaming data. Delta tables can be a sink or a source for data streams created using the Spark Structured Streaming API. In this example, you’ll use a delta table as a sink for some streaming data in a simulated internet of things (IoT) scenario. The simulated device data is in JSON format, like this:
{"device":"Dev1","status":"ok"}
{"device":"Dev1","status":"ok"}
{"device":"Dev1","status":"ok"}
{"device":"Dev2","status":"error"}
{"device":"Dev1","status":"ok"}
{"device":"Dev1","status":"error"}
{"device":"Dev2","status":"ok"}
{"device":"Dev2","status":"error"}
{"device":"Dev1","status":"ok"}
-
In a new cell, run the following code to download the JSON file:
%sh rm -r /dbfs/device_stream mkdir /dbfs/device_stream wget -O /dbfs/device_stream/devices1.json https://raw.githubusercontent.com/MicrosoftLearning/mslearn-databricks/main/data/devices1.json -
In a new cell, run the following code to create a stream based on the folder containing the JSON device data:
from pyspark.sql.types import * from pyspark.sql.functions import * # Create a stream that reads data from the folder, using a JSON schema inputPath = '/device_stream/' jsonSchema = StructType([ StructField("device", StringType(), False), StructField("status", StringType(), False) ]) iotstream = spark.readStream.schema(jsonSchema).option("maxFilesPerTrigger", 1).json(inputPath) print("Source stream created...") -
Add a new code cell and use it to perpetually write the stream of data to a delta folder:
# Write the stream to a delta table delta_stream_table_path = '/delta/iotdevicedata' checkpointpath = '/delta/checkpoint' deltastream = iotstream.writeStream.format("delta").option("checkpointLocation", checkpointpath).start(delta_stream_table_path) print("Streaming to delta sink...") -
Add code to read the data, just like any other delta folder:
# Read the data in delta format into a dataframe df = spark.read.format("delta").load(delta_stream_table_path) display(df) -
Add the following code to create a table based on the delta folder to which the streaming data is being written:
# create a catalog table based on the streaming sink spark.sql("CREATE TABLE IotDeviceData USING DELTA LOCATION '{0}'".format(delta_stream_table_path)) -
Use the following code to query the table:
%sql SELECT * FROM IotDeviceData; -
Run the following code to add some fresh device data to the stream:
%sh wget -O /dbfs/device_stream/devices2.json https://raw.githubusercontent.com/MicrosoftLearning/mslearn-databricks/main/data/devices2.json -
Re-run the following SQL query code to verify that the new data has been added to the stream and written to the delta folder:
%sql SELECT * FROM IotDeviceData; -
Run the following code to stop the stream:
deltastream.stop()
Clean up
In Azure Databricks portal, on the Compute page, select your cluster and select ■ Terminate to shut it down.
If you’ve finished exploring Azure Databricks, you can delete the resources you’ve created to avoid unnecessary Azure costs and free up capacity in your subscription.