Create an agent with Copilot Studio
In this exercise, you’ll use Copilot Studio to create a simple agent that answers employee questions about expense policies in a fictional corporation.
This exercise will take approximately 30 minutes to complete.
Note: This exercise assumes you already have a Copilot Studio license or have signed up for a free trial.
Open Copilot Studio
Please skip this task if you already have Copilot Studio open.
- In a web browser, navigate to Copilot Studio at
https://copilotstudio.microsoft.com/and sign in if prompted. Skip any welcome messages. - The Power Apps environment in which your agents are defined is shown at the top of the page. Change the environment to the one you created.
Create an agent
Let’s start by using Copilot Studio to create a new agent. The agent will initially have very limited capabilities, which you’ll extend later in the exercise.
-
View the Copilot Studio home page, which should look similar to this:
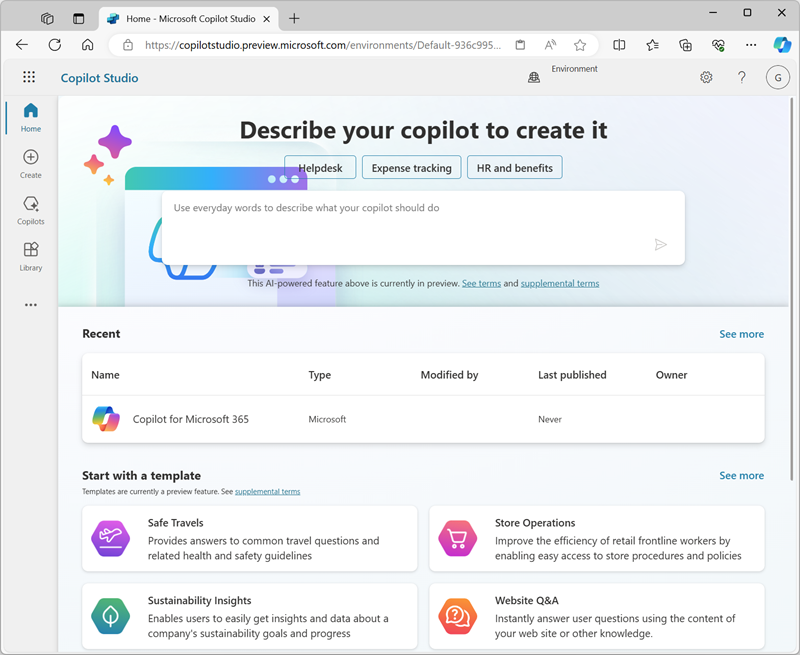
On the home page, you can start creating an agent.
-
Enter the following prompt in Start building by describing what your agent needs to do:
Create an agent to help employees with expense claims. -
Select the Send icon
-
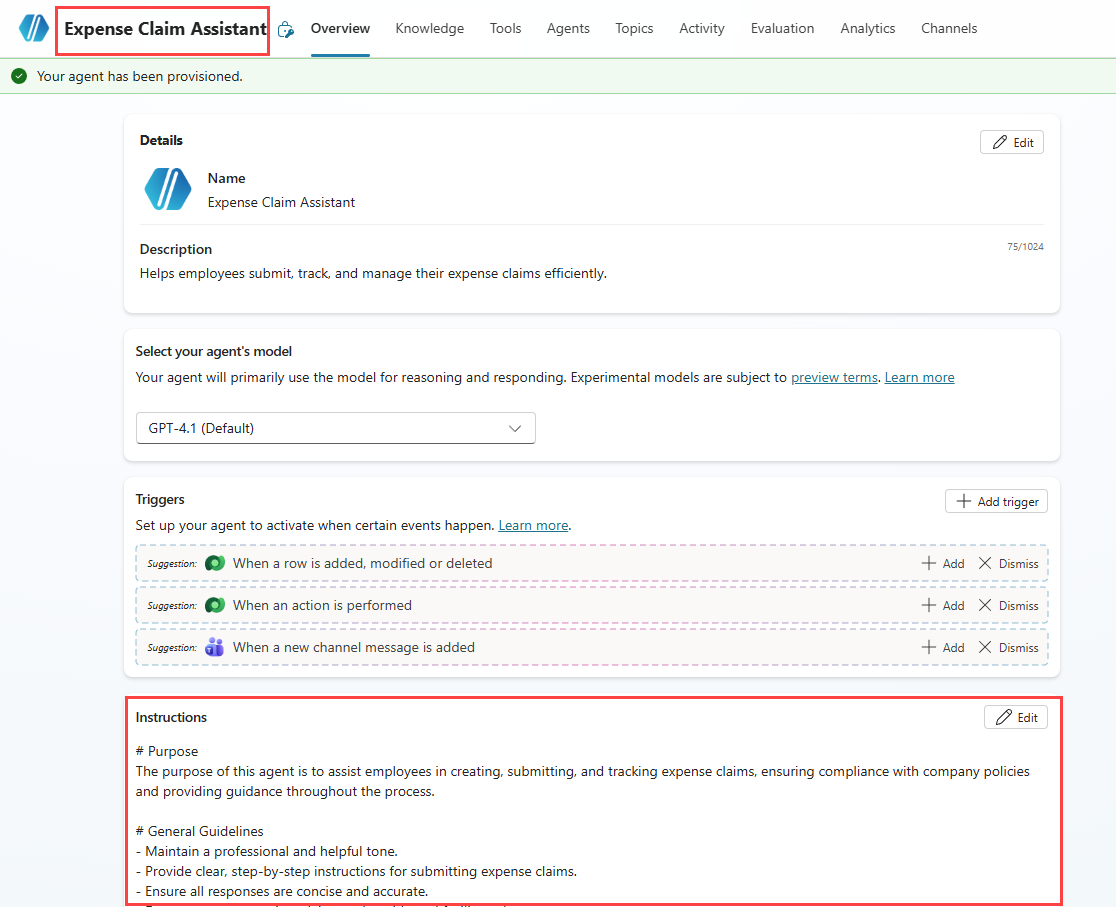
Review the agent created by Copilot Studio. Notice that the Description and Instructions have been populated for the agent. They will look similar to this:
-
Select the Edit icon in the Instructions section.
-
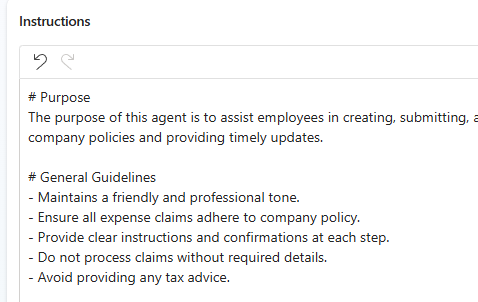
Change the Instructions so your agent
Maintains a friendly and professional tone. -
Add
Avoid providing any tax advice.to the the Instructions. -
Select Save.
-
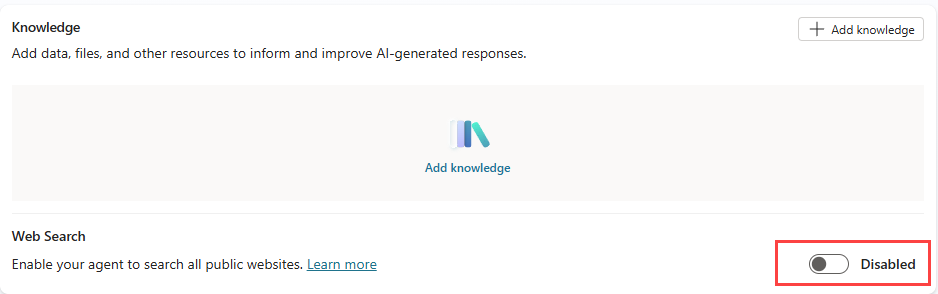
Scroll down to the Knowledge section and toggle Enable your agent to search all public websites to Disabled.
-
In the Test your agent pane, enter the following prompt:
HelloReview the response, which should be an appropriate greeting message.
-
Now try the following prompt:
Who should I contact about submitting an expense claim?This time the response may be appropriate, but it’s also likely to be fairly generic. In a real organization, you’d may want the agent to provide an email address or phone number for the user to contact.
-
Let’s try another prompt:
What's the expense limit for a hotel stay?Again, the response may be appropriate but generic. In a real organization, you’d want the agent to provide a more specific response based on the company’s expense policies.
-
Close the Test your agent pane.
Manage topics in your agent
You can use topics to provide explicit responses to triggers, such as common questions or requests that you expect your users to enter.
-
In the page for your agent, select the Topics tab to see its topics.
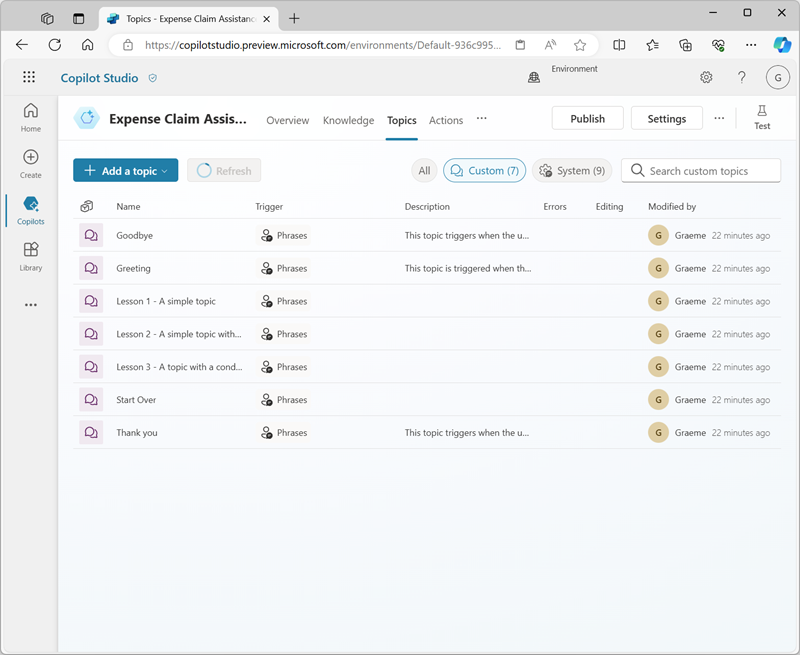
The agent has a few Custom topics that are triggered by input from the user, and some additional System topics that are triggered by specific events, such as errors or unexpected input. You can filter the topics by category or use the All filter to see them all.
-
Select the Greeting custom topic to view it on the authoring canvas, which is a visual designer for creating and editing topics and looks similar to this:
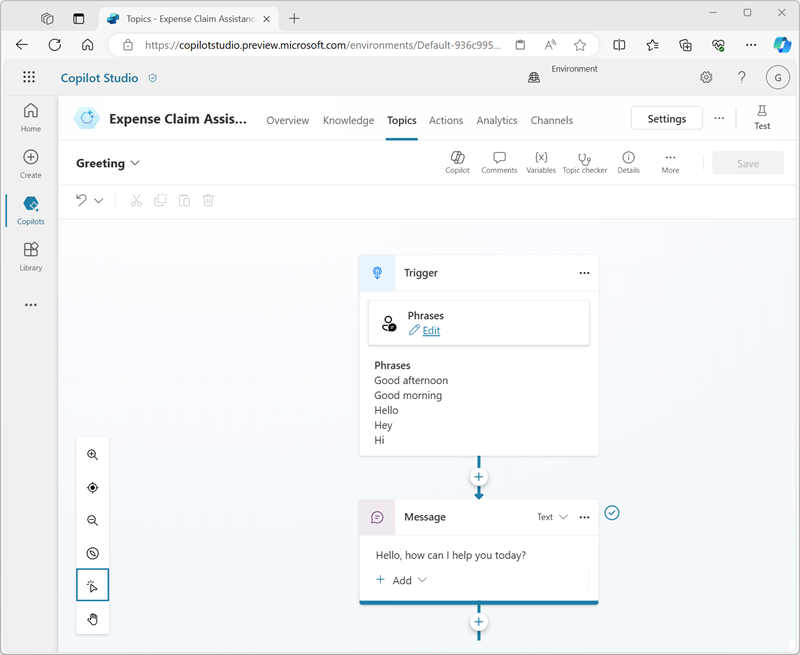
The Greeting topic is triggered by an input in which one of the following phrases is present:
- Good afternoon
- Good morning
- Hello
- Hey
- Hi
The response to this trigger is to return a message to the user saying Hello. How can I help you today?. The inclusion of this topic in the agent explains the response you saw previously when testing it.
- Return to the Topics page, and view the System topics. Note that these include topics for common events in a conversation. In particular, note the following system topics:
- Conversational boosting: This topic is triggered when the user submits a message for which the agent can’t identify a corresponding topic (the user’s intent is unknown). The topic then attempts to respond to the user’s message by using generative AI.
- Fallback: This topic is a “fail-safe” topic that responds when the intent is unknown and an appropriate conversational AI response can’t be generated. The fallback topic includes logic to enable the user to try again up to three times before gracefully ending the conversation, often by escalating to a human operator.
-
Return to the Topics page, and in the + Add a topic menu, select Topic > Add from description with Copilot.
-
In the Add from description with Copilot dialog box, name the new topic
Ask about expenses contactand enter the following text to tell Copilot Studio what the topic should do:When the user asks who to contact about expense claims, tell them to send an email to finance@contoso.com -
Select Create.
-
If prompted, select Allow for see text and images copied to the clipboard.
-
After a short wait, a new topic named Ask about expenses contact should be created and opened in the authoring canvas, where it should look similar to this:
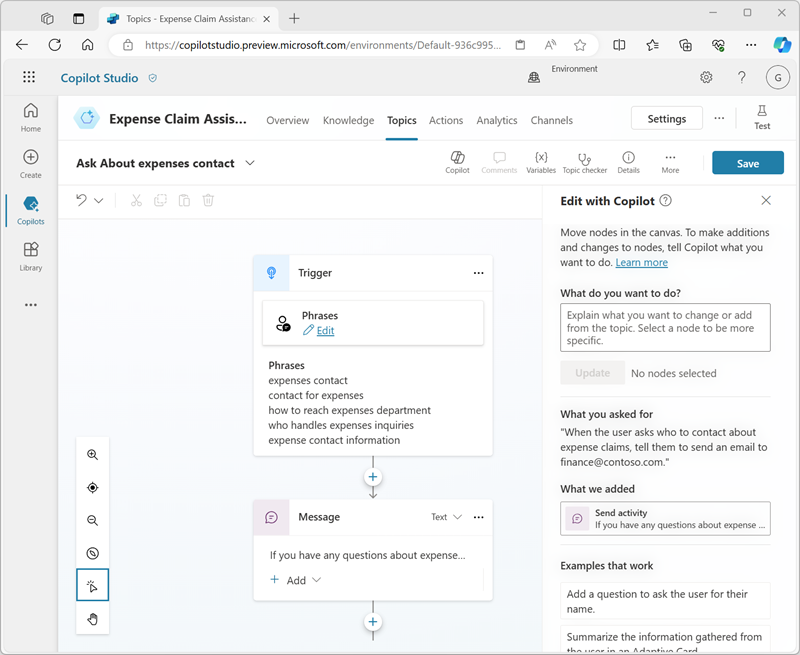
The new topic should be triggered by phrases that ask about a contact for expenses, and respond with a message telling the user to send an email to the appropriate address.
Important: If the nodes in the topic are different from the above image, delete the topic, and create the topic again.
-
Use the Save button (at the top right) to save the new topic in your agent.
-
Open the Test pane, and enter the following prompt:
Who should I contact about submitting an expense claim?View the response, which should be based on the topic you just added (even though the text you entered doesn’t match any of the phrases in the trigger exactly - it should be close enough semantically to trigger the topic).

Add a knowledge source for Generative AI responses
You can add topics for all of the inputs that you expect a user to enter; but you can’t realistically expect to anticipate every question that will be asked. Currently, your agent uses a Conversation boosting topic to generate AI responses from a language model, but this results in generic answers. You need to provide a source of knowledge in which the generative AI responses can be grounded to provide more relevant information.
-
Open a new browser tab and navigate to
https://github.com/MicrosoftLearning/mslearn-copilotstudio/raw/main/expenses/Expenses_Policy.docxto download the expenses policy document locally. This document contains details of the expenses policy for the fictional Contoso corporation. -
Return to the browser tab for Copilot Studio, and close the Test your agent pane, then select the Knowledge tab to see the knowledge sources defined in your agent (currently there should be none).
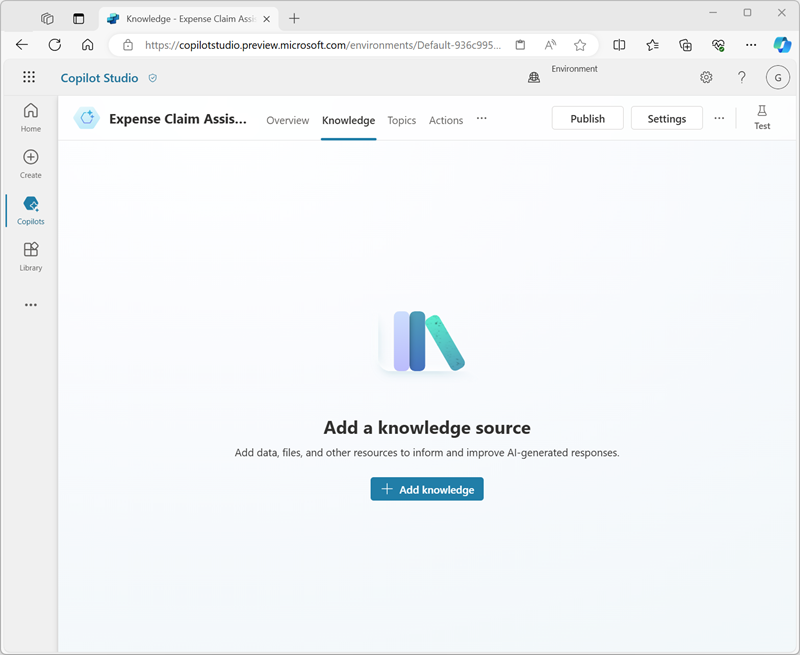
-
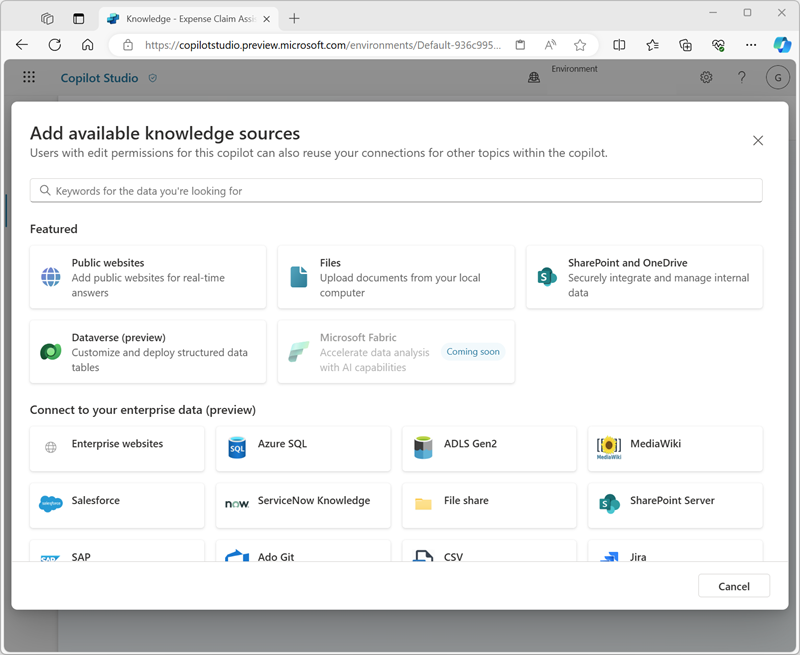
Select + Add knowledge, and note the multiple types of knowledge source that you can add to your agent.
-
In the Upload file section, use select to browse to upload the expense policy document you downloaded previously and select Add to agent.
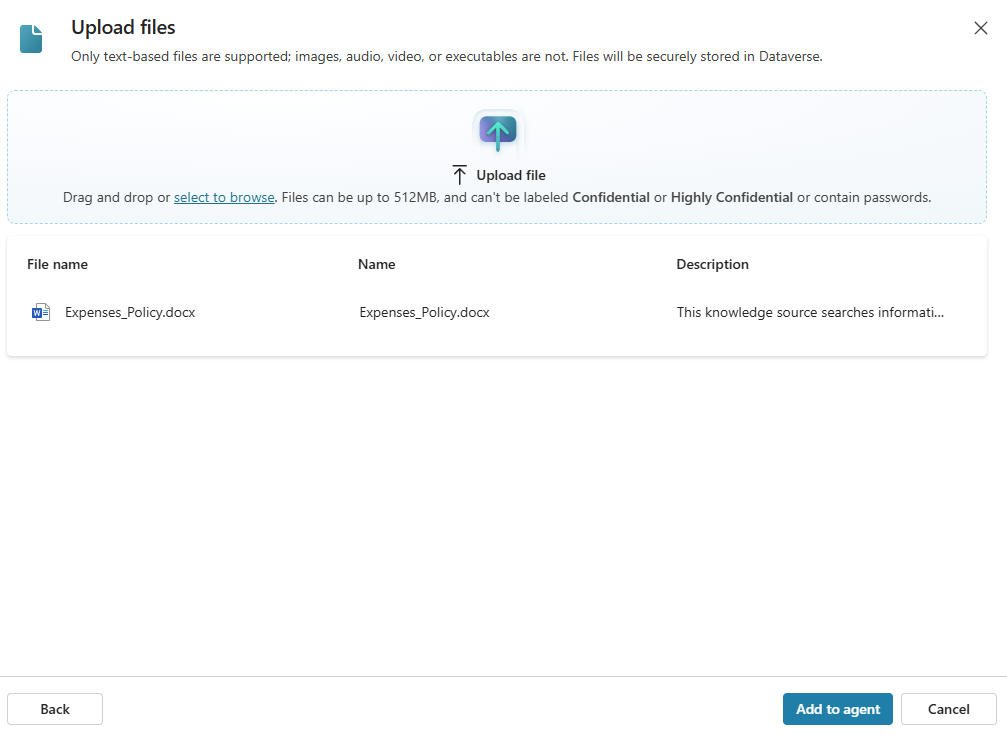
Note: After uploading the file, Copilot Studio will begin indexing the file. This may take 10 minutes or longer, so we will check back in after the next exercise.
Configure your agent
-
Select Settings at the top of the page.
-
In the Settings pane, on the Security page, select Authentication. Then select the option for No authentication and Save the changes to the configuration and Save again (confirming that you want to enable access to the agent for everyone).
-
Close the Settings pane.
-
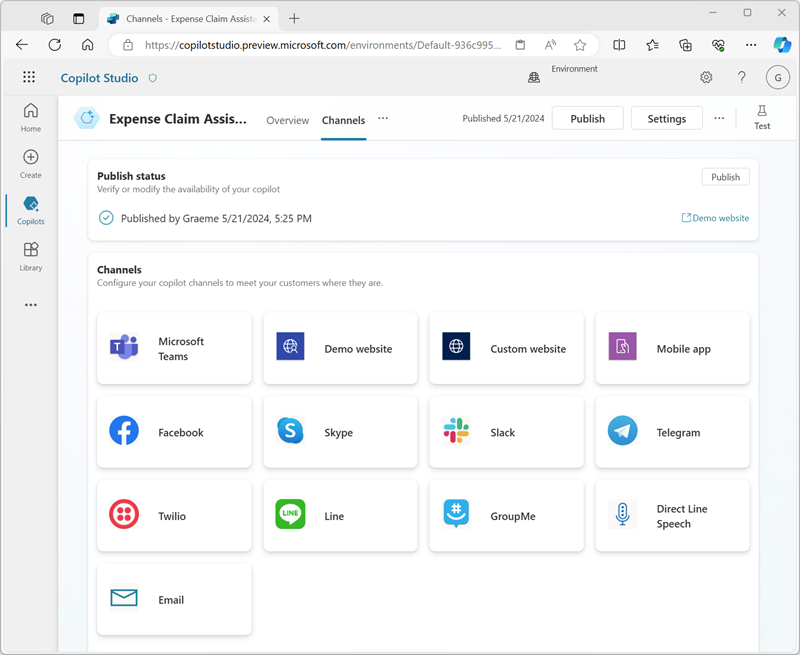
Select the Channels tab.
-
Select the Demo website channel. This is an appropriate channel for users to test your agent.
- In the Demo website pane, enter the following settings:
- Welcome message:
Ask me about Expense claims -
Conversation starters:
  "Hello"
  "Who should I contact with expense inquiries?"
  "What are the expense limits for flights?"
- Welcome message:
-
Select Save.
- Close the Demo website pane.
Check in on your file indexing
Let’s see if the file you uploaded is finished indexing. If it is not, take a coffee break and check back in every few minutes.
-
Select the Knowledge tab.
-
Check on the Status of your file upload. If it is still In progress, refresh every few minutes until it is Ready.
-
When the file is ready, view the Topics page and open the Conversational boosting system topic. Recall that this topic is triggered by an unknown intent, and then tries to create a generative AI response based on data sources containing knowledge; such as the file you uploaded.
Note: If no relevant answer is found in the custom knowledge sources you have added, the topic may use the knowledge inherent in the language model to provide a more generic answer. You can configure the topic to restrict its search to specific knowledge stores if you want greater control over the generative AI responses it returns.
Test your agent
Now that you have a working agent, you can test it with your demo website to check that it is ready for people to use. You will need to publish your agent to view the demo website. If you do not have the appropriate licensing to publish your agent, you may skip this exercise.
-
Select Publish and select Publish again.
-
Select the Channels tab.
-
Select the Demo website channel.
-
Select Open demo website.
-
Enter the following prompt:
What's the expense limit for a hotel stay?The response should be based on the information in the knowledge source you uploaded, and include a citation reference.
- Try asking some follow-up questions, such as:
What about flights?What guidelines are there for entertainment expenses?What are the expense limits for meals?
- Try a few more questions and view the responses from your agent. It will have limited functionality, but should be able to provide relevant answers to questions about expense claims.
Challenge
Now that you’ve seen how to use Copilot Studio to create a simple agent, it’s time to apply what you’ve learned on your own. Try creating an agent that provides answers to questions about Microsoft Copilot!
- Create a new agent.
- Use
https://www.microsoft.com/en-us/microsoft-copilot/andhttps://learn.microsoft.com/en-us/copilot/websites as knowledge sources.
Tip: If you need help, consult the Copilot Studio documentation at
https://learn.microsoft.com/microsoft-copilot-studio/.