Exercise 1 - Create a Power Platform environment
Task 1.1 - Power Platform Admin Center
Before you start the lab exercises, you must create a development environment for you to work in.
-
Open a web browser, navigate to
https://admin.powerplatform.microsoft.com/manage/environments, and sign in using your credentials for this exercise. -
If prompted, choose the option to stay signed in.
-
Close any pop-up messages that are displayed.
Task 1.2 - Add Dataverse to the default environment
-
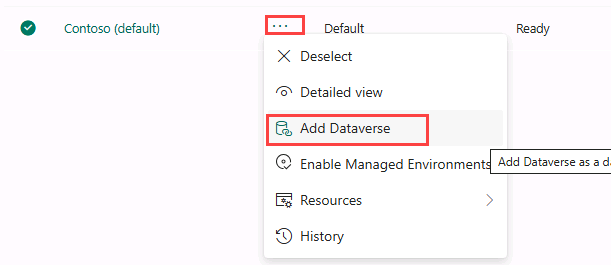
Select the ellipsis (…) for the default environment (for example, Contoso (default)) and select Add Dataverse.
-
Leave all of the default settings and select Add.
Task 1.3 - Create a new environment
-
In the Environments page, select + New to create a new environment with the following settings:
- Type: Developer
- Macro Region Geography: North America
- Name: Your name
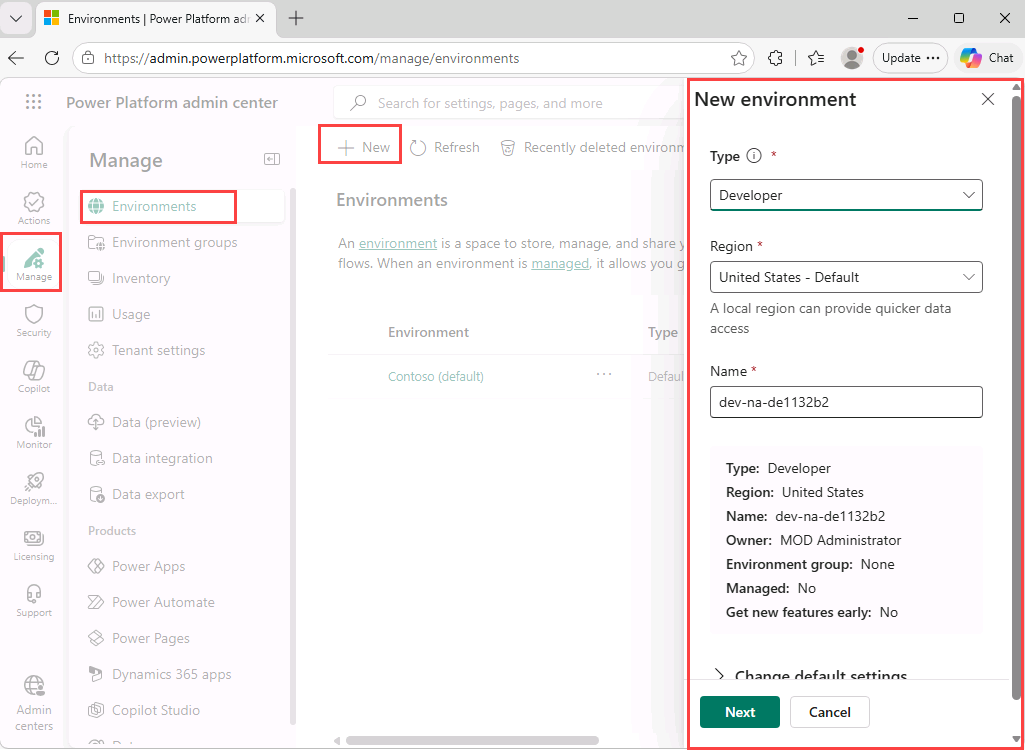
- Expand Change default settings and configure the following:
- Environment group: None
- Make this a Managed Environment: No
- Create on behalf: No
- Add a Dataverse data store?: Yes
-
Select Next and in the Add Dataverse section:
- Language: English (United States)
- Currency: USD ($)
- Deploy sample apps and data?: No
-
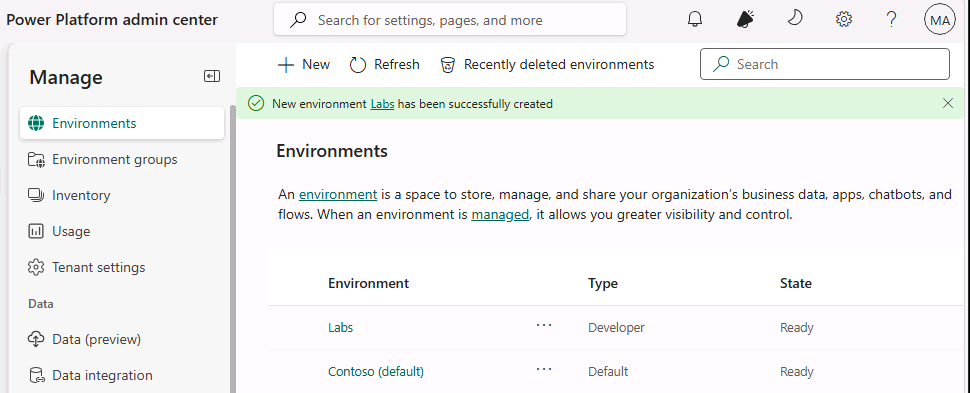
Select Save and wait until the state of your environment is Ready (you can use the Refresh button to update the display).
[!NOTE] Environment provisioning can take several minutes depending on tenant configuration.
-
In a new browser tab, navigate to
https://copilotstudio.preview.microsoft.com/and sign in if prompted.[!NOTE]
If you experience issues loading Copilot Studio on your environment:- First, capture your environment ID (GUID) from the Power Platform admin center:
- Open the environment you created at
https://admin.powerplatform.microsoft.com/manage/environments. - Locate the environment ID in the URL (a long string such as
12345678-90ab-cdef-1234-567890abcdef). - Copy and save this value.
- Open the environment you created at
- Then try accessing your environment directly by pasting your ID into the following URL:
https://copilotstudio.preview.microsoft.com/environments/<your-environment-id>/home
- First, capture your environment ID (GUID) from the Power Platform admin center:
-
If prompted with a Get Started screen, accept the default country or region and continue. Skip any welcome messages.
-
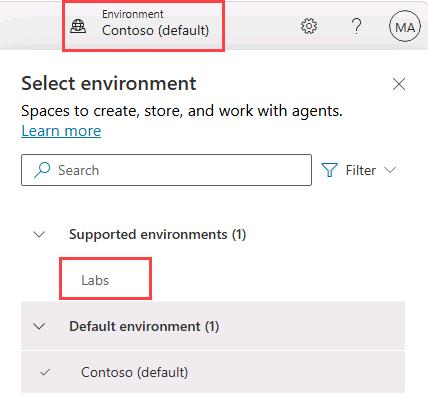
In the bottom-left corner, select the environment selector that displays the name of the currently selected environment, and then choose the environment you created.
Task 1.4 - Create a solution
-
In the left navigation pane, select the ellipsis (…) next to your account name and then select Solutions.
[!NOTE] Selecting Solutions may redirect you to the classic experience. If this occurs, close the classic experience. Then, select the ellipsis (…) next to your account name again and select Solutions a second time to open the solutions list.
-
If prompted with a Get Started screen, select Get Started and then skip any welcome messages.
-
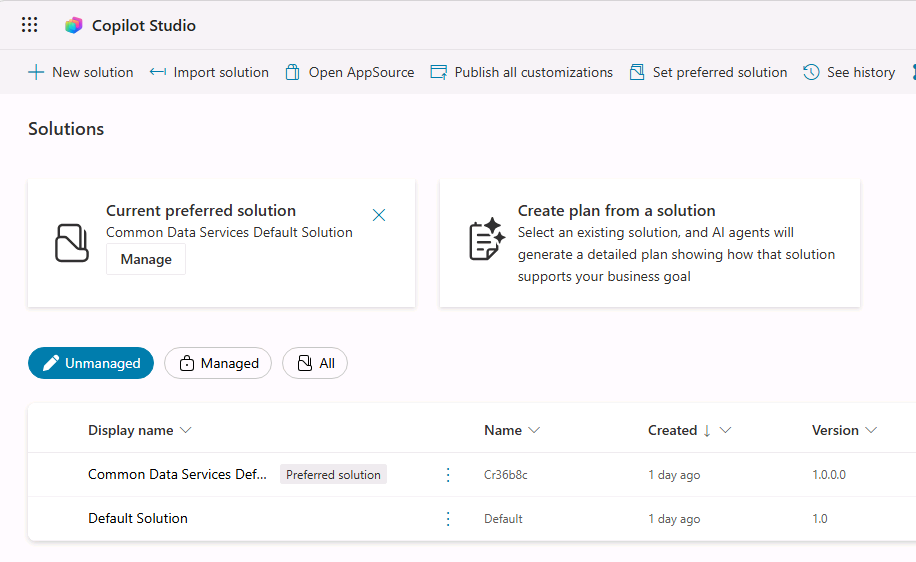
You should see several solutions including the Default Solution and the Common Data Services Default Solution.
-
Select + New solution.
-
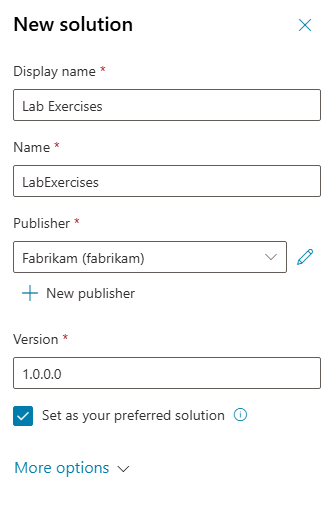
In the Display name text box, enter
Lab Exercises -
Verify that Name is automatically populated.
-
Select + New publisher below the Publisher drop-down.
-
For Display name, enter
Fabrikam -
For Name, enter
fabrikam -
For Prefix, enter
fab -
Select Save to create the publisher.
[!NOTE] If Save is unavailable, create the solution in Power Apps at
https://make.powerapps.com. -
Verify that Fabrikam (fabrikam) is selected in the Publisher drop-down.
-
Select the Set as your preferred solution checkbox.
[!NOTE] Setting this as your preferred solution ensures new assets created during later labs are added to the Lab Exercises solution by default.
-
Select Create.
-
Close the Solutions browser tab.
-
Refresh the Copilot Studio page.
You now have a Power Platform environment and solution to work in.