Deploy a containerized app to Azure App Service
In this exercise, you create an Azure App Service web app configured to run a containerized application by specifying a container image from Microsoft Container Registry. You learn how to configure container settings, deploy the app, and verify that the containerized application is running successfully in Azure App Service.
Tasks performed in this exercise:
- Create an Azure App Service resource and deploy a containerized app
- View the results
- Clean up resources
This exercise takes approximately 15 minutes to complete.
Create a web app resource
-
In your browser navigate to the Azure portal https://portal.azure.com; signing in with your Azure credentials if prompted.
-
Select the + Create a resource located in the Azure Services heading near the top of the homepage.
-
In the Search the Marketplace search bar, enter web app and press enter to start searching.
-
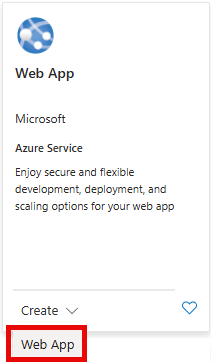
In the Web App tile, select the Create drop-down and then select Web App.

Selecting Create will open a template with a few tabs to fill out with information about your deployment. The following steps walk you through what changes to make in the relevant tabs.
-
Fill out the Basics tab with the information in the following table:
Setting Action Subscription Retain the default value. Resource group Select Create new, enter rg-WebApp, and then select OK. You can also select an existing resource group if you prefer.Name Enter a unique name, for example your-initials-containerwebapp. Replace your-initials with your initials, or some other value. The name needs to be unique, so it may require a few changes. Slider under Name setting Select the slider to turn it off. This slider only appears in some Azure configurations. Publish Select the Container option. Operating System Ensure Linux is selected. Region Retain the default selection, or choose a region near you. Linux Plan Retain the default selection. Pricing plan Select the drop-down and choose the Free F1 plan. -
Select, or navigate to, the Container tab, and enter the information in the following table:
Setting Action Sidecar support Slider should be set to the off position. Image Source Select Other container registries. Access Type Retain default Public selection. Registry server URL Enter mcr.microsoft.com/k8se.Image and Tag Enter quickstart:latest.Startup Command Leave blank. -
Select the Review + create tab.
-
Review the selections you made, and then select the Create button.
It may take a few minutes for the deployment to complete. When it is finished select the Go to resource button.
Now that your deployment has finished it's time to view the web app. Select the link to your web app located next to the Default domain field in the Essentials section. The link will open the site in a new tab.
Note: It may take a few minutes for the deployed container app to run and display in the new tab.
Clean up resources
Now that you finished the exercise, you should delete the cloud resources you created to avoid unnecessary resource usage.
- In your browser navigate to the Azure portal https://portal.azure.com; signing in with your Azure credentials if prompted.
- Navigate to the resource group you created and view the contents of the resources used in this exercise.
- On the toolbar, select Delete resource group.
- Enter the resource group name and confirm that you want to delete it.
CAUTION: Deleting a resource group deletes all resources contained within it. If you chose an existing resource group for this exercise, any existing resources outside the scope of this exercise will also be deleted.