Import and configure an API with Azure API Management
In this exercise, you create an Azure API Management instance, import an OpenAPI specification backend API, configure the API settings including the web service URL and subscription requirements, and test the API operations to verify they work correctly.
Tasks performed in this exercise:
- Create an Azure API Management (APIM) instance
- Import an API
- Configure the backend settings
- Test the API
This exercise takes approximately 20 minutes to complete.
Create an API Management instance
In this section of the exercise you create a resource group and Azure Storage account. You also record the endpoint, and access key for the account.
-
In your browser navigate to the Azure portal https://portal.azure.com; signing in with your Azure credentials if prompted.
-
Use the [>_] button to the right of the search bar at the top of the page to create a new cloud shell in the Azure portal, selecting a Bash environment. The cloud shell provides a command line interface in a pane at the bottom of the Azure portal. If you are prompted to select a storage account to persist your files, select No storage account required, your subscription, and then select Apply.
Note: If you have previously created a cloud shell that uses a PowerShell environment, switch it to Bash.
-
Create a resource group for the resources needed for this exercise. Replace myResourceGroup with a name you want to use for the resource group. You can replace eastus2 with a region near you if needed. If you already have a resource group you want to use, proceed to the next step.
az group create --location eastus2 --name myResourceGroup -
Create a few variables for the CLI commands to use, it reduces amount of typing. Replace
with the value you chose earlier. The APIM name needs to be a globally unique name, and the following script generates a random string. Replace with an email address you can access. Replace with the value you chose earlier. myApiName=import-apim-$RANDOM myLocation=<myLocation> myEmail=<myEmail> myResourceGroup=<myResourceGroup> -
Create an APIM instance. The az apim create command is used to create the instance.
az apim create -n $myApiName \
    --location $myLocation \
    --publisher-email $myEmail  \
    --resource-group $myResourceGroup \
    --publisher-name Import-API-Exercise \
    --sku-name Consumption
Note: The operation should complete in about five minutes.
Import a backend API
This section shows how to import and publish an OpenAPI specification backend API.
-
In the Azure portal, search for and select API Management services.
-
On the API Management services screen, select the API Management instance you created.
-
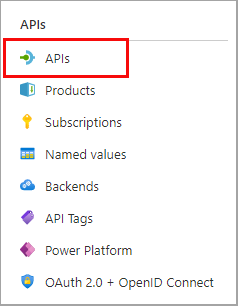
In the API management service navigation pane, select > APIs and then select APIs.
-
Select OpenAPI in the Create from definition section, and set the Basic/Full toggle to Full in the pop-up that appears.
Use the values from the following table to fill out the form. You can leave any fields not mentioned to their default value.
Setting Value Description OpenAPI Specification https://petstore.swagger.io/v2/swagger.jsonReferences the service implementing the API, requests are forwarded to this address. Most of the necessary information in the form is automatically populated after you enter this value. URL scheme Ensure HTTPS is selected. Defines the security level of the HTTP protocol accepted by the API. -
Select Create.
Test the API
Now that the API has been imported and configured it's time to test the API.
-
Select Test in the menu bar. This will display all of the operations available in the API.
-
Search for, and select the Find Pets by status. operation.
-
In the Template parameters section, enter
availableas the value in the status field. -
Select Send. You may need to scroll down on the page to view the HTTP response.
Backend responds with 200 OK and some data.
-
If you want to try different results you can enter a different status in the Template parameters section. Enter
pendingorsoldas the value, and then select Send to see the new results.
Clean up resources
Now that you finished the exercise, you should delete the cloud resources you created to avoid unnecessary resource usage.
- In your browser navigate to the Azure portal https://portal.azure.com; signing in with your Azure credentials if prompted.
- Navigate to the resource group you created and view the contents of the resources used in this exercise.
- On the toolbar, select Delete resource group.
- Enter the resource group name and confirm that you want to delete it.
CAUTION: Deleting a resource group deletes all resources contained within it. If you chose an existing resource group for this exercise, any existing resources outside the scope of this exercise will also be deleted.