Analyze video (deprecated)
Note: This exercise is deprecated. Consider reviewing the QuickStart tutorial at https://learn.microsoft.com/azure/azure-video-indexer/try-vi-web-portal-quickstart.
A large proportion of the data created and consumed today is in the format of video. Azure AI Video Indexer is an AI-powered service that you can use to index videos and extract insights from them.
Note: From June 21st 2022, capabilities of Azure AI services that return personally identifiable information are restricted to customers who have been granted limited access. Without getting limited access approval, recognizing people and celebrities with Video Indexer for this lab is not available. For more details about the changes Microsoft has made, and why - see Responsible AI investments and safeguards for facial recognition.
Upload a video to Video Indexer
First, you’ll need to sign into the Video Indexer portal and upload a video.
- In your browser, open the Video Indexer portal at
https://www.videoindexer.ai. -
If you have an existing Video Indexer account, sign in. Otherwise, sign up for a free account and sign in using your Microsoft account (or any other valid account type). If you have difficulty signing in, try opening a private browser session.
Note: If this is your first time signing in you might see a pop-up form asking you to verify how you’re going to use the service.
- In a new tab, download the Responsible AI video by visiting
https://aka.ms/responsible-ai-video. Save the file. - In Video Indexer, select the Upload option. Then select the option to Browse for files, select the downloaded video, and click Add. Change the text in the File name field to Responsible AI. Select Review + upload, review the summary overview, select the checkbox to verify compliance with Microsoft’s policies for facial recognition, and upload the file.
- After the file has uploaded, wait a few minutes while Video Indexer automatically indexes it.
Note: In this exercise, we’re using this video to explore Video Indexer functionality; but you should take the time to watch it in full when you’ve finished the exercise as it contains useful information and guidance for developing AI-enabled applications responsibly!
Review video insights
The indexing process extracts insights from the video, which you can view in the portal.
-
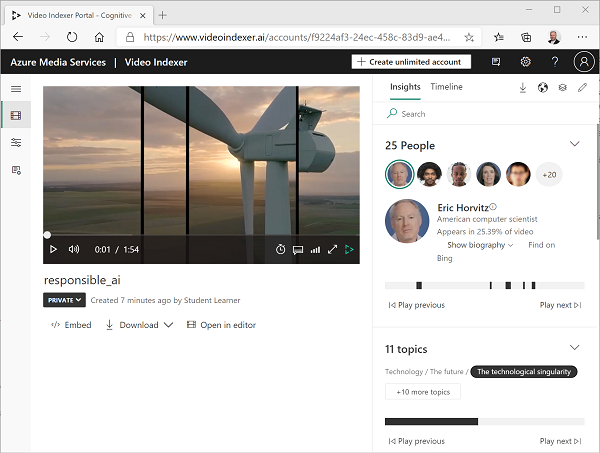
In the Video Indexer portal, when the video is indexed, select it to view it. You’ll see the video player alongside a pane that shows insights extracted from the video.
Note: Due to the limited access policy to protect individuals identities, you may not see names when you index the video.
-
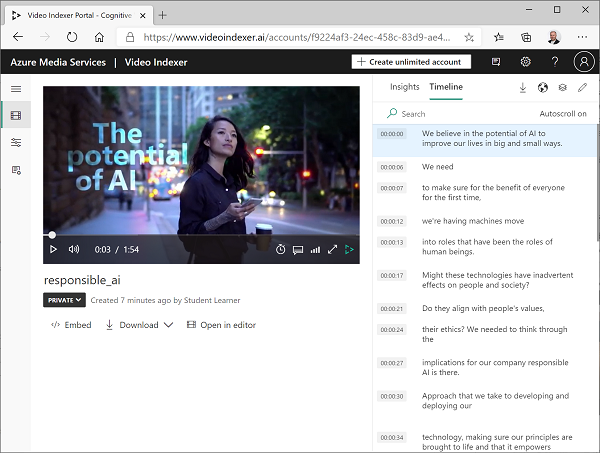
As the video plays, select the Timeline tab to view a transcript of the video audio.
-
At the top right of the portal, select the View symbol (which looks similar to 🗇), and in the list of insights, in addition to Transcript, select OCR and Speakers.
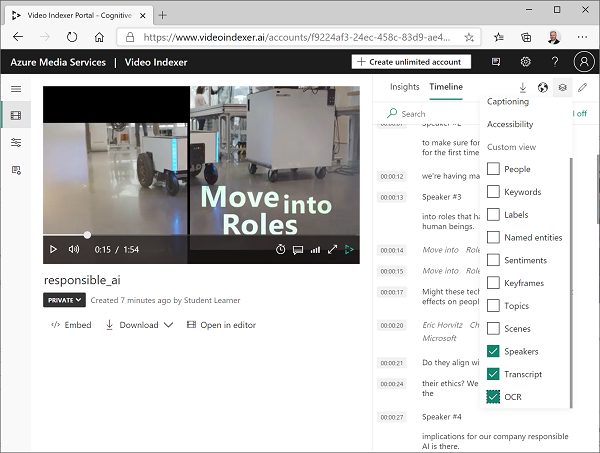
- Observe that the Timeline pane now includes:
- Transcript of audio narration.
- Text visible in the video.
- Indications of speakers who appear in the video. Some well-known people are automatically recognized by name, others are indicated by number (for example Speaker #1).
- Switch back to the Insights pane and view the insights show there. They include:
- Individual people who appear in the video.
- Topics discussed in the video.
- Labels for objects that appear in the video.
- Named entities, such as people and brands that appear in the video.
- Key scenes.
-
With the Insights pane visible, select the View symbol again, and in the list of insights, add Keywords and Sentiments to the pane.
The insights found can help you determine the main themes in the video. For example, the topics for this video show that it is clearly about technology, social responsibility, and ethics.
Search for insights
You can use Video Indexer to search the video for insights.
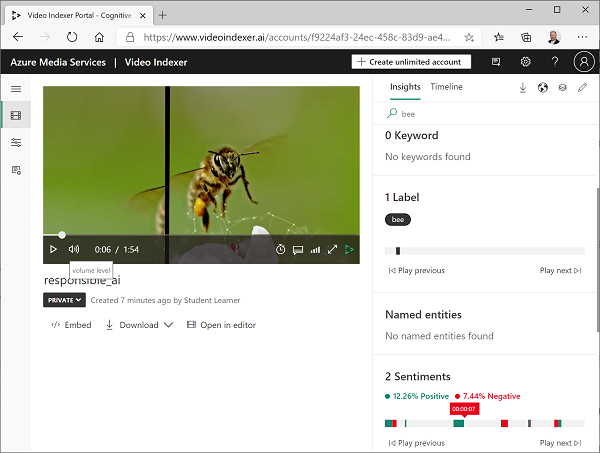
- In the Insights pane, in the Search box, enter Bee. You may need to scroll down in the Insights pane to see results for all types of insight.
- Observe that one matching label is found, with its location in the video indicated beneath.
-
Select the beginning of the section where the presence of a bee is indicated, and view the video at that point (you may need to pause the video and select carefully - the bee only appears briefly!)
- Clear the Search box to show all insights for the video.
Use the Video Indexer REST API
Video Indexer provides a REST API that you can use to upload and manage videos in your account.
- In a new browser tab, open the Azure portal at
https://portal.azure.com, and sign in using your Azure credentials. Keep the existing tab with the Video Indexer portal open. -
In the Azure portal, use the [>_] button to the right of the search bar at the top of the page to create a new Cloud Shell in the Azure portal, selecting a PowerShell environment with no storage in your subscription.
The cloud shell provides a command-line interface in a pane at the bottom of the Azure portal.
Note: If you have previously created a cloud shell that uses a Bash environment, switch it to PowerShell.
Note: If the portal asks you to select a storage to persist your files, choose No storage account required, select the subscription you are using and press Apply.
-
In the cloud shell toolbar, in the Settings menu, select Go to Classic version (this is required to use the code editor).
Ensure you've switched to the classic version of the cloud shell before continuing.
-
Resize the cloud shell pane so you can see more of it.
Tip” You can resize the pane by dragging the top border. You can also use the minimize and maximize buttons to switch between the cloud shell and the main portal interface.
-
In the cloud shell pane, enter the following commands to clone the GitHub repo containing the code files for this exercise (type the command, or copy it to the clipboard and then right-click in the command line and paste as plain text):
rm -r mslearn-ai-vision -f git clone https://github.com/MicrosoftLearning/mslearn-ai-visionTip: As you paste commands into the cloudshell, the ouput may take up a large amount of the screen buffer. You can clear the screen by entering the
clscommand to make it easier to focus on each task. -
After the repo has been cloned, navigate to the folder containing the application code file for this exercise:
cd mslearn-ai-vision/Labfiles/video-indexer
Get your API details
To use the Video Indexer API, you need some information to authenticate requests:
- In the Video Indexer portal, expand the left pane and select the Account settings page.
- Note the Account ID on this page - you will need it later.
- Open a new browser tab and go to the Video Indexer developer portal at `https://api-portal.videoindexer.ai, signing with your Azure credentials.
- On the Profile page, view the Subscriptions associated with your profile.
- On the page with your subscription(s), observe that you have been assigned two keys (primary and secondary) for each subscription. Then select Show for any of the keys to see it. You will need this key shortly.
Use the REST API
Now that you have the account ID and an API key, you can use the REST API to work with videos in your account. In this procedure, you’ll use a PowerShell script to make REST calls; but the same principles apply with HTTP utilities such as cURL or Postman, or any programming language capable of sending and receiving JSON over HTTP.
All interactions with the Video Indexer REST API follow the same pattern:
- An initial request to the AccessToken method with the API key in the header is used to obtain an access token.
- Subsequent requests use the access token to authenticate when calling REST methods to work with videos.
-
In the cloud shell, use the following command to open the PowerShell script:
code get-videos.ps1 - In the PowerShell script, replace the YOUR_ACCOUNT_ID and YOUR_API_KEY placeholders with the account ID and API key values you identified previously.
- Observe that the location for a free account is “trial”. If you have created an unrestricted Video Indexer account (with an associated Azure resource), you can change this to the location where your Azure resource is provisioned (for example “eastus”).
- Review the code in the script, noting that invokes two REST methods: one to get an access token, and another to list the videos in your account.
-
Save your changes (press CTRL+S), close the code editor (press CTRL+Q) and then run the following command to execute the script:
./get-videos.ps1 - View the JSON response from the REST service, which should contain details of the Responsible AI video you indexed previously.
Use Video Indexer widgets
The Video Indexer portal is a useful interface to manage video indexing projects. However, there may be occasions when you want to make the video and its insights available to people who don’t have access to your Video Indexer account. Video Indexer provides widgets that you can embed in a web page for this purpose.
- Use the
lscommand,to view the contents of the video-indexer folder. Note that it contains a analyze-video.html file. This is a basic HTML page to which you will add the Video Indexer Player and Insights widgets. -
Enter the following command to edit the file:
code analyze-video.htmlThe file is opened in a code editor.
- Note the reference to the vb.widgets.mediator.js script in the header - this script enables multiple Video Indexer widgets on the page to interact with one another.
- In the Video Indexer portal, return to the Media files page and open your Responsible AI video.
- Under the video player, select </> Embed to view the HTML iframe code to embed the widgets.
- In the Share and Embed dialog box, select the Player widget, set the video size to 560 x 315, and then copy the embed code to the clipboard.
- In the Azure portal cloud shell, in the code editor for the analyze-video.html file, paste the copied code under the comment <– Player widget goes here – >.
- Back in the Video Indexer portal, in the Share and Embed dialog box, select the Insights widget and then copy the embed code to the clipboard. Then close the Share and Embed dialog box, switch back to Azure portal, and paste the copied code under the comment <– Insights widget goes here – >.
- After editing the file, within the code editor, save your changes (CTRL+S) and then close the code editor (CTRL+Q) while keeping the cloud shell command line open.
-
In the cloud shell toolbar, enter the following (Cloud shell-specific) command to download the HTML file you edited:
download analyze-video.htmlThe download command creates a popup link at the bottom right of your browser, which you can select to download and open the file; which should look like this:
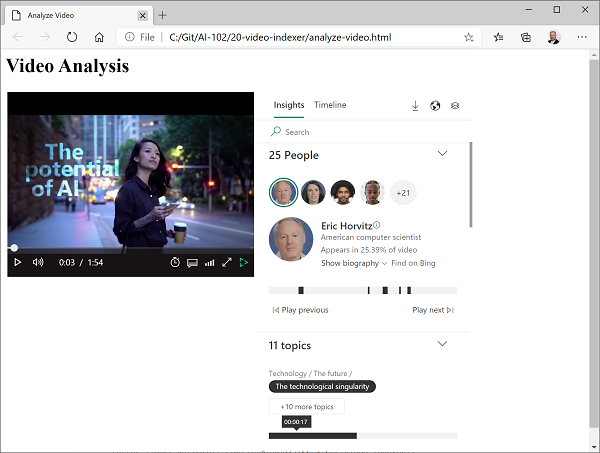
- Experiment with the widgets, using the Insights widget to search for insights and jump to them in the video.