Classify images (deprecated)
Note: This exercise is deprecated. Consider reviewing the QuickStart tutorial at https://learn.microsoft.com/azure/ai-services/custom-vision-service/getting-started-build-a-classifier.
The Azure AI Custom Vision service enables you to create computer vision models that are trained on your own images. You can use it to train image classification and object detection models; which you can then publish and consume from applications.
In this exercise, you will use the Custom Vision service to train an image classification model that can identify three classes of fruit (apple, banana, and orange).
While this exercise is based on the Azure Custom Vision Python SDK, you can develop vision applications using multiple language-specific SDKs; including:
- Azure Custom Vision for JavaScript (training)
- Azure Custom Vision for JavaScript (prediction)
- Azure Custom Vision for Microsoft .NET (training)
- Azure Custom Vision for Microsoft .NET (prediction)
- Azure Custom Vision for Java (training)
- Azure Custom Vision for Java (prediction)
This exercise takes approximately 45 minutes.
Create Custom Vision resources
Before you can train a model, you will need Azure resources for training and prediction. You can create Custom Vision resources for each of these tasks, or you can create a single resource and use it for both. In this exercise, you’ll create Custom Vision resources for training and prediction.
- Open the Azure portal at
https://portal.azure.com, and sign in using your Azure credentials. Close any welcome messages or tips that are displayed. - Select Create a resource.
- In the search bar, search for
Custom Vision, select Custom Vision, and create the resource with the following settings:- Create options: Both
- Subscription: Your Azure subscription
- Resource group: Create or select a resource group
- Region: Choose any available region
- Name: A valid name for your Custom Vision resource
- Training pricing tier: F0
- Prediction pricing tier: F0
-
Create the resource and wait for deployment to complete, and then view the deployment details. Note that two Custom Vision resources are provisioned; one for training, and another for prediction.
Note: Each resource has its own endpoint and keys, which are used to manage access from your code. To train an image classification model, your code must use the training resource (with its endpoint and key); and to use the trained model to predict image classes, your code must use the prediction resource (with its endpoint and key).
- When the resources have been deployed, go to the resource group to view them. You should see two custom vision resources, one with the suffix -Prediction.
Create a Custom Vision project in the Custom Vision portal
To train an image classification model, you need to create a Custom Vision project based on your training resource. To do this, you’ll use the Custom Vision portal.
- Open a new browser tab (keeping the Azure portal tab open - you’ll return to it later).
- In the new browser tab, open the Custom Vision portal at
https://customvision.ai. If prompted, sign in using your Azure credentials and agree to the terms of service. - In the Custom Vision portal, create a new project with the following settings:
- Name:
Classify Fruit - Description:
Image classification for fruit - Resource: Your Custom Vision resource
- Project Types: Classification
- Classification Types: Multiclass (single tag per image)
- Domains: Food
- Name:
Upload and tag images
- In a new browser tab, download the training images from
https://github.com/MicrosoftLearning/mslearn-ai-vision/raw/main/Labfiles/image-classification/training-images.zipand extract the zip folder to view its contents. This folder contains subfolders of apple, banana, and orange images. -
In the Custom Vision portal, in your image classification project, click Add images, and select all of the files in the training-images/apple folder you downloaded and extracted previously. Then upload the image files, specifying the tag
apple, like this: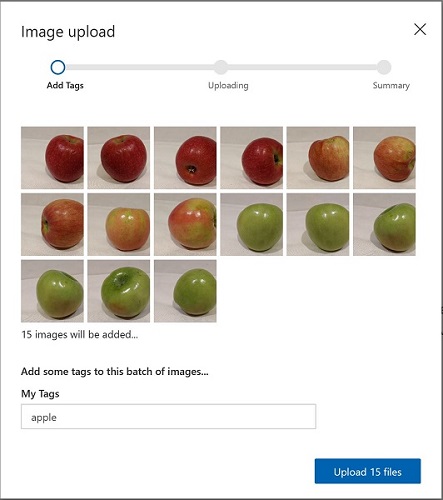
- Use the Add Images ([+]) toolbar icon to repeat the previous step to upload the images in the banana folder with the tag
banana, and the images in the orange folder with the tagorange. -
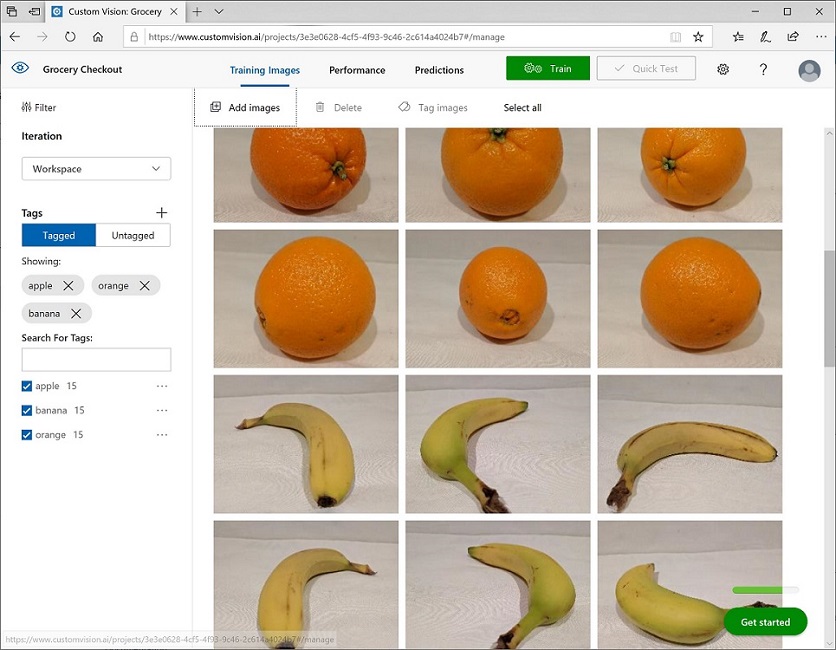
Explore the images you have uploaded in the Custom Vision project - there should be 15 images of each class, like this:
Train a model
- In the Custom Vision project, above the images, click Train (⚙⚙) to train a classification model using the tagged images. Select the Quick Training option, and then wait for the training iteration to complete (this may take a minute or so).
-
When the model iteration has been trained, review the Precision, Recall, and AP performance metrics - these measure the prediction accuracy of the classification model, and should all be high.

Note: The performance metrics are based on a probability threshold of 50% for each prediction (in other words, if the model calculates a 50% or higher probability that an image is of a particular class, then that class is predicted). You can adjust this at the top-left of the page.
Test the model
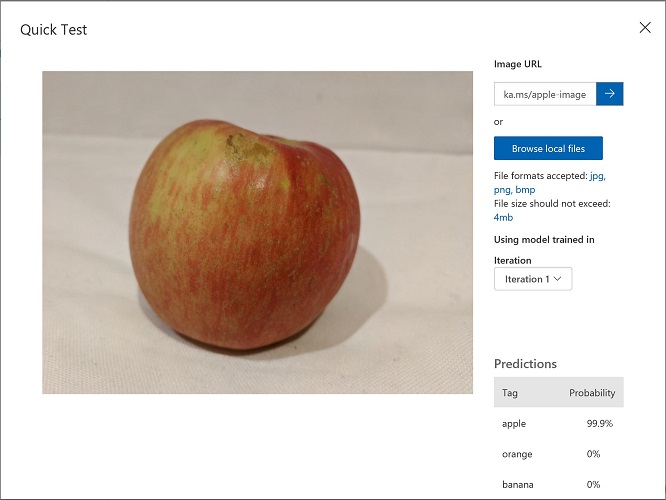
- Above the performance metrics, click Quick Test.
- In the Image URL box, type
https://aka.ms/test-appleand click the quick test image (➔) button. -
View the predictions returned by your model - the probability score for apple should be the highest, like this:
- Try testing the following images:
https://aka.ms/test-bananahttps://aka.ms/test-orange
- Close the Quick Test window.
View the project settings
The project you have created has been assigned a unique identifier, which you will need to specify in any code that interacts with it.
- Click the settings (⚙) icon at the top right of the Performance page to view the project settings.
- Under General (on the left), note the Project Id that uniquely identifies this project.
- On the right, under Resources note that the key and endpoint are shown. These are the details for the training resource (you can also obtain this information by viewing the resource in the Azure portal).
Use the training API
The Custom Vision portal provides a convenient user interface that you can use to upload and tag images, and train models. However, in some scenarios you may want to automate model training by using the Custom Vision training API.
Prepare the application configuration
- Return to the browser tab containing the Azure portal (keeping the Custom Vision portal tab open - you’ll return to it later).
-
In the Azure portal, use the [>_] button to the right of the search bar at the top of the page to create a new Cloud Shell in the Azure portal, selecting a PowerShell environment with no storage in your subscription.
The cloud shell provides a command-line interface in a pane at the bottom of the Azure portal.
Note: If you have previously created a cloud shell that uses a Bash environment, switch it to PowerShell.
Note: If the portal asks you to select a storage to persist your files, choose No storage account required, select the subscription you are using and press Apply.
-
In the cloud shell toolbar, in the Settings menu, select Go to Classic version (this is required to use the code editor).
Ensure you've switched to the classic version of the cloud shell before continuing.
-
Resize the cloud shell pane so you can see more of it.
Tip” You can resize the pane by dragging the top border. You can also use the minimize and maximize buttons to switch between the cloud shell and the main portal interface.
-
In the cloud shell pane, enter the following commands to clone the GitHub repo containing the code files for this exercise (type the command, or copy it to the clipboard and then right-click in the command line and paste as plain text):
rm -r mslearn-ai-vision -f git clone https://github.com/MicrosoftLearning/mslearn-ai-visionTip: As you paste commands into the cloudshell, the ouput may take up a large amount of the screen buffer. You can clear the screen by entering the
clscommand to make it easier to focus on each task. -
After the repo has been cloned, use the following command to navigate to the application code files:
cd mslearn-ai-vision/Labfiles/image-classification/python/train-classifier
ls -a -l
The folder contains application configuration and code files for your app. It also contains an /more-training-images subfolder, which contains some image files you’ll use to perform additional training of your model.
-
Install the Azure AI Custom Vision SDK package for training and any other required packages by running the following commands:
python -m venv labenv ./labenv/bin/Activate.ps1 pip install -r requirements.txt azure-cognitiveservices-vision-customvision -
Enter the following command to edit the configuration file for your app:
code .envThe file is opened in a code editor.
- In the code file, update the configuration values it contains to reflect the Endpoint and an authentication Key for your Custom Vision training resource, and the Project ID for the custom vision project you created previously.
- After you’ve replaced the placeholders, within the code editor, use the CTRL+S command to save your changes and then use the CTRL+Q command to close the code editor while keeping the cloud shell command line open.
Write code to perform model training
-
In the cloud shell command line, enter the following command to open the code file for the client application:
code train-classifier.py - Note the following details in the code file:
- The namespaces for the Azure AI Custom Vision SDK are imported.
- The Main function retrieves the configuration settings, and uses the key and endpoint to create an authenticated.
- CustomVisionTrainingClient, which is then used with the project ID to create a Project reference to your project.
- The Upload_Images function retrieves the tags that are defined in the Custom Vision project and then uploads image files from correspondingly named folders to the project, assigning the appropriate tag ID.
- The Train_Model function creates a new training iteration for the project and waits for training to complete.
-
Close the code editor (CTRL+Q) and enter the following command to run the program:
python train-classifier.py - Wait for the program to end. Then return to the browser tab containing the Custom Vision portal, and view the Training Images page for your project (refreshing the browser if necessary).
- Verify that some new tagged images have been added to the project. Then view the Performance page and verify that a new iteration has been created.
Use the image classifier in a client application
Now you’re ready to publish your trained model and use it in a client application.
Publish the image classification model
- In the Custom Vision portal, on the Performance page, click 🗸 Publish to publish the trained model with the following settings:
- Model name:
fruit-classifier - Prediction Resource: The prediction resource you created previously which ends with “-Prediction” (not the training resource).
- Model name:
- At the top left of the Project Settings page, click the Projects Gallery (👁) icon to return to the Custom Vision portal home page, where your project is now listed.
- On the Custom Vision portal home page, at the top right, click the settings (⚙) icon to view the settings for your Custom Vision service. Then, under Resources, find your prediction resource which ends with “-Prediction” (not the training resource) to determine its Key and Endpoint values (you can also obtain this information by viewing the resource in the Azure portal).
Use the image classifier from a client application
- Return to the browser tab containing the Azure portal and the cloud shell pane.
-
In cloud shell, run the following commands to switch to the folder for your client application and view the files it contains:
cd ../test-classifier
ls -a -l
The folder contains application configuration and code files for your app. It also contains a /test-images subfolder, which contains some image files you’ll use to test your model.
-
Install the Azure AI Custom Vision SDK package for prediction and any other required packages by running the following commands:
python -m venv labenv ./labenv/bin/Activate.ps1 pip install -r requirements.txt azure-cognitiveservices-vision-customvision -
Enter the following command to edit the configuration file for your app:
code .envThe file is opened in a code editor.
- Update the configuration values to reflect the Endpoint and Key for your Custom Vision prediction resource, the Project ID for the classification project, and the name of your published model (which should be fruit-classifier). Save your changes (CTRL+S) and close the code editor (CTRL+Q).
-
In the cloud shell command line, enter the following command to open the code file for the client application:
code test-classifier.py - Review the code, noting the following details:
- The namespaces for the Azure AI Custom Vision SDK are imported.
- The Main function retrieves the configuration settings, and uses the key and endpoint to create an authenticated CustomVisionPredictionClient.
- The prediction client object is used to predict a class for each image in the test-images folder, specifying the project ID and model name for each request. Each prediction includes a probability for each possible class, and only predicted tags with a probability greater than 50% are displayed.
-
Close the code editor and enter the following command to run the program:
python test-classifier.pyThe program submits each of the following images to the model for classification:
IMG_TEST_1.jpg

IMG_TEST_2.jpg
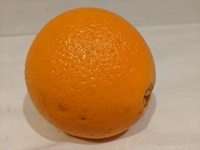
IMG_TEST_3.jpg
- View the label (tag) and probability scores for each prediction.
Clean up resources
If you’ve finished exploring Azure AI Custom Vision, you should delete the resources you have created in this exercise to avoid incurring unnecessary Azure costs:
-
Open the Azure portal at
https://portal.azure.com, and in the top search bar, search for the resources you created in this lab. -
On the resource page, select Delete and follow the instructions to delete the resource. Alternatively, you can delete the entire resource group to clean up all resources at the same time.