Create a generative AI app that uses your own data (deprecated)
Note: This exercise is deprecated. Consider completing the replacement exercise at https://microsoftlearning.github.io/mslearn-ai-studio/Instructions/Exercises/04a-use-own-data.html.
Retrieval Augmented Generation (RAG) is a technique used to build applications that integrate data from custom data sources into a prompt for a generative AI model. RAG is a commonly used pattern for developing generative AI apps - chat-based applications that use a language model to interpret inputs and generate appropriate responses.
In this exercise, you’ll use Microsoft Foundry to integrate custom data into a generative AI solution.
Note: The code in this exercise is based on pre-release SDK software, which may be subject to change. Where necessary, we’ve used specific versions of packages; which may not reflect the latest available versions. You may experience some unexpected behavior, warnings, or errors.
While this exercise is based on the Azure OpenAI Python SDK, you can develop AI chat applications using multiple language-specific SDKs; including:
This exercise takes approximately 45 minutes.
Create a Microsoft Foundry hub and project
The features of Foundry we’re going to use in this exercise require a project that is based on a Foundry hub resource.
-
In a web browser, open the Foundry portal at
https://ai.azure.comand sign in using your Azure credentials. Close any tips or quick start panes that are opened the first time you sign in, and if necessary use the Foundry logo at the top left to navigate to the home page, which looks similar to the following image (close the Help pane if it’s open):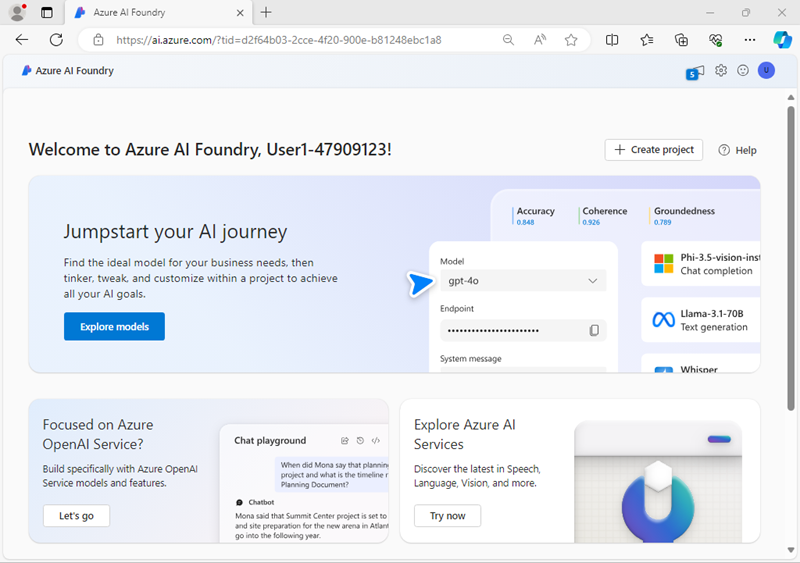
- In the browser, navigate to
https://ai.azure.com/managementCenter/allResourcesand select Create new. Then choose the option to create a new AI hub resource. - In the Create a project wizard, enter a valid name for your project, and select the option to create a new hub. Then use the Rename hub link to specify a valid name for your new hub, expand Advanced options, and specify the following settings for your project:
- Subscription: Your Azure subscription
- Resource group: Create or select a resource group
- Region: East US 2 or Sweden Central (In the event of a quota limit being exceeded later in the exercise, you may need to create another resource in a different region.)
Note: If you’re working in an Azure subscription in which policies are used to restrict allowable resource names, you may need to use the link at the bottom of the Create a new project dialog box to create the hub using the Azure portal.
Tip: If the Create button is still disabled, be sure to rename your hub to a unique alphanumeric value.
- Wait for your project to be created, and then navigate to your project.
Deploy models
You need two models to implement your solution:
- An embedding model to vectorize text data for efficient indexing and processing.
- A model that can generate natural language responses to questions based on your data.
- In your project inside the Foundry portal, select Model catalog from the navigation pane on the left.
- On the filter panel, select the Collections and insert
OpenAIto filter by OpenAI collections only. - Search for
text-embedding-ada-002, select it, and then on the detail page select Use this model. If a pop-up with purchase options appears, select the Direct from Azure models option. -
Use the following settings by selecting Customize in the Deploy model wizard:
- Deployment name: A valid name for your model deployment
- Deployment type: Global Standard
- Model version: Select the default version
- Connected AI resource: Select the resource created previously
- Tokens per Minute Rate Limit (thousands): 50K (or the maximum available in your subscription if less than 50K)
- Content filter: DefaultV2
Note: If your current AI resource location doesn’t have quota available for the model you want to deploy, you will be asked to choose a different location where a new AI resource will be created and connected to your project.
-
Return to the Models catalog page and repeat the previous steps to deploy a gpt-4o model using a Global Standard deployment of the most recent version with a TPM rate limit of 50K (or the maximum available in your subscription if less than 50K).
Note: Reducing the Tokens Per Minute (TPM) helps avoid over-using the quota available in the subscription you are using. 50,000 TPM is sufficient for the data used in this exercise.
Add data to your project
The data for your app consists of a set of travel brochures in PDF format from the fictitious travel agency Margie’s Travel. Let’s add them to the project.
- In a new browser tab, download the zipped archive of brochures from
https://github.com/MicrosoftLearning/mslearn-ai-studio/raw/main/data/brochures.zipand extract it to a folder named brochures on your local file system. - In Foundry portal, in your project, in the navigation pane on the left, under My assets, select the Data + indexes page.
- Select + New data.
- In the Add your data wizard, expand the drop-down menu to select Upload files/folders.
- Select Upload folder and upload the brochures folder. Wait until all the files in the folder are listed.
- Select Next and set the data name to
brochures. - Wait for the folder to be uploaded and note that it contains several .pdf files.
Create an index for your data
Now that you’ve added a data source to your project, you can use it to create an index in your Azure AI Search resource.
- In Foundry portal, in your project, in the navigation pane on the left, under My assets, select the Data + indexes page.
- In the Indexes tab, add a new index with the following settings:
- Source location:
- Data source: Data in Foundry
- Select the brochures data source
- Data source: Data in Foundry
- Index configuration:
- Select Azure AI Search service: Create a new Azure AI Search resource with the following settings:
- Subscription: You Azure subscription
- Resource group: The same resource group as your AI hub
- Service name: A valid name for your AI Search Resource
- Location: The same location as your AI hub
- Pricing tier: Basic
Wait for the AI Search resource to be created. Then return to the Foundry and finish configuring the index by selecting Connect other Azure AI Search resource and adding a connection to the AI Search resource you just created.
- Vector index:
brochures-index - Virtual machine: Auto select
- Select Azure AI Search service: Create a new Azure AI Search resource with the following settings:
- Search settings:
- Vector settings: Add vector search to this search resource
- Azure OpenAI connection: Select the default Azure OpenAI resource for your hub.
- Embedding model: text-embedding-ada-002
- Embedding model deployment: Your deployment of the text-embedding-ada-002 model
- Source location:
-
Create the vector index and wait for the indexing process to be completed, which can take a while depending on available compute resources in your subscription.
The index creation operation consists of the following jobs:
- Crack, chunk, and embed the text tokens in your brochures data.
- Create the Azure AI Search index.
- Register the index asset.
Tip: While you’re waiting for the index to be created, why not take a look at the brochures you downloaded to get familiar with their contents?
Test the index in the playground
Before using your index in a RAG-based prompt flow, let’s verify that it can be used to affect generative AI responses.
- In the navigation pane on the left, select the Playgrounds page and open the Chat playground.
- On the Chat playground page, in the Setup pane, ensure that your gpt-4o model deployment is selected. Then, in the main chat session panel, submit the prompt
Where can I stay in New York? - Review the response, which should be a generic answer from the model without any data from the index.
-
In the Setup pane, expand the Add your data field, and then add the brochures-index project index and select the hybrid (vector + keyword) search type.
Tip: In some cases, newly created indexes may not be available right away. Refreshing the browser usually helps, but if you’re still experiencing the issue where it can’t find the index you may need to wait until the index is recognized.
- After the index has been added and the chat session has restarted, resubmit the prompt
Where can I stay in New York? - Review the response, which should be based on data in the index.
Create a RAG client app
Now that you have a working index, you can use the Azure OpenAI SDK to implement the RAG pattern in a client application. Let’s explore the code to accomplish this in a simple example.
Prepare the application configuration
- Return to the browser tab containing the Azure portal (keeping the Foundry portal open in the existing tab).
-
Use the [>_] button to the right of the search bar at the top of the page to create a new Cloud Shell in the Azure portal, selecting a PowerShell environment with no storage in your subscription.
The cloud shell provides a command-line interface in a pane at the bottom of the Azure portal. You can resize or maximize this pane to make it easier to work in.
Note: If you have previously created a cloud shell that uses a Bash environment, switch it to PowerShell.
-
In the cloud shell toolbar, in the Settings menu, select Go to Classic version (this is required to use the code editor).
Ensure you've switched to the classic version of the cloud shell before continuing.
-
In the cloud shell pane, enter the following commands to clone the GitHub repo containing the code files for this exercise (type the command, or copy it to the clipboard and then right-click in the command line and paste as plain text):
rm -r mslearn-ai-foundry -f git clone https://github.com/microsoftlearning/mslearn-ai-studio mslearn-ai-foundryTip: As you paste commands into the cloudshell, the output may take up a large amount of the screen buffer. You can clear the screen by entering the
clscommand to make it easier to focus on each task. -
After the repo has been cloned, navigate to the folder containing the chat application code files:
cd mslearn-ai-foundry/labfiles/rag-app/python -
In the cloud shell command-line pane, enter the following command to install the OpenAI SDK library:
python -m venv labenv ./labenv/bin/Activate.ps1 pip install -r requirements.txt openai -
Enter the following command to edit the configuration file that has been provided:
code .envThe file is opened in a code editor.
- In the configuration file, replace the following placeholders:
- your_openai_endpoint: The Open AI endpoint from your project’s Overview page in the Foundry portal (be sure to select the Azure OpenAI capability tab).
- your_openai_api_key The Open AI API key from your project’s Overview page in the Foundry portal (be sure to select the Azure OpenAI capability tab).
- your_chat_model: The name you assigned to your gpt-4o model deployment, from the Models + endpoints page in the Foundry portal (the default name is
gpt-4o). - your_embedding_model: The name you assigned to your text-embedding-ada-002 model deployment, from the Models + endpoints page in the Foundry portal (the default name is
text-embedding-ada-002). - your_search_endpoint: The URL for your Azure AI Search resource. You’ll find this in the Management center in the Foundry portal.
- your_search_api_key: The API key for your Azure AI Search resource. You’ll find this in the Management center in the Foundry portal.
- your_index: Replace with your index name from the Data + indexes page for your project in the Foundry portal (it should be
brochures-index).
- After you’ve replaced the placeholders, in the code editor, use the CTRL+S command or Right-click > Save to save your changes and then use the CTRL+Q command or Right-click > Quit to close the code editor while keeping the cloud shell command line open.
Explore code to implement the RAG pattern
-
Enter the following command to edit the code file that has been provided:
code rag-app.py - Review the code in the file, noting that it:
- Creates an Azure OpenAI client using the endpoint, key, and chat model.
- Creates a suitable system message for a travel-related chat solution.
- Submits a prompt (including the system and a user message based on the user input) to the Azure OpenAI client, adding:
- Connection details for the Azure AI Search index to be queried.
- Details of the embedding model to be used to vectorize the query*.
- Displays the response from the grounded prompt.
- Adds the response to the chat history.
* The query for the search index is based on the prompt, and is used to find relevant text in the indexed documents. You can use a keyword-based search that submits the query as text, but using a vector-based search can be more efficient - hence the use of an embedding model to vectorize the query text before submitting it.
- Use the CTRL+Q command to close the code editor without saving any changes, while keeping the cloud shell command line open.
Run the chat application
-
In the cloud shell command-line pane, enter the following command to run the app:
python rag-app.py -
When prompted, enter a question, such as
Where should I go on vacation to see architecture?and review the response from your generative AI model.Note that the response includes source references to indicate the indexed data in which the answer was found.
-
Try a follow-up question, for example
Where can I stay there? -
When you’re finished, enter
quitto exit the program. Then close the cloud shell pane.
Clean up
To avoid unnecessary Azure costs and resource utilization, you should remove the resources you deployed in this exercise.
- If you’ve finished exploring Foundry, return to the Azure portal at
https://portal.azure.comand sign in using your Azure credentials if necessary. Then delete the resources in the resource group where you provisioned your Azure AI Search and Azure AI resources.