Recognize and synthesize speech
Azure AI Speech is a service that provides speech-related functionality, including:
- A speech-to-text API that enables you to implement speech recognition (converting audible spoken words into text).
- A text-to-speech API that enables you to implement speech synthesis (converting text into audible speech).
In this exercise, you’ll use both of these APIs to implement a speaking clock application.
NOTE This exercise is designed to be completed in the Azure cloud shell, where direct access to your computer’s sound hardware is not supported. The lab will therefore use audio files for speech input and output streams. The code to achieve the same results using a mic and speaker is provided for your reference.
Create an Azure AI Foundry project
Let’s start by creating an Azure AI Foundry project.
-
In a web browser, open the Azure AI Foundry portal at
https://ai.azure.comand sign in using your Azure credentials. Close any tips or quick start panes that are opened the first time you sign in, and if necessary use the Azure AI Foundry logo at the top left to navigate to the home page, which looks similar to the following image: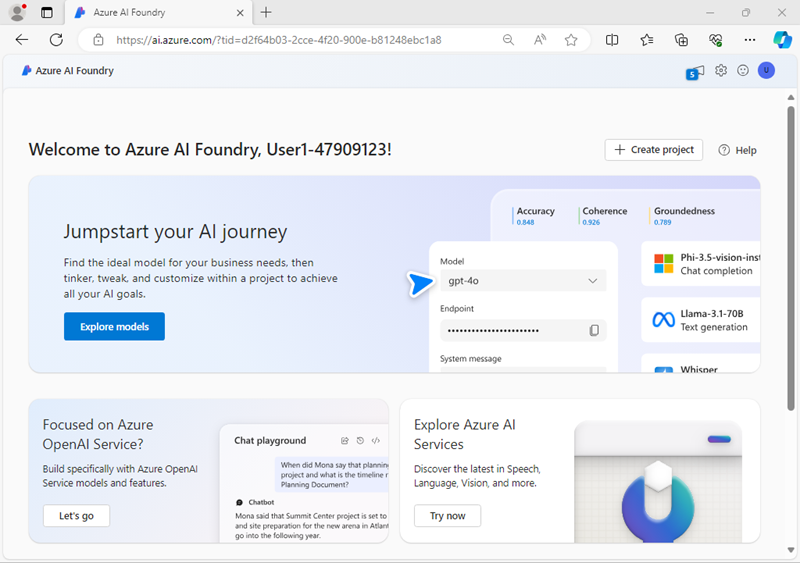
- In the home page, select + Create project.
- In the Create a project wizard, enter a suitable project name for (for example,
my-ai-project) then review the Azure resources that will be automatically created to support your project. - Select Customize and specify the following settings for your hub:
- Hub name: A unique name - for example
my-ai-hub - Subscription: Your Azure subscription
- Resource group: Create a new resource group with a unique name (for example,
my-ai-resources), or select an existing one - Location: Choose any available region
- Connect Azure AI Services or Azure OpenAI: Create a new AI Services resource with an appropriate name (for example,
my-ai-services) or use an existing one - Connect Azure AI Search: Skip connecting
- Hub name: A unique name - for example
- Select Next and review your configuration. Then select Create and wait for the process to complete.
-
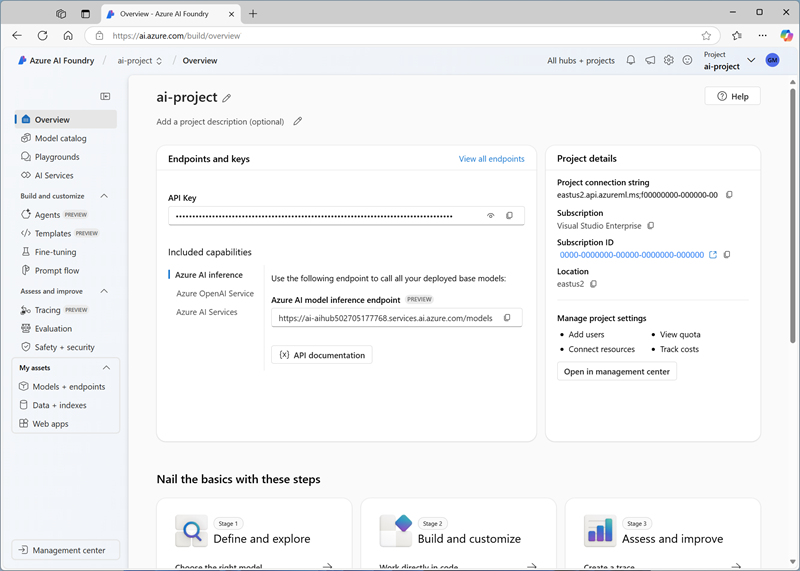
When your project is created, close any tips that are displayed and review the project page in Azure AI Foundry portal, which should look similar to the following image:
Prepare and configure the speaking clock app
- In the Azure AI Foundry portal, view the Overview page for your project.
- In the Project details area, note the Project connection string and location for your project You’ll use the connection string to connect to your project in a client application, and you’ll need the location to connect to the Azure AI Services Speech endpoint.
- Open a new browser tab (keeping the Azure AI Foundry portal open in the existing tab). Then in the new tab, browse to the Azure portal at
https://portal.azure.com; signing in with your Azure credentials if prompted. -
Use the [>_] button to the right of the search bar at the top of the page to create a new Cloud Shell in the Azure portal, selecting a PowerShell environment. The cloud shell provides a command line interface in a pane at the bottom of the Azure portal.
Note: If you have previously created a cloud shell that uses a Bash environment, switch it to PowerShell.
-
In the cloud shell toolbar, in the Settings menu, select Go to Classic version (this is required to use the code editor).
Tip: As you paste commands into the cloudshell, the ouput may take up a large amount of the screen buffer. You can clear the screen by entering the
clscommand to make it easier to focus on each task. -
In the PowerShell pane, enter the following commands to clone the GitHub repo for this exercise:
rm -r mslearn-ai-language -f
git clone https://github.com/microsoftlearning/mslearn-ai-language mslearn-ai-language
Now follow the steps for your chosen programming language.
-
After the repo has been cloned, navigate to the folder containing the speaking clock application code files:
Python
cd mslearn-ai-language/labfiles/07b-speech/python/speaking-clockC#
cd mslearn-ai-language/labfiles/07b-speech/c-sharp/speaking-clock -
In the cloud shell command line pane, enter the following command to install the libraries you’ll use:
Python
pip install python-dotenv azure-identity azure-ai-projects azure-cognitiveservices-speech==1.42.0C#
dotnet add package Azure.Identity dotnet add package Azure.AI.Projects --prerelease dotnet add package Microsoft.CognitiveServices.Speech --version 1.42.0 -
Enter the following command to edit the configuration file that has been provided:
Python
code .envC#
code appsettings.jsonThe file is opened in a code editor.
- In the code file, replace the your_project_endpoint and your_location placeholders with the connection string and location for your project (copied from the project Overview page in the Azure AI Foundry portal).
- After you’ve replaced the placeholders, use the CTRL+S command to save your changes and then use the CTRL+Q command to close the code editor while keeping the cloud shell command line open.
Add code to use the Azure AI Speech SDK
Tip: As you add code, be sure to maintain the correct indentation.
-
Enter the following command to edit the code file that has been provided:
Python
code speaking-clock.pyC#
code Program.cs -
At the top of the code file, under the existing namespace references, find the comment Import namespaces. Then, under this comment, add the following language-specific code to import the namespaces you will need to use the Azure AI Speech SDK with the Azure AI Services resource in your Azure Ai Foundry project:
Python
# Import namespaces
from dotenv import load_dotenv
from azure.ai.projects.models import ConnectionType
from azure.identity import DefaultAzureCredential
from azure.core.credentials import AzureKeyCredential
from azure.ai.projects import AIProjectClient
import azure.cognitiveservices.speech as speech_sdk
C#
// Import namespaces using Azure.Identity; using Azure.AI.Projects; using Microsoft.CognitiveServices.Speech; using Microsoft.CognitiveServices.Speech.Audio; -
In the main function, under the comment Get config settings, note that the code loads the project connection string and location you defined in the configuration file.
-
Add the following code under the comment Get AI Speech endpoint and key from the project:
Python
# Get AI Services key from the project
project_client = AIProjectClient.from_connection_string(
     conn_str=project_connection,
     credential=DefaultAzureCredential())

ai_svc_connection = project_client.connections.get_default(
   connection_type=ConnectionType.AZURE_AI_SERVICES,
   include_credentials=True,
 )

ai_svc_key = ai_svc_connection.key
C#
// Get AI Services key from the project
var projectClient = new AIProjectClient(project_connection,
                     new DefaultAzureCredential());

ConnectionResponse aiSvcConnection = projectClient.GetConnectionsClient().GetDefaultConnection(ConnectionType.AzureAIServices, true);

var apiKeyAuthProperties = aiSvcConnection.Properties as ConnectionPropertiesApiKeyAuth;

var aiSvcKey = apiKeyAuthProperties.Credentials.Key;
This code connects to your Azure AI Foundry project, gets its default AI Services connected resource, and retrieves the authentication key needed to use it.
-
Under the comment Configure speech service, add the following code to use the AI Services key and your project’s region to configure your connection to the Azure AI Services Speech endpoint
Python
# Configure speech service
speech_config = speech_sdk.SpeechConfig(ai_svc_key, location)
print('Ready to use speech service in:', speech_config.region)
C#
// Configure speech service speechConfig = SpeechConfig.FromSubscription(aiSvcKey, location); Console.WriteLine("Ready to use speech service in " + speechConfig.Region); -
Save your changes (CTRL+S), but leave the code editor open.
Run the app
So far, the app doesn’t do anything other than connect to your Azure AI Foundry project to retrieve the details needed to use the Speech service, but it’s useful to run it and check that it works before adding speech functionality.
-
In the command line below the code editor, enter the following Azure CLI command to determine the Azure account that is signed in for the session:
az account showThe resulting JSON output should include details of your Azure account and the subscription you are working in (which should be the same subscription in which you created your Azure AI Foundry project.)
Your app uses the Azure credentials for the context in which it’s run to authenticate the connection to your project. In a production environment the app might be configured to run using a managed identity. In this development environment, it will use your authenticated cloud shell session credentials.
Note: You can sign into Azure in your development environment by using the
az loginAzure CLI command. In this case, the cloud shell has already logged in using the Azure credentials you signed into the portal with; so signing in explicitly is unnecessary. To learn more about using the Azure CLI to authenticate to Azure, see Authenticate to Azure using Azure CLI. -
In the command line, enter the following language-specific command to run the speaking clock app:
Python
python speaking-clock.pyC#
dotnet run -
If you are using C#, you can ignore any warnings about using the await operator in asynchronous methods - we’ll fix that later. The code should display the region of the speech service resource the application will use. A successful run indicates that the app has connected to your Azure AI Foundry project and retrieved the key it needs to use the Azure AI Speech service.
Add code to recognize speech
Now that you have a SpeechConfig for the speech service in your project’s Azure AI Services resource, you can use the Speech-to-text API to recognize speech and transcribe it to text.
In this procedure, the speech input is captured from an audio file, which you can play here:
-
In the Main function, note that the code uses the TranscribeCommand function to accept spoken input. Then in the TranscribeCommand function, under the comment Configure speech recognition, add the appropriate code below to create a SpeechRecognizer client that can be used to recognize and transcribe speech from an audio file:
Python
# Configure speech recognition
current_dir = os.getcwd()
audioFile = current_dir + '/time.wav'
audio_config = speech_sdk.AudioConfig(filename=audioFile)
speech_recognizer = speech_sdk.SpeechRecognizer(speech_config, audio_config)
C#
// Configure speech recognition string audioFile = "time.wav"; using AudioConfig audioConfig = AudioConfig.FromWavFileInput(audioFile); using SpeechRecognizer speechRecognizer = new SpeechRecognizer(speechConfig, audioConfig); -
In the TranscribeCommand function, under the comment Process speech input, add the following code to listen for spoken input, being careful not to replace the code at the end of the function that returns the command:
Python
# Process speech input
print("Listening...")
speech = speech_recognizer.recognize_once_async().get()
if speech.reason == speech_sdk.ResultReason.RecognizedSpeech:
    command = speech.text
    print(command)
else:
    print(speech.reason)
    if speech.reason == speech_sdk.ResultReason.Canceled:
        cancellation = speech.cancellation_details
        print(cancellation.reason)
        print(cancellation.error_details)
C#
// Process speech input Console.WriteLine("Listening..."); SpeechRecognitionResult speech = await speechRecognizer.RecognizeOnceAsync(); if (speech.Reason == ResultReason.RecognizedSpeech) { command = speech.Text; Console.WriteLine(command); } else { Console.WriteLine(speech.Reason); if (speech.Reason == ResultReason.Canceled) { var cancellation = CancellationDetails.FromResult(speech); Console.WriteLine(cancellation.Reason); Console.WriteLine(cancellation.ErrorDetails); } } -
Save your changes (CTRL+S), and then in the command line below the code editor, enter the following command to run the program:
Python
python speaking-clock.pyC#
dotnet run -
Review the output from the application, which should successfully “hear” the speech in the audio file and return an appropriate response (note that your Azure cloud shell may be running on a server that is in a different time-zone to yours!)
Tip: If the SpeechRecognizer encounters an error, it produces a result of “Cancelled”. The code in the application will then display the error message. The most likely cause is an incorrect region value in the configuration file.
Synthesize speech
Your speaking clock application accepts spoken input, but it doesn’t actually speak! Let’s fix that by adding code to synthesize speech.
Once again, due to the hardware limitations of the cloud shell we’ll direct the synthesized speech output to a file.
- In the Main function for your program, note that the code uses the TellTime function to tell the user the current time.
-
In the TellTime function, under the comment Configure speech synthesis, add the following code to create a SpeechSynthesizer client that can be used to generate spoken output:
Python
# Configure speech synthesis
output_file = "output.wav"
speech_config.speech_synthesis_voice_name = "en-GB-RyanNeural"
audio_config = speech_sdk.audio.AudioConfig(filename=output_file)
speech_synthesizer = speech_sdk.SpeechSynthesizer(speech_config, audio_config,)
C#
// Configure speech synthesis var outputFile = "output.wav"; speechConfig.SpeechSynthesisVoiceName = "en-GB-RyanNeural"; using var audioConfig = AudioConfig.FromWavFileOutput(outputFile); using SpeechSynthesizer speechSynthesizer = new SpeechSynthesizer(speechConfig, audioConfig); -
In the TellTime function, under the comment Synthesize spoken output, add the following code to generate spoken output, being careful not to replace the code at the end of the function that prints the response:
Python
# Synthesize spoken output
speak = speech_synthesizer.speak_text_async(response_text).get()
if speak.reason != speech_sdk.ResultReason.SynthesizingAudioCompleted:
    print(speak.reason)
else:
    print("Spoken output saved in " + outputFile)
C#
// Synthesize spoken output SpeechSynthesisResult speak = await speechSynthesizer.SpeakTextAsync(responseText); if (speak.Reason != ResultReason.SynthesizingAudioCompleted) { Console.WriteLine(speak.Reason); } else { Console.WriteLine("Spoken output saved in " + outputFile); } -
Save your changes (CTRL+S), and then in the command line below the code editor, enter the following command to run the program:
Python
python speaking-clock.pyC#
dotnet run - Review the output from the application, which should indicate that the spoken output was saved in a file.
-
If you have a media player capable of playing .wav audio files, in the toolbar for the cloud shell pane, use the Upload/Download files button to download the audio file from your app folder, and then play it:
Python
/home/user
/mslearn-ai-language/Labfiles/07b-speech/Python/speaking-clock/output.wavC#
/home/user
/mslearn-ai-language/Labfiles/07b-speech/C-Sharp/speaking-clock/output.wavThe file should sound similar to this:
Use Speech Synthesis Markup Language
Speech Synthesis Markup Language (SSML) enables you to customize the way your speech is synthesized using an XML-based format.
-
In the TellTime function, replace all of the current code under the comment Synthesize spoken output with the following code (leave the code under the comment Print the response):
Python
# Synthesize spoken output
responseSsml = " \
    <speak version='1.0' xmlns='http://www.w3.org/2001/10/synthesis' xml:lang='en-US'> \
        <voice name='en-GB-LibbyNeural'> \
            {} \
            <break strength='weak'/> \
            Time to end this lab! \
        </voice> \
    </speak>".format(response_text)
speak = speech_synthesizer.speak_ssml_async(responseSsml).get()
if speak.reason != speech_sdk.ResultReason.SynthesizingAudioCompleted:
    print(speak.reason)
else:
    print("Spoken output saved in " + outputFile)
C#
// Synthesize spoken output string responseSsml = $@" <speak version='1.0' xmlns='http://www.w3.org/2001/10/synthesis' xml:lang='en-US'> <voice name='en-GB-LibbyNeural'> {responseText} <break strength='weak'/> Time to end this lab! </voice> </speak>"; SpeechSynthesisResult speak = await speechSynthesizer.SpeakSsmlAsync(responseSsml); if (speak.Reason != ResultReason.SynthesizingAudioCompleted) { Console.WriteLine(speak.Reason); } else { Console.WriteLine("Spoken output saved in " + outputFile); } -
Save your changes and return to the integrated terminal for the speaking-clock folder, and enter the following command to run the program:
Python
python speaking-clock.pyC#
dotnet run - Review the output from the application, which should indicate that the spoken output was saved in a file.
-
Once again, if you have a media player capable of playing .wav audio files, in the toolbar for the cloud shell pane, use the Upload/Download files button to download the audio file from your app folder, and then play it:
Python
/home/user
/mslearn-ai-language/Labfiles/07b-speech/Python/speaking-clock/output.wavC#
/home/user
/mslearn-ai-language/Labfiles/07b-speech/C-Sharp/speaking-clock/output.wavThe file should sound similar to this:
Clean up
If you’ve finished exploring Azure AI Speech, you should delete the resources you have created in this exercise to avoid incurring unnecessary Azure costs.
- Return to the browser tab containing the Azure portal (or re-open the Azure portal at
https://portal.azure.comin a new browser tab) and view the contents of the resource group where you deployed the resources used in this exercise. - On the toolbar, select Delete resource group.
- Enter the resource group name and confirm that you want to delete it.
What if you have a mic and speaker?
In this exercise, you used audio files for the speech input and output. Let’s see how the code can be modified to use audio hardware.
Using speech recognition with a microphone
If you have a mic, you can use the following code to capture spoken input for speech recognition:
Python
# Configure speech recognition
audio_config = speech_sdk.AudioConfig(use_default_microphone=True)
speech_recognizer = speech_sdk.SpeechRecognizer(speech_config, audio_config)
print('Speak now...')

# Process speech input
speech = speech_recognizer.recognize_once_async().get()
if speech.reason == speech_sdk.ResultReason.RecognizedSpeech:
    command = speech.text
    print(command)
else:
    print(speech.reason)
    if speech.reason == speech_sdk.ResultReason.Canceled:
        cancellation = speech.cancellation_details
        print(cancellation.reason)
        print(cancellation.error_details)
C#
// Configure speech recognition
using AudioConfig audioConfig = AudioConfig.FromDefaultMicrophoneInput();
using SpeechRecognizer speechRecognizer = new SpeechRecognizer(speechConfig, audioConfig);
Console.WriteLine("Speak now...");

SpeechRecognitionResult speech = await speechRecognizer.RecognizeOnceAsync();
if (speech.Reason == ResultReason.RecognizedSpeech)
{
    command = speech.Text;
    Console.WriteLine(command);
}
else
{
    Console.WriteLine(speech.Reason);
    if (speech.Reason == ResultReason.Canceled)
    {
        var cancellation = CancellationDetails.FromResult(speech);
        Console.WriteLine(cancellation.Reason);
        Console.WriteLine(cancellation.ErrorDetails);
    }
}
Note: The system default microphone is the default audio input, so you could also just omit the AudioConfig altogether!
Using speech synthesis with a speaker
If you have a speaker, you can use the following code to synthesize speech.
Python
response_text = 'The time is {}:{:02d}'.format(now.hour,now.minute)

# Configure speech synthesis
speech_config.speech_synthesis_voice_name = "en-GB-RyanNeural"
audio_config = speech_sdk.audio.AudioOutputConfig(use_default_speaker=True)
speech_synthesizer = speech_sdk.SpeechSynthesizer(speech_config, audio_config)

# Synthesize spoken output
speak = speech_synthesizer.speak_text_async(response_text).get()
if speak.reason != speech_sdk.ResultReason.SynthesizingAudioCompleted:
    print(speak.reason)
C#
var now = DateTime.Now;
string responseText = "The time is " + now.Hour.ToString() + ":" + now.Minute.ToString("D2");

// Configure speech synthesis
speechConfig.SpeechSynthesisVoiceName = "en-GB-RyanNeural";
using var audioConfig = AudioConfig.FromDefaultSpeakerOutput();
using SpeechSynthesizer speechSynthesizer = new SpeechSynthesizer(speechConfig, audioConfig);

// Synthesize spoken output
SpeechSynthesisResult speak = await speechSynthesizer.SpeakTextAsync(responseText);
if (speak.Reason != ResultReason.SynthesizingAudioCompleted)
{
    Console.WriteLine(speak.Reason);
}
Note: The system default speaker is the default audio output, so you could also just omit the AudioConfig altogether!
More information
For more information about using the Speech-to-text and Text-to-speech APIs, see the Speech-to-text documentation and Text-to-speech documentation.