Explore Azure AI Translator
Note To complete this lab, you will need an Azure subscription in which you have administrative access.
Artificial Intelligence (AI) can help simplify translation between languages, helping to remove barriers to communication across countries and cultures.
To test the capabilities of Azure AI Translator service, we’ll take a look at it in action in the Azure Portal. The same principles and functionality apply in real-world solutions, such as web sites or phone apps.
Create a Translator resource
You can use the Translator service by creating either a Translator resource or an Azure AI services resource.
For this exercise, create an Translator resource in your Azure subscription.
-
In another browser tab, open the Azure portal at https://portal.azure.com, signing in with your Microsoft account.
- Click the +Create a resource button and search for Translator. Select create. You will be taken to a page to create a Translator resource. Configure it with the following settings:
- Subscription: Your Azure subscription.
- Resource group: Select or create a resource group with a unique name.
- Region: Choose any available region.
- Name: Enter a unique name.
- Pricing tier: Standard S0
- Review and create the resource, and wait for deployment to complete. Then go to the deployed resource.
Explore Translator service
We can explore the capabilities of the Translator service in the Azure Portal.
-
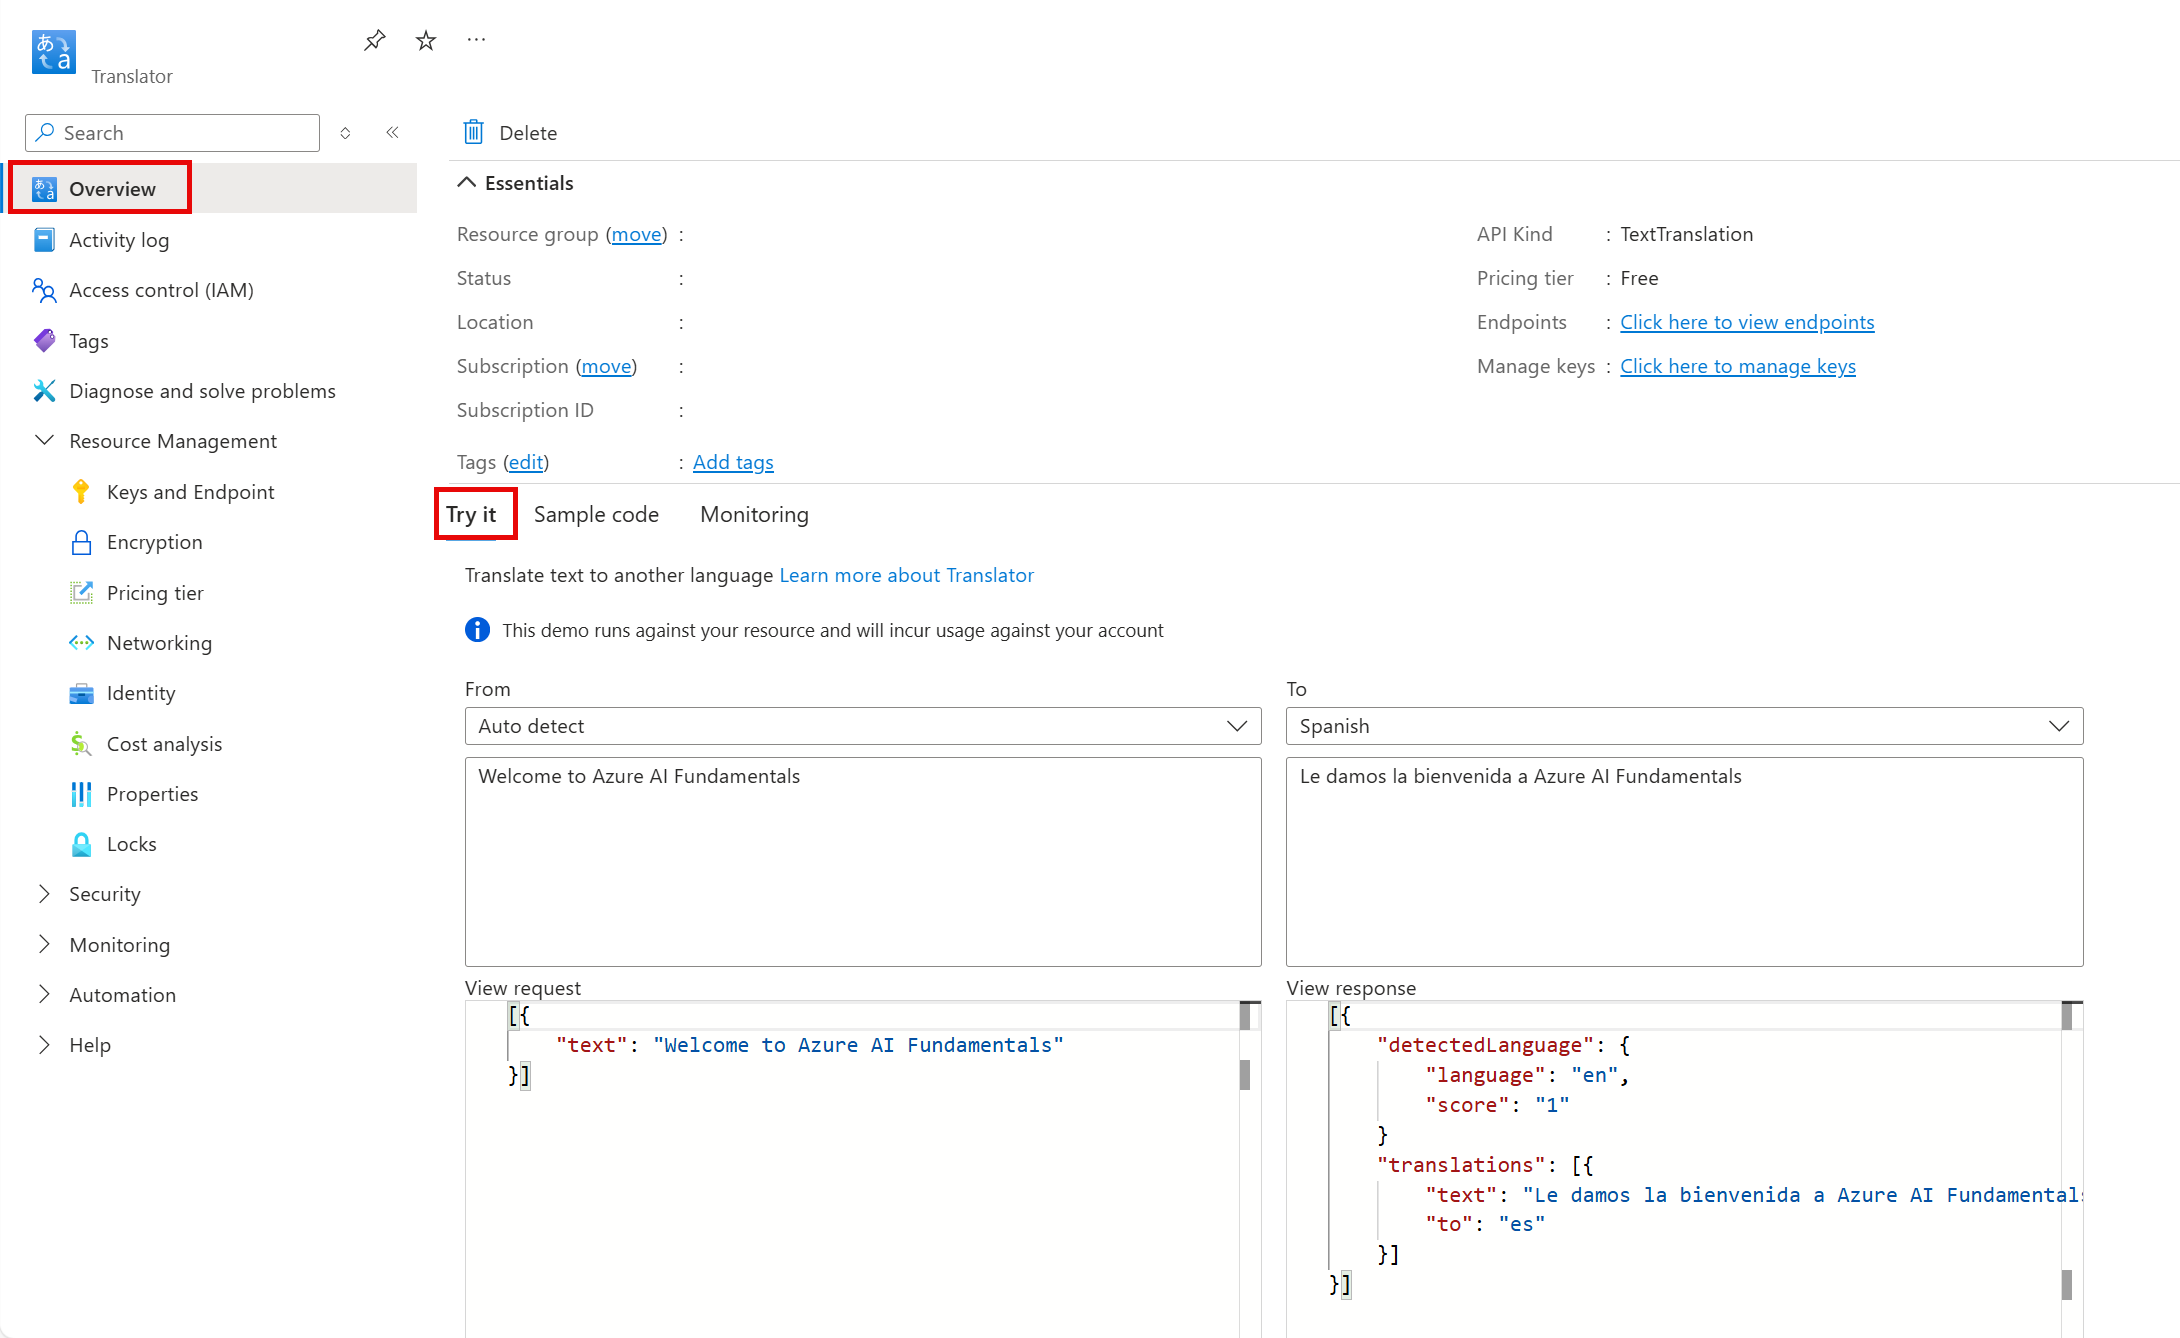
In the Azure portal, in the deployed resource, review the Overview page.
-
In the Try it section of the Overview page, under the From: Auto detect section, type the text
Welcome to Azure AI Fundamentals. Notice the JSON that appears in correspondence in the View request section. -
In the View response section, view the JSON. Behind the scenes, a request has been sent to the Translator service. The response includes the detected source language with a confidence score, a translation using the alphabet of the output language, and an output language code.
-
The demo in the Try it section shows what it would look like if you created a simple translation application with a user interface. In the case of the demo, as soon as you type in text, a request is made to the Translator service. How could you make this request? Check out the Sample Code tab. Here you see examples of code in different programming languages that could be used to make the request.
-
Identify the lines in the code samples where you need to include your Translator service’s Key and Endpoint. With your key and endpoint, you would be able to send a request to the Translator service, and receive a response like you saw in the demo.
-
Navigate to the left hand menu. Under Resource Management, select Keys and Endpoint. If you were to build an application, you would find your key and endpoint here.
Clean-up
- Delete your resource once you are done using it.
Learn more
To learn more about what you can do with this service, see the Translator page.