Use Conversational Language Understanding with Language Studio
Increasingly, we expect computers to be able to use AI to understand natural language commands, either spoken or typed. For example, you might want a home automation system to control devices in your home by using voice commands such as “switch on the light” or “put the fan on.” AI-powered devices can understand these commands and take appropriate action.
In this exercise, you will use Language Studio to create and test a project that sends instructions to devices such as lights or fans. You’ll use the capabilities of the Conversational Language Understanding service to configure your project.
Create a Language resource
You can use many Azure AI Language features with either a Language or Azure AI services resource. There are some instances where only a Language resource can be used. For the exercise below, we will use a Language resource. If you haven’t already done so, create a Language resource in your Azure subscription.
-
In another browser tab, open the Azure portal at https://portal.azure.com, signing in with the Microsoft account associated with your Azure subscription.
-
Click the +Create a resource button and search for Language service. Select create a Language service plan. You will be taken to a page to *Select additional features. Keep the default selection and click **Continue to create your resource.
- On the page Create Language, configure it with the following settings:
- Subscription: Your Azure subscription.
- Resource group: Select or create a resource group with a unique name.
- Region: Select the closest geographical region. If in eastern US, use “East US 2”.
- Name: Enter a unique name.
- Pricing tier: Free F0 or S if Free F0 is not available
- By checking this box I acknowledge that I have read and understood all the terms below: Selected.
- Select Review + create then Create and wait for deployment to complete.
Create a Conversational Language Understanding App
To implement natural language understanding with Conversational Language Understanding, you create an app; and then add entities, intents, and utterances to define the commands you want the app to execute.
-
In a new browser tab, open the Language Studio portal at https://language.azure.com and sign in using the Microsoft account associated with your Azure subscription.
- If prompted to choose a Language resource, select the following settings:
- Azure directory: The Azure directory containing your subscription.
- Azure subscription: Your Azure subscription.
- Language resource: The Language resource you created previously.
If you are not prompted to choose a language resource, it may be because you have multiple Language resources in your subscription; in which case:
- On the bar at the top if the page, select Settings (⚙).
- On the Settings page, view the Resources tab.
- Select the language resource you just created, and select Switch resource.
- At the top of the page, select Language Studio to return to the Language Studio home page.
-
At the top of the portal, in the Create new menu, select Conversational language understanding.
- In the Create a project dialog box, on the Enter basic information page, enter the following details and select Next:
- Name: Create a unique name
- Utterances primary language: English
- Enable multiple languages in project: Do not select
- Description:
Simple home automation
Tip: Make a note of your project name, you will use it later.
- On the Review and finish page, select Create.
Create intents, utterances, and entities
An intent is an action you want to perform - for example, you might want to switch on a light, or turn off a fan. In this case, you’ll define two intents: one to switch on a device, and another to switch off a device. For each intent, you’ll specify sample utterances that indicate the kind of language used to indicate the intent.
-
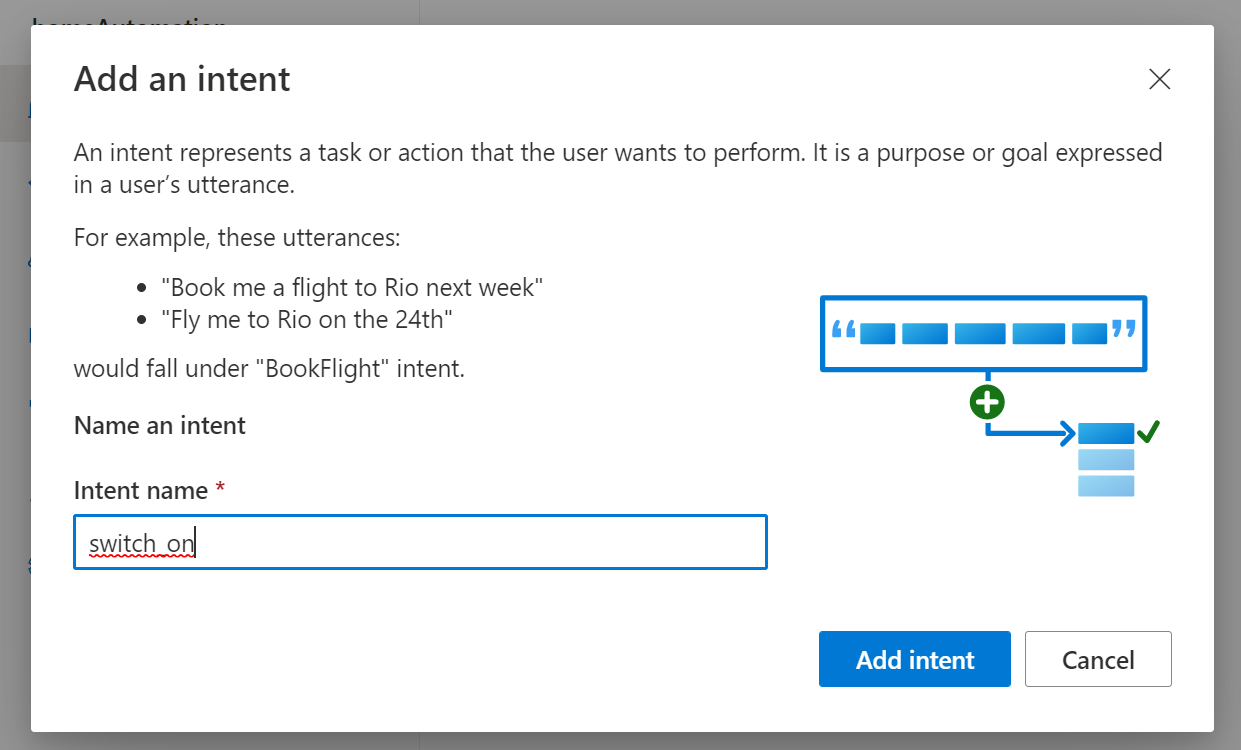
In the Schema definition pane, ensure that Intents is selected then select Add, and add an intent with the name
switch_on(in lower-case) and select Add intent.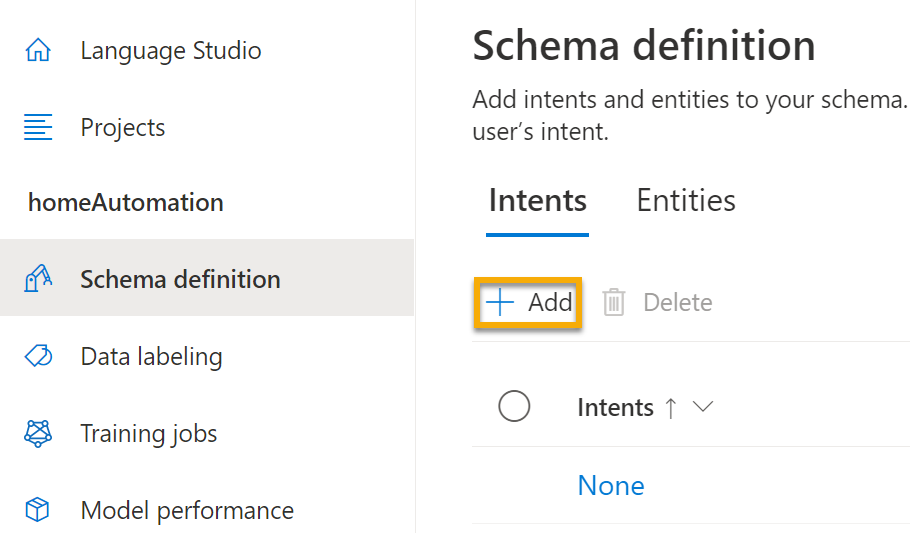
-
Select the switch_on intent. It will take you to the Data labeling page. In the Intent drop down, select switch_on. Next to the switch_on intent, type the utterance
turn the light onand press Enter to submit this utterance to the list.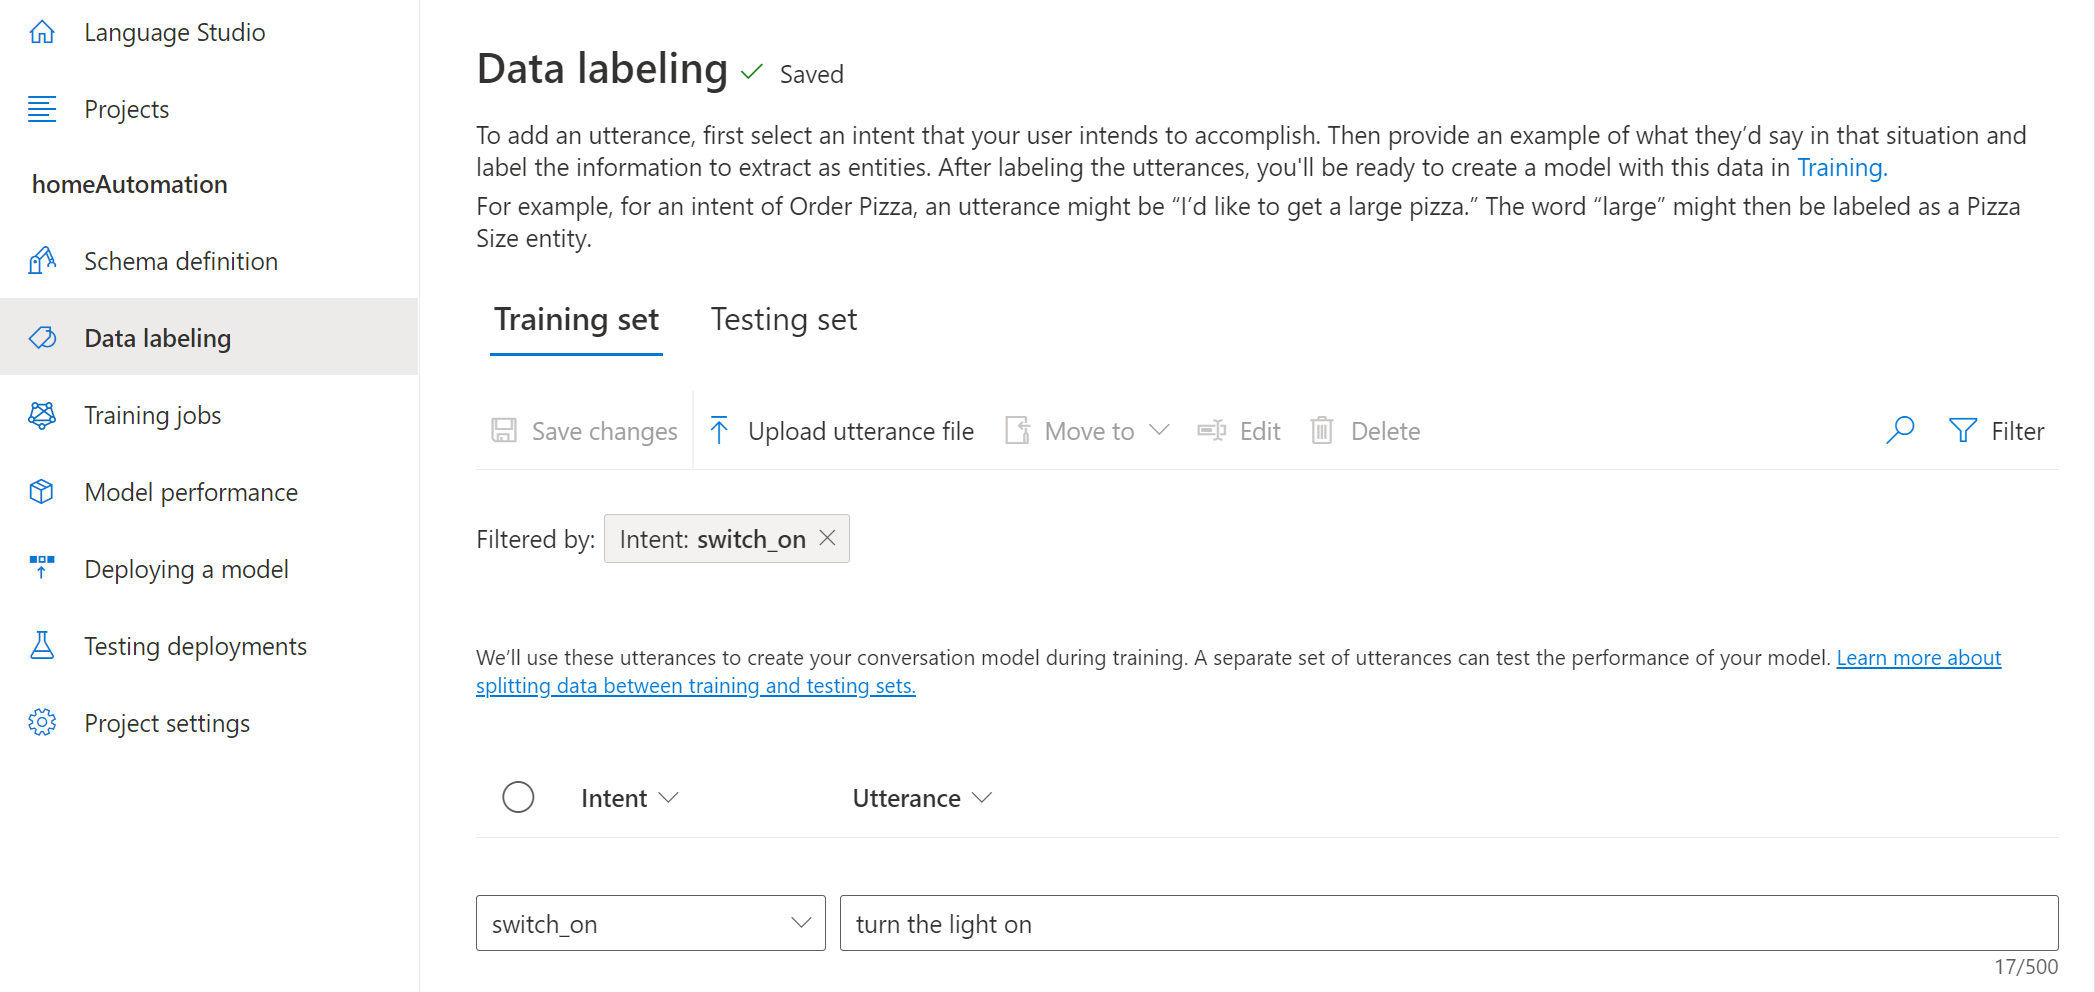
- The language service needs at least five different utterance examples for each intent to sufficiently train the language model. Add five more utterance examples for the switch_on intent:
switch on the fanput the fan onput the light onswitch on the lightturn the fan on
-
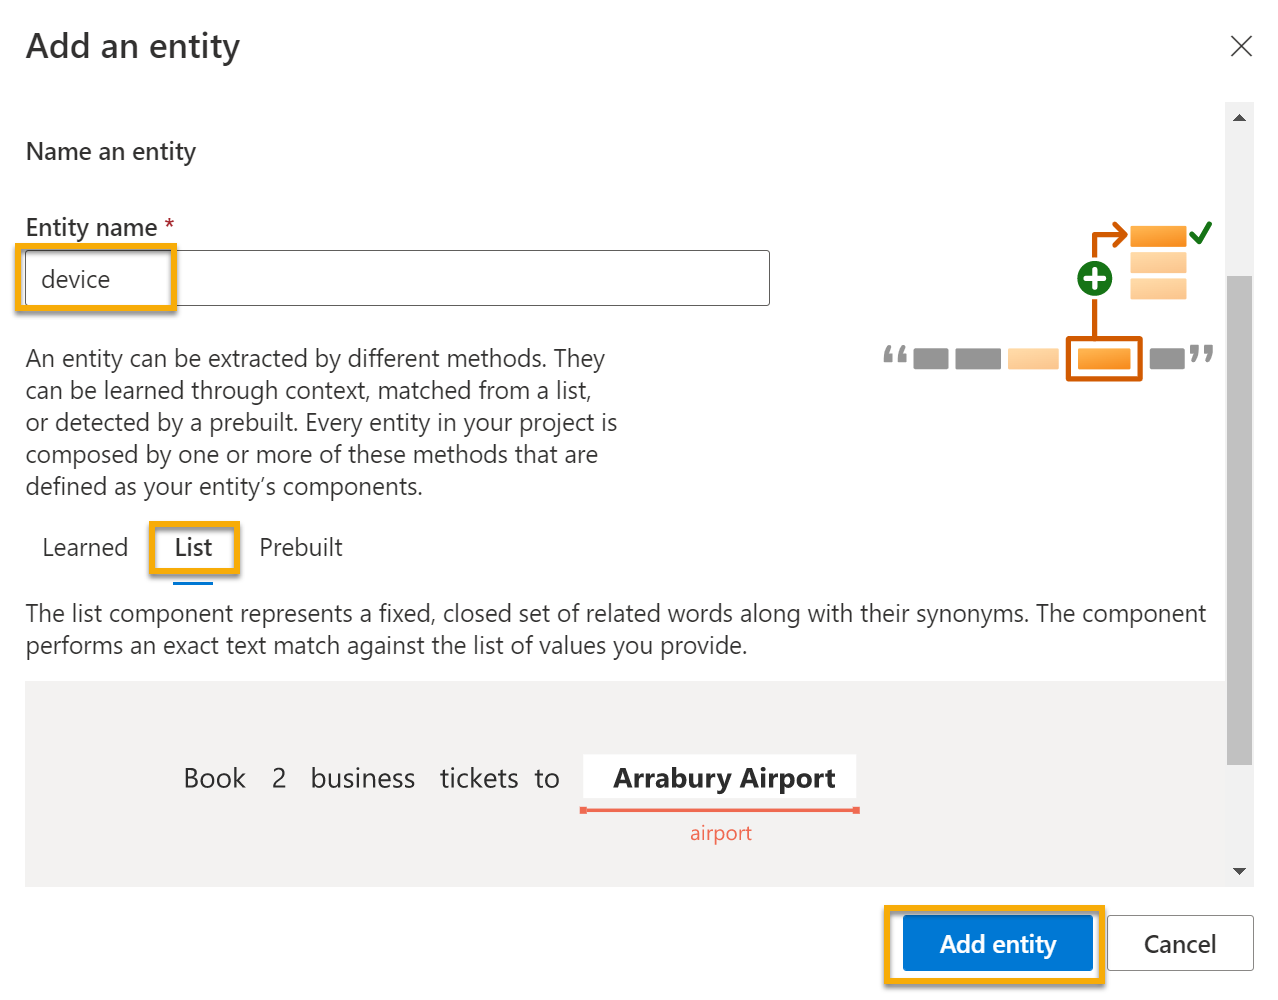
On the Labeling entities for training pane on the right-hand side of the screen, select Labels, then select Add entity. Type
device(in lower-case), select List and select Add entity.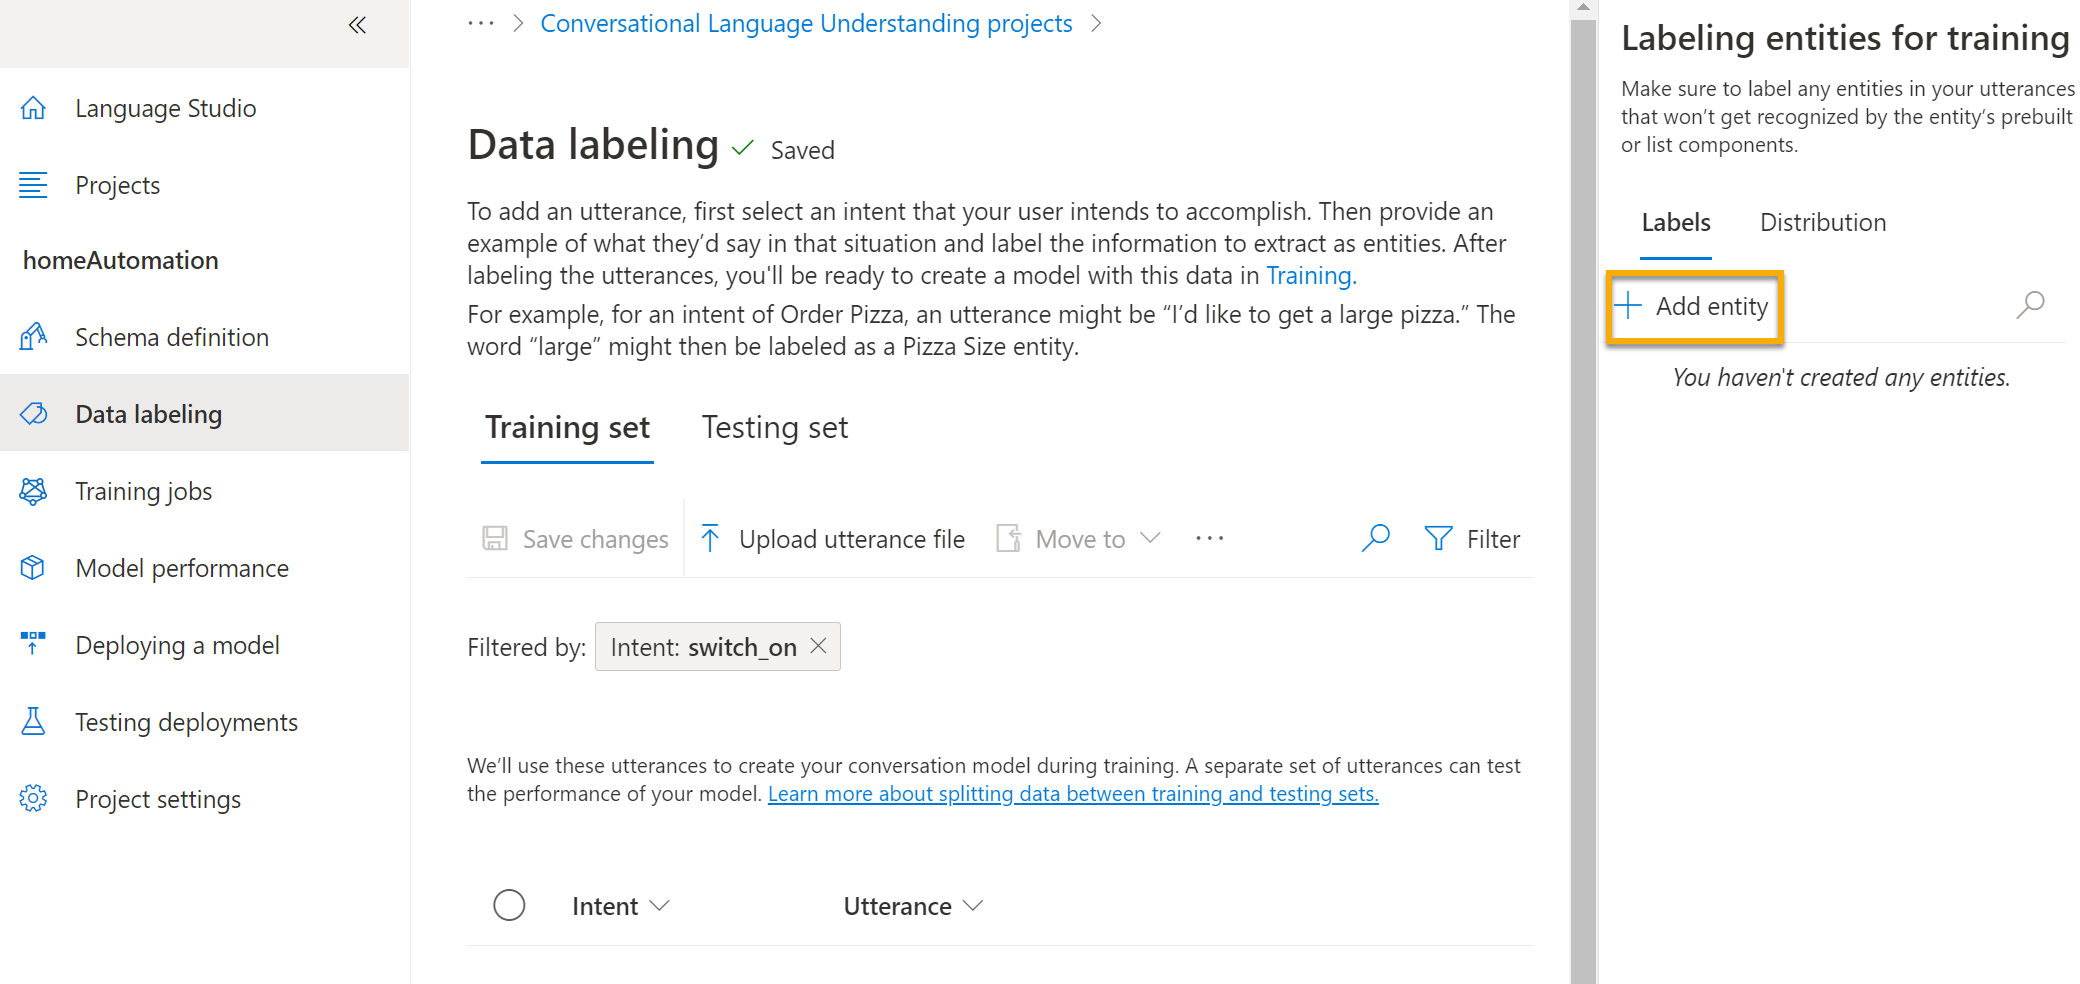
-
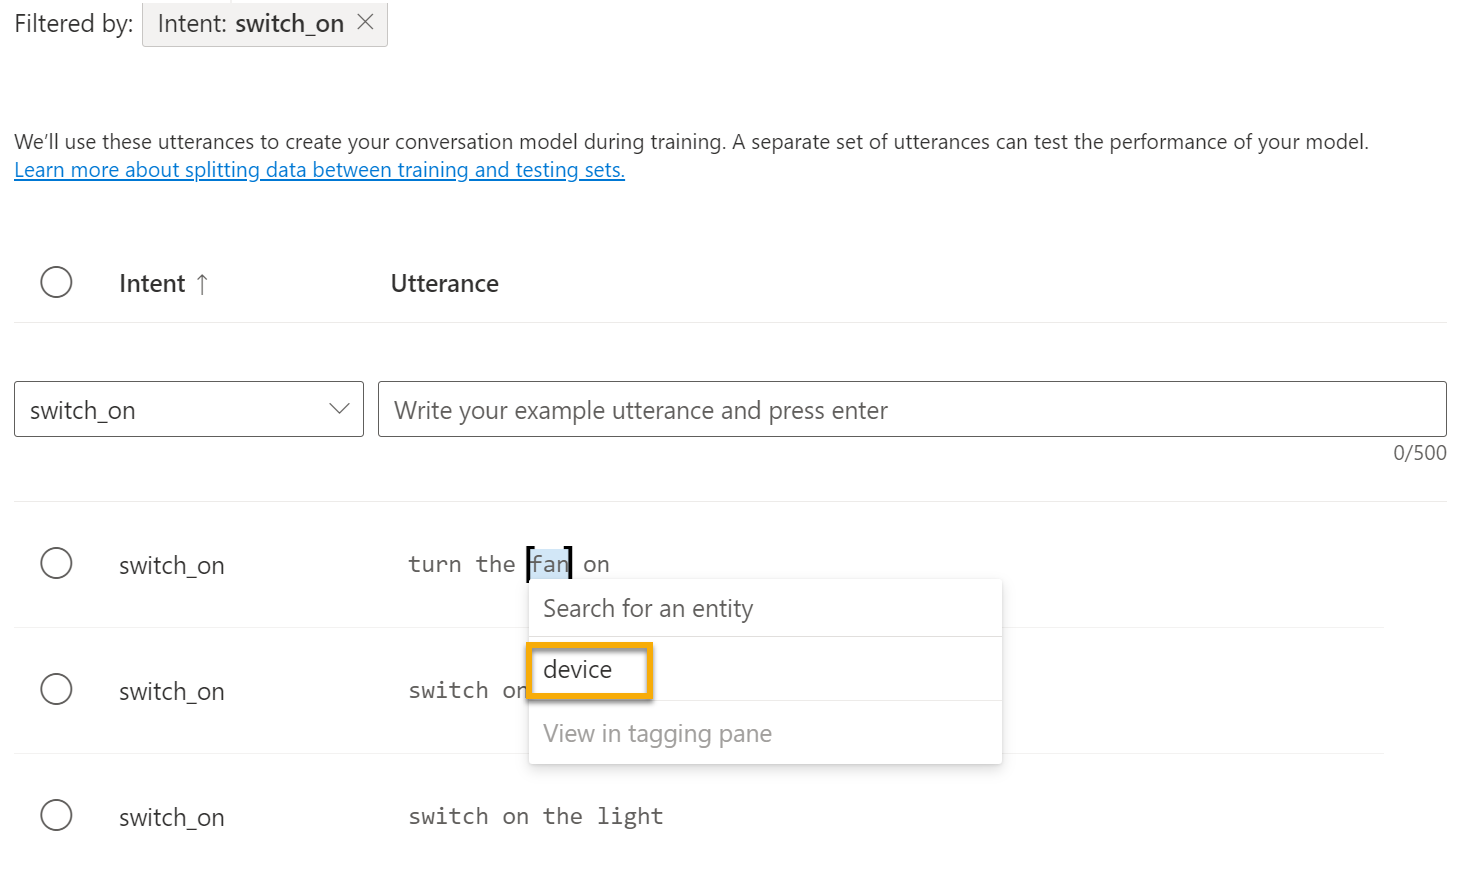
In the turn the fan on utterance, highlight the word “fan”. Then in the list that appears, in the Search for an entity box select device.
-
Do the same for all the utterances. Label the rest of the fan or light utterances with the device entity. When you’re finished, verify that you have the following utterances and make sure to select Save changes:
intent utterance entity switch_on Put on the fan Device - select fan switch_on Put on the light Device - select light switch_on Switch on the light Device - select light switch_on Turn the fan on Device - select fan switch_on Switch on the fan Device - select fan switch_on Turn the light on Device - select light 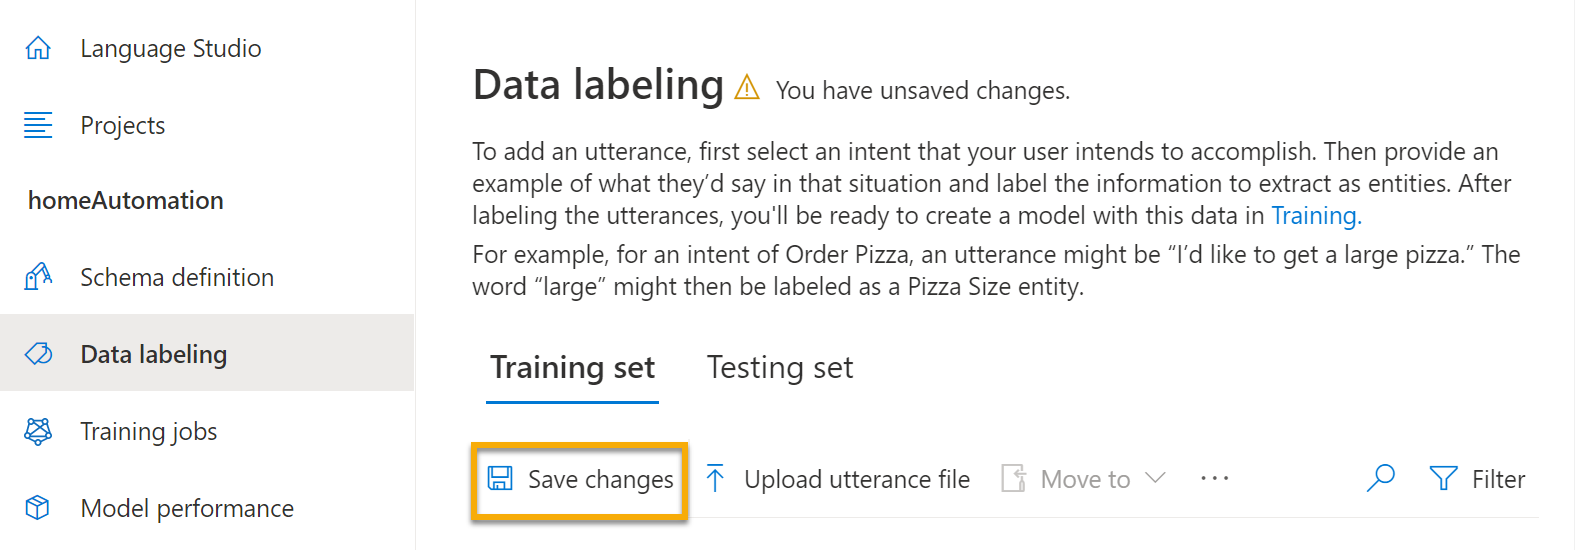
-
In the pane on the left, select Schema definition and verify that your switch_on intent is listed. Then select Add and add a new intent with the name
switch_off(in lower-case).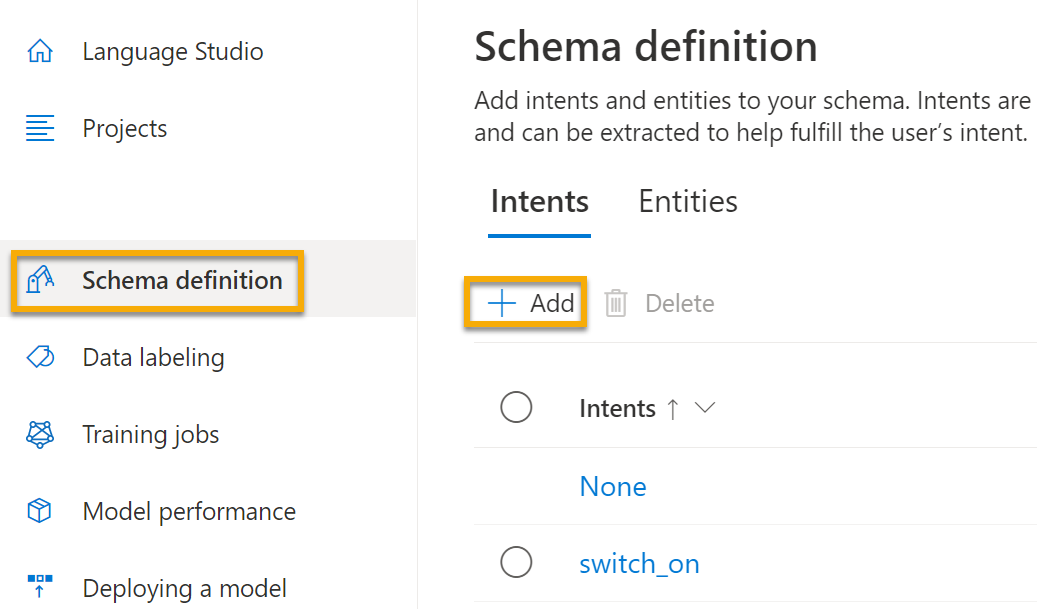
-
Select the switch_off intent. It will take you to the Data labeling page. In the Intent drop down, select switch_off. Next to the switch_off intent, add the utterance
turn the light off. - Add five more utterance examples to the switch_off intent.
switch off the fanput the fan offput the light offturn off the lightswitch the fan off
-
Label the words light or fan with the device entity. When you’re finished, verify that you have the following utterances and make sure to select Save changes:
intent utterance entity switch_off Put the fan off Device - select fan switch_off Put the light off Device - select light switch_off Turn off the light Device - select light switch_off Switch the fan off Device - select fan switch_off Switch off the fan Device - select fan switch_off Turn the light off Device - select light
Train the model
Now you’re ready to use the intents and entities you have defined to train the conversational language model for your app.
- On the left hand side of Language Studio, select Training jobs, then select Start a training job. Use the following settings:
- Train a new model: Selected and choose a model name
- Training mode: Standard training (free)
- Data Splitting: select Automatically split the testing set from the training data, keep default percentages
- Select Train at the bottom of the page.
- Wait for training to complete.
Deploy and test the model
To use your trained model in a client application, you must deploy it as an endpoint to which the client applications can send new utterances; from which intents and entities will be predicted.
-
On the left-hand side of Language Studio, select Deploying a model.
- Select your model name and then Add deployment. Use these settings:
- Create or select an existing deployment name: Select create a new deployment name. Add a unique name.
- Assign trained model to your deployment name: Select the name of the trained model.
- Select Deploy
Tip: Note your deployment name, you will use it later.
-
When the model is deployed, select Testing deployments on the left-hand side of the page, and then select your deployed model under Deployment name.
-
Enter the following text, and then select Run the test:
switch the light on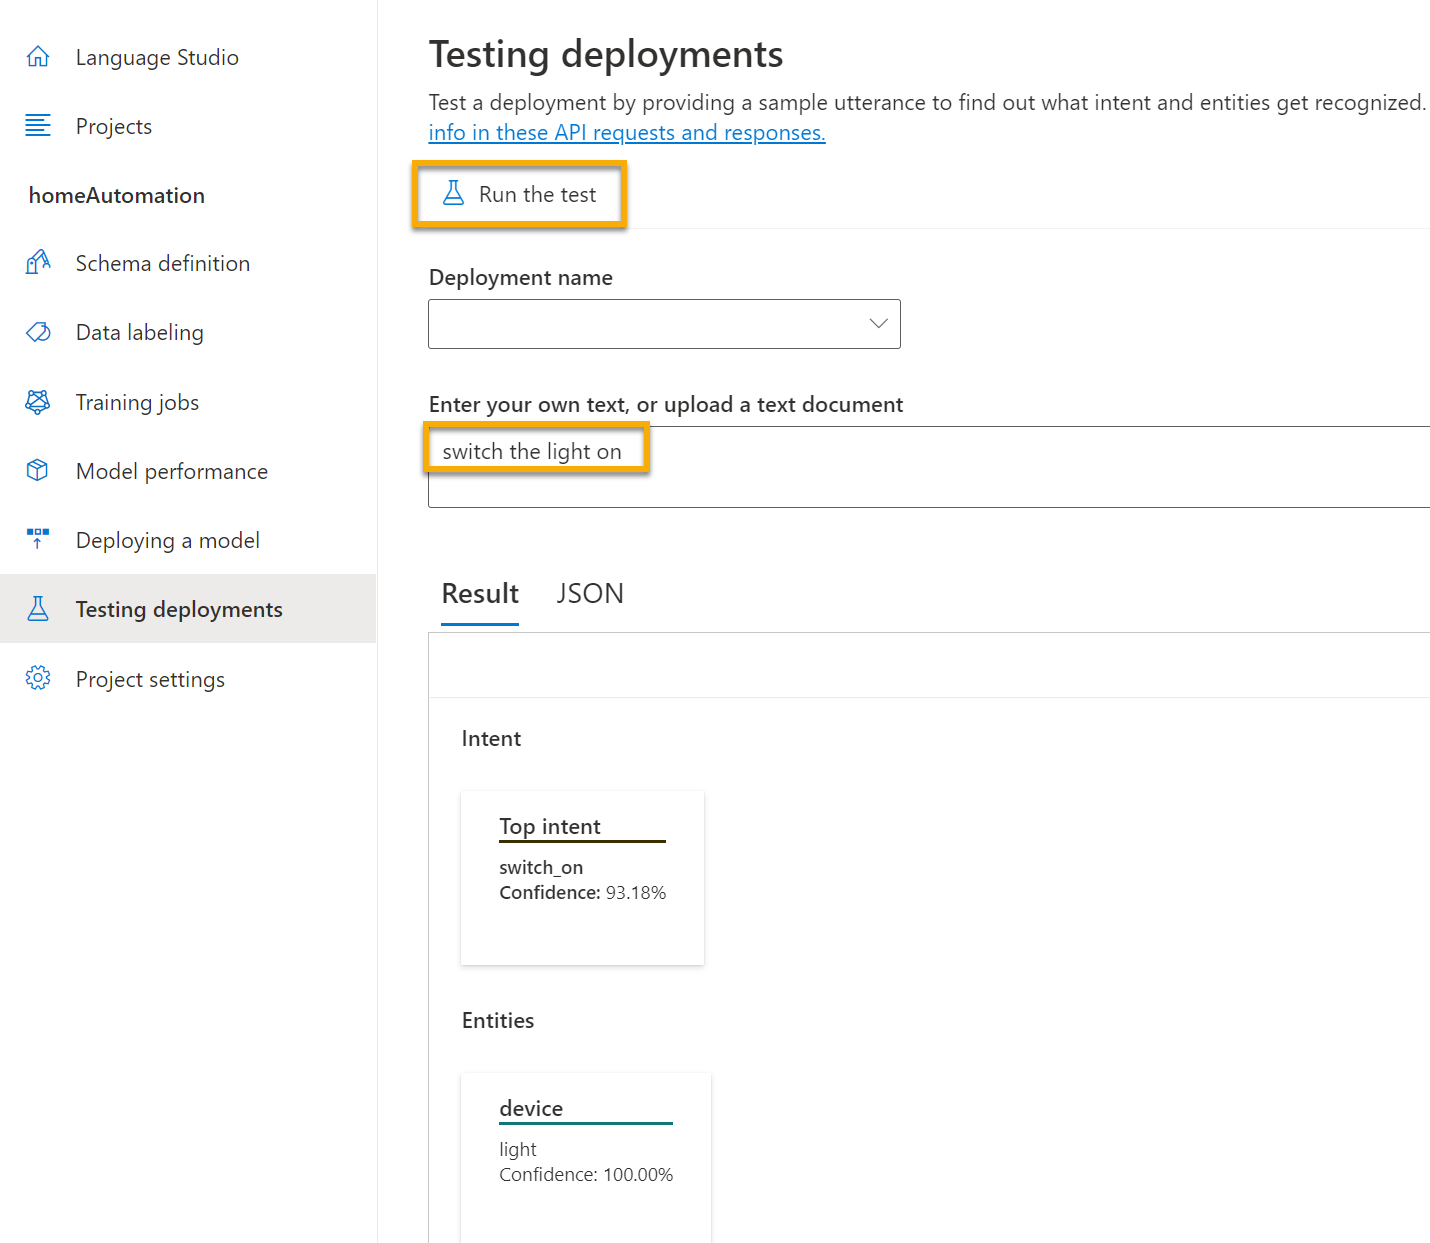
Review the result that is returned, noting that it includes the predicted intent (which should be switch_on) and the predicted entity (device) with confidence scores that indicates the probability the model calculated for the predicted intent and entity. The JSON tab shows the comparative confidence for each potential intent (the one with the highest confidence score is the predicted intent)
- Clear the text box and test the model with the following utterances under Enter your own text, or upload a text document:
turn off the fanput the light onput the fan off
You have now successfully configured a conversational language project, and defined entities, intents, and utterances. You have seen how to train and deploy a model in the Language Studio. And you have tried it out with both utterances you defined, and some that you did not explicitly define but the model was able to determine.
NOTE: Conversational language understanding provides the intelligence to interpret the intention of the input; it doesn’t perform any actions such as turning on the light or the fan. A developer would need to build an application that uses the Conversational Language Understanding model to determine the user’s intent, and then automate the appropriate action.
Clean up
If you don’t intend to do more exercises, delete any resources that you no longer need. This avoids accruing any unnecessary costs.
1.Open the Azure portal and select the resource group that contains the resource you created. 1.Select the resource and select Delete and then Yes to confirm. The resource is then deleted.
Learn more
This app shows only some of the capabilities of the Conversational Language Understanding feature of the Language service. To learn more about what you can do with this service, see the Conversational Language Understanding page.