Use Question Answering with the Language Studio
In this exercise you will use Language Studio to create and train a knowledge base of question and answers. Content for the knowledge base will come from an existing FAQ page from the web site of Margie’s Travel, a fictitious travel agency. You will then use Language Studio to see how it would work when used by customers.
Azure AI Language includes question answering capabilities, which you will use to create a knowledge base. Knowledge bases can be created either by entering question and answer pairs manually, or from an existing document or web page. Margie’s Travel wants to use their existing FAQ document.
The Language service’s question answering feature enables you to quickly create a knowledge base, either by entering question and answer pairs or from an existing document or web page. It can then use some built-in natural language processing capabilities to interpret questions and find appropriate answers.
Create a Language resource
To use question answering, you need a Language resource.
-
In another browser tab, open the Azure portal at https://portal.azure.com, signing in with the Microsoft account associated with your Azure subscription.
- Click the +Create a resource button and search for Language service. Select create a Language service plan. You will be taken to a page to Select additional features. Use the following settings:
- Select Additional Features:
- Default features: Keep the default features.
- Custom features: Select custom question answering.
- Select Continue to create your resource

- Select Additional Features:
- On the Create Language page, specify the following settings:
- Project Details
- Subscription: Your Azure subscription.
- Resource group: Select an existing resource group or create a new one.
- Instance Details
- Region: Select a region. If in eastern US, use “East US 2”
- Name: A unique name for your Language resource.
- Pricing tier: S (1K Calls per minute)
- Custom question answering
- Azure search region: Any available location.
- Azure search pricing tier: Free F (3 Indexes) - (If this tier is not available, select Basic)
- Responsible AI Notice
- By checking this box I certify that I have reviewed and acknowledge the terms in the Responsible AI Notice: Selected.
- Project Details
-
Select Review and Create and then select Create. Wait for the deployment of the Language service that will support your custom question answering knowledge base.
Note If you have already provisioned a free-tier Azure Cognitive Search resource, your quota may not allow you to create another one. In which case, select a tier other than Free F.
Create a new project
- In a new browser tab, open the Language Studio portal at https://language.azure.com and sign in using the Microsoft account associated with your Azure subscription.
- If prompted to choose a Language resource, select the following settings:
- Azure directory: The Azure directory containing your subscription.
- Azure subscription: Your Azure subscription.
- Language resource: The Language resource you created previously.
If you are not prompted to choose a language resource, it may be because you have multiple Language resources in your subscription; in which case:
- On the bar at the top if the page, select Settings (⚙).
- On the Settings page, view the Resources tab.
- Select the language resource you just created, and select Switch resource.
- At the top of the page, select Language Studio to return to the Language Studio home page.
-
At the top of the Language Studio portal, in the Create new menu, select Custom question answering.
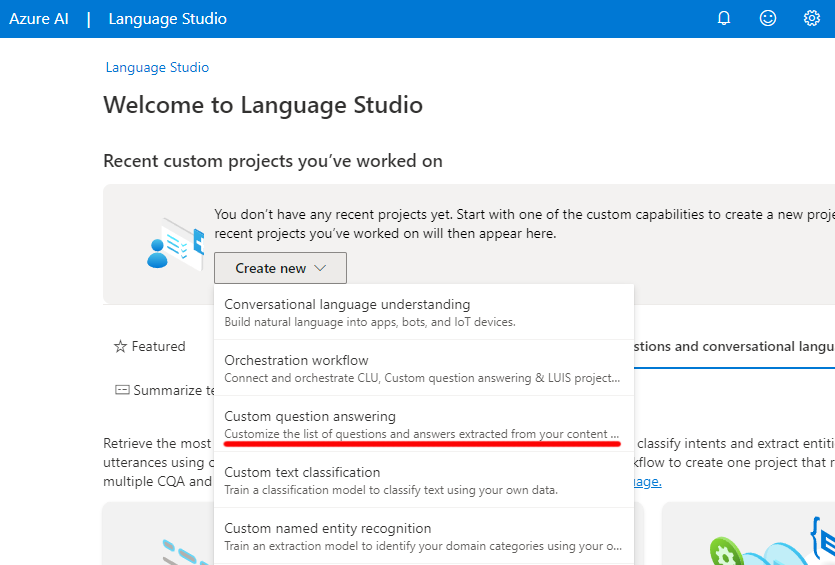
-
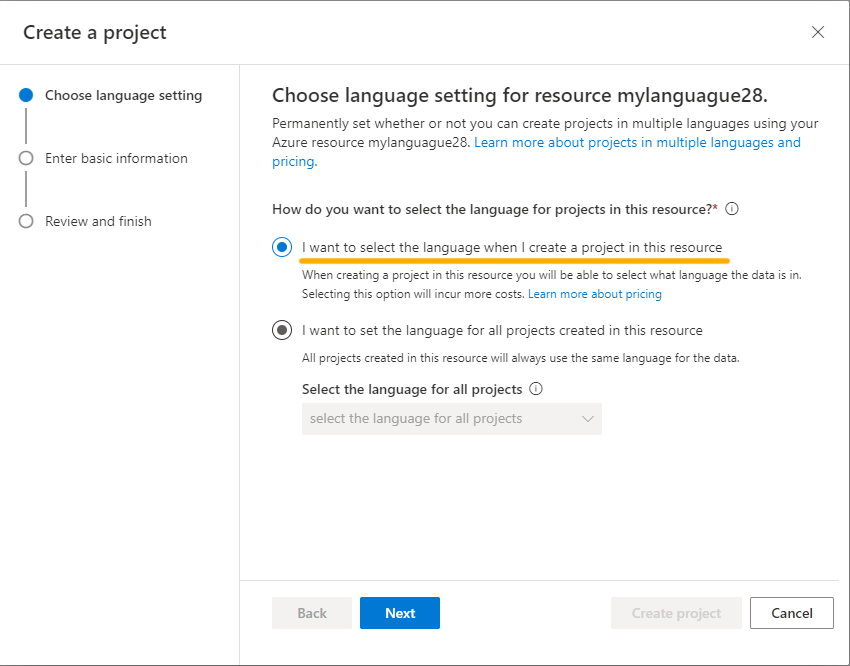
On the Choose language setting for resource your resource page, select I want to select the language when I create a project in this resource and click Next.
- On the Enter basic information page, enter the following details and click Next:
- Language resource: choose your language resource.
- Azure search resource: choose your Azure search resource.
- Name:
MargiesTravel - Description:
A simple knowledge base - Source language: English
- Default answer when no answer is returned:
No answer found
- On the Review and finish page, select Create project.
- You will be taken to the Manage sources page. Select +Add source and select URLs.
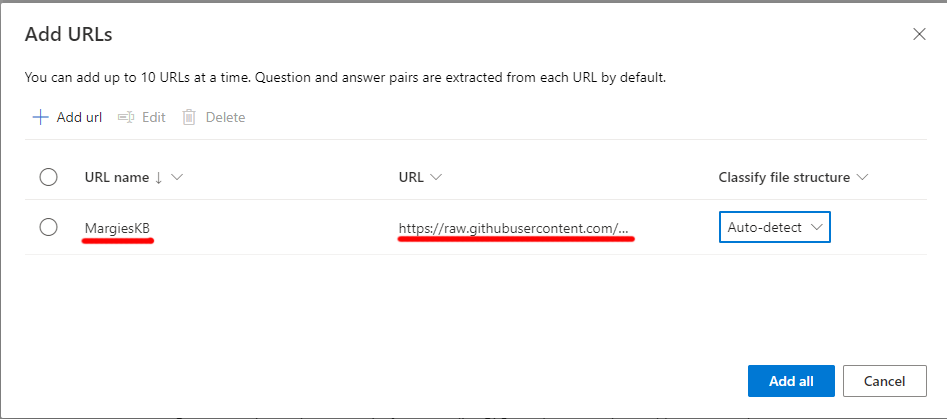
- In the Add URLs box, select + Add url. Type in the following and select Add all:
- URL name:
MargiesKB - URL:
https://raw.githubusercontent.com/MicrosoftLearning/mslearn-ai-fundamentals/main/data/natural-language/margies_faq.docx - Classify file structure: Auto-detect
- URL name:
- Select Add all.
Edit the knowledge base
Your knowledge base is based on the details in the FAQ document and some pre-defined responses. You can add custom question-and-answer pairs to supplement these.
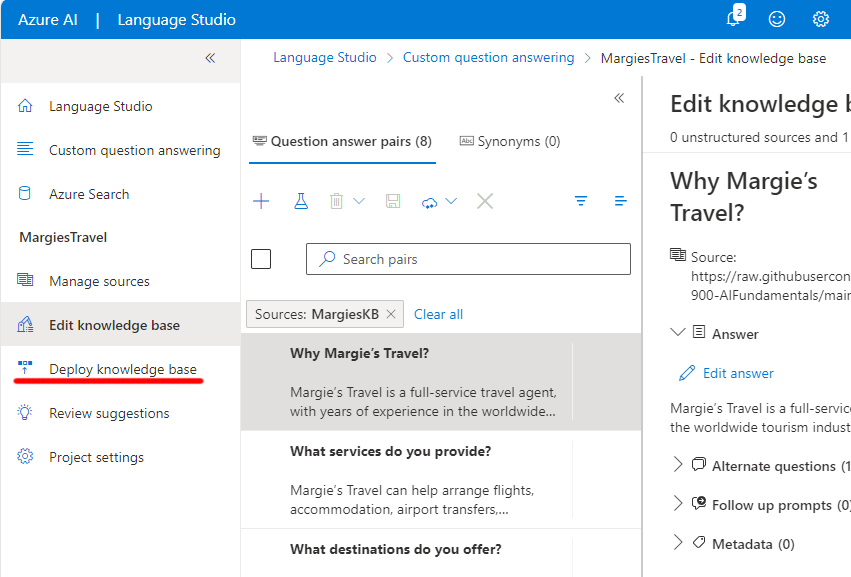
- Expand the left panel and select Edit knowledge base. Then select + to add a new question pair.
- In the Add a new question answer pair dialog box, in the Question type
Hello, and in the Answer typeHi, then select Done. - Expand Alternate questions and select + Add alternate question. Then enter
Hiyaas an alternative phrasing for “Hello”. - At the top of the Question answer pairs pane, select Save to save your knowledge base.
Train and test the knowledge base
Now that you have a knowledge base, you can test it.
- At the top of the Question answer pairs pane, select Test to test your knowledge base.
- In the test pane, at the bottom enter the message
Hi. The response Hi should be returned. -
In the test pane, at the bottom enter the message
I want to book a flight. An appropriate response from the FAQ should be returned.Note The response includes a short answer as well as a more verbose answer passage - the answer passage shows the full text in the FAQ document for the closest matched question, while the short answer is intelligently extracted from the passage. You can control whether the short answer is from the response by using the Display short answer checkbox at the top of the test pane.
- Try another question, such as
How can I cancel a reservation? - When you’re done testing the knowledge base, select Test to close the test pane.
Deploy your project
You can deploy the knowledge base as a client application to answer questions.
- In the left panel, select Deploy knowledge base.
- At the top of the page, select Deploy. A dialogue box will ask if you want to deploy the project. Select Deploy.
Clean up
If you don’t intend to do more exercises, delete any resources that you no longer need. This avoids accruing any unnecessary costs.
- Open the Azure portal and select the resource group that contains the resource you created.
- Select the resource and select Delete and then Yes to confirm. The resource is then deleted.
Learn more
- To learn more about the Question Answering service, view the documentation.