Get started with text analysis in Microsoft Foundry

Hi, I’m Anton.
I’ll be here to help you with hints and tips as you work through this lab, in which you’ll use AI to analyze text.
If you want more interactive help, you can chat with me in the Ask Anton app.
https://aka.ms/choose-anton:
- Azure-based: Best experience (requires an Azure subscription and deployment of a model in a Foundry project).
- Browser-based: Use a small language model in your browser (reduced functionality - may be slow or work only in "basic" mode in older/lower-spec devices).
Ask Anton is not a supported Microsoft product or a component of Microsoft Learn or AI Skills Navigator.
In this exercise, you’ll use Microsoft Foundry, Microsoft’s platform for creating AI applications, to explore common text analysis techniques.
Foundry offers two approaches to text analysis: general-purpose AI models that handle a broad range of tasks through natural language prompts, and purpose-built language tools that return structured, deterministic results for specific tasks. By exploring both, you’ll gain a clearer understanding of when to use each approach.
In the first part of this exercise, you’ll use a general purpose AI model in the Foundry portal’s chat playground. In the second part of this exercise, you’ll explore some features of Azure Language in Foundry tools.
This exercise takes approximately 20 minutes.
Create a project in Microsoft Foundry
- In a web browser, open Microsoft Foundry at
https://ai.azure.comto start building; signing in using your Azure credentials. - If it isn’t already enabled, in the tool bar the top of the page, enable the New Foundry option.
- If you do not have any existing projects, you will be prompted to create one. Create a new project with a unique name; expanding the Advanced options area to specify the following settings for your project (or you can select an existing project if you have one!):
- Foundry resource: Enter a valid name for your AI Foundry resource.
- Subscription: Your Azure subscription
- Resource group: Create or select a resource group
- Region: Select any of the AI Foundry recommended regions in this list
Tip: Depending on your permissions in the Azure subscription, you may need to clear the option to set up recommended resources. -
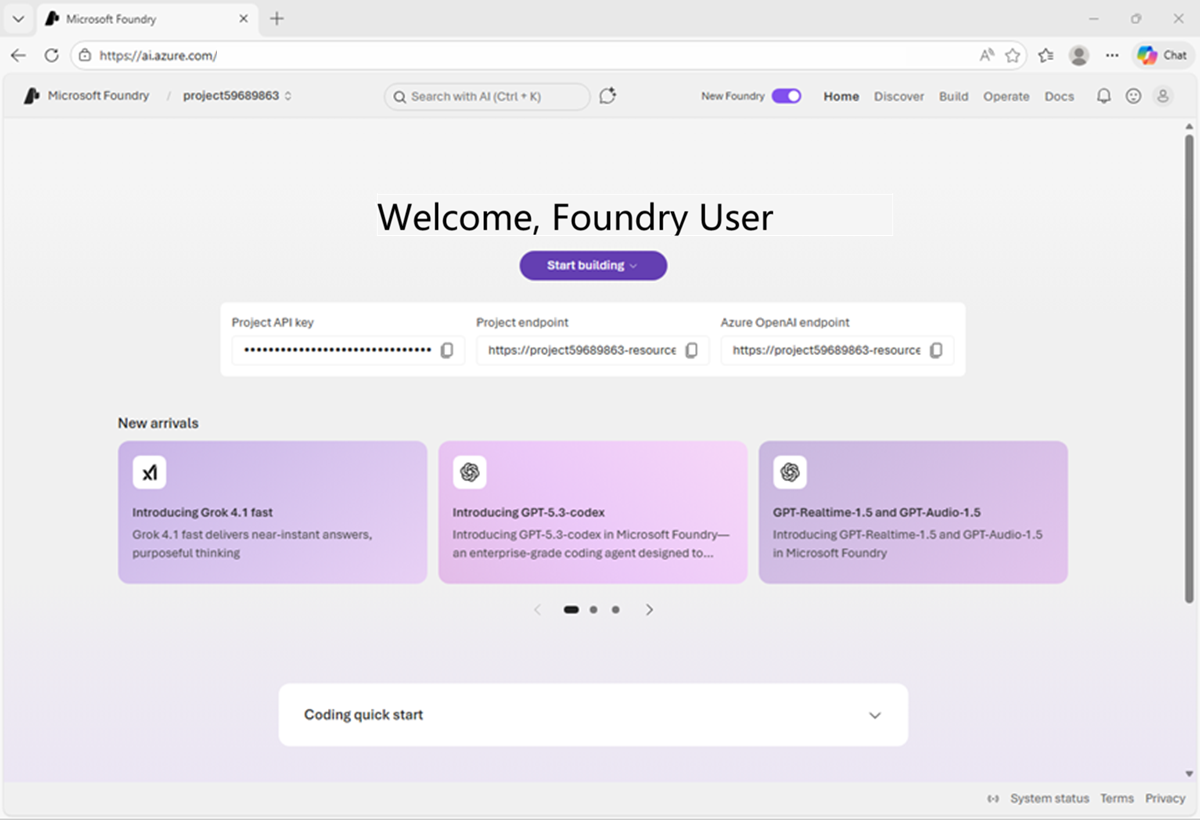
Select Create. Wait for your project to be created. It may take a few minutes. After creating or selecting a project in the new Foundry portal, it should open in a page similar to the following image (you may need to close any quick start pages that are displayed):
Explore a general-purpose AI model’s text analysis capabilities
Let’s start by using a chat interface to submit prompts to a generative AI model to perform a common text analysis task - summarizing text.
-
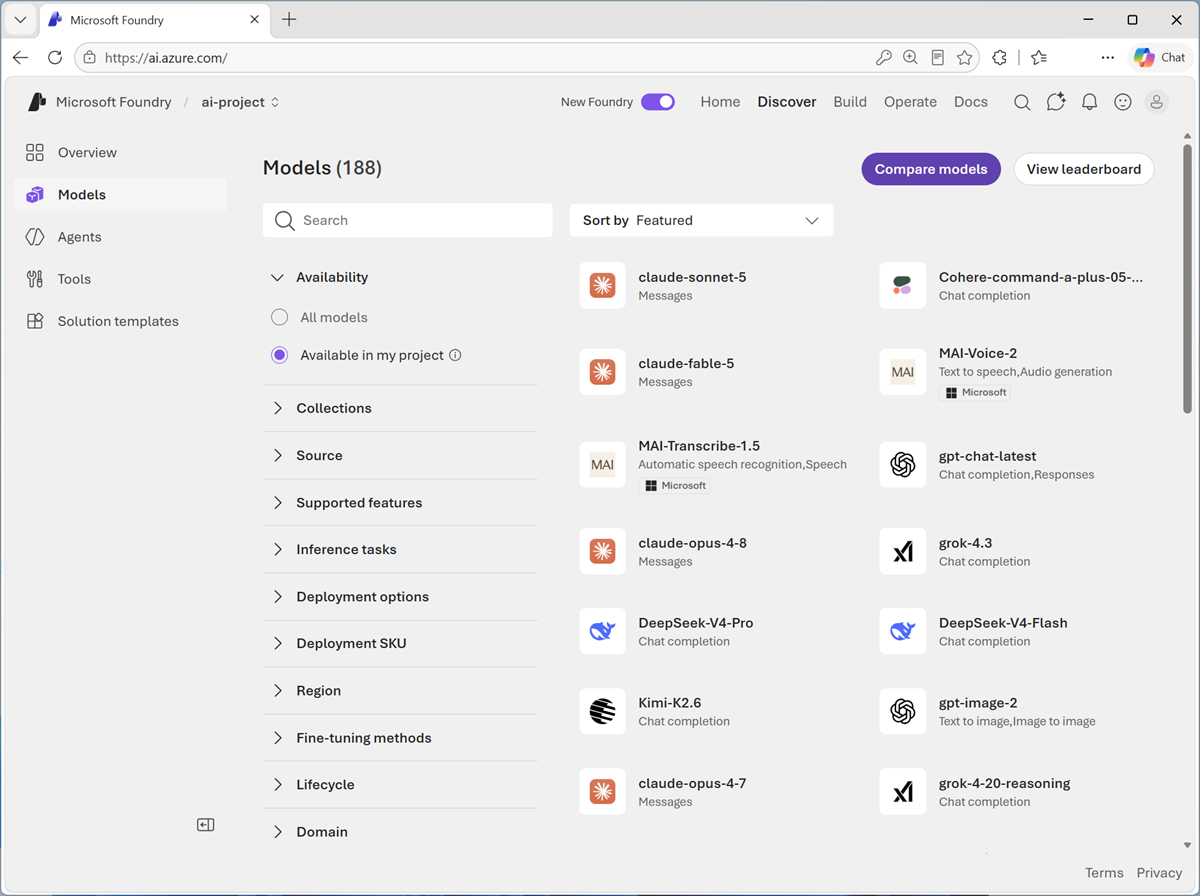
Now you’re ready to explore models. On the Discover page, select the Models tab to view the Microsoft Foundry model catalog.
-
Search for and select the
gpt-5-minimodel, and view the page for this model, which describes its features and capabilities.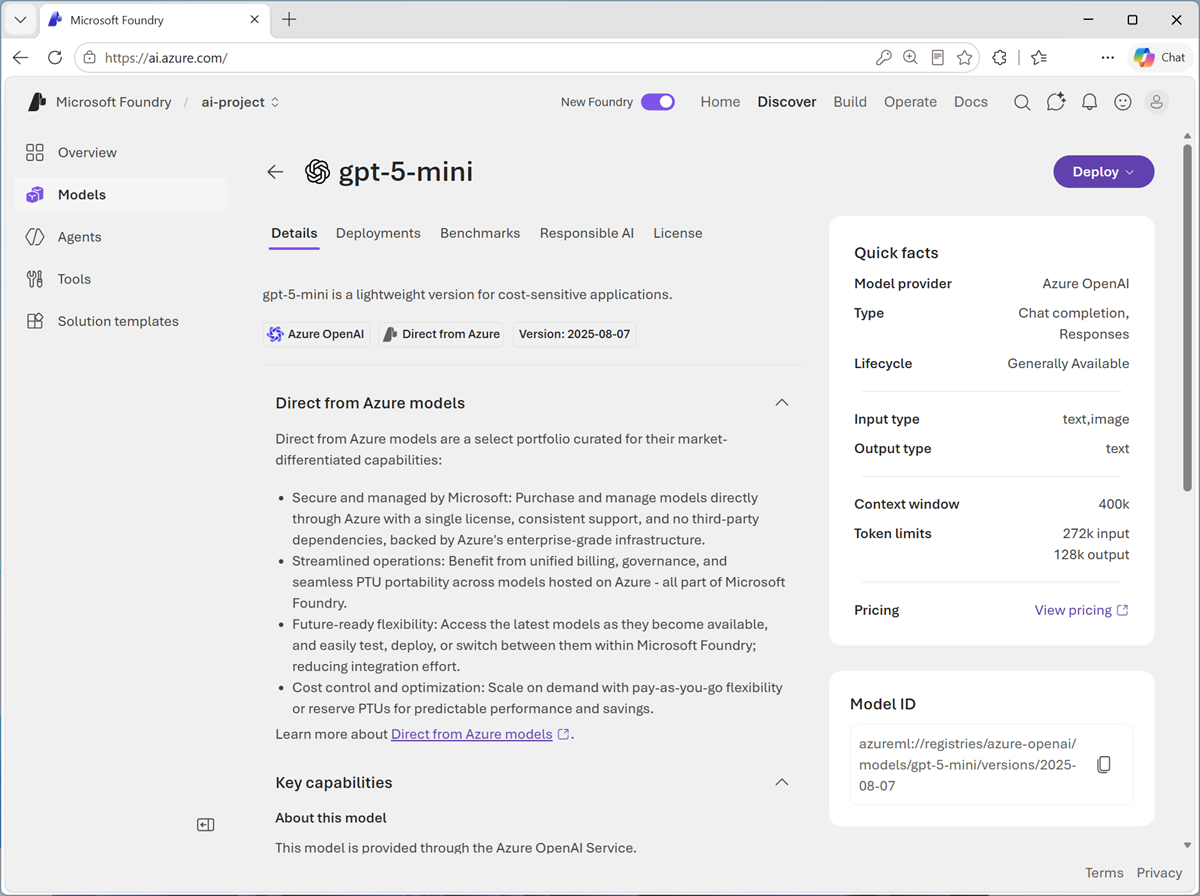
-
Use the Deploy button to deploy the model using the default settings. Wait for the deployment to complete. After the deployment is complete, you’re taken to a chat playground, where you can test out the model’s capabilities.
Tip: If you already have a gpt model deployment, you can use it instead of deploying a new one. Model deployments are subject to regional quotas. If you don’t have enough quota to deploy a gpt-5-mini model in your project’s region, you can use a different gpt chat-capable model - such as gpt-5-nano, or gpt-5.4-mini. Alternatively, you can create a new project in a different region.
Summarize text
A common requirement in text processing is to summarize a large body of text to distill it to its most salient points.
For example, suppose you’ve found an old article from a computer trade magazine, that includes a review of a home computer that was launched in the 1980s. Rather than reading the whole artice, you might want to generate a summary that highlights the key positives and negatives the reviewer found; and the overall conclusion.
- In the chat playground page, use the button at the bottom of the left navigation pane to hide it and give yourself more room to work with.
-
In the pane on the left, change the default Instructions to:
You are an AI assistant that analyzes and summarizes text. -
Enter the following prompt (you can press CTRL+ENTER for a new line):
Summarize this review as a single short paragraph:

Commodore 64: A Strong Contender in the Home Computer Market

Commodore's long-awaited Commodore 64 has finally arrived on dealers' shelves, and first impressions suggest that the company may have another substantial success on its hands. Priced aggressively and boasting a full 64K of RAM, the machine offers specifications that would have seemed remarkable in a home computer only a short time ago. Its colourful graphics and impressive sound capabilities place it among the most capable entertainment-oriented systems currently available.

Particularly noteworthy is the SID sound generator, which produces effects and musical output far beyond what users have come to expect from machines in this price bracket. Software houses are already expressing strong interest in the platform, and the combination of advanced graphics and sound should make the Commodore 64 an attractive proposition for both game developers and serious hobbyists alike.

The machine is not without its shortcomings, however. The keyboard, while serviceable, lacks the solid feel of some competing systems, and Commodore's documentation will do little to reassure newcomers to computing. Furthermore, prospective purchasers may wish to consider the total cost of ownership, as disk drives and other peripherals remain relatively expensive. Nevertheless, the Commodore 64 enters the market as one of the most compelling home computers currently available and is likely to be a significant force in the months ahead.
The model should generate a summary of the review.
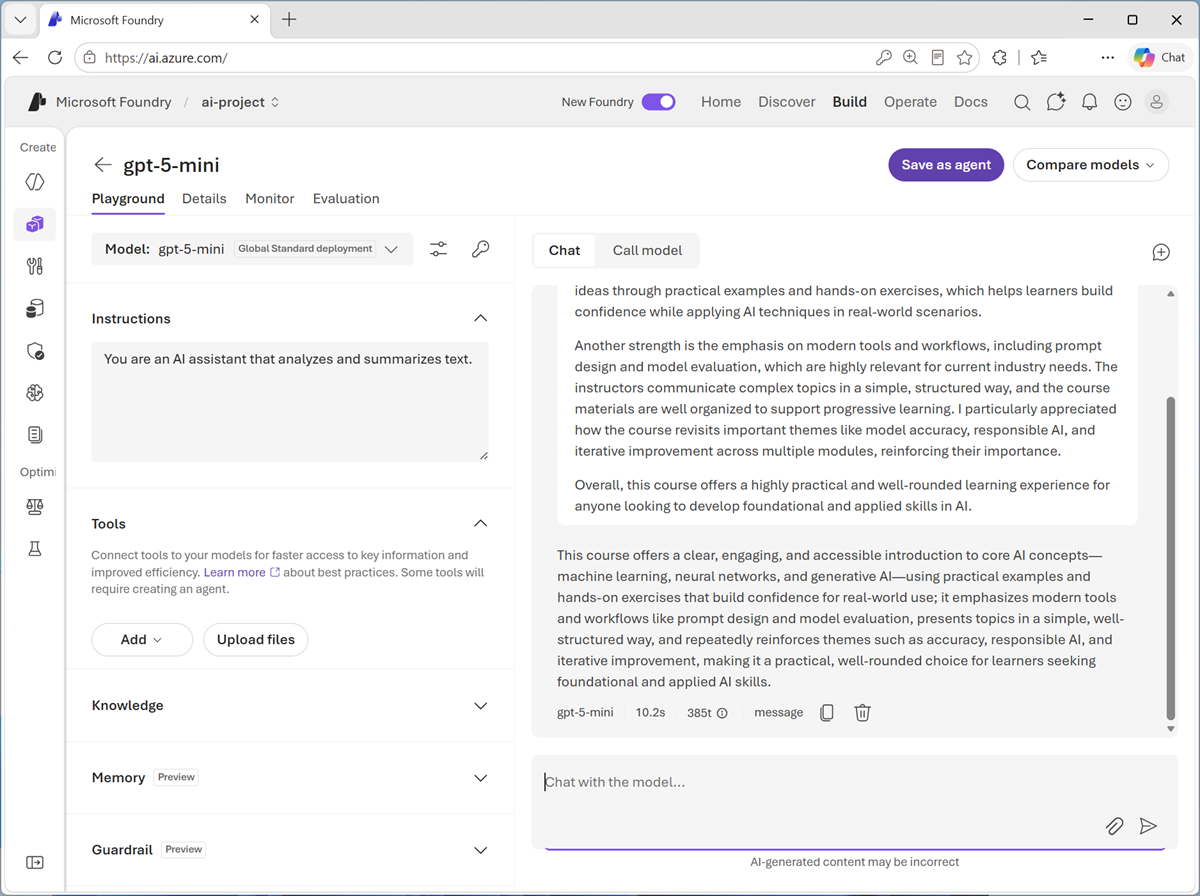
Large language models (LLMs) are built on machine learning techniques that have their origins in natural language processing and text analysis, so they’re good at summarizing text, extracting named entities (such as people and place names), and classifying documents based on sentiment, topic, style, and other factors.
Use a specialized language analysis tool
While a language model that’s trained for general generative AI workloads can often do a great job of text analysis, sometimes a more specialized tool can be used by an agent to get more predictable results.
The Azure Language in Foundry Tools provides purpose-built analyzers that use statistical techniques to return structured, deterministic results—ideal for consistent output in automated pipelines.
-
In the Foundry portal, navigate to the menu at the top of the screen and select Build.
-
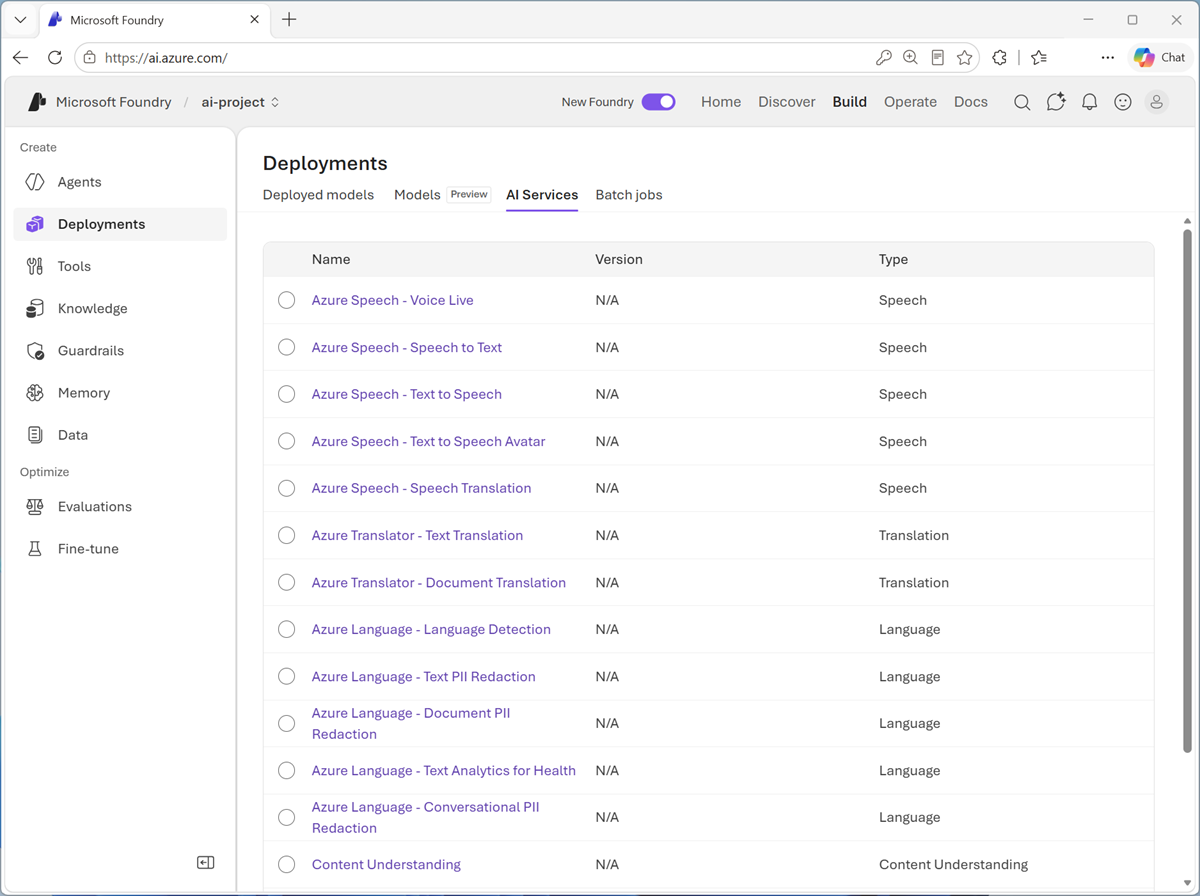
On the Build page, navigate to the menu on the left-side of the screen (you may need to expand it). In the menu, select the Services page.
Microsoft Foundry Tools includes multiple AI Services (formerly known as Microsoft Cognitive Services) that support common speech, translation, language, and content understanding workloads.
-
Note the available services; which include Azure Language services for language detection and PII redaction.
Detect language
In scenarios where text could potentially be in one of multiple languages, the first step in an analysis workflow is often to determine the primary language so the text can be routed to the most appropriate model or agent for the subsequent processing.
- In the list of Services, select the Azure Language - Language detection analyzer.
-
In the Input text list, select one of the provided sample documents. Then use the Detect button to detect the language in which the sample is written.
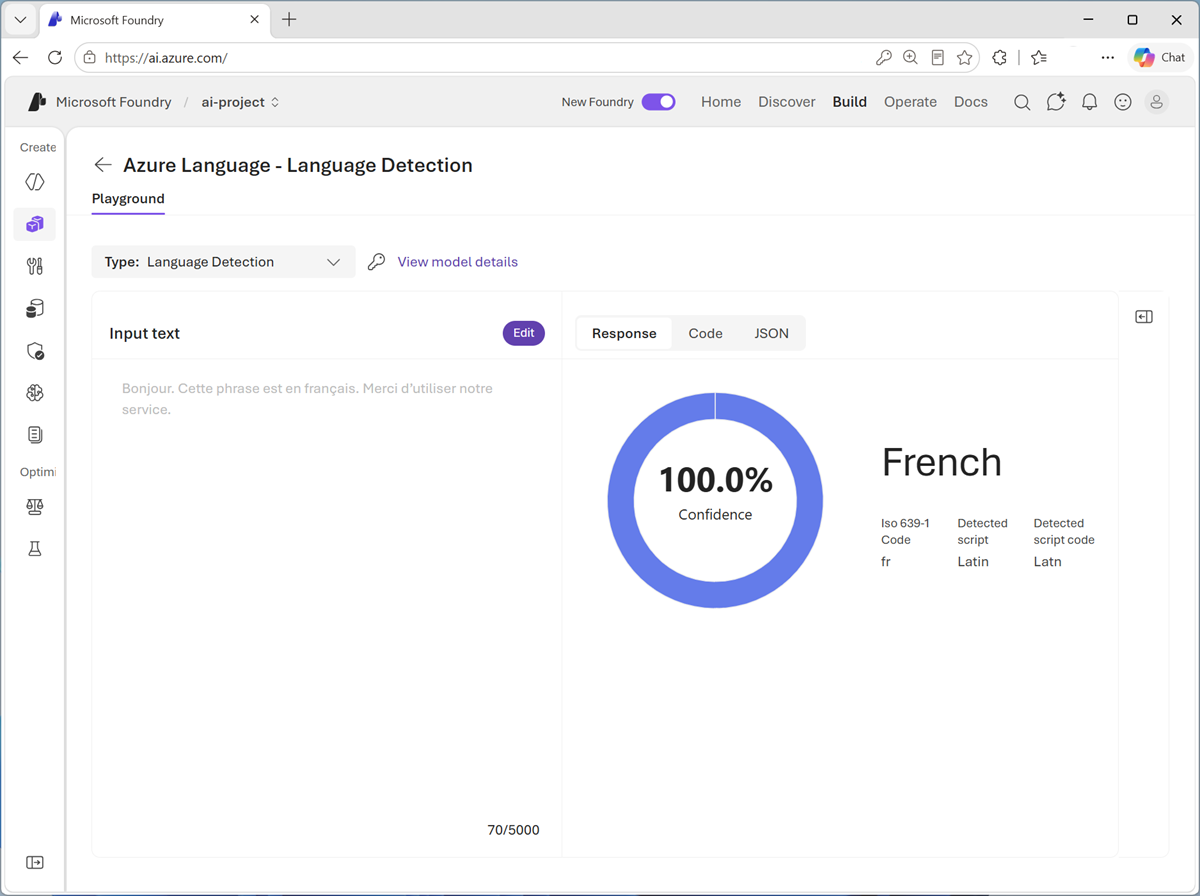
- After reviewing the detected language details, use the Edit button icon to make the input text editable again. Now you can:
- Select another sample.
- Type your own text.
- Upload a text file.
For example, suppose you encounter a vintage computer, and you’re curious about its history. You find a label that contains the following text on the computer casing. Enter the text and detect the language it is written in:
CPC 464
Art.-Nr.: 31020
Serien-Nr.: 464-87-041256
220–240 V ~ 50 Hz
40 W
Hergestellt in Korea
SCHNEIDER RUNDFUNKWERKE AG
Türkheim/Unterallgäu
Bundesrepublik Deutschland
Tip: If you want to investigate further, Foundry Tools includes a Text Translator service in the AI Services page; which you could use to translate the text.
Identify PII in text
To comply with privacy policies and laws, organizations often need to detect and redact personally identifiable information (PII) such as names, addresses, phone numbers, email addresses, and other personal details.
- On the language detection playground page, in the Type drop-down list, select Text PII Redaction (or return to the list of AI services and select Azure Language - Text PII Redaction).
-
In the Input text list, select one of the provided sample documents. Then use the Detect button to detect PII values in the text.
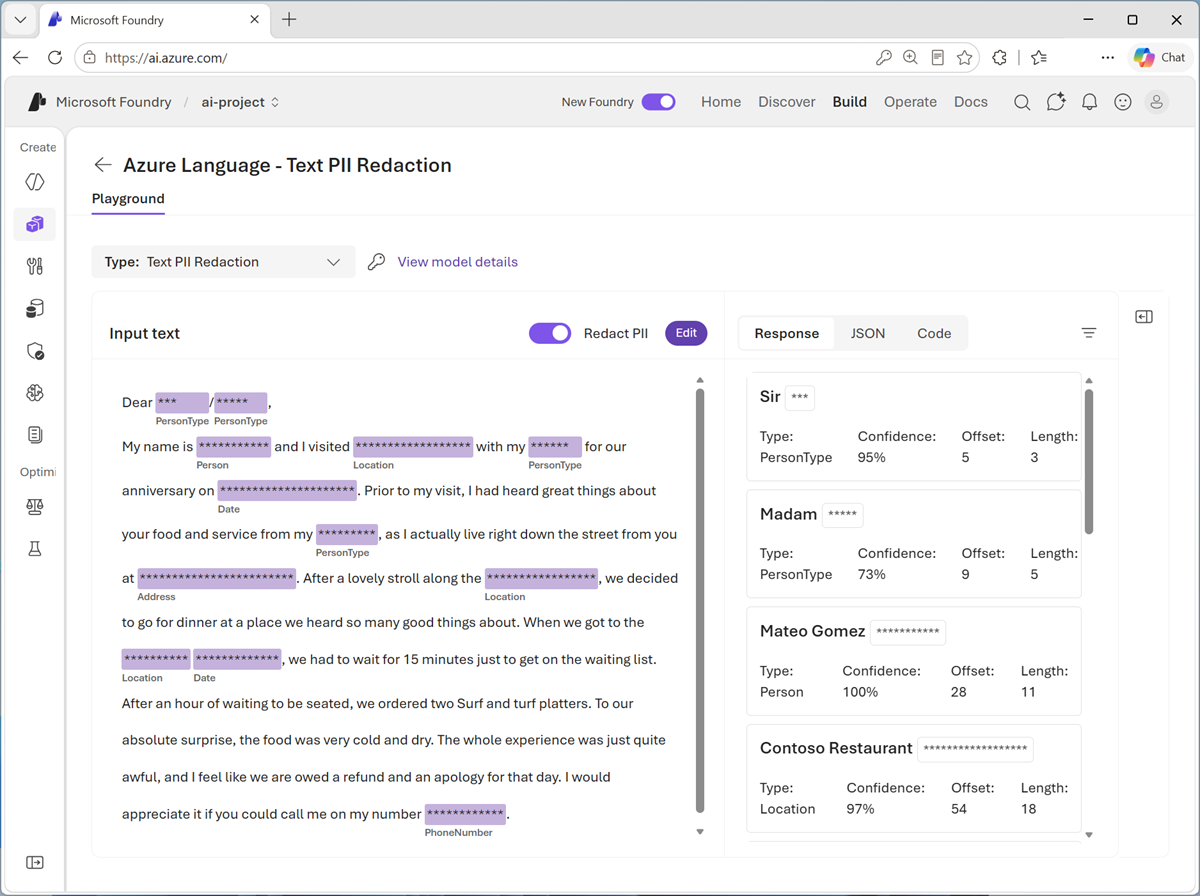
- After reviewing the detected PII details, use the Edit button to make the input text editable again. Now you can:
- Select another sample.
- Type your own text.
- Upload a text file.
For example, suppose you find the following invoice in the box of a vintage computer you have purchased:
Tailspin Toys Ltd
Invoice
14 September 1984

Customer:
  Margaret Ellis
  128 High Street, Reading, Berkshire RG1 2AB
  Telephone: 021 685 4215

Item: ZX Spectrum 48K home computer (includes power supply, RF lead, and user manual)
Price: £79.00
Payment received:  £79.00
Enter this text and determine what personally identifiable information it contains.
-
Experiment with input of your own. Azure Language can recognize an extensive list of PII. You can see the full list here. A few of those entities include:
- People names
- Email addresses
- Phone numbers
- Street addresses
Review the sample code
Foundry provides sample code for some Azure Language capabilities. You can use the sample code to begin creating your own client application.
-
Select the Code tab on the right to view sample code for PII identification, which should be similar to this:
key = "<your-api-key>"
endpoint = "https://ai-resrce.cognitiveservices.azure.com/"

from azure.ai.textanalytics import TextAnalyticsClient
from azure.core.credentials import AzureKeyCredential

# Authenticate the client using your key and endpoint
def authenticate_client():
     ta_credential = AzureKeyCredential(key)
     text_analytics_client = TextAnalyticsClient(
             endpoint=endpoint,
             credential=ta_credential)
     return text_analytics_client

client = authenticate_client()

# Example method for detecting sensitive information (PII) from text
def pii_recognition_example(client):
     documents = [
         "$documents"
     ]
     response = client.recognize_pii_entities(documents, language="en")
     result = [doc for doc in response if not doc.is_error]
     for doc in result:
         print("Redacted Text: {}".format(doc.redacted_text))
         for entity in doc.entities:
             print("Entity: {}".format(entity.text))
             print(" Category: {}".format(entity.category))
             print(" Confidence Score: {}".format(entity.confidence_score))
             print(" Offset: {}".format(entity.offset))
             print(" Length: {}".format(entity.length))
pii_recognition_example(client)
Tip: You can copy the code and run it in your preferred Python development environment - for example Visual Studio Code. You will need to create environment variables for your Azure Language endpoint and key; which you can find in the code sample window.
Summary
In this exercise, you explored how to use a generative AI model and the Azure Language tool in Foundry to analyze text. In many scenarios, the native language capabilities of a generative AI model provide all the natural language processing functionality you need. For more specialized scenarios, the Azure Language tool provides a dedicated service for NLP tasks.
Clean up
If you have finished exploring Microsoft Foundry, delete any resources that you no longer need. This avoids accruing any unnecessary costs.
- Open the Azure portal at https://portal.azure.com and select the resource group that contains the resources you created.
- Select Delete resource group and then enter the resource group name to confirm. The resource group is then deleted.
If you used the Ask Anton app during this lab, we’d love you to tell us about your experience with it!