Develop an Azure AI chat agent with the Microsoft Agent Framework SDK
In this exercise, you’ll use Azure AI Agent Service and Microsoft Agent Framework to create an AI agent that processes expense claims.
This exercise should take approximately 30 minutes to complete.
Note: Some of the technologies used in this exercise are in preview or in active development. You may experience some unexpected behavior, warnings, or errors.
Prerequisites
Before starting this exercise, ensure you have:
- Visual Studio Code installed on your local machine
- An active Azure subscription
- Python 3.13 or later installed
- Git installed on your local machine
* Python 3.13 is available, but some dependencies are not yet compiled for that release. The lab has been successfully tested with Python 3.13.12.
Create a Foundry project with the Foundry Toolkit VS Code extension
As a developer, you may spend some time working in the Foundry portal; but you’re also likely to spend a lot of time in Visual Studio Code. The Foundry Toolkit extension provides a convenient way to work with Foundry project resources without leaving the development environment.
-
Open Visual Studio Code.
-
Select Extensions from the left pane (or press Ctrl+Shift+X).
-
Search the extensions marketplace for the
Foundry Toolkitextension from Microsoft and select Install.Note: The extension is currently listed as Foundry Toolkit, but some VS Code labels, commands, or older screenshots may still refer to AI Toolkit. In this lab, treat those names as referring to the same extension experience.
-
After installing the extension, select its icon in the sidebar to open the Foundry Toolkit view.
You should be prompted to sign in to your Azure account if you haven’t already.
-
Select Create Project under Microsoft Foundry Resources.
If a default project is already active, the project name will appear under My Resources. You can create a new project by right-clicking on the active project and selecting Switch Default Project.
-
Select your Azure subscription and resource group, then enter a name for your Foundry project to create a new project for this exercise.
When the deployment is complete, you should see the project appear in the Foundry Toolkit pane as the default project.
Deploy a model
At the core of any generative AI project, there’s at least one generative AI model. In this task, you’ll deploy a model from the Model Catalog to use with your agent.
-
When the “Project deployed successfully” popup appears, select the Deploy a model button. This opens the Model Catalog.
Tip: You can also access the Model Catalog by selecting the + icon next to Models in the Resources section, or by pressing F1 and running the command Foundry Toolkit: Show model catalog.
-
In the Model Catalog, locate the gpt-5 model (you can use the search bar to find it quickly).
-
Select Deploy next to the gpt-5 model.
- Configure the deployment settings:
- Deployment name: Enter a name like “gpt-5”
- Deployment type: Select Global Standard (or Standard if Global Standard is not available)
- Model version: Leave as default
- Tokens per minute: Leave as default
-
Select Deploy to Microsoft Foundry in the bottom-left corner.
-
Wait for the deployment to complete. Your deployed model will appear under the Models section in the Resources view.
-
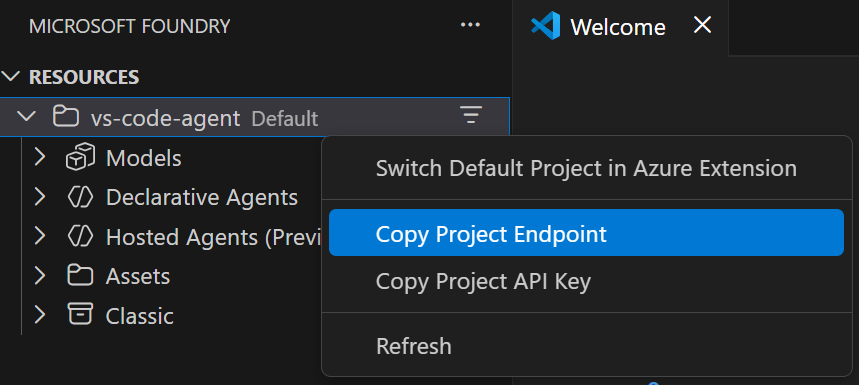
Right-click the name of the project deployment and select Copy Project Endpoint. You’ll need this URL to connect your agent to the Foundry project in the next steps.
Clone the starter code repository
For this exercise, you’ll use starter code that will help you connect to your Foundry project and create an agent that can process expenses data. You’ll clone this code from a GitHub repository.
-
In VS Code, open the Command Palette (Ctrl+Shift+P or View > Command Palette).
-
Type Git: Clone and select it from the list.
-
Enter the repository URL:
https://github.com/MicrosoftLearning/mslearn-ai-agents.git -
Choose a location on your local machine to clone the repository.
-
When prompted, select Open to open the cloned repository in VS Code.
-
Once the repository opens, select File > Open Folder and navigate to
mslearn-ai-agents/Labfiles/07-agent-framework, then choose Select Folder. -
In the Explorer pane, expand the Python folder to view the code files for this exercise.
-
Right-click on the requirements.txt file and select Open in Integrated Terminal.
-
In the terminal, enter the following command to install the required Python packages in a virtual environment:
python -m venv labenv .\labenv\Scripts\Activate.ps1 pip install -r requirements.txt -
Open the .env file, replace the your_project_endpoint placeholder with the endpoint for your project (copied from the project deployment resource in the Foundry Toolkit extension) and ensure that the MODEL_DEPLOYMENT_NAME variable is set to your model deployment name. Use Ctrl+S to save the file after making these changes.
Now you’re ready to create an AI agent that uses a custom tool to process expenses data.
Create an agent with a custom tool
Tip: As you add code, be sure to maintain the correct indentation. Use the existing comments as a guide, entering the new code at the same level of indentation.
-
Open the agent-framework.py file in the code editor.
- Review the code in the file. It contains:
- Some import statements to add references to commonly used namespaces
- A main function that loads a file containing expenses data, asks the user for instructions, and and then calls…
- A process_expenses_data function in which the code to create and use your agent must be added
-
At the top of the file, after the existing import statement, find the comment Add references, and add the following code to reference the namespaces in the libraries you’ll need to implement your agent:
# Add references from agent_framework import tool, Agent from agent_framework.foundry import FoundryChatClient from azure.identity import AzureCliCredential from pydantic import Field from typing import Annotated -
Near the bottom of the file, find the comment Create a tool function for the email functionality, and add the following code to define a function that your agent will use to send email (tools are a way to add custom functionality to agents)
# Create a tool function for the email functionality @tool(approval_mode="never_require") def submit_claim( to: Annotated[str, Field(description="Who to send the email to")], subject: Annotated[str, Field(description="The subject of the email.")], body: Annotated[str, Field(description="The text body of the email.")]): print("\nTo:", to) print("Subject:", subject) print(body, "\n")Note: The function simulates sending an email by printing it to the console. In a real application, you’d use an SMTP service or similar to actually send the email!
-
Back up above the send_email code, in the process_expenses_data function, find the comment Create a foundry chat client, and add the following code:
(Be sure to maintain the indentation level)
# Create a foundry chat client
client = FoundryChatClient(
    project_endpoint=os.getenv("PROJECT_ENDPOINT"),
    model=os.getenv("MODEL_DEPLOYMENT_NAME"),
    credential=AzureCliCredential()
)
Note that the AzureCliCredential object will allow your code to authenticate to your Azure account. This client will be used to interact with the Foundry agent services.
-
Find the comment Initialize an agent with the tool and instructions, and add the following code:
(Be sure to maintain the indentation level)
# Initialize an agent with the tool and instructions
async with (
    Agent(
        client=client,
        name="ExpenseClaimAgent",
        instructions="""You are an AI assistant for expense claim submission.
                    At the user's request, create an expense claim and use the plug-in function to send an email to expenses@contoso.com with the subject 'Expense Claim`and a body that contains itemized expenses with a total.
                    Then confirm to the user that you've done so. Don't ask for any more information from the user, just use the data provided to create the email.""",
        tools=[submit_claim],
    ) as agent,
):
In this code, the Agent object is initialized with the client, instructions for the agent, and the tool function you defined to send emails.
-
Find the comment Use the agent to process the expenses data, and add the following code to create a thread for your agent to run on, and then invoke it with a chat message.
(Be sure to maintain the indentation level):
# Use the agent to process the expenses data try: # Add the input prompt to a list of messages to be submitted prompt_messages = [f"{prompt}: {expenses_data}"] # Invoke the agent for the specified thread with the messages response = await agent.run(prompt_messages) # Display the response print(f"\n# Agent:\n{response}") except Exception as e: # Something went wrong print (e) - Review that the completed code for your agent, using the comments to help you understand what each block of code does, and then save your code changes (CTRL+S).
Test the application
-
In the integrated terminal, enter the following commands to run the application:
az loginpython agent-framework.pyaz loginallows the AzureCliCredential to authenticate to your Azure account. -
When asked what to do with the expenses data, enter the following prompt:
Submit an expense claim -
When the application has finished, review the output. The agent should have composed an email for an expenses claim based on the data that was provided.
Tip: If the app fails because the rate limit is exceeded. Wait a few seconds and try again. If there is insufficient quota available in your subscription, the model may not be able to respond.
-
When you’re finished, enter
deactivatein the terminal to exit the Python virtual environment.
Clean up
If you’ve finished exploring Azure AI Agent Service, you should delete the resources you have created in this exercise to avoid incurring unnecessary Azure costs.
Delete your model
-
In VS Code, refresh the Azure Resources view.
-
Expand the Models subsection.
-
Right-click on your deployed model and select Delete.
Delete the resource group
-
Open the Azure portal.
-
Navigate to the resource group containing your Microsoft Foundry resources.
-
Select Delete resource group and confirm the deletion.