Build a workflow in Microsoft Foundry (deprecated)
In this exercise, you’ll use the Microsoft Foundry portal to create a workflow. Workflows are UI-based tools that allow you to define sequences of actions involving AI agents. For this exercise, you’ll create a workflow that helps resolve customer support requests.
Workflow overview
-
Collect incoming support tickets
The workflow starts with a predefined array of customer support issues. Each item in the array represents an individual support ticket submitted to ContosoPay.
-
Process tickets one at a time
A for-each loop iterates over the array, ensuring each support ticket is handled independently while using the same workflow logic.
-
Classify each ticket with an AI agent
For each ticket, the workflow invokes a Triage Agent to classify the issue as Billing, Technical, or General, along with a confidence score.
-
Handle uncertainty with conditional logic
If the confidence score is below a defined threshold, the workflow recommends additional info for that ticket.
-
Route based on issue category
Billing issues are flagged for escalation and removed from the automated resolution path. Technical and General issues continue through automated handling.
-
Generate a recommended response
For non-billing tickets, the workflow invokes a Resolution Agent to draft a category-appropriate support response.
This exercise should take approximately 30 minutes to complete.
Note: The workflow builder in Microsoft Foundry is currently in preview. You may experience some unexpected behavior, warnings, or errors.
Create a Foundry project
Let’s start by creating a Foundry project.
-
In a web browser, open the Foundry portal at
https://ai.azure.comand sign in using your Azure credentials. -
Ensure the New Foundry toggle is set to On.

-
You may be prompted to create a new project before continuing to the New Foundry experience. Select Create a new project.
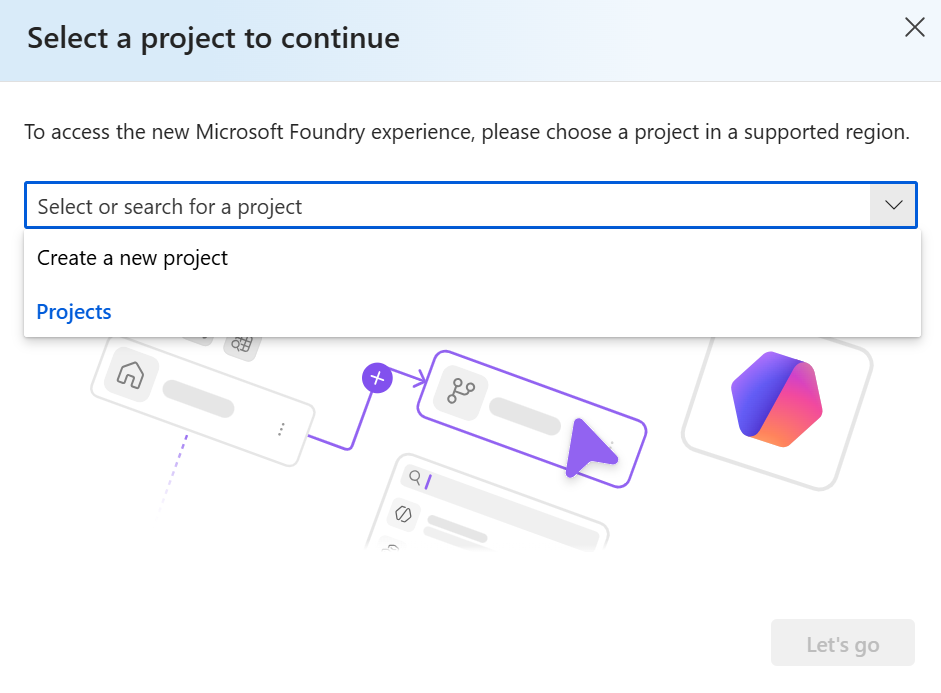
If you’re not prompted, select the projects drop down menu on the upper left, and then select Create new project.
-
Enter a name for your Foundry project in the textbox and select Create.
Wait a few moments for the project to be created. The new Foundry portal home page should appear with your project selected.
Create a customer support triage workflow
In this section, you’ll create a workflow that helps triage and respond to customer support requests for a fictional company called ContosoPay. The workflow uses two AI agents that classify and respond to support tickets.
-
On the Foundry portal home page, select Build from the toolbar menu.
-
On the left-hand menu, select Agents.
-
On the Agents page in the tab on top, look for Workflow tab and select it.
-
In the upper right corner, select Create > Blank workflow to create a new blank workflow.
The type of workflow you’ll create in this exercise is a sequential workflow. However, starting with a blank workflow will simplify the process of adding the necessary nodes.
-
Select Save in the visualizer to save your new workflow. In the dialog box, enter a name for your workflow, such as ContosoPay-Customer-Support-Triage, and then select Save.
Create a ticket array variable
-
In the workflow visualizer, select the + (plus) icon to add a new node.
-
In the workflow actions menu, under Data transformation, select Set variable to add a node that initializes an array of support tickets.
-
In the Set variable node editor, create a new variable by selecting Create new variable. Enter a name such as SupportTickets.

The new variable should appear as
Local.SupportTickets. -
In the To value field, enter the following array that contains sample support tickets:
[ "The API returns a 403 error when creating invoices, but our API key hasn't changed.", "Is there a way to export all invoices as a CSV?", "I was charged twice for the same invoice last Friday and my customer is also seeing two receipts. Can someone fix this?"] -
Select Done to save the node.
Add a for-each loop to process tickets
-
Select the + (plus) icon below the Set variable and create a For each node to process each support ticket in the array.
-
In the For each node editor, set the Select the items to loop for each field to the variable you created earlier:
Local.SupportTickets. -
In the Loop Value Variable field, create a new variable named
CurrentTicket. -
Select Done to save the node.
Invoke an agent to classify the ticket
-
Select the + (plus) icon within the For each node to add a new node that classifies the current support ticket.
-
In the workflow actions menu, under Invoke, select Agent to add an agent node.
-
In the Invoke agent node editor, under Select an agent, select Create new agent.
-
Enter an agent name such as Triage-Agent and select Create.
Configure the agent settings
-
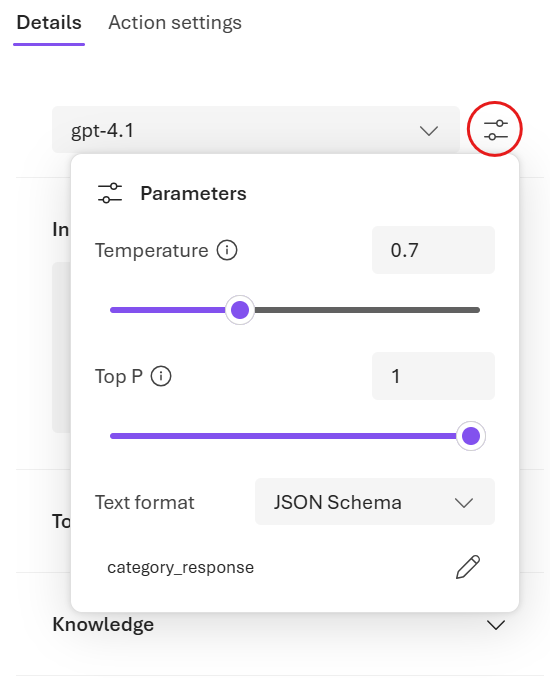
In the editor, under Details, select the Parameters button near the model name.
-
In the Parameters pane, next to Text format, select JSON Schema.
-
In the Add response format pane, enter the following definition and select Save:
{ "name": "category_response", "schema": { "type": "object", "properties": { "customer_issue": { "type": "string" }, "category": { "type": "string" }, "confidence": { "type": "number" } }, "additionalProperties": false, "required": [ "customer_issue", "category", "confidence" ] }, "strict": true } -
In the Invoke Agent Details pane, set the Instructions field to the following prompt:
Classify the user's problem description into exactly ONE category from the list below. Provide a confidence score from 0 to 1. Billing - Charges, refunds, duplicate payments - Missing or incorrect payouts - Subscription pricing or invoices being charged Technical - API errors, integrations, webhooks - Platform bugs or unexpected behavior General - How-to questions - Feature availability - Data exports, reports, or UI navigation Important rules - Questions about exporting, viewing, or downloading invoices are General, not Billing - Billing ONLY applies when money was charged, refunded, or paid incorrectly -
Select Node settings to configure the input and output of the agent.
-
Set the Input message field to the
Local.CurrentTicketvariable. -
Under Save agent output message as, create a new variable named
TriageOutputText. -
Under Save the output json_object as, create a new variable named
TriageOutputJson. -
Select Done to save the node.
Handle low-confidence classifications
-
Select the + (plus) icon below the Agent node to add a new node that handles low-confidence classifications.
-
In the workflow actions menu, under Flow, select If/Else to add a conditional logic node.
-
In the If/Else node editor, select the pencil icon to edit the If branch condition.
-
Set the Condition field to the following expression to check if the confidence score is above 0.6:
Local.TriageOutputJson.confidence > 0.6 -
Select Done to save the node.
Recommend additional info for low-confidence tickets
-
In the visualizer, under the Else branch of the If/Else condition node, select the + (plus) icon to add a new node that recommends additional information for low-confidence tickets.
-
In the workflow actions menu, under Basics, select Send message to add a send message activity.
-
In the Send message node editor, set the Message to send field to the following response:
The support ticket classification has low confidence. Requesting more details about the issue: "{Local.CurrentTicket}"
Route the ticket based on category
In this section, you’ll add conditional logic to route the ticket based on its classified category if the confidence score is high enough.
-
In the visualizer, under the If branch of the If/Else condition node, select the + (plus) icon to add a new node that routes the ticket based on its category.
-
In the workflow actions menu, under Flow, select If/Else to add another conditional logic node.
-
In the If/Else node editor, set the If Condition to the following expression to check if the ticket category is “Billing”:
Local.TriageOutputJson.category = "Billing" -
Select the + (plus) icon under the If branch of the If/Else node to add a new node that escalates billing tickets to human support.
-
In the workflow actions menu, under Basics, select Send message to add a send message activity.
-
In the Send message node editor, set the Message to send to the following response:
Escalate billing issue to human support team. -
Select Done to save the node.
Generate a recommended response
-
In the visualizer, select the + (plus) icon under the Else branch of the second If/Else node to add a new node that drafts a response for non-billing tickets.
-
In the workflow actions menu, under Invoke, select Agent to add an agent node.
-
In the Agent node editor, select Create new agent.
-
Enter an agent name such as Resolution-Agent and select Create.
-
In the agent editor, set the Instructions field to the following prompt:
You are a customer support resolution assistant for ContosoPay, a B2B payments and invoicing platform. Your task is to draft a clear, professional, and friendly support response based on the issue category and customer message. Guidelines: If the issue category is Technical: Suggest 1–2 common troubleshooting steps at a high level. Avoid asking for logs, credentials, or sensitive data. Do not imply fault by the customer. If the issue category is General: Provide a concise, helpful explanation or guidance. Keep the response under 5 sentences. Tone: Professional, calm, and supportive Clear and concise No emojis Output: Return only the drafted response text. Do not include internal reasoning or analysis. -
Select Node settings to configure the input and output of the agent.
-
Set the Input message field to the
Local.TriageOutputTextvariable. -
Under Save agent output message as, create a new variable named
ResolutionOutputText. -
Select Done to save the node.
Preview the workflow
-
Select the Save button to save all changes to your workflow.
-
Select the Preview button to start the workflow.
-
In the chat window that appears, enter some text to trigger the workflow, such as
Start processing support tickets. -
Observe the workflow as it processes each support ticket in sequence. Review the messages generated by the workflow in the chat window.
You should see some output indicating that billing issues are being escalated, while technical and general issues receive drafted responses. For example:
 Current Ticket:
 The API returns a 403 error when creating invoices, but our API key hasn't changed.


 Copilot said:
 Thank you for reaching out about the 403 error when creating invoices. This error typically indicates a permissions or access issue.
 Please ensure that your API key has the necessary permissions for invoice creation and that your request is being sent to the correct endpoint.
 If the issue persists, try regenerating your API key and updating it in your integration to see if that resolves the problem.
Use your workflow in code
Now that you’ve built and tested your workflow in the Foundry portal, you can also invoke it from your own code using the Azure AI Projects SDK. This allows you to integrate the workflow into your applications or automate its execution.
Prepare the environment
-
Open a new browser tab (keeping the Foundry portal open in the existing tab). Then in the new tab, browse to the Azure portal at
https://portal.azure.com; signing in with your Azure credentials if prompted.Close any welcome notifications to see the Azure portal home page.
-
Use the [>_] button to the right of the search bar at the top of the page to create a new Cloud Shell in the Azure portal, selecting a PowerShell environment with no storage in your subscription.
The cloud shell provides a command-line interface in a pane at the bottom of the Azure portal. You can resize or maximize this pane to make it easier to work in.
Note: If you have previously created a cloud shell that uses a Bash environment, switch it to PowerShell.
-
In the cloud shell toolbar, in the Settings menu, select Go to Classic version (this is required to use the code editor).
Ensure you've switched to the classic version of the cloud shell before continuing.
-
In the cloud shell pane, enter the following commands to clone the GitHub repo containing the code files for this exercise (type the command, or copy it to the clipboard and then right-click in the command line and paste as plain text):
rm -r ai-agents -f git clone https://github.com/MicrosoftLearning/mslearn-ai-agents ai-agentsTip: As you enter commands into the cloud shell, the output may take up a large amount of the screen buffer and the cursor on the current line may be obscured. You can clear the screen by entering the
clscommand to make it easier to focus on each task. -
When the repo has been cloned, enter the following command to change the working directory to the folder containing the code files and list them all.
cd ai-agents/Labfiles/08-build-workflow-ms-foundry/Python
ls -a -l
The provided files include application code and a file for configuration settings.
Configure the application settings
-
In the cloud shell command-line pane, enter the following command to install the libraries you’ll use:
python -m venv labenv ./labenv/bin/Activate.ps1 pip install -r requirements.txt -
Enter the following command to edit the configuration file that is provided:
code .envThe file is opened in a code editor.
-
In the code file, replace the your_project_endpoint placeholder with the endpoint for your project (copied from the project Overview page in the Foundry portal), and the your_model_deployment placeholder with the name you assigned to your gpt-4.1 model deployment (which by default is
gpt-4.1). -
After you’ve replaced the placeholders, use the CTRL+S command to save your changes and then use the CTRL+Q command to close the code editor while keeping the cloud shell command line open.
Connect to the workflow and run it
-
Enter the following command to edit the workflow.py file:
code workflow.py -
Review the code in the file, noting that it contains strings for each agent name and instructions.
-
Find the comment Add references and add the following code to import the classes you’ll need:
# Add references from azure.identity import DefaultAzureCredential from azure.ai.projects import AIProjectClient from azure.ai.projects.models import ItemType -
Note that code to load the project endpoint and model name from your environment variables has been provided.
-
Find the comment Connect to the agents client, and add the following code to create an AgentsClient connected to your project:
# Connect to the AI Project client
with (
    DefaultAzureCredential(
        exclude_environment_credential=True,
        exclude_managed_identity_credential=True) as credential,
    AIProjectClient(endpoint=endpoint, credential=credential) as project_client,
    project_client.get_openai_client() as openai_client,
):
Now you’ll add code that uses the AgentsClient to create multiple agents, each with a specific role to play in processing a support ticket.
Tip: When adding subsequent code, be sure to maintain the right level of indentation.
-
Find the comment Specify the workflow and the following code:
# Specify the workflow
 workflow = {
     "name": "ContosoPay-Customer-Support-Triage",
     "version": "1",
 }
Be sure to use the name and version of the workflow you created in the Foundry portal.
-
Find the comment Create a conversation and run the workflow, and add the following code to create a conversation and invoke your workflow:
 # Create a conversation and run the workflow
 conversation = openai_client.conversations.create()
 print(f"Created conversation (id: {conversation.id})")

 stream = openai_client.responses.create(
     conversation=conversation.id,
     extra_body={"agent": {"name": workflow["name"], "type": "agent_reference"}},
     input="Start",
     stream=True,
     metadata={"x-ms-debug-mode-enabled": "1"},
 )
This code will stream the output of the workflow execution to the console, allowing you to see the flow of messages as the workflow processes each ticket.
-
Find the comment Process events from the workflow run, and add the following code to process the streamed output and print messages to the console:
# Process events from the workflow run for event in stream: if (event.type == "response.completed"): print("\nResponse completed:") for message in event.response.output: if message.content: for content_item in message.content: if content_item.type == 'output_text': print(content_item.text) if (event.type == "response.output_item.done") and event.item.type == ItemType.WORKFLOW_ACTION: print(f"item action ID '{event.item.action_id}' is '{event.item.status}' (previous action ID: '{event.item.previous_action_id}')") -
Find the comment Clean up resources, and enter the following code to delete the conversation when it is longer required:
# Clean up resources openai_client.conversations.delete(conversation_id=conversation.id) print("\nConversation deleted") -
Use the CTRL+S command to save your changes to the code file. You can keep it open (in case you need to edit the code to fix any errors) or use the CTRL+Q command to close the code editor while keeping the cloud shell command line open.
Sign into Azure and run the app
Now you’re ready to run your code and watch your AI agents collaborate.
-
In the cloud shell command-line pane, enter the following command to sign into Azure.
az loginYou must sign into Azure - even though the cloud shell session is already authenticated.
Note: In most scenarios, just using az login will be sufficient. However, if you have subscriptions in multiple tenants, you may need to specify the tenant by using the –tenant parameter. See Sign into Azure interactively using the Azure CLI for details.
-
When prompted, follow the instructions to open the sign-in page in a new tab and enter the authentication code provided and your Azure credentials. Then complete the sign in process in the command line, selecting the subscription containing your Foundry hub if prompted.
-
After you have signed in, enter the following command to run the application:
python workflow.py -
Wait a moment for the workflow to process the tickets. As the workflow runs, you should see output in the console indicating the progress of the workflow, including messages generated by the agents and status updates for each action in the workflow.
-
When the workflow completes, you should see some output similar to the following:
 Created conversation (id: {id})
 item action ID 'action-{id}' is 'completed' (previous action ID: 'trigger_id')
 item action ID 'action-{id}' is 'completed' (previous action ID: 'action-{id}')
 item action ID 'action-{id}' is 'completed' (previous action ID: 'action-{id}_Start')
 ...

 Response completed:
 ...
 Current Ticket:
 I was charged twice for the same invoice last Friday and my customer is also seeing two receipts. Can someone fix this?
 {"customer_issue":"I was charged twice for the same invoice last Friday and my customer is also seeing two receipts. Can someone fix this?","category":"Billing","confidence":1}
 Escalation required
In the output, you can see the how the workflow completes each step, including the classification of each ticket and the recommended response or escalation. Great work!
Summary
In this exercise, you created a sequential workflow in Microsoft Foundry that processes customer support tickets. You used conditional logic and configured AI agents to produce JSON-formatted outputs. Your workflow classified each ticket using an AI agent, handled low-confidence classifications with conditional logic, and generated recommended responses for non-billing issues. Great job!
Clean up
If you’ve finished exploring workflows in Microsoft Foundry, you should delete the resources you have created in this exercise to avoid incurring unnecessary Azure costs.
-
Navigate to the Azure portal at
https://portal.azure.comand view the contents of the resource group where your Foundry project was deployed. - On the toolbar, select Delete resource group.
- Enter the resource group name and confirm that you want to delete it.