Develop an AI agent with VS Code extension (deprecated)
In this exercise, you’ll use the Microsoft Foundry VS Code extension to create an agent that can use Model Context Protocol (MCP) server tools to access external data sources and APIs. The agent will be able to retrieve up-to-date information and interact with various services through MCP tools.
This exercise should take approximately 30 minutes to complete.
Note: Some of the technologies used in this exercise are in preview or in active development. You may experience some unexpected behavior, warnings, or errors.
Prerequisites
Before starting this exercise, ensure you have:
- Visual Studio Code installed
- An active Azure subscription
Install the Microsoft Foundry VS Code extension
Let’s start by installing and setting up the VS Code extension.
-
Open Visual Studio Code.
-
Select Extensions from the left pane (or press Ctrl+Shift+X).
-
In the search bar, type Microsoft Foundry and press Enter.
-
Select the Microsoft Foundry extension from Microsoft and click Install.
-
After installation is complete, verify the extension appears in the primary navigation bar on the left side of Visual Studio Code.
Tip: If you already have the extension installed, make sure the version is at least v0.16.0 to follow along with the instructions in this exercise.
Sign in to Azure and create a project
Now you’ll connect to your Azure resources and create a new AI Foundry project.
-
In the VS Code sidebar, select the Microsoft Foundry extension icon.
-
In the Resources view, select Sign in to Azure… and follow the authentication prompts.
Note: You won’t see this option if you’re already signed in.
-
Create a new Foundry project by selecting the + (plus) icon next to Resources in the Foundry Extension view.
-
Select your Azure subscription from the dropdown.
-
Choose whether to create a new resource group or use an existing one:
To create a new resource group:
- Select Create new resource group and press Enter
- Enter a name for your resource group (e.g., “rg-ai-agents-lab”) and press Enter
- Select a location from the available options and press Enter
To use an existing resource group:
- Select the resource group you want to use from the list and press Enter
-
Enter a name for your Foundry project (e.g., “ai-agents-project”) in the textbox and press Enter.
-
Wait for the project deployment to complete. A popup will appear with the message “Project deployed successfully.”
Deploy a model
You’ll need a deployed model to use with your agent.
-
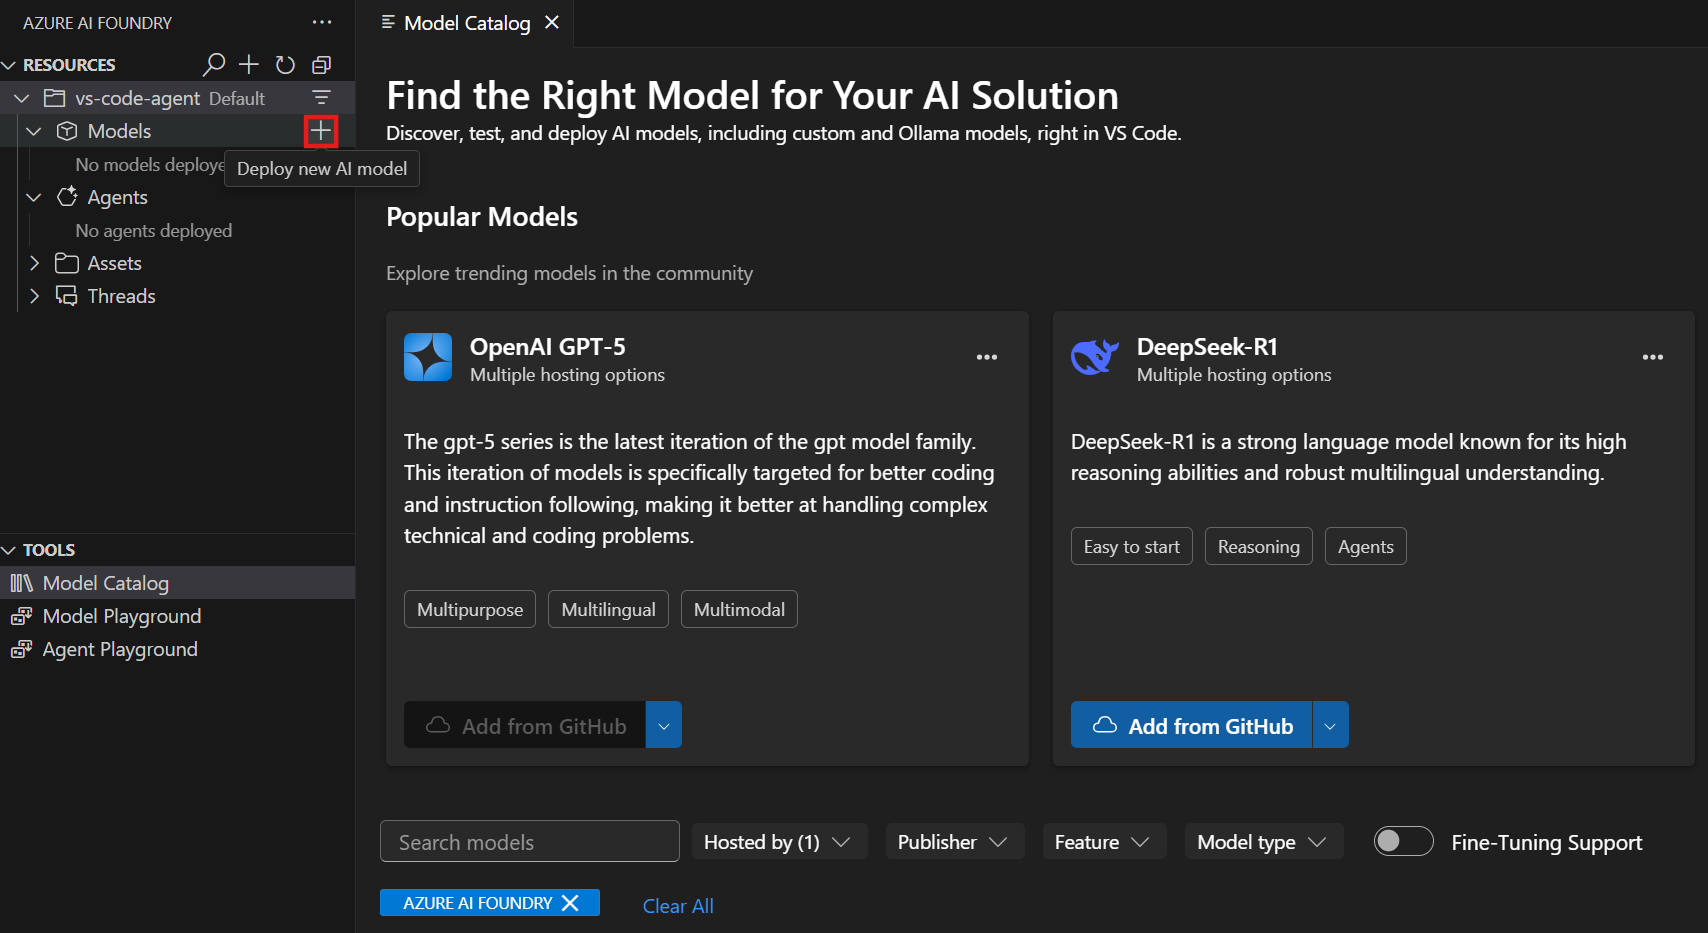
When the “Project deployed successfully” popup appears, select the Deploy a model button. This opens the Model Catalog.
Tip: You can also access the Model Catalog by selecting the + icon next to Models in the Resources section, or by pressing F1 and running the command Microsoft Foundry: Open Model Catalog.
-
In the Model Catalog, locate the gpt-4 model (you can use the search bar to find it quickly).
-
Select Deploy next to the gpt-4 model.
- Configure the deployment settings:
- Deployment name: Enter a name like “gpt-4-deployment”
- Deployment type: Select Global Standard (or Standard if Global Standard is not available)
- Model version: Leave as default
- Tokens per minute: Leave as default
-
Select Deploy in Microsoft Foundry in the bottom-left corner.
-
In the confirmation dialog, select Deploy to deploy the model.
- Wait for the deployment to complete. Your deployed model will appear under the Models section in the Resources view.
Create an AI agent with the designer view
Now you’ll create an AI agent using the visual designer interface. Rather than writing code, you’ll configure the agent’s instructions, settings, and tools through the user interface.
-
In the Microsoft Foundry extension view, find the Resources section.
-
Expand the Classic subsection.
-
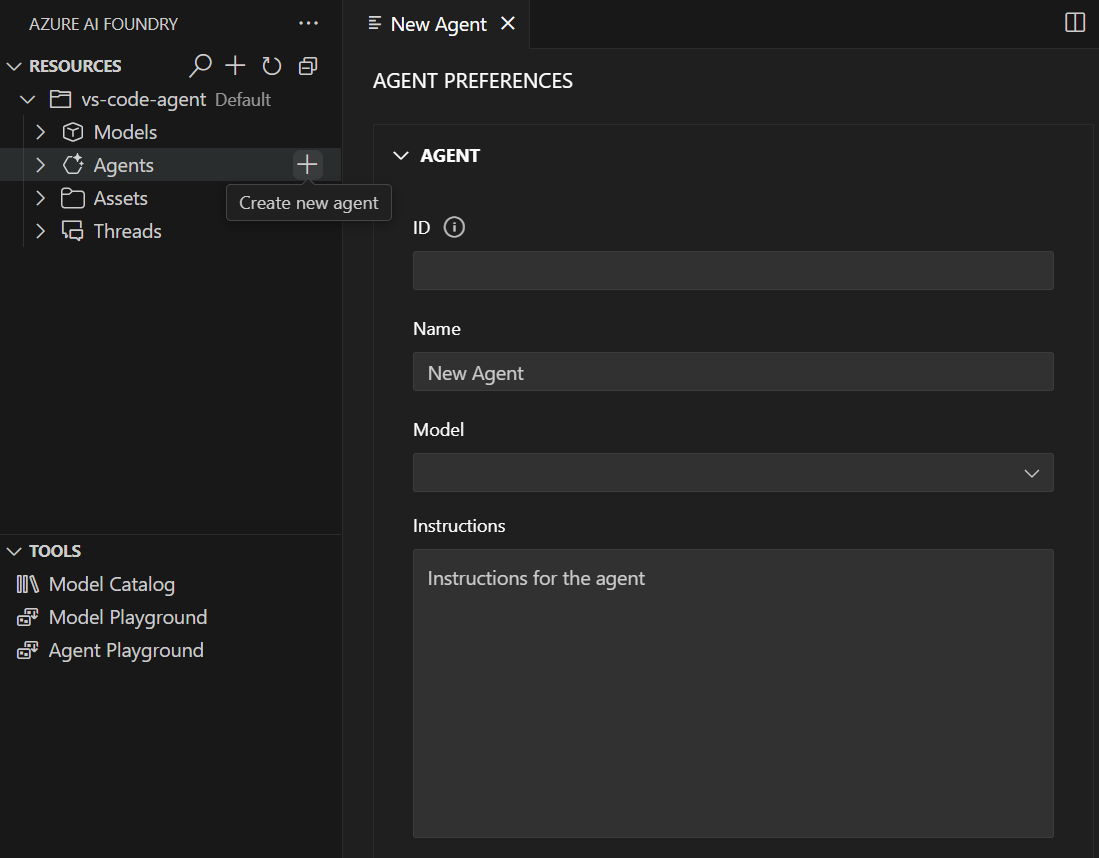
Select the + (plus) icon next to the Classic Agents subsection to create a new AI Agent.
-
Choose a location to save your agent files when prompted.
-
A New Agent tab will open to an “Agent Preferences” editor, along with a
.yamlconfiguration file.
Configure your agent in the designer
- In the agent preferences, configure the following fields:
- Name: Enter a descriptive name for your agent (e.g., “data-research-agent”)
- Model: Select your GPT-4o deployment from the dropdown
-
Instructions: Enter system instructions such as:
You are an AI agent that helps users research information from various sources. Use the available tools to access up-to-date information and provide comprehensive responses based on external data sources.
- Save the configuration by selecting File > Save from the VS Code menu bar.
Add an MCP Server tool to your agent
You’ll now add a Model Context Protocol (MCP) server tool that allows your agent to access external APIs and data sources.
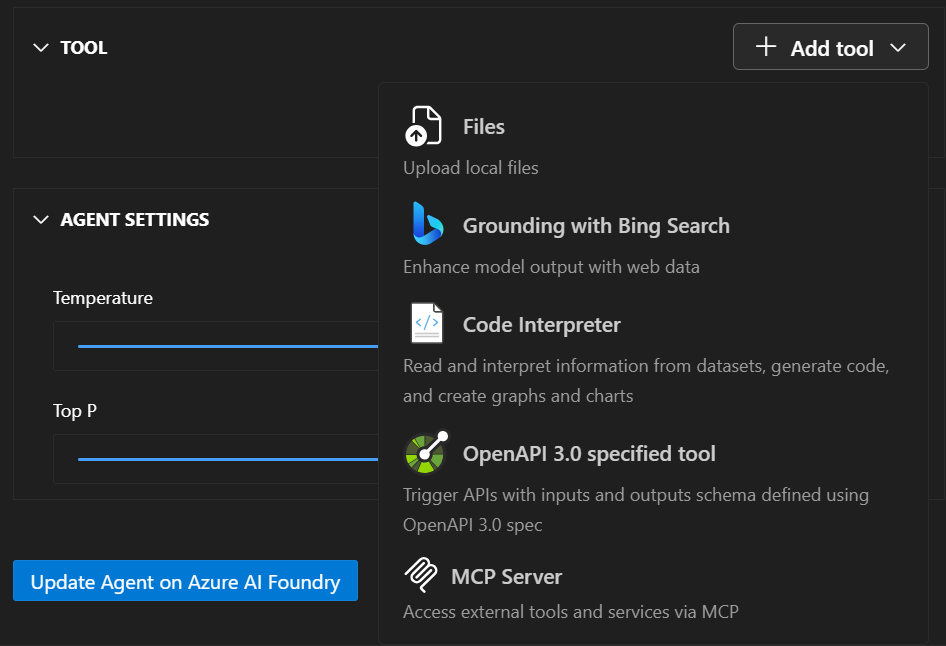
- In the TOOL section of the designer, select the Add tool button in the top-right corner.
-
From the dropdown menu, choose MCP Server.
- Configure the MCP Server tool with the following information:
- Server URL: Enter the URL of an MCP server (e.g.,
https://gitmcp.io/Azure/azure-rest-api-specs) - Server Label: Enter a unique identifier (e.g., “github_docs_server”)
- Server URL: Enter the URL of an MCP server (e.g.,
-
Leave the Allowed tools dropdown empty to allow all tools from the MCP server.
- Select the Create tool button to add the tool to your agent.
Deploy your agent to Microsoft Foundry
-
In the agent designer view, select the Create Agent on Microsoft Foundry button in the bottom-left corner.
-
Wait for the deployment to complete.
-
In the VS Code navbar, refresh the Resources view. Your deployed agent should now appear under the Classic Agents subsection.
Test your agent in the playground
-
Right-click on your deployed agent in the Classic Agents subsection.
-
Select Open Playground from the context menu.
-
The Agents Playground will open in a new tab within VS Code.
-
Type a test prompt such as:
Can you help me find documentation about Azure Container Apps and provide an example of how to create one? - Send the message and observe the authentication and approval prompts for the MCP Server tool:
- For this exercise, select No Authentication when prompted.
- For the MCP Tools approval preference, you can select Always approve.
-
Review the agent’s response and note how it uses the MCP server tool to retrieve external information.
- Check the Agent Annotations section to see the sources of information used by the agent.
Generate sample code for your agent
-
Right-click on your deployed agent and select Open Code File, or select the Open Code File button in the Agent Preferences page.
-
Choose your preferred SDK from the dropdown (Python, .NET, JavaScript, or Java).
-
Select your preferred programming language.
-
Choose your preferred authentication method.
-
Review the generated sample code that demonstrates how to interact with your agent programmatically.
You can use this code as a starting point for building applications that leverage your AI agent.
View conversation history and threads
-
In the Azure Resources view, expand the Threads subsection to see conversations created during your agent interactions.
- Select a thread to view the Thread Details page, which shows:
- Individual messages in the conversation
- Run information and execution details
- Agent responses and tool usage
- Select View run info to see detailed JSON information about each run.
Summary
In this exercise, you used the Foundry VS Code extension to create an AI agent with MCP server tools. The agent can access external data sources and APIs through the Model Context Protocol, enabling it to provide up-to-date information and interact with various services. You also learned how to test the agent in the playground and generate sample code for programmatic interaction.
Clean up
When you’ve finished exploring the Foundry VS Code extension, you should clean up the resources to avoid incurring unnecessary Azure costs.
Delete your agents
-
In the Foundry portal, select Agents from the navigation menu.
-
Select your agent and then select the Delete button.
Delete your models
-
In VS Code, refresh the Azure Resources view.
-
Expand the Models subsection.
-
Right-click on your deployed model and select Delete.
Delete other resources
-
Open the Azure portal.
-
Navigate to the resource group containing your AI Foundry resources.
-
Select Delete resource group and confirm the deletion.