Connect AI agents to tools using Model Context Protocol (MCP)
In this exercise, you’ll build an agent that connects to a cloud-hosted MCP server. The agent will use AI-powered search to help developers find accurate, real-time answers from Microsoft’s official documentation. This is useful for building assistants that support developers with up-to-date guidance on tools like Azure, .NET, and Microsoft 365. The agent will use the available MCP tools to query the documentation and return relevant results.
Tip: The code used in this exercise is based on the Azure AI Agent service MCP support sample repository. Refer to Azure OpenAI demos or visit Connect to Model Context Protocol servers for more details.
This exercise should take approximately 30 minutes to complete.
Note: Some of the technologies used in this exercise are in preview or in active development. You may experience some unexpected behavior, warnings, or errors.
Create a Microsoft Foundry project
Let’s start by creating a Foundry project.
-
In a web browser, open the Foundry portal at
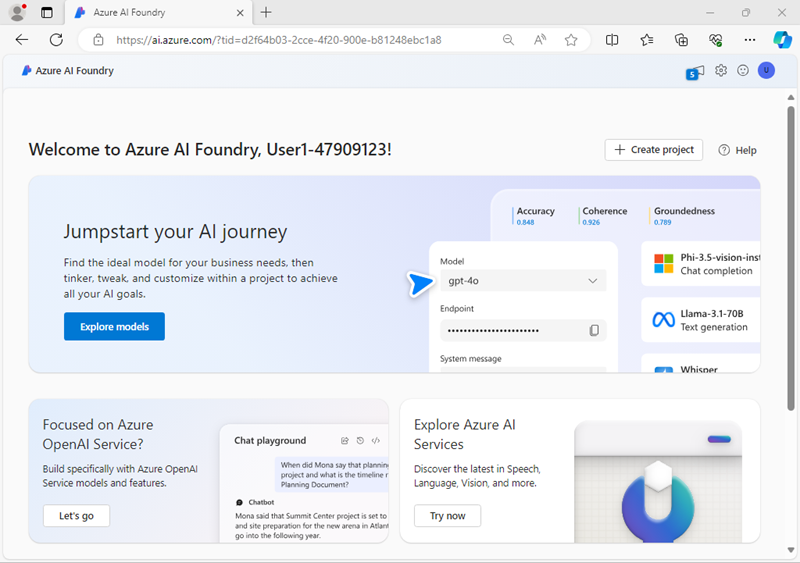
https://ai.azure.comand sign in using your Azure credentials. Close any tips or quick start panes that are opened the first time you sign in, and if necessary use the Foundry logo at the top left to navigate to the home page, which looks similar to the following image (close the Help pane if it’s open):
Important: Make sure the New Foundry toggle is Off for this lab.
- In the home page, select Create an agent.
- When prompted to create a project, enter a valid name for your project and expand Advanced options.
- Confirm the following settings for your project:
- Foundry resource: A valid name for your Foundry resource
- Subscription: Your Azure subscription
- Resource group: Create or select a resource group
- Region: Select any of the following supported locations: *
- West US 2
- West US
- Norway East
- Switzerland North
- UAE North
- South India
* Some Azure AI resources are constrained by regional model quotas. In the event of a quota limit being exceeded later in the exercise, there’s a possibility you may need to create another resource in a different region.
- Select Create and wait for your project to be created.
-
If prompted, deploy a gpt-4o model using either the Global Standard or Standard deployment option (depending on your quota availability).
Note: If quota is available, a GPT-4o base model may be deployed automatically when creating your Agent and project.
-
When your project is created, the Agents playground will be opened.
-
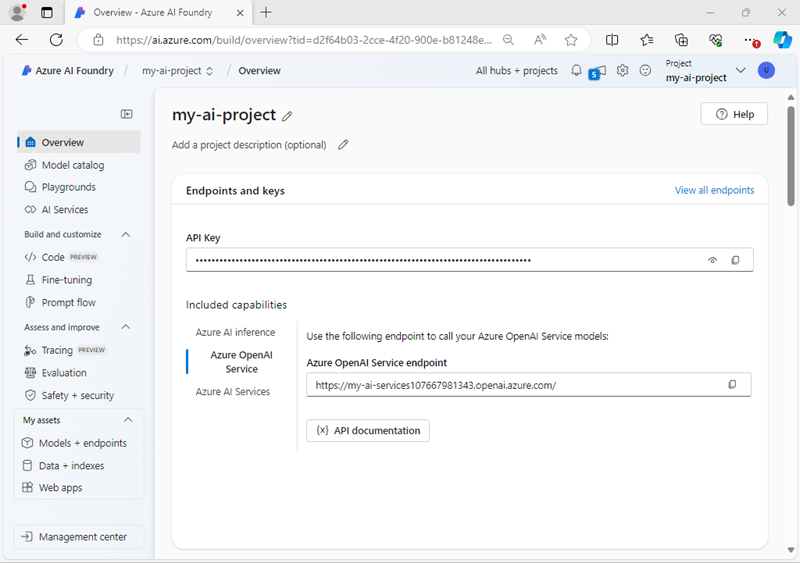
In the navigation pane on the left, select Overview to see the main page for your project; which looks like this:

- Copy the Foundry project endpoint value. You’ll use it to connect to your project in a client application.
Develop an agent that uses MCP function tools
Now that you’ve created your project in AI Foundry, let’s develop an app that integrates an AI agent with an MCP server.
Clone the repo containing the application code
-
Open a new browser tab (keeping the Foundry portal open in the existing tab). Then in the new tab, browse to the Azure portal at
https://portal.azure.com; signing in with your Azure credentials if prompted.Close any welcome notifications to see the Azure portal home page.
-
Use the [>_] button to the right of the search bar at the top of the page to create a new Cloud Shell in the Azure portal, selecting a PowerShell environment with no storage in your subscription.
The cloud shell provides a command-line interface in a pane at the bottom of the Azure portal. You can resize or maximize this pane to make it easier to work in.
Note: If you have previously created a cloud shell that uses a Bash environment, switch it to PowerShell.
-
In the cloud shell toolbar, in the Settings menu, select Go to Classic version (this is required to use the code editor).
Ensure you've switched to the classic version of the cloud shell before continuing.
-
In the cloud shell pane, enter the following commands to clone the GitHub repo containing the code files for this exercise (type the command, or copy it to the clipboard and then right-click in the command line and paste as plain text):
rm -r ai-agents -f git clone https://github.com/MicrosoftLearning/mslearn-ai-agents ai-agentsTip: As you enter commands into the cloudshell, the output may take up a large amount of the screen buffer and the cursor on the current line may be obscured. You can clear the screen by entering the
clscommand to make it easier to focus on each task. -
Enter the following command to change the working directory to the folder containing the code files and list them all.
cd ai-agents/Labfiles/03c-use-agent-tools-with-mcp/Python
ls -a -l
Configure the application settings
-
In the cloud shell command-line pane, enter the following command to install the libraries you’ll use:
python -m venv labenv
./labenv/bin/Activate.ps1
pip install -r requirements.txt
Note: You can ignore any warning or error messages displayed during the library installation.
-
Enter the following command to edit the configuration file that has been provided:
code .envThe file is opened in a code editor.
-
In the code file, replace the your_project_endpoint placeholder with the endpoint for your project (copied from the project Overview page in the Foundry portal) and ensure that the MODEL_DEPLOYMENT_NAME variable is set to your model deployment name (which should be gpt-4o).
-
After you’ve replaced the placeholder, use the CTRL+S command to save your changes and then use the CTRL+Q command to close the code editor while keeping the cloud shell command line open.
Connect an Azure AI Agent to a remote MCP server
In this task, you’ll connect to a remote MCP server, prepare the AI agent, and run a user prompt.
-
Enter the following command to edit the code file that has been provided:
code client.pyThe file is opened in the code editor.
-
Find the comment Add references and add the following code to import the classes:
# Add references from azure.identity import DefaultAzureCredential from azure.ai.projects import AIProjectClient from azure.ai.projects.models import PromptAgentDefinition, MCPTool from openai.types.responses.response_input_param import McpApprovalResponse, ResponseInputParam -
Find the comment Connect to the agents client and add the following code to connect to the Azure AI project using the current Azure credentials.
# Connect to the agents client with ( DefaultAzureCredential( exclude_environment_credential=True, exclude_managed_identity_credential=True) as credential, AIProjectClient(endpoint=project_endpoint, credential=credential) as project_client, project_client.get_openai_client() as openai_client, ): -
Under the comment Initialize agent MCP tool, add the following code:
# Initialize agent MCP tool
mcp_tool = MCPTool(
    server_label="api-specs",
    server_url="https://learn.microsoft.com/api/mcp",
    require_approval="always",
)
This code will connect to the Microsft Learn Docs remote MCP server. This is a cloud-hosted service that enables clients to access trusted and up-to-date information directly from Microsoft’s official documentation.
-
Under the comment Create a new agent with the MCP tool and add the following code:
# Create a new agent with the MCP tool
agent = project_client.agents.create_version(
    agent_name="MyAgent",
    definition=PromptAgentDefinition(
        model=model_deployment,
        instructions="You are a helpful agent that can use MCP tools to assist users. Use the available MCP tools to answer questions and perform tasks.",
        tools=[mcp_tool],
    ),
)
print(f"Agent created (id: {agent.id}, name: {agent.name}, version: {agent.version})")
In this code, you provide instructions for the agent and provide it with the MCP tool definitions.
-
Find the comment Create a conversation thread and add the following code:
# Create a conversation thread conversation = openai_client.conversations.create() print(f"Created conversation (id: {conversation.id})") -
Find the comment Send initial request that will trigger the MCP tool and add the following code:
# Send initial request that will trigger the MCP tool response = openai_client.responses.create( conversation=conversation.id, input="Give me the Azure CLI commands to create an Azure Container App with a managed identity.", extra_body={"agent": {"name": agent.name, "type": "agent_reference"}}, ) -
Find the comment Process any MCP approval requests that were generated and add the following code:
# Process any MCP approval requests that were generated input_list: ResponseInputParam = [] for item in response.output: if item.type == "mcp_approval_request": if item.server_label == "api-specs" and item.id: # Automatically approve the MCP request to allow the agent to proceed input_list.append( McpApprovalResponse( type="mcp_approval_response", approve=True, approval_request_id=item.id, ) ) print("Final input:") print(input_list) -
Find the comment Send the approval response back and retrieve a response and add the following code:
# Send the approval response back and retrieve a response response = openai_client.responses.create( input=input_list, previous_response_id=response.id, extra_body={"agent": {"name": agent.name, "type": "agent_reference"}}, ) print(f"\nAgent response: {response.output_text}") -
Find the comment Clean up resources by deleting the agent version and add the following code:
# Clean up resources by deleting the agent version project_client.agents.delete_version(agent_name=agent.name, agent_version=agent.version) print("Agent deleted") -
Save the code file (CTRL+S) when you have finished. You can also close the code editor (CTRL+Q); though you may want to keep it open in case you need to make any edits to the code you added. In either case, keep the cloud shell command-line pane open.
Sign into Azure and run the app
-
In the cloud shell command-line pane, enter the following command to sign into Azure.
az loginYou must sign into Azure - even though the cloud shell session is already authenticated.
Note: In most scenarios, just using az login will be sufficient. However, if you have subscriptions in multiple tenants, you may need to specify the tenant by using the –tenant parameter. See Sign into Azure interactively using the Azure CLI for details.
-
When prompted, follow the instructions to open the sign-in page in a new tab and enter the authentication code provided and your Azure credentials. Then complete the sign in process in the command line, selecting the subscription containing your Foundry hub if prompted.
-
After you have signed in, enter the following command to run the application:
python client.py -
Wait for the agent to process the prompt, using the MCP server to find a suitable tool to retrieve the requested information. You should see some output similar to the following:
 Agent created (id: MyAgent:2, name: MyAgent, version: 2)
 Created conversation (id: conv_086911ecabcbc05700BBHIeNRoPSO5tKPHiXRkgHuStYzy27BS)
 Final input:
 [{'type': 'mcp_approval_response', 'approve': True, 'approval_request_id': '{approval_request_id}'}]

 Agent response: Here are Azure CLI commands to create an Azure Container App with a managed identity:

 **1. For a System-assigned Managed Identity**
 ```sh
 az containerapp create \
 --name <CONTAINERAPP_NAME> \
 --resource-group <RESOURCE_GROUP> \
 --environment <CONTAINERAPPS_ENVIRONMENT> \
 --image <CONTAINER_IMAGE> \
 --identity 'system'
[continued…]
Agent deleted ```
Notice that the agent was able to invoke the MCP tool to automatically fulfill the request.
-
You can update the input in the request to ask for different information. In each case, the agent will attempt to find technical documentation by using the MCP tool.
Clean up
Now that you’ve finished the exercise, you should delete the cloud resources you’ve created to avoid unnecessary resource usage.
- Open the Azure portal at
https://portal.azure.comand view the contents of the resource group where you deployed the hub resources used in this exercise. - On the toolbar, select Delete resource group.
- Enter the resource group name and confirm that you want to delete it.